Tools and Tool Placement FAQ
compiled & edited by Kristian #562
Please read the Disclaimer before attempting any work in this FAQ.
Updated 15 August 2004 by
Nate #1379
Tools
for General Maintenance
Tools
& Parts for Trips
General Parts
Tool Humour
Tools for General Maintenance
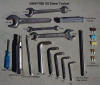
What Stock Tools does BMW Provide ?
Allen Keys, Spark Plug Socket,
Couple of Dinky Spanners, Reversible Plain/Philips Screwdriver.
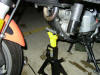
For the GS See this Pic, from
Gerry #951
What additional Tools should I buy to
fix my Bike?
The Classic REQUIRES only one
SPECIAL tool, the alternator rotor puller, to tear the entire
bike into little tiny pieces. That's about $24 and hardly worth
paying postage to ship around. There is a special bolt required
to hold the crank when doing cam stuff. But that costs under a
dollar, and you can make one by grinding the end of a normal bolt
for a rounded "point." To completely tear down a
Classic, you'll need a pair of 22mm sockets, a 30mm socket, a
26mm socket (or 1-1/16") and probably a 30mm combination
wrench, too. A set of 6, 8 and 10 mm Allen sockets and a ball-end
5mm Allen key simplify and speed up the job. All the regular,
normal tools will be needed. Assorted metric wrenches (17 and
19mm combination wrenches are critical), a selection of
screwdrivers and pliers and, of course, a hammer. Having
1/4", 3/8" and 1/2" drive socket sets with an
assortment of extensions will make you happier while the work is
going on. But you COULD do it with just one set and a lot of
cussing.
If you plan on dropping the motor,
first get a pair of 14mm bolts at least 100mm long. They make it
SO much easier to keep things in line when pulling the swingarm
bolt. And they make getting the motor back into position at the
swingarm a snap. Otherwise, you'll be wrestling with those dammed
nylon swing arm washers for what seems like forever (Dab of
grease helps!). Flash #412.
Choose just what YOU need:
- Torque Wrench
- Good Metric Socket Set
- A SkewDriver is a VERY useful
Tool if you have a carbed bike. Refer Idle
Mix Screw for why.
- If you were a real BMW rider,
you would just slip a credit card in your tool kit and
forget the rest of the stuff. (In my case, I have added
an adjustable wrench, a tire pressure gauge, a rag and
hand cleaner, one of those little valve core wrenches,
electrical tape and a small knife.) Richard #230.
- I have added REAL 8 and a
REAL 10 mm combination wrenches. I threw away that p.o.s.
factory-supplied screwdriver and stuck in one what has
two nut drivers and large and small + & - tips. I
keep my crank stop bolt in there, too, and some LocTite.
I also carry four t-handle Allen's. Don't recall the
sizes, but they fit the tank and sidecover screws and a
bigger one for the engine case screws and a REAL big one
for one of the honkin' suspension bolts. I also have a
5mm Allen with a ball tip on one end. I think I REPLACED
all of the p.o.s. factory Allen's, too. I added SMALL
Excelite +/- screwdrivers. I have a set of REAL open end
wrenches from 6 to 19 mm. I have some other stuff in
there that I can't think of right now. And I have some
other stuff that I carry when I tour (that doesn't live
in the toolkit under the seat or in the tail section). I
must say that a set of 3/8" drive metric Allen keys
is THE TICKET when doing major service to the bike. That,
and I put 4 t-handle Allen's in my under seat tool kit to
carry ALL the time. AND... a 5mm ball point Allen is THE
tool to add to the tool kit. Flash #412
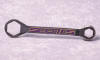
- Exhaust Gasket Replacements. Get a 13mm box end wrench. A
socket won't work. An open end won't work. Get a BOX end
wrench. An open end will round off the corners of the
cream cheese material used to make the fasteners. The
stock stud nuts are made of cream cheese and
extraordinarily cheesy. You may want to replace them with
some Japanese exhaust nuts that you have lying around.
Perhaps slather everything with Aunti Seize (she didn't
mind). (That’s Anti-Seize to non-native English
Speakers - ed). Flash #412
- Here's a link to the IBA site
for Ron Major's toolkit. Its been used as a reference for
on-road duty for several years now. Just needs adapting
to be bike specific. Shawn #1051 Maine. http://www.ironbutt.com/aow/major_tools.htm
- Pulling the Flywheel. The
Flywheel Puller Tool 12 5 510 is the BMW tool number.
This number is from the GS manual, but from the pictures
of the tool and motor, it's likely the same.
- On the classic, here are a
few socket sizes you may need:
- Swing arm removal, 22mm X 2
- Countershaft, 30mm
- Rear axle, 19mm and 24mm
- Steering head, 32mm
- Since most kits don't go
above 24mm and most also don't have 2 22mm sockets, you
have to buy a few extras. Each is about $4-6 at sears.
Mark #403
- Here is a Christmas gift
suggestion for someone who likes tools and has one of
everything. Torq-it Products ( www.torq-it.com/products ) (1-888-876-9555) makes a cute
3/8 inch palm ratchet wrench called the Torq-It Speed
Driver. It is about 3 inches in diameter and about one
inch thick and has a pull-rope, like you use to start a
lawn mower. You loosen the bolt or screw with your hand,
or a regular ratchet wrench if it is too stubborn, and
pull on the rope once or twice and the fastener spins
off. Is particularly useful for removing and installing
F650 body parts. It serves the function of a cordless
screwdriver or air ratchet, without the charging or
air-compressor, and takes up much less space in the tool
box. It sells for about $20. My daughter brought me one
for my birthday and I have found it very useful. I
recommend it for gadget and tool lovers.
- Torque wrench guide: I have
heard that Snap-on tools are more durable, but they are
also far more expensive than Sears. If you were running a
garage and using your torque wrenches constantly on a
daily basis, it might make sense to invest in Snap-On.
Proto also makes some fine tools. I found this link very
helpful, and would suggest you check it out before buying
anything. It's a quick read: http://www.rdfrantz.com/rdf/TorqueWrenches.htm. Mason #631.
- I suggest 3 Torque Wrenches 1
inch pound, 1, 5lbs to 50lbs and 1, 35 to 150 lbs . Why?
Because the accuracy can be less than desirable with a
wrench that covers to much too much range. V V.
- A Voltmeter.
- Possibly a Micrometer.
- Refer also to individual
FAQs.
For the GS Only:
- Sears also sells regular
drivers with Torx ends. Same as a screwdriver/different
end of course. There are four sizes you'll need at least
for a '01 GS Dakar:
- Item Sears part
- Torx T25 41476
- Torx T30 41477
- Torx T40 42665
- Torx T45 42666
- The first two are the
screwdriver-types and are for the smaller bits. The last
two are the larger ones and are excellent for use with a
torque wrench. I'll supplement these with t-wrenches one
of these days but these are a good starter set. Gerry
#951
- Torx Wrench. I have been very
happy with the set on this link. http://www.wihatools.com/364serie.htm TomO-AR 650GS;1150GS Adventure.
- I added a 3-4mm Allen key
(not sure) to the tool kit for the air filter. db (00
GSD) au.
Feedback:
- ..we have added
"T"-handle / ball end allen tools (about
10" long w/ red handle) in #3, #4, #5, and #6 --
made working on the bikes much faster! We don't use for
serious torquing (sp?)/tightening, just helps get the
bolts out much faster :-)
#3 is for windsheild and fairing screws
#4 is for the side panels and a couple of fairing screws
#5 is for engine and much of the frame -- most common
size
#6 is for chain tensioner and larger frame bolts
#10 and #13 wrenchs with ratchet built in on one end will
also speed things along..
ultimatejourney
Special
BMW tools
Davidhpark, #711
Subject: Special BMW tools
In re-reading/reviewing the BMW service manual for the F650GS I
decided to extract the BMW part numbers for the tools that they
recommend using (why they can't simply provide a list at the end
of the manual is beyond me). I submitted them to my local dealer
to get pricing/availability. These are all "special
order", must be prepaid and there can be no returns. That
being said, I found it funny that some of the stuff wasn't
available (at all) in the US and some of the tools that they list
for valve adjustment aren't available at all (i.e. no longer
available either in US or Germany).
- Countersprocket puller,
BMWNo.88886 00 8 400 = $52.25 available in US
- Oil drain guide, BMW No.
9088611 7 511 = $61.50 available in US
- Hose pliers, , BMW No.
9088617 5 500 = $115 available in US
- Valve-clearance adjuster,
BMWNo.9088611 7 501 = $235 available in US
- Thruster, BMWNo.9088611 7 503
= no longer available
- Shaft, BMW No. 9088611 7 502
= no longer available
- Clamp block, BMW No. 9088611
7 504. = no longer available
- Magnetic holder, BMW No.
9088611 7 505 = $44 not in stock, Germany may have it.
- Hose clips, BMW No. 9088613 3
010. = $10.40 available in US
You can get by for most
jobs, without any of these Tools (See individual FAQs). You DO
need the BMW Flywheel Puller though. Flash#412, Kristian #562.
Generic Flywheel & Clutch Holder
Tools
- http://www.denniskirk.com/powervendor/details/detail.asp?serverid=OffRoad&PartNo=28288 Designed to hold clutch baskets,
flywheels, gears, sprockets, etc. Jaws open 5"
Medium-carbon steel with hardened jaws. Flywheel/Clutch
Tool Part Number 28288 Manufacturer Motion Pro Type
Engine Tools $29.99 In Stock
- http://alba.buyol.com/Item/PC005018.htm
Clutch Inner
Hub Holder - Motion Pro [PC005018] shipping weight: 1
LB This tool is used for holding the inner clutch hub
while you loosen the nut holding it on. It is very
helpful during motor rebuilds. This tool can be used on
most any dirtbike or atv. We highly recommend this tool
if you plan to install a Hinson clutch basket. Also good
for pulling teeth. Every good motocross mechanic should
have one of these in their tool kit.
$30.99
- http://www.motionpro.com/servicetools_3.html Clutch Holding Tool The Motion
Pro Clutch Holding Tool is made from medium carbon
steel with hardened jaws. They feature spanner pins and
the jaws open up to 5" wide. They are ideal for
holding clutch hubs, flywheels, gears, sprockets, etc.
Part Number 08-0008 Sug. Retail: $ 30.30
Specialist
Tools
Axle Wrench: You can replace the axle wrench
with one of Scott's tools (smaller/multi-function). You need a
24mm for the rear axle - options for the other end are 19mm and
17mm.
BMW Valve Shim Removal Tool: When talking to
the tech's (Jim) at CalBMW we were discussing valve adjustments
on the F650GS/Dakar. Apparently they have a special tool that you
can use which makes the job a 5-10 minute job as you don't have
to take off the cam chain, etc. You bolt this appliance on
to the top and then with a few turns and such can take out and
replace the shims. It's about $350 and I'm seriously considering
getting it. Opinions? Would be nice to save time and not have to
mess with parts of the bike that don't need to be disassembled.
DHP #711
The Overwhelming Opinion is SAVE YOUR MONEY. (See
the GS Valve Shim FAQ): Here's the feedback:
- Seems like a lot of dough for
something that doesn't get used a lot... But if you just
won the Lottery and have money to burn, go for it.
Seriously, BMW is notorious for charging a premium for
their tools. Have you seen it? Is it something that you
could reproduce easily and inexpensively? Do you know if
it works for the Classic, or just the later model head?
Inquiring minds. Harl #380
- You must be checking your
valves quite often ;-) For $350, you could just let
someone else do it a couple of times, but doing it
yourself is of course more fun. If you got the money go
ahead and buy it, personally there are so many
accessories I'd buy before this tool. On the classic it
is just another 10-15 minutes of work to loosen the nuts
and zip-tying the chain. IMHO. Spakur#1117.
- Take a few pictures of it and
post them where folks can SEE 'em. THEN let's discuss it.
Nearly EVERYTHING can be fabricated for a WHOLE lot le$$
than BMW.
Flash 412 (CO)
- This tool is very involved
and takes a lot of time to setup and use. It really is
just as easy to remove the cams, which is not all that
involved once you know how. Besides, shim adjustments are
not that frequent once set. BUT it would be nice to
create a tool library listers could rent or borrow from
to do specific tasks where special tools are involved. If
a hundred people chipped in $25 each you could buy a lot
of tools which could then be mailed around as needed.
echo
- Now I know why the techs
never had to sweat getting the cam chain tensioner bolt
off my bike! If your GS has ABS this tool might just be
worth having because without the tool you have to remove
that bolt which is nearly impossible to do on bikes with
ABS. bg#1002
- I have used this tool and it
won't work on the cam chain side valves. It is fine on
the sparkplug side. The BMW school for BMW Certification
teaches you to remove the cams!! Save your money. Steve
1130 Or
Tool Tips and Tips for Tool-use:
by Mal #1011 & Various Authors
For years I've been using some
dodges I've not seen on the web. I thought I'd share them
with the Gang. Here I'll scratch the surface with a couple..
Allen keys:
Take a set of regular Allen keys and cut off at the turn so as to
end up with straight keys. Also the short lengths (not shown) can
be used the same way.
SEE Cut-Offs1 and
Cut-Offs2.
1. Can be used in many ways in a cordless
drill/driver (handy for taking all those screws that hold the
bodywork and engine covers). ALWAYS start screws in the thread
the usual way as the drill/drivers are too fierce. SEE DrillDrvr
2. Can be used with sockets. I use Blu-Tak, the
tacky plasticine for sticking paper on billboards etc To hold
them in. SEE Socketkey
Allen screws with thread locking
compound on them or seized:
- Heat them without damage.
Brake disks/rear wheel sprocket etc. The key hole will
round off most of the time if attacked cold. The trick is
to heat the compound and make it soft so it stops doing
it's job. So buy cheap set of keys for the job.
- Place the long end of the key
in the hole. Heat it with a blowlamp or electric hot air
gun. A soldering iron would work by replacing the bit
with the Allen key. Take your time , it will take a while
for the heat to get down the key and into the screw.
Every few minutes take out the hot key ( Remember it's
HOT ) and GENTLY try to undo the screw with a regular
key.
- SEE HeatKey1
Fork Top
Threads:
These are a fine thread and can get crossed up. If
the sockets are held as in ThreadFeel,
this way the top stays square. With the ratchet in the undo/anti
clockwise (AC) direction - press down and turn AC . You will feel
a jump as the thread on the top cap meets the end/start of the
threads in the stanchion. Ease out the top cap and let it sit in
position on the spacer. Set the ratchet clockwise (CW) to
tighten. Press down as in ThreadFeel
and the threads will be lined up start to start.
Spring Removal - Installation
by Flash #412
Try placing coins in between the
spring coils to extend it. For spring removal, I would start with
the bike on the centerstand, as this will extend the spring to
some extent. Don't try to extend the spring to add more coins,
but rather try to flex it side to side. Eventually, when enough
coins are inserted, you should be able to retract the centerstand
and the spring should be extended enough for removal.

Listening to Engine Rattles
by Flash & Richard #230
Use a screwdriver as a stethoscope
to help track down the location of the rattle.
Torque
Wrenches
- Don't leave your clicker
torque wrench set for 100 NM, it will knock the thing out
of adjustment. These type of torque wrenches must always
be reset to 0, once you are finished using them. I assume
that the spring tension that makes the wrench work will
get sacked-out if it is kept tight all of the time. This
will make your wrench click at too low a value. All of my
clicker wrenches came with a warning to always reset the
tension to zero before putting the wrench away. Richard
#230, Pacifica.
- Richard is correct on this
one - torque wrenches are subject to wear, abuse and
damage. They should always be reset to zero when not in
use. Generally speaking, they should not be lubricated,
used as a breaker bar, or used to remove bolts. Quality
ones can be sent for recalibration. Todd #389.
- Since I'm off to get my
torque wrenches re-calibrated, thought I might mention it
here. For those of you who tighten up bolts to specified
torque values, you should get your torque wrenches
recalibrated every couple of years. They can (and do)
start to vary either direction. One other point: Torque
wrenches are calibrated for certain temperature ranges,
so if you're out in the unheated garage and its 10F
outside, you might want to bring your torque wrenches
inside for a few hours before use. Nate
- While at it, I just spoke to
my Dad (very smart man) about torque wrenches. He said
that for the type that makes the "click" sound
(what are they called?) to not over torque with them.
Apparently, they have the reputation for losing their
calibration quickly. According to him this is in large
part because people over torque with those wrenches,
thinking a few more lb-ft or Nm can't hurt. You're
supposed to stop at the click, if you want more, adjust
for more and go to the click, or use a different wrench.
its_xls
- http://www.geocities.com/motorcity/downs/3837/torqwren.html
- Next.
Torque:
Metric Converters
Penetrating
Oils
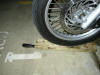
- This past weekend I decided
to remove the Staintune exhaust from my classic F and
re-install the stock pipe. Except I couldn't get the
crossover pipe to separate from the header. I took the
header/crossover off the engine and tried a chain wrench,
heat, and wrestled with this for hours. Finally gave up
and drove to the nearest auto parts store and the pimply
faced teen-ager behind the counter handed me a can of
B'Laster penetrating catalyst and said "this stuff
is fantastic". I said to myself ya, right. what does
this kid know but for five dollars I thought it worth a
try. I sprayed the stuff on the junction of the pipe and
muffler and let it sit for 5 minutes and the two pieces
separated easily. Richard 424, Oregon
- If you're talking about
PBlaster--it is the best penetrating lubricant I've ever
used to separate frozen parts and loosen frozen
nuts/bolts. Nate
- My favorite is marvel mystery
oil that comes in a red can. The stuff is fantastic. I
keep an oil can loaded with it and use it all the time!
It is great on rusty parts. (I have done work on fords so
I know!) Don - Rochester, NY
- ANTI SEIZE. Now ya know why
ya should always use anti seize on exhaust
connections,,,,years later they just slide apart,,,,,mike
mike410(Iowa)
- I like Marvel Mystery oil
too. Smells great! I don't find it to be as good as
PBlaster for loosening nuts/bolts. I like it for cylinder
lube (engines which aren't going to run for several
months), as a cutting oil and during engine/transmission
assembly (along side assembly lube). I also add it on
occasion to a tank of gas in my old (1967) Land Rover to
lube the valves and valve seats. (BMW content: BMW owned
Land Rover for about 7 minutes once). Nate
Getting
Stubborn Nuts Loose
- USE a SIX POINT SOCKET - NOT a 12
Point one.
- Some bolts cannot be undone
alone - you may need a strong and beefy assistant to
steady the bike and hold the brake, and you'll need a
proper breaker bar (extra long socket wrench). If it's
assembled with Loctite 243, use of a heat gun (or careful
use of a propane torch ON THE NUT NOT THE SURROUND) may
be necessary. If a previous mechanic mistakenly used
Loctite 648 (per OEM) or Red Loctite, serious heat will
be REQUIRED, not optional.
- The next level involves use
of a large commercial air impact wrench for : removal,
however, use of heat is still recommended, as if there is
Red Loctite in there and it's not softened with heat, you
can break things or rip the threads right off the
assembly. (Not likely in this case with a hardened crank,
but you never know.) If heat AND an air wrench won't get
it... eww. If you have the proper wrench setup, don't be
afraid to get the nut up to 100 degrees centigrade
(212F), maybe even 225F. No higher or you start to : ruin
seals, and if it's the Flywheel Nut, the magnets in the
flywheel don't like excessive heat either. Best to start
off organized, all tools in place, a dry run, quickly
apply massive heat on the nut with precision, remove and
cool down with a fan.
- Personal Impact wrench. I
have a cheap electric one that is sold for removing tire
lug nuts and plugs into a car cigarette lighter
receptacle and supposedly produces about 200 pound feet
of torque. Maybe you could rent a real one at a
rent-a-tool shop. In the mean time, soaking the nut with
penetrating oil overnight couldn't hurt. Richard #230.
- Finally Drill a set of small
holes in the nut, all in a row. Then take a cold chisel
and a BFH and break the nut off. Flash #412
- What's a BFH? A BIG F*****N
Hammer.
- Be careful when taking the
sump bolt out off the bottom of the bike. I first tried
with a socket wrench on the left side of the bike. If you
have changed the oil before, you know how difficult it is
getting that bolt off. Anyway I yanked really hard once
just to have the bike lurch forward and teeter on the
center stand. Luckily it fell back on the stand. If it
hadn't, it could of been ugly. I was in the garage laying
on the floor and caught between my car and bike. Anyway,
the lesson learned is to unscrew the sump bolt on the
right side. At least on my GS. Bobcatou '02 GS
#1157
- Try to not "yank"
on bolts--this leads to rounded bolts, broken off bolt
heads, cracked sockets and motorcycles, engine blocks,
transmissions, etc slipping off their supports. If the
bolt won't go, try these things: 1. Put a cheater bar on
the socket handle (i.e. a longer arm for greater torque).
I've had up to 14 FEET of pipe on a socket before (was a
nut on the bottom of a 6 foot bush hog). Gentle firm
pressure on a longer arm will get more done with less
damage than yanking on too short of a socket handle 2.
Blue wrench (i.e. heat). Heat gun, propane torch etc will
often crack the points of adhesion. Heat the bolt
directly (to avoid damaging the surface the bolt goes
into). 3. PBlaster (or other penetrating oil) soak, leave
and drink beer, then come back, test. Repeat as
necessary. Yanking will cause you grief in the long
run. Just say no. Nate
- 14 feet Wow! I have used some
long cheaters before maybe 6 feet on the axle nut of my
VW Bus one time. Then again sometimes I use long ones at
work on ships. The ultimate for me was removing the top
and bottom fittings on high-pressure air flasks (5000
psi) for the Navy. I set up a 2-foot piece of 10 inch I
beam standing on end and welded it to a steel table 1
inch thick. I put the air flasks laying on there sides in
special clamps to hold them down with one end pushed up
against the I beam. At the other end another I beam and
in-between a 1 1/2 drive socket (about a 4 inch nut) on
an 1 1/2 drive air impact gun and used a portapower jack
to hold pressure on the impact gut against the nut. What
a racket it would make but it worked very well. Others
used heat and a slugging wrench but that would take as
long as several hours on one flask. My method did several
flasks in an hour. I also did not like applying heat for
a number of reasons. The seal was some sort of Teflony
thing and made nasty smoke when heated and the flask in
my opinion should not see this much heat because of the
pressures involved. Will in CA
- Another basic lesson: RIGHTEY
TIGHTEY---LEFTY LOOSEY. That is true 99%of the time
(except with left hand threads). bmwterrien2. "don't
force it- or it will break" Steve #11059 in MA
- In reading Bryan's post a
second time, I believe his point was that it's best to
recline and work from the right side of the bike, so that
the force used to loosen the sump bolt is transmitted
backward toward the center stand, rather than toward the
front of the bike as can be when working from the left
side of the bike. I also once almost pushed my bike off
the center stand in this way (back when it had a center
stand before I put on a Touratech suspension kit). I
don't know if Bryan meant he literally yanked on the
wrench, but the bike can be rocked forward simply with a
very strong, even pull on the wrench from the left side
if one is pulling toward the front of the bike. Mike #926
- When you are going to be
working under the bike like that, bungy or tie the front
brake lever to the handgrip so the bike can't
accidentally roll forward off the centerstand. Bonnie
#1158 northern Illinois '02 F650GLA.
- I just got around to reading
my June issue of Motorcycle Consumer News. They tested
three tools for removing stripped nuts. They highly
recommend the Sears Craftsman Bolt-Out set(part no.
952165) at $59.95 for a set of 10-19mm sockets. They said
that it was able to remove every nut that they tried. The
Vice-Grip 10L W-02 fits nuts of 15-28mm, at $14.90, was
partially successful at removing their test nuts. The
Harbor Freight Universal ratchet set at $11.99 was
useless. Richard #230
Cheap
Maintenance Tips
- Here are some random tips:
(Richard #230)
1. If you have plastic side panels on your bike that plug
into rubber female grommets, they can be hard to push in
and even harder to pull out of the grommets. Coating the
rubber with Armor All, or the equivalent, will make it a
lot easier to push them in and pull them out without
breaking the plastic male appendage and leaving it stuck
in the female attachment.
2. Placing a small rubber O-ring around the back of body
panel screws will help to keep them attached to the body
panel when you remove it from the bike. That way they
will stay with the panels and you will not have to dump
all of the little screws into a can and dig through them
for the right size when re-installing the panels. It also
prevents you from kicking your screw can and watching the
screws travel all over the garage, some of which will end
up stuck into your tire, while you will find the rest in
the middle of a spider's nest, or stuck to the sock you
lost last year.
3. For those of you that have bikes with uncovered slots
in the clutch lever and lever housing (which is used to
install and remove the clutch cable from the lever), you
can cover the slots with small pieces of black electrical
tape to keep dirt and water out of the clutch lever pivot
area and clutch cable ferrule.
- Next.
Bike Storage Tools
- I can finally park my car in
the garage. I just bought the Telefix Motoboy. It's a
center stand platform on wheels that allows you to move
your bike very easily in tight spaces. I think these are
popular in Europe but I haven't seen too many of these in
the U.S. Now I finally have room to park my car in the
garage. Warning: until you get used to it, it is very
difficult to place it on the dolly since it is a little
higher off the ground than the ... ground. You don't get
as much leverage when propping up the bike on its center
stand. I think I'll try rolling the back wheel on a board
to raise the back higher off the ground to see if that
helps. Here is a link if anyone wants to see what it
looks like. http://www.bmwbobs.com/store/tools/Telefix.html. esef
- A cute device, but it looks
like you need a centerstand to use it. Marketing types
say that centerstands are too practical and will not sell
motorcycles, so lets stop making bikes with those
ungainly things attached to them. After all, our
customers would not want to get their hands dirty to oil
a chain or change a tire (would they?). (Hey CS, where is
your centerstand?) Richard #230: 1997 Funduro, 2002
R1150R, 2002 Yamaha YZ1, 1993 Honda CB750 - Pacifica, CA,
USA
- Here's the
"high-tech" device that I use to get my 99 F650
up on the center stand---namely---a one inch thick piece
of board. I slide it up tight to the rear wheel, bump the
bike back on it and then it pops right up on the center
stand. I have the lowering kit on my bike and the center
stand has been made a bit shorter so some of the leverage
is lost--thus I can't get the center stand to work
without the board. I guess if I weighed a lot more this
would not be a problem. When I take the board out and use
it in a public parking area, it has drawn some very
strange looks!!!! Bill No. 391 Las Vegas
Micrometers:
Metric
http://www.utc.edu/Faculty/Harold-Climer/metricmic.pdf
Standard (not really
"standard", since THE standard is the metric one)
http://www.precisionmeasure.com/microm1.htm
http://www.formtechservices.com/dstuff/bookstuf/p26.micrometers.html
Spoke
Wrench Information
General
Spoke Wrench Info
by Marty #436-Chicago-97 F650F &
Seacuke, #1214, F650GS
I measured my Classic spoke nipples...about
0.240" (close to 6 mm). My old set of spoke wrenches say
that it's between a #9 (sloppy fit, but works) and #10 (no fit,
and I have no clue what the numbers convert to...). Personally, a
4" crescent wrench works for me in a pinch.
So I finally got a spoke wrench (Rowe Spoke Wrench), and discovered that the size '3' is the proper
(I should say 'properest') fit. This #3 didn't mean much to me,
but I did find this chart which
seems to maybe make some sense. If indeed this is 3 AWG, that
would put our diameter at 5.816 mm, and in eyeballing the tool
with a ruler, it does indeed appear to be just over 1/2 a cm
(5mm) wide at the '3' size.
So I guess what I'm saying is that I'd believe that the threaded
end of the spokes on our wheels measures somewhere's around 3
AWG.
Reviews of FAASTCO's Spoke Wrench
Fasstco Spoke Torque Wrench
Price (MSRP): $119.00
Optional heads: (5.0mm, 5.6mm, 6.0mm, 6.2mm, 6.3mm, 6.4mm, 6.7mm,
6.8mm, 7.1mm, and spline drive) $9.95 each
Will Pattison's Review
Ok, let's get the disclaimer out there right from the start -
I am not a professional wheel builder. I've been riding, racing,
and wrenching on my own motorcycles for 20 years, but it's not
how I make my living. While I've split my share of cases and done
top ends by the dozens, I only recently decided to tackle wheel
building. As a mechanical engineer, I can readily accept that
every spoke in a wheel should have the same torque, and that
there is in fact an ideal setting. I figured that the Faast Co.
Spoke Torque Wrench would put some science into the art of
determining exactly what that value should be. I also imagined
that it would turn a newbie wheel lacer into a pro in short
order.
In a word, wrong. The first task I chose to try the wrench was a
rear wheel. I already had everything pretty snug, and the rim had
less than 0.025" of run-out or wobble. I assumed at that
point that I could simply use the torque wrench to take them all
to the 100 lbs. mine is set at and be done with it. Big mistake.
After cinching up all 36 spokes I stepped back to admire my
handiwork and quickly saw that I was in trouble - the wheel had a
wobble I could measure with a yardstick! At that point, I did a
reset and finished the job by feel. As I expected, the wheel
loosened each time I rode the bike (yz400) for the first 5-6
hours, but since the spokes seated themselves, I've had no
issues.
I did give the wrench another chance, however, when I built the
front wheel in the set. Again, I found it to be less than
helpful. To be fair, though, I have to say I'm not sure that the
wrench is at fault. First, I believe that the same torque value
should probably not be used for both a front and rear wheel. Not
only are the spokes different diameter and the rims of differing
strength, but the abuse one takes is clearly greater than the
other. Second, in my short wheel-truing career, I've decided not
to use the resistance at the nipple to judge how tight the spoke
is. It seems that even with anti-seize on all the threads that
some of them want to gall a bit, which of course sets the torque
wrench off prematurely. That may be a manufacturing issue with
the spokes themselves (Buchanan in this case) or it may be my
choice of lubricant. I'm going to build the next one using plain
grease and see if it makes a difference.
Either way, I'd certainly like to hear the feedback of an
experienced wheel builder. I guess that until I did, it would be
difficult for me to recommend that any one else spend the $119.95
Faast is asking for this tool. I still believe that nipple torque
is important, but until I can reconcile that with actual
practice, I'm going to continue tightening them by feel and
sound.
Contacts:
Fasstco: http://www.fasstco.com
- Note: A Special Just For Honda XR.com Web Surfers! Faast Company has
extending a very special offer to web surfers of Honda
XR.com! They are offering one spoke torque wrench and one
head for $100! That's $30 off the normal price! Just
mention this review when purchasing your Fasst Company
spoke torque wrench!
- Please Note: Currency is U.S.
dollars. This offer is valid only on purchases made
directly from Fasst Company. Applicable taxes and
shipping may be additional. Honda XR.com is not
affiliated in any way with Fasst Company.
Tool
Feedback:
Genuine 2 by 4 with Snap-on
screwdriver to shim/adjust the wheel for doing the
bearings! (lift on 2 by 4 to lift the wheel to index fork
legs etc)
|
Craftsman jack stand holding up the
bike.
|
DeWalt light that takes the
rechargeable batteries, an excellent shop-light.
|
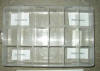
Valve Adjustment Box:
If you have take your shims out, keep track
of them. It is FAR to easy to mix them up, switch
buckets, shims can and will migrate/interchange/disappear
I made this box and chart for my 6K service but my valves
are all within spec (!). See the f650.com faq for more
shim explanation. I will have part #s for the
Triumph and Kawasaki replacement shims forthwith.
|
Rhodesian
Factory Tool:
After a long hard day working on the F650,
every Ridgeback needs a nice warm bath!
This is Cecil, my 115# Rhodesian Ridgeback
that helps with everything.
She grew up getting in the way of TY250s,
BMW Airheads and now is an F650 fan.
|
By Nate #1379
Hi all you fans of stripped thread holes.
Due to the unfortunate fact that BMW has chosen a cross between
pot metal and Cheddar cheese to use for the engine and
transmission cases (among other things), it may become necessary
at some point to repair a badly stripped out threaded hole.
There are really three options:
1. Fix it yourself
2. Take it to a machine shop to fix it
3. Buy a new part
While buying a new part will preserve the
originality of the bike, it is the most expensive option and
often requires additional disassembly to put the new part on. The
machine shop option usually is cheaper, but also requires
additional disassembly. Fixing it yourself is the least
expensive, and may not require any further disassembly. If you
choose to re-thread the hole yourself, you have a few options:
1. Drill the hole out bigger, retap and
use a bigger bolt (least appealing but fastest option)
2. Use a thread repair epoxy (only good for low torque,
non-critical threads)
2. Use an insert like Helicoil
3. Use an insert like Time-Sert
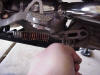
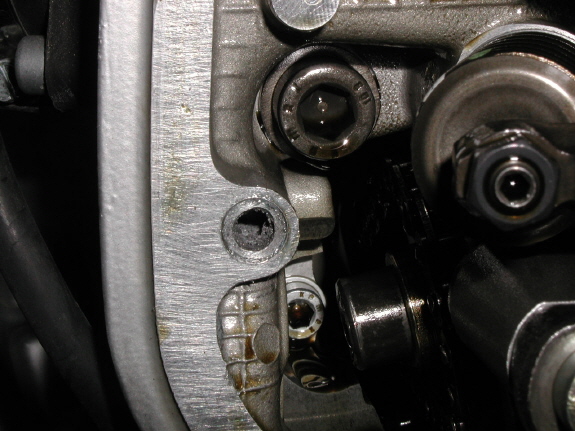
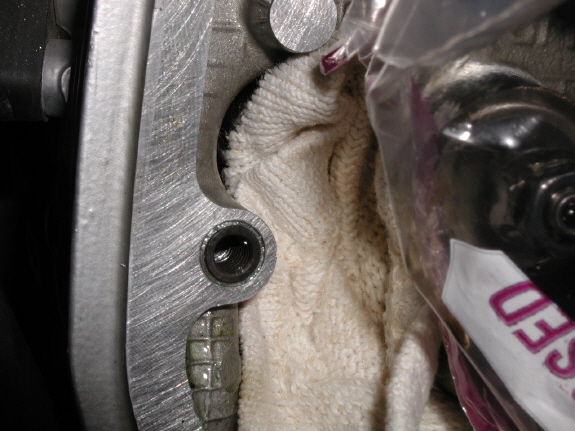
This is not an F650, but in fact a boxer
engine head (R1100S) where one of the head cover bolt holes has
been stripped out. Note that the hole is elongated as well
(towards 1 o'clock)
Although there are a few options in how to
repair this, I chose to use the Time-Sert method of replacing the threads to their
original dimensions (instead of drilling out to the next size up
bolt). The kit is expensive, but is significantly better than the
alternative Helicoil
since the new threaded insert cannot migrate down into the hole
and won't uncoil since the Time-Sert is a solid bush insert.
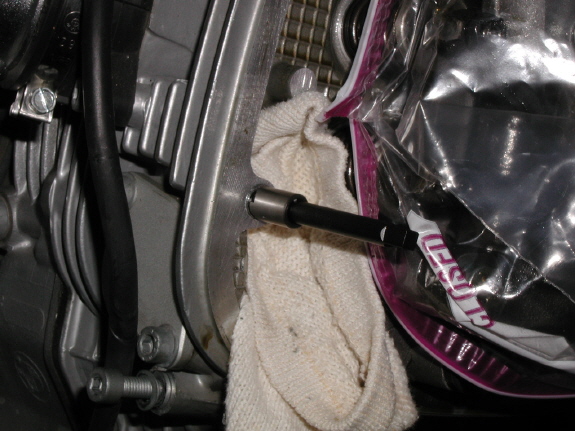
In general, the included instructions will
guide you well. But first things first. In order to use the
Time-Sert, one must have good, direct access to the hole, so that
drilling and tapping of the hole can be done completely square to
the surface.
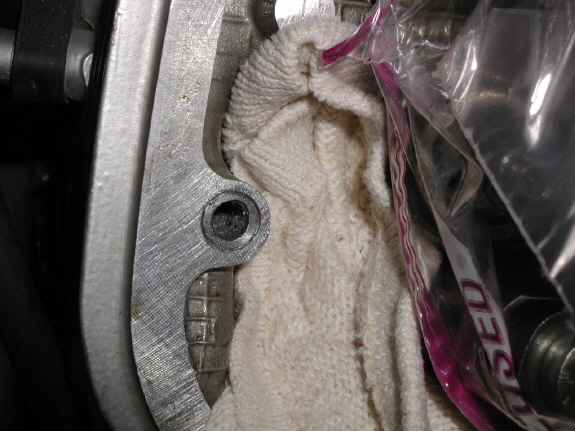
Note that I have protected the rocker
assembly and timing chain from bits of metal by using a plastic
bag and cloth. One does not want the drilled and tapped bits of
metal to drop into the engine.
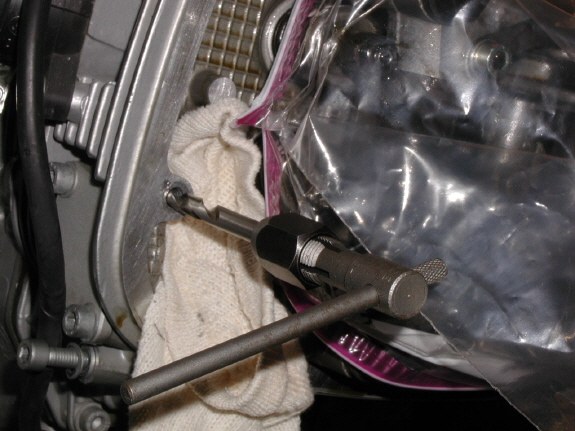
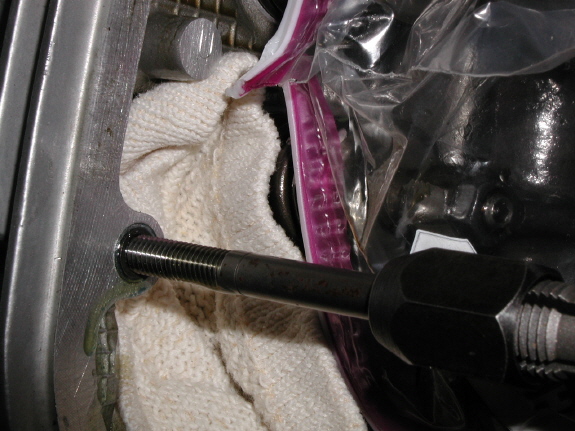
The first step is to drill out the old
threads using the included drill bit. Before I started drilling,
I used a small drill bit to determine how deep the hole was and
taped off the Time-Sert drill bit at that length to prevent
drilling too deep. I also spray the drill bit with WD40 away from
the open engine. The WD40 works as a cutting oil, but you do NOT
want excess draining into the engine or transmission oil because
WD40 will adversely alter viscosity. Be CAREFUL, the aluminum is
very soft and can be almost drilled by hand with a tap handle.
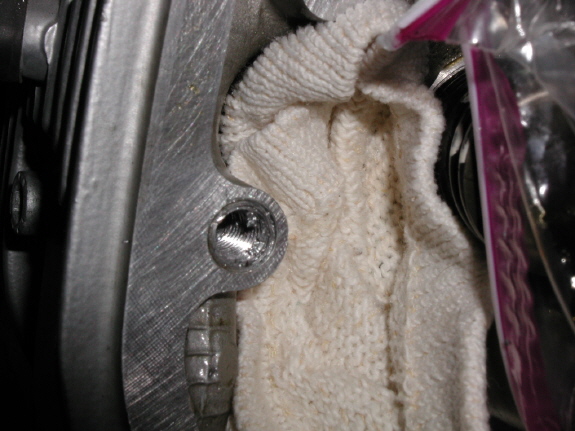
This next picture shows the counterbore in
the hole. The Time-Sert counterbore is set so it can't really cut
too deep. Again, I spray it with WD40 before boring, but do so
away from the engine oil.
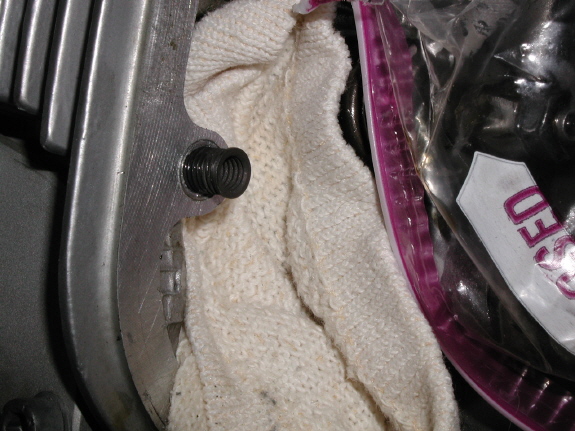
Here, the hole as been tapped out. Be very
careful that the tap is completely square to the hole or else the
threads will be difficult to use (the hole will effectively be
oval). Again, I use WD40 before tapping. When turning the tap
handle, clockwise cuts the thread. After turning about 1 turn, it
is good practice to back off 1/4 turn (turn out counterclockwise)
to clear metallic chips from the cutting edge. Be careful to feel
for the change in resistance that signals the bottom of the hole.
DO NOT TURN ANY FURTHER when you get to the bottom of the hole or
you will damage the freshly cut threads. After backing out the
tap, blow out the hole to remove any leftover chips.
Some people coat the tap with grease to
increase catching chips. I have only done this once when trying
to tap a spark plug hole in place (ie head not removed).
The next step is to put in the insert and
turn it a few turns by hand. Although it is not mentioned in the
included instructions, I put a couple drops of locktite on the
outside surface to help ensure the insert locks in place.
This step involves driving the insert into
the hole. I coat the driver with a light machine oil (or engine
oil) instead of WD40 to prevent any chance of damage to the
insert threads. As you drive it into the hole, it will get
slightly more difficult and then get easier again. This is
because you are cutting the final threads and expanding the end
of the insert, locking it in place.
This is the finished insert. Carefully
remove the cloth and plastic to keep chips out of the
engine/transmission. I was able to retorque this hole back to
spec torque.
A couple of
explanatory notes to go with this:
1. If you have never tapped out a hole before, practice drilling
and then tapping the hole before trying it on your bike. Scrap
metal is cheaper than engine heads.
2. I only used the electric drill in a couple of steps:
A. Drilling out old threads--lightly
drilled, then used the drill bit in a tap handle
B. Counter bore--Used the drill without any concerns. The
counter bore will only cut the prescribed depth
C. Tapping the hole--NO ELECTRIC DRILL USED. I used a tap
handle (sometimes in a tight spot, an open end box wrench
will work if you are careful)
D. Installing the insert--NO ELECTRIC DRILL USED. Tap handle
only
Tools & Parts for Trips
What Tools should I carry on Long Trips ?
Q. Are
there any favourite tools that F650 riders carry in addition to
the stock tool kit?
A. It depends on whether you’re doing a Long, Medium
or Short Trip, or a World Tour.
Here is a
cross-section of opinions:
An
observation: tools and parts are a bit like insurance --
necessary, but hopefully never needed. e.g., if you never need
the extra tools and spare parts, they seem like a burdensome
luxury. But, if ever in a situation when you do need them, they
are the only thing that will suffice:
- The original Leatherman
Supertool: don't leave the carport without it.
- Hardwired accessory plug that
will allow access to battery with (a) your cellular phone
and (b) other pre wired goodies.
- Motorcycle specific jumper
cables.
- 70% polyester rag for
cleaning windshield. Keep it in,
- One of a half dozen quart
size zip lock bags so the rag does not collect lint or
excess moisture. Save the others for general purposes.
- Spare headlight and tail
bulbs (wrapped in bubble wrap so they do not get damaged
by banging around with the metal stuff).
- List of emergency telephone
numbers for you to call for help if necessary.
- Separate short list of
emergency telephone numbers for someone else to call if
you are injured and can't call for yourself (And keep it
where it can be found without blowing to the four winds
if you t-bone a tree or some other immovable object).
- Plastic mistletoe to hang on
your tail light if you are run out of a place you will be
better off leaving anyway. And finally,
- Carry a change of underwear.
That way, if you have to spend the night in the boonies
because you failed to carry adequate tools and parts, you
can enjoy the luxury of a fresh change before you begin
your walk out in the morning. And save the old ones to
use for a signal flag if a search party is sent
out.” Rick #725
From my
experience I have added to the standard tools:
- A little screwdriver, mainly
to help to take off the battery caps.
- A tube type hexagonal key 6-8
mm.
- Some spare electrical cable.
- Some hatbands (little and
medium size).
- Insulating tape, and what we
know in Europe as American Tape.
- A little box with spare bulbs
(obligatory to ride in Europe).
- A little punch, to help in
taken off the break pads.
- An adventure multiuse tool
all in one (pliers, scissors, clasp knife...).
And on large
trips:
- A spare clutch cable, only
the inner cable with a properly diameter trigger for
screwing down at the end of the cable.
- A manual air pump.
- Don't use the canned
Fix-a-Flat stuff. It doesn't work on tube type tires and
wheels. Use Slime and carry a pressurized Moto Pump.
All the above
mentioned have been used at least once, specially for the other
friends that I ride with. Unknown.
Feedback:
- Carry a valve core remover
(and a spare valve core). They rarely break, but if they
do, can leave you with an unfixable flat. They take up
practically no space. Marty #436
- Carry all the tools you
need. This is not a smart-ass answer. If you do your own
maintenance, you KNOW what tools you need to do
EVERYTHING you may need to do. If you don't do your own
maintenance, then likely you wouldn't know what to do to
fix what breaks anyway. In that case a cell phone and
credit card are the tools YOU need. I carry tire irons,
patch kit, pump and augmented tool kit. My valve caps
have integrated stem tools. The further I go from home,
the more I carry. Ask Prof if he thinks I carry too many
spare parts. ;-) Flash #412
- An electrical relay plus
female spades, wire and scotch-lock connectors are
useful. Just about anything electrical can be by-passed.
The Horn relay makes a good emergency fix for any other
switch (disconnect the horn). I ran nearly a thousand
miles running the fan through the horn button when the
radiator fan switch went. Electrical tape, multimeter and
pliers make life easier. Duct tape is a must. Andy Leeds
UK #982
- A compass stuck to the
wind-screen will be effected by the bikes magnetic field
and will only give an rough indication of direction. You
should get at least 5m (15 feet) from the bike to take an
accurate bearing. You could of course write yourself a
nice long correction list, but walking away from the bike
is easier and cheaper than GPS. Andy Leeds UK #982
- Here is a Christmas gift
suggestion for someone who likes tools and has one of
everything. Torq-it Products (www.torq-it.com/products)
(1-888-876-9555) makes a cute 3/8 inch palm ratchet
wrench called the Torq-It Speed Driver. It is about 3
inches in diameter and about one inch thick and has a
pull-rope, like you use to start a lawn mower. You loosen
the bolt or screw with your hand, or a regular ratchet
wrench if it is too stubborn, and pull on the rope once
or twice and the fastener spins off. Is particularly
useful for removing and installing F650 body parts. It
serves the function of a cordless screwdriver or air
ratchet, without the charging or air-compressor, and
takes up much less space in the tool box. It sells for
about $20. My daughter brought me one for my birthday and
I have found it very useful. I recommend it for gadget
and tool lovers. Richard #230.
- These are all replacement
items, but...
- Light bulbs for headlight, tail light, turn signals
- Fuses, definitely
- Flat-tire repair kit (note that adding sealant -- don't
use Slime -- to the tires or tubes helps prevent most
flats)
- Tire valve wrench (small nipple wrench for
removing/tightening/thread-cleaning valve cores --
indispensable for what it does)
- Spare chain (of correct length) and related tools
(chain breaker, etc.), small brush for chain cleaning,
small can of chain lube
- I've found a very small voltmeter (VOM) very handy for
troubleshooting electrical-related problems
- Small white-LED flashlight -- lasts much, much longer
than a regular incandescent flashlight -- I prefer a
headlight type that mounts on a headband, leaving my
hands free
- From my former SAR days I always carry a large survival
whistle (big orange plastic thing, so loud that I have to
plug my ears when I use it)
DesertRider
- Do not forget the compressed
air, either CO2 cartrigdes, or NO2, is you want a laugh
and dispensing unit.
You could be creative, and show off,,,,,, do the
following. Buy a cheapo cig light powered air compressor,
break all of the plastic off of it, shorten the DC power
wire, and air hose. You should be left with a compressor
that fits into your hand(no Lie) that can do a tire in
less than a minute, It starts off the size of a car
batter, and once all the plastic is gone, and and
hose,wire shortened, it can actually be stuffed into a
coat pocket For 11$ at Harbor frieght, if you are
interested in the how to link, i can dig one up off a VFR
mailing list I belong to.. Buy a tire plug and repair kit
from an auto repair store, they are much cheaper than
bike stores, and a tube repair kit from a Mnt Bike shop,
the kind with no separate glue, quicker as well. Maybe
skip the whole chain, and just go with a couple of master
links, and six inches of spare chain for weight savings,
and in a pinch a weapon.Oh yeah, for that low side, some
pain killers to keep you riding until you find someone
who can help. Do not take toooo many, and you will
undoubtedly crash again. devir
- Your best bet before leaving
on a long trip:
1) Fix whatever is broken or questionable. Your chain and
tires should last the whole trip. If the trip will be
longer than new tires, youd best make arrangements before
hand.
2) Evaluate your bikes weak points and bring spares
accordingly. You dont want to leave with a bunch of
things youll never use or can get somewhere on the trip
if you do, or if they do break you can make do without.
3) You did all the scheduled maintainence before you
left.
I try to carry as little as possible and start with a
bike is excellent condition. Not always possible!
echo
- Basically I carry 12 volt air
compressor and a can of fix a flat. You are most likely
to get a flat and FAF has in fact got me the 100 miles to
my cousins house in St Paul with a small rod in my rear
tire. If you have a GS youll need a set of torx bits 3/8
inch drive. I carry a couple of vise grips, a 3/8 inch
drive socket set with unused sockets removed, a service
manual if possible, a roll of duct tape and some
electrical wire (which I fixed a faulty side stand switch
with once). When the ST1100 I own used a little coolant
mysteriously I carried a quart of unmixed coolant. (until
I added a manual fan on switch which when turned on
before entering stop and go traffic solved the coolant
disappearing) You see, basically Im customizing the stuff
carried to the particulkar bike. Which isnt helping you
much! I dont think you can say there is anything that is
goinbg to fail via F650 per se. You can say what might
fail on YOUR motorcycle. I always carry roadside
assistance cards. That and a cell phone which I dont have
would probably insure you of repair. Just grok the bike
and bring what comes to you to bring and go with
confidence! echo
What Tools should I carry on Worldwide
Trips ?
Impossible question to answer
here, because there are so many variables. Have a look at
Werner's book. (See Documentation FAQs).
These are from people who have
been RTW or close.
1 - Spares to Pack for the Big
One
by Werner #547 Ottawa., Werner #547 -- 2000 F650 Classic --
1991 R100 GSPD.
The first prize goes to Flash. Alas, not
everyone is a flush as Flash. I travel light: VISA, MC and lots
of cash. But I'm a sucker for packing tools: only the best:
Snap-On, state of the art, and spare parts. I carry a whole set
of valve adjusting shims (you never know!). I carry a torque
wrench (Snap-On, of course), and a micrometer (guess what make?).
Spare tubes (two each). Oil, water (for the battery), multimeter.
With all that hardware there is no more room left for software
(e.g. clothes). Therefore I look grubby at times. I call it,
"like a macho biker," but others might have a different
opinion. If you're travelling in the so-called third world, it
doesn't really matter. Most of the locals look the same way. The
main thing is to have fun. And that's what it's all about.
There's an amusing incident in "Jupiter's Travels"
relating to spare parts. Ted Simon had carried a spare stator for
his Triumph for quite a while. He never needed it, so he sent it
home to England. The next week his stator went on the blink.
Lesson: Whatever spare part you carry, you'll never need it. What
you'll need is what you don't have.
Carrying spare parts must involve compromises. You can't carry a
spare piston. If you would, the transmission would go. So what is
feasible to take along?
- Plugs and filters (but these are consumables, and don't really count as spares)
- Clutch
cable ( I always
carry one, hence mine never breaks)
- Set of wheel bearings (my rear ones failed after 25,000
miles)
- Rectifier/voltage regulator (it's not heavy, but expensive, and hard to
get at times)
- Brake
pads (again not
heavy)
- Valve adjustment discs (Shims) (2 sizes thinner or
thicker than the ones installed) Important: Know what's
in there. Make a diagram. Be sure that the ones you're
carrying have the thickness printed on them.
- Tube
repair kit and tire pump (a guarantee not to get a flat)
- Light bulbs and fuses (again not heavy)
- A set of good tools, including a torque
wrench and a
multi-meter.
- A repair
manual with
pictures (of utmost importance. If you need a part you
have to get shipped in by FedEX, for example, it's good
to fax a picture to the dealer with whom you have made
prior arrangements in case of emergency)
- A set of credit cards (comes
in handy when you're in civilization, but not very useful
in the middle of the Sahara.
- You can get parts shipped in
within three days to all parts of the world. But be
advised that this is very, very expensive. Customs of the
country you're in usually take at least a third of the
value of the goods imported. The only way to get around
this is if you're a female, pretty, and under 25 years of
age. Believe me, I've tried.
2 - Spares to Pack for the Big One
by Flash 412 (CO)
Never forget that the Classic is Italian.
"For Italian vehicle owners. The first law of Italian parts
is, 'If you have that spare part, you will never need it.' The
second law of Italian parts is, 'If you have the part and need
it, it will turn out to be the wrong part."
- When you change plugs, carry
the old ones as spares until you get new ones. (Don't
forget to get the new ones.)
- YES!
- Change your "lifetime
lubricated" sealed wheel bearings every 24k. 24k is
the "lifetime" of sealed wheel bearings. If
you're going to cross a 24k mark on your trip, maybe
carry the spares. But these bearings are very common all
over the world.
- There are other VR's that
fit. Figuring out which and how, in the middle of
nowhere, can be tricky. Not a bad idea to carry one.
- If you pay attention and
inspect your brakes, you shouldn't need to carry spares.
(But personally, I keep a set of pads for whichever wheel
will need them next under my seat at all times.)
- Put the shims in little bags
or envelopes on which you can write (and re-write) the
size of the contents.
- YES! And maybe a bead
breaker, too. Particularly if you are in the Sahara or
somewhere that is nowhere.
- YES!
- Yes. But... I don't bother
with a torque wrench. BTW... that Doc Allen's Versatool
KICKS A-S-S.
- Hmmm... at LEAST carry a
wiring diagram.
- YES!
- Werner, just HOW do you go
about trying to be female, pretty and under 25?
3 - Spares to Pack for the Big One
by y_kiwi, Lance, #1303, '01 F650GS, '96
G650ST.
From 1-11 I carry 7, 9, 10 (virtually on my laptop) and 11 only.
I have not had to have parts shipped in 4 long trips (Europe,
Europe-Singapore, Australia and Nth/Sth America). A lot of that
is lucky timing - and regular BMW servicing whenever there is a
dealer.
- Can get plugs pretty much
anywhere, washable air filter is the best option (sadly I
don't have one), external fuel filter and spare is a
great bet (BMW fuel filter is expensive)
- Never had a problem...
accelerator cable is another story...
- Never had a problem in 70k
miles on 2 bikes... steering bearings went though.
- Do these fail on their own or
only when hit in a crash? Seems like a part that either
works or doesn't...
- Mine last ones lasted for
35,000 miles and still had a bit left when I replaced
them. I agree with flash.
- I just wait for a dealer...
bit more expensive but...
- Absolutely. some also carry a
spare tube. and tire levers.
- Lamps are easily obtainable
(front light is standard H4 halogen light - I picked one
up at a service station in Argentina)
- Not so sure about the torque
wrench, but multimeter is very useful
- Or have the PDF on your
laptop or a handy website you can FTP from. Repair books
are very heavy
- Cash also works - preferably
us dollars.... :-)
- Or buy from the local BMW
dealer. still expensive but the hourly rates are low so
it evens out. You can also have parts made - especially
in the third world. A frame bolt sheared on my my bike in
Ushuaia and the local moto dealer made a new one from
alloy bolt stock.
I would add:
13: fork seals - they are light and they do
break.
14: duct tape, metal goo, 2 part glue, superglue and wire for
fixing those random bits that break.
15: some also carry chain and sprockets. I don't, but have found
it hard to find sprockets..
and if you are going to send spare parts home send the old part
and install the new one.
Feedback:
- You need to make an
evaluation of the particular bike you are going to take
along. Is it going to be time to do the water pump? How
about the chain and sprockets? My ST1100 suffered from
disappearing coolant for a few years (until I fixed it by
putting in a manual switch for the fan...it got hot but
not overly so in traffic unless you switched on the fan
before hand) so I always brought along a quart of
coolant. How about jumper cables? Don't forget your BMW
road service card. Also, think "what do I need to do
to get this thing to someplace where it can be fixed
right". echo F650GS Dakar, Camden, New Jersey.
What should I pack for Long Trips (Clothes and Spares)
- Bicycle
Shorts (Mike639) Definitely! The best way to keep your
ass from getting saddlesore. There is an added benefit of
some muscular support as well (quads here not your butt
:-). Whether on or off-road I have these on (off-road
ones are different though with hip and thigh protective
pads). A very inexpensive way to improve the enjoyment
from your long distance riding.
- One pair of
jeans, and more (BestRest). If you're going to bring
jeans, one pair will do it. Personally I've found jeans
to be less useful when motorcycle touring. I've switched
to wearing ExOfficio clothing or certain things from REI
or NorthFace. I'm very particular about what I bring with
me and it's got to have certain properties like being
lightweight or having some technical benefit such as sun
protection/cooling or the same garment type in short/long
sleeves. Anyways, I experimented and how have the
collection that suits me well for just about any trip. As
far as the off-bike gear goes I layer. I have REI fleece
jacket and pants (but the special version which is
thinner and lighter weight) and layer a Gore-Tex
windbreaker/pants over this in case the camping is wet. I
have off-bike gloves/combo to match so it's easy to think
about what to wear when off the bike. Cold weather,
fleece, really cold fleece and Gore-Tex overprotection,
city stuff ExOfficio/REI pants/shorts with whatever shirt
of the moment. No cotton t-shirts here as I prefer the
active wear stuff from Nike, NorthFace and REI. It lasts
longer when actually being used, packs lighter, and dries
faster. Ditto on the ability to buy stuff and for sending
stuff home
- Using the
post office (Alan 442). If you've got to bring a lot of
medicine with you this might take up a lot of room that
you could do better with over time. Remember it's a
battle of time vs. space. Send things to you and get them
via poste restante or friends. Alan also caught that you
have too many socks. I had three pair for the entire
three weeks of the Dakar. Remember with a rest stop you
can always find a Laundromat, either a drop-off wash and
fold or a do it yourself place. Even when you're die-hard
ride all day, sometimes a nice stop can be made for you
to eat and do your clothes.
- Werner's
comments. Werner and I think alike in that there is no
substitute for being able to fix your bike by yourself. I
"reserve" the left pannier for this for my
trips (mostly off-road backcountry affairs), spare tubes,
oil filter (for my other bikes not for the F650GS as I
run the Scott's reusable one), air filter oil (I run the
K&N), and other stuff like Werner has. But all of
this has to be balanced as Flash said against your
ability to make said repair (why carry two sets of tubes for
each tire if you don't even know how to take the wheel
off of the bike).
- Of you're in
the US/Canada most of the times help is just a phone call
away. Something like membership in BMWMOA so that you can
get the "anonymous" book goes a long way and
IMHO is better than BMW's "roadside dis-assistance"
program.,
- Shank's words
of wisdom. Definitely do what he says. Lay it all out.
Weigh it (at least I did to make a spreadsheet), then
pack it, unpack it, pack it again, then take a local
trip, camp out somewhere close and pack and unpack in the
dark. You'll quickly see how much time it takes the more
stuff you have. As far as the cooking while riding goes,
I can't vouch for this. I prefer to eat first then ride.
but then again YMMV.
My comments:
1. Draggin' jeans are too bulky: Get rid of these, stick
to touring motorcycle wear, and think about not having
jeans at all, if you must one pair only.
2. Fewer socks and underwear: Bulky and easy to buy on
the road (and one of life's small pleasures).
3. 1 set of real clothes, Pants last longer than shirts
and can be worn twice.
4. Maps - take it easy, carry those you need now and send
the rest ahead or stop at AAA and get them as you go
along.
5. A camelback - this is the one thing that I constantly
remind people of. You need to CONSTANTLY hydrate. So
drinking (water) while riding is what you need to do. If
you "feel" thirsty" it's too late. If you
get this in a small backpack version you've also got a
place to put some food and personal accessories.
- Werner
#547: Spares to Pack for the Big One:
There's an amusing incident in "Jupiter's
Travels" relating to spare parts. Ted Simon had
carried a spare stator for his Triumph for quite a while.
He never needed it, so he sent it home to England. The
next week his stator went on the blink. Lesson: Whatever
spare part you carry, you'll never need it. What you'll
need is what you don't have.
Carrying spare parts must involve compromises. You can't
carry a spare piston. If you would, the transmission
would go. So what is feasible to take along?
(1) Plugs and filters (but these are consumables, and
don't really count as spares)
(2) Clutch cable ( I always carry one, hence mine never
breaks)
(3) set of wheel bearings (my rear ones failed after
25,000 miles)
(4) rectifier/voltage regulator (it's not heavy, but
expensive, and hard to get at times)
(5) brake pads (again not heavy)
(6) valve adjustment discs (2 sizes thinner or thicker
than the ones installed)
Important: Know what's in there. Make a diagram. Be sure
that the ones you're carrying have the thickness printed
on them.
(7) Tube repair kit and tire pump (a guarantee not to get
a flat)
(8) Light bulbs and fuses (again not heavy)
(9) A set of good tools, including a torque wrench and a
multi-meter.
(10) A repair manual with pictures (of utmost importance.
If you need a part you have to get shipped in by FedEX,
for example, it's good to fax a picture to the dealer
with whom you have made prior arrangements in case of
emergency)
(11) A set of credit cards (comes in handy when you're in
civilization, but not very useful in the middle of the
Sahara.
(12) You can get parts shipped in within three days to
all parts of the world. But be advised that this is very,
very expensive. Customs of the country you're in usually
take at least a third of the value of the goods imported.
The only way to get around this is if you're a female,
pretty, and under 25 years of age. Believe me, I've
tried.
Preparation for the Big One: Bike: 2000 F650
(actually 1999) Classic. Lowering kit, heated had grips,
BMW alarm, BMW crash bars, Aprilia hand protectors,
Triumph fork protectors, Staintune exhaust system,
15-tooth front sprocket, Acerbis 27-litre tank, Touratech
skid plate, Jesse radiator guard, Jesse luggage carriers
and aluminum side cases, Hepco and Becker plastic top
case, Corbin saddle, Fenda Extenda, Scottoiler, in-line
fuel filter, Hyperlites; tires: stock Silverstone
Trailwings. The Big One: London- Cape Town -London,
35,650 km in five months and six days, over the choicest
parcels of real estate Africa can throw at you. Of course
some of you want to know how this well-prepared
wunderbike with its less well-prepared rider made out. I
would like to tell you. Fortunately a book about this
trip just came out, written by some guy named Werner
Africanus, whom I know intimately. However, the
constitution prevents me from blowing this guy's horn, or
- Allah forbid - flogging the book. Should your curiosity
get the better of you, you could contact me at the
address below. bauswe@yahoo.comBottom Line for
the Big One: If you want to do adventure touring in a
relatively big way, you need three things: (1) A reliable
bike; (2) A bit of money; (3) Lots of time.
To (1): We all have the first requirement. Any kind of
F650 is fully capable of doing a Big One. Forget larger
bikes. You don't need all that power, and if you ever get
stuck in mud, you can forget to get going again. R1150's
are the SUV's of motorcycles. Good on the Interstate. But
would you ever dare to take it into the mud?
(2) Money. You cannot take along enough of it: Cards,
cash, T.C.'s. For example, before you get going you have
to get a Carnet de passage en Duane, available through
the Canadian Automobile Association. This is a customs
document which will guarantee to the country you are
visiting that you will export the bike, or else forfeit a
certain amount of money. Iran, for example, requires a
deposit of 110% of the value of the vehicle. For my 2000
F650 I had to leave a deposit of US$8,000 with the CAA.
Of course I will get it back when the bike is signed in
again for Canada. My visas cost me a cool US$500, and I
have to get several more on the road. And there are more
bills to come. Adventure motorbiking is by no means a
poor man's sport. My trip around Africa (five months and
six days) cost me an estimated US$17,000.
(3) Time, a rare commodity for most of us, unless we are
retired, like this old geezer (now 65). So age is a plus,
provided you are still healthy. You must live with this
in mind. "Use it, or lose it." This goes for
all body parts. If you have all of the three
prerequisites, you are ready for the Big One. "Just
do it!" Werner #547 Ottawa
- Flash 412
(CO): Never forget that the Classic is Italian.
"For Italian vehicle owners. The first law of
Italian parts is, 'If you have that spare part, you will
never need it.' The second law of Italian parts is, 'If
you have the part and need it, it will turn out to be the
wrong part.'"
1. When you change plugs, carry the old ones as spares
until you get new ones. (Don't forget to get the new
ones.)
2. YES!
3. Change your "lifetime lubricated" sealed
wheel bearings every 24k. 24k is the "lifetime"
of sealed wheel bearings. If you're going to cross a 24k
mark on your trip, mebbe carry the spares. But these
bearings are very common all over the world.
4. There are other VRs that fit. Figuring out which and
how, in the middle of nowhere, can be tricky. Not a bad
idea to carry one.
5. If you pay attention and inspect your brakes, you
shouldn't need to carry spares. (But personally, I keep a
set of pads for whichever wheel will need them next under
my seat at all times.)
6. Put the shims in little bags or envelopes on which you
can write (and re-write) the size of the contents.
7. YES! And maybe a bead breaker, too. Particularly if
you are in the Sahara or somewhere that is nowhere.
8. YES!
9. Yes. But... I don't bother with a torque wrench.
BTW... that Doc Allen's Versatool KICKS A-S-S.
10. Hmmm... at LEAST carry a wiring diagram.
11. YES!
12. Werner, just HOW do you go about trying to be female,
pretty and under 25?
- y_kiwi: From
1-11 I carry 7, 9, 10 (virtually on my laptop) and 11
only. I have not had to have parts shipped in 4 long
trips (Europe, Europe Singapore, Australia and nth/sth
America). A lot of that is lucky timing - and regular BMW
servicing whenever there is a dealer..
1: Can get plugs pretty much anywhere. Washable air
filter is the best option (sadly I don't have one).
External fuel filter and spare is a great bet (BMW fuel
filter is expensive)
2: Never had a problem... accelerator cable is another
story.
3: Never had a problem in 70k miles on 2 bikes...
steering bearings went though.
4: Do these fail on their own or only when hit in a
crash? Seems like a part that either works or doesn't...
5: Mine last ones lasted for 35,000 miles and still had a
bit left when I replaced them. I agree with flash.
6: I just wait for a dealer... bit more expensive but...
7: Absolutely. some also carry a spare tube. and tire
levers.
8: Lamps are easily obtainable (front light is standard
H4 halogen light - I picked one up at a service station
in Argentina)
9: Not so sure about the torque wrench, but multimeter is
very useful
10: Or have the PDF on your laptop or a handy website you
can FTP from. repair books are very heavy
11: Cash also works - preferably us dollars.... :-)
12: Or buy from the local BMW dealer. still expensive but
the hourly rates are low so it evens out. You can also
have parts made - especially in the third world. A frame
bolt sheared on my my bike in Ushuaia and the local moto
dealer made a new one from alloy bolt stock.
I would add:
13: Fork seals - they are light and they do break.
14: Duct tape, metal goo, 2 part glue, superglue and wire
for fixing those random bits that break.
15: Some also carry chain and sprockets. I don't, but
have found it hard to find sprockets.. and if you are
going to send spare parts home send the old part and
install the new one....#1303 F650GS 2001, G650ST 1996
- Bernard: Packing
Tips and Techniques. www.helen2wheels.com is a brilliant
site that explains how (and why) to pack a bike - with
the emphasis on using a large duffel bag (or two) where
the top box normally goes. The site features clear
photographs and detailed instructions - well worth a
visit. In addition, Helen also has some great kit on
offer for those a that may need it. I met a European
couple (Tjeert and Ingeborg from Holland and Germany) on
a recent mini-tour and they use a very similar system,
which makes a lot of sense to me. It may not apply to all
tourers, but it should prove insightful to some. Please
excuse me if all are familiar with this nugget of info! Cheers,
Bernard Cape Town, South Africa.
- Spakur: First
thing is to fix whatever may be wrong with the bike. This
you have done. Second is to think about any areas which
have given trouble in the past and bring relevant
parts/tools to fix them. Third is to go over the bike
completely checking tightness of bolts, condition of all
hoses (there are a lot of them of the F650), shocks,
forks, cables, spokes, wiring, brake pads. Everything you
can think of. It sounds like you've done this too. I
think you you have brought a good selection of spare
parts. You didn't mention dealing with flat tires, so I'm
assuming you've got spare inner tubes and patches, the
means to get the tires on and off, a way to inflate the
tire (electric pump is best...or a foot pump) and a can
of fix-a-flat. The BMW book of dealers locations and
phone numbers and other places/sources of parts would be
helpful, as would the list of people willing to help BMW
riders from the IBMWR website. (if any in that neck of
the woods) If you have just changed the rear sprocket
bearing etc I don't think you need a spare. Also, wheel
bearings inspected to be in good condition should be fine
for the trip. I don't think you will need valve shims if
you have just inspected them. As I recall you have a
number of miles on your bike and it is a few years old.
So you must be prepared to deal with something unexpected
breaking. Unfortunately it isn't possible to carry
something to fix everything! That is why connections to
places of repair/sources of parts/ people who will help
is important. This is the best advice I can give you.
That and if something should require time to repair, my
advice is to accept the delay as part of the
trip/adventure. In my experience when that happens I will
meet some interesting people and have maybe the most
interesting experience of the trip. Good luck and have a
safe trip!. Just to try and be helpful to those planning
a trip and wondering what to bring in the way of spare
parts. Its a good idea to eliminate bringing things which
you can inspect on the bike beforehand. Things like brake
pads, chains and sprockets, air filters, wheel bearings,
water pumps, spark plugs etc should last the life of the
trip and are unlikely to fail. Things which you know to
be marginal can be replaced before the trip. If you want
to take a chance on that water pump by all means bring a
spare, but these things are best done beforehand. My list
of spares to bring has been reduced drastically from what
it used to be, making it much easier to pack everything
else I really will use. F650GS Dakar, Camden, New Jersey.
echo
- It also
depends on how long your trip is and how remote you are
travelling. Another issue is also if you are travelling
solo or not. When it comes down to space/weight it is
usually the tools that take up bigger space/weight than
the spare parts, not to mention all the camping
equipment. Tools are also wider available comparing to
spare parts, so If one should limit something, it should
be the tools and the spare parts that don't just give up
without giving you a notice before, like chain,
sprockets, spark plugs, etc (not to mention camping stuff
and clothes). Anyway I got myself 2 extra wheel bearings
and an extra sprocket carrier bearing just in case. The
way I have prepared my bike before this trip, I doubt if
anything will break (unless I crash which I think is much
more likely). However Murphy can always come by Regards,
Spakur #1117, Icelander in Malmö, Sweden, 1995 Classic
Red F650 with 65.000+ KM
- I would
consider a spare brake & clutch lever; if you break
one in a tip-over, you may not be mobile again until you
locate a new one (and I understand that they are
different than most other bikes). At minimum, drill the
ball ends per David Parks' long-ago suggestion.
- It is not
exactly a "spare" for the bike, but I always
carry with me one of those shiny "surviving
blankets". Folded it is not bigger than a wallet and
may come handy if you are stranded in the middle of
nowhere waiting for help. It also works as a shade... http://www.campingsurvival.com/campingsurvival/sosprinmylal.html Mine doesn't have
the "SOS" painted on it :) '97 F650, Waltham,
MA. gim
- My best
advice is put some miles on the bike BEFORE you leave,
now that you have done all this work. Just in case
something isn't quite right. David #476, '99 F650.
- Nate: I
am heading out on a 12-15k mile/2 month trip. Here is a
tentative list of field-serviceable parts I plan to carry
on the bike at all times. any other suggestions?
- 2 of every fuse
- 1 more of every bulb (except the small dash bulbs)
- oil change kits
- clutch cable
- spark plugs
- 1 of each tar tube (+ tar irons & a 6" C-clamp
for bead-breakin' and inflator)
- 1.5 litres of H2O / antifreeze mix
- tools (+ duct tape, bailing wire, etc)
- chain maintenance stuff and all the other fluids, etc.
Things I am wavering on:
- clutch/brake/rear brake levers (I won't do much more
difficult than rutted forest roads).
- plug wires
- a few spares of select bolts that are apt to shit the
bed on me (if anyone can suggest those I should take,
part numbers would be cool)?
I am not capable of field stripping and rebuilding the
bike using a toothpick and a glop of earwax (a la Flash)
but am reasonably savvy enough to get myself back within
cell phone range so I can whine for help should something
major go T/U.
- For 10-15km I
would take essentially no spare parts. sure some duct
tape, wire, superglue (great for broken blinkers) and a
handful of spare fasteners for when you drop the bike
will help. and a puncture repair kit for sure. In the
75,000 kms that I just completed I have had no need for
anything other than tires, chains, sprockets, bolts of
random sizes (which can be bought anywhere), a new
radiator (should have covered up the old one with a
protector), 1 shim (at about 60,000 km), air and fuel
filters. All of these things, if ok before the trip, will
almost certainly be ok for the duration. Tire wear is
probably a concern - but you will be ok on tires if you
take it easy, or even use up your road tires getting east
then change to decent combo tires once you start going
off road. The less weight the more fun. simple. Lance,
#1303, '01 F650GS, '96 G650ST.
- I'm with
Werner... tools, spare parts, and other stuff. See the
following page for a comprehensive list: Broccoli Rider's
Camping Page. http://www.geocities.com/MotorCity/Downs/1569/camping.htm Not my list, I
don't bring ALL those things, but I try. I also rarely
venture off-road, where the weight is especially
detrimental. And you'll rarely hear me whine about
getting blown around in the wind (too heavy), but I will
bitch about the gas mileage. Marty #436-Chicago-97 F650F
- Pete.
Overkill in a couple of places. Tyre change stuff. If you
have a backyard, try doing a tyre change there, if you
can't change the tyre there, then you won't be able to on
the road so why carry all that stuff ?. (Tyre
"goop" and some means of pumping will usually
get you places eventually, even if it's in 5 mile hops,
and with a lot less sweat than a roadside change).
Antifreeze, forget it. If you need to tap water will do,
distilled water is better, but you won't destroy the
engine running with plain 'ol H2O for a few 100 miles. If
it's an 'F, you probably don't need spare plugs, it'll
run badly with one, but it'll still run. If you do pack
plugs, wrap them in something water proof. If you have a
non-riveted chain, a spare master link is a good idea. A
couple of pairs of disposable plastic gloves are good
value. Near 0 weight and volume and it beats getting
grease of your hands or getting grease over the inside of
your riding gloves. (You can put them over your greasy
hands, it'll be sweaty, but it'll save the gloves until
you get somewhere you can clean your hands). Wire your
brake & gear change lever on as well as the sump
plug, and carry a couple of spare hex bolts and nuts.
- If its a FI
GS or Dakar, take a spare fuel filter/regulator
unit.....you get a foul batch of juice and it will cause
you grief. You can't substitute an ordinary inline filter
from an Auto Parts shop as the unit incorporates the FI
pressure regulator, essential for the machine to run.
Jack F650GS Australia
- In my
experience, oil change kits are one of the few items that
BMW dealers are actually likely to have in stock. Unless
you anticipate an oil change in a location where there
are no BMW dealers (and there are plenty of areas with no
BMW dealers around), you should be able to pick up a kit
on the road fairly easily. Pete's disposable glove idea
is good; I'd also take a small tube of waterless hand
cleaner (Castrol makes some) for those times your hands
get greasy before you know it. James #523 CT USA '99
- I agree with
all above. I would say that I would not take a spare rear
brake lever (its pretty strong). I would take a spare
clutch lever. I wouldn't go out of my way to order a
spare front brake lever for the trip, but if I had one
around, I'd take it. And yeah it is overkill what you
have listed, but I would probably pack likewise. gar
#673- Ky 97F
- I agree that
it's overkill. Fuses - okay, small and easy to
carry but I've rarely if ever gone though them, 2 of each
one, okay if that makes you feel better. bulbs -
if you really want to carry all of this around, I have to
seriously ask WHY? I just carry a spare headlight bulb
(but then again I do a lot of off-road). The rear brakes
have an LED unit for backup (on my bike) turn signals I
can do without in a pinch (use your hand). Headlight's
the only crucial one here. oil change kits - as
somebody else stated, you can pick this up from a dealer,
as you've got to stop and get the oil anyways. I use a
reusable filter from Scott's Performance so I bring the
crush rings and seal which is MUCH smaller than hauling
around an extra filter (which you intend to do). clutch
cable - sure no problems with this one. spark
plugs - no problem here either tire tubes - I'd drop
the C clamp. 1.5 litres of H2O / antifreeze mix -
were you planning on drinking? You can get this (or
borrow a bit) from any gas station. - tools (+ duct tape,
bailing wire, etc) - "bailing wire", I'd
question if you're perhaps bringing too many tools. -
chain maintenance stuff and all the other fluids, etc.-
what do you consider "all the other fluids",
are your containers small enough. Sounds like you're
going to be a mobile parts store. -- clutch/brake/rear
brake levers (I won't do much more difficult than
rutted forest roads). - this would be the first things on
my list, I ALWAYS have an extra brake and clutch lever
(drilled out for extra safety). This weighs nothing and
you CAN'T find this away from a dealer/late at night (no
matter what roads you will ride, you can break these by
dumb drops in parking lots so bring 'em). - plug wires
- WHY???- a few spares of select bolts that are apt to
shit the bed on me (if anyone can suggest those I should
take, part numbers would be cool)? - not necessary I am
not capable of field stripping and rebuilding the bike
using a toothpick and a glop of earwax (a la Flash) -
that's because you don't have Flash's earwax (it's
special...) As far as disassembling the bike, you should
do a practice strip-and-check the bike BEFORE you go on
your trip. It will help familiarize yourself with the
bike and where everything is/how it works. This includes
simple things like chain adjustment, brake caliper
bleeding, etc. Do a walkthrough with your tools and
service manual - you'll know more BEFORE things go wrong
and then you won't be guessing. davidhpark, #711
- I always
carry a SMALL Vice grip pliers, a real Vice Grip brand.
It can be used to replace a lost shift lever, brake lever
or clutch or hold things together. Secure your shift
lever REAL good! Be sure to carry the odd hex head bolts
used on the body work (long and short, both sizes) some
of the rubber well nuts, and some of the tinnerman-clip
type nuts used on the body work. Add a set of the folding
pocket knife style Allen wrenches. You can't have too
many Allen wrenches. Claude #312, Annapolis, Md
- Even if your
are starting out with a fresh chain and sprockets you
will likely need a replacement before you finish your
12-14K mile trip (unless you're using something like a
Scott Oiler). You will need at least 1 and possibly 2
valve clearance checks. Not necessarily suggesting you
carry a spare chain but you may want to make some
arrangements (e.g. leave a fresh chain with someone who
can FedEx it to you if needed). Brake pads don't take up
much room. My rear pads were pretty much used up a 14K
miles. Mike639 - Covington, WA
- Clutch/Brake
Lever. You simply drill a small hole a few mm off of the
end of the lever where the ball is. Don't do it too close
to the end where there is not enough material to support
the hole. What then happens if/when you drop the bike and
it hits the lever is that the ball part hits first and
snaps off because of the hole. If you don't have the
lever pre-weakened because of the hole, all of the
force/weight of the bike gets transmitted to the lever
either bending it useless or more often than not snapping
it higher up rendering it useless. By this cheap and easy
to do pre-fix, you save the time/hassle of changing a
lever and save your spares for when you really need them.
davidhpark, #711
- I like to
carry a couple of clean rags and a small bottle of
cleaner for my visor. The rags are useful for many other
things besides wiping the bug guts off your visor. I
agree with the others about the spare tube -- a bottle of
Slime and a foot-powered K-Mart pump should get you back
to civilization. Also, I'd suggest a basic first-aid kit.
Bob#550 (Olympia WA)
- From my North
Africa checklist:
Tyre levers
1 towrope (nylon strap 5metres long)
1 petrol siphon
2 innertubes + patchkit
1 set metric wrenches + wheel change kit
1 pliers/Leatherman
PVC tape + gaffa tape
Cable ties
Sparkplugs
Oil filter, Airfilter? (K&N on the bike)
Coppergrease
Bungees
Flashlight
Front Brakepads
S.
- Pop the
plastic caps off the swingarm bolts for a Classic. Stuff
some of your favorite bearing grease in there. It is
handy if you need some while on the road. Remove all four
license plate nuts and bolts. Replace them with: a bronze
battery terminal nut and bolt, a small body panel bolt
and tinnerman nut like is used to hold the fairing to the
tank, a large body panel tinnerman nut and bolt like the
ones that hold the rear sidecovers on, and finally a 6mm
bolt about 20mm long, with washer, lock washer and nut.
This makes it a royal pita to steal your tag AND gives
you a variety of spares to use in case you need them
without having to PACK the darn things. SPARE KEY. Carry
a spare key. Better yet, HIDE it somewhere on your bike.
Man, if you carry antifreeze or oil, then you MUST be
going so far offroad that you'll need a TRAILER to carry
the gasoline. CHAIN LUBE? Flash #412 (CO)
- My
recollection is that you'll need an 11mm box end wrench
to bleed the brakes. Don't believe it's in the stock tool
kit. Also, add a valve stem remover and spare valve stem
(or "borrow). Marty #436-Chicago-97 F650F
- Metalset
epoxy or similar will fix a clutch or gear lever in about
an hour (assuming you have the bits or can get hold of
suitable stock to "extend" a bit you saved). A
small tube takes up as much space as the other levers but
is more universal. Still carry the spare clutch lever. A
spare clutch cable can be covered in tape and routed
alongside the one in use. If it goes, just clear the ends
and fasten on. A speedo cable can be done the same way if
you don't have GPS and need to calculate fuel remaining
etc. (only needed in serious out of way places). Carry
more big fuses than small ones. At a push, you can use a
25 amp in a 5 amp circuit but not the other way round. I
carry one of each and two extra of the biggest. You are
right about only carrying what you know how to use. A
credit card and mobile phone are the best tools in most
places. Andy Leeds UK #982
- Next.
Where can I carry Tools on Long
Trips/While Touring
?
Normally Under your seat, in your
luggage, but there are custom places:
- Custom Tool Carrier:
Have enclosed a couple pics of my 96 F650's touring
modifications. i.e.. highway footpegs clamped on to the
engine roll bar; a 90x500 mm length of PVC pipe with
screw on end for tools like bead breaker, tyre irons,
etc. Pipe also attaches to roll bar using large 'hose'
clamps. Lee (Australia)
- On the Classic, if you
removed the Hated Canister, put a PVC Pipe or Stainless
Canister There: I tried to build one. Ended up being
so small (compared to Jesse bags) that I never used it,
just put the tools in the bottom of the bags. PVC only
comes in certain sizes, and small enough to fit into the
clamps is very tiny inside. Marty #436-Chicago-97 F650F
- If you have put on an
aftermarket Can on the GS, In the Spare "Faux"
Exhaust. See Exhaust Modifications GS
Tyre Pumps (Small ones, for use while On the
Road).
Here is a Cross-Section of TYPES
of Small (Portable) Pump Available. No, the CG does not endorse
any of these products. YOU Choose.!
Opinions on
Pumps
- Manual is ok as a last
resort, but certainly no fun. I believe more people pack
CO2 and/or small electric pumps. Mason #631
- I pack a manual footpump -
works great and cost was about US$6. Spakur #1117
- If you are going to go
manual- try to find the largest possible diameter pump
you can find. That will save you some sweat. The smaller
diameter pumps are only appropriate for achieving high
PSI on a tiny road bicycle tire- but it would take a
lifetime to get a Moto tire filled even to the low (in
comparison) PSI required. Lee#1106
- I carry a CO2 inflator with 2
cartridges, enough to inflate one tire (watch out for the
different sizes: 12, 16, 24 oz, etc). And just in case I
get a second flat, I carry a mountain bike pump. Haven't
had to use any of this stuff . . . yet. .Scott, ID
- I'm with Spakur -- the cheap
foot-pumps you can get at any discount bike store work
great for motorcycles! Mine cost about $8 and I've used
it for three years. When I travel, I wrap it up in an old
towel, and stuff it in the corner of my top box. Bob#550
- I've used a small bicycle
pump for many years, even inflated tires which I mounted
on the rim with this pump. It works in both directions
(i.e., it pumps air with the down stroke AND the up
stroke). And since I'm a tire pressure fanatic, I know
that it takes 20 strokes to increase pressure 0.1 bar
(2psi) for the rear tire, approx. 15 strokes for the
front for the same increase. The pump is tiny and fits
under the seat. Cannot recall the manufacturer but one
can easily be had at any bicycle store. CO2 cartridges
are lame, pathetic and the method of choice for the lazy
and flaccid (gee, how many people did I piss off there?).
I used one once, was totally disgusted and threw away the
stupid CO2 cartridge pump thingy, what a WASTE of time
and money. And it didn't even properly inflate the tire,
I STILL had to use a tire pump that I borrowed from
someone. Needless to say, I soon bought a proper pump. If
I could only figure out a way to capture and use the air
pressure I naturally create when riding I wouldn't even
need the pump. Shank
- An alternative is to get a
cheap 12V compressor from an auto supplies shop, such as
the one pictured. (Above.) Crack the plastic case open
and you'll find the motor and compressor inside will
almost fit in your pocket. The price (in Norway) for the
unit pictured is about $15. I wouldn't trust this pump so
much I wouldn't pack a bicycle pump as a backup, though.
Oyvind #1052
- Making a large one smaller. http://www.gr8designs.com/Tech/AirComp.html. This web site will describe
with words and photographs how to take a $10 or $12 12V
pump purchased from a auto supply store, remove the bulky
plastic housing which then allows it to be carried on a
motorcycle 12v pump. Richard 424, Oregon
- A fail-safe manual pump like
this http://www.lickbike.com/i3496100.htm I have used it and it's much
easily to pump when one end of the pump can rest on the
ground. It even has a built-in pressure gauge. karlyap
- Engine air pump. They were
probably talking about one of those sparkplug-replacing
valves/hoses that allows you to use the engine to pump up
your tire. See Pump. Gerry #951
- Portable Air Compressor:
After reading a comparison of tire inflators in
Motorcycle Consumer News I got to thinking that the CO2
cartridges and small hand pump would not cut it. I went
in search of a small electric pump I could buy and
dismantle much like the article posted farther down. At
my local Target store in the automotive section I found a
Target brand compressor part# 092 03 0008. This is it a
small self contained air pump. All I had to do was cut
off the electric plug and install a BMW plug. This unit
even has a built in switch and gauge. The whole unit
measures 6.5 by 5.5 by 2.5 inches about the size of the
battery on our bikes. Yes it does work I deflated my rear
tire and set the pump to work. All this for $16.50. Craig
325
- Making a large one smaller.
See this Tip on Web Bike World.
- Compact tire pump. From the
Airhead list, this suggestion: http://www.nohorizons.net/Micropump.htm. Hal #15.
- I like to lower my tire
pressures for off-road, but often mix in asphalt sections
during a day’s ride—not to mention getting to
the fun parts, and back home afterwards. The frustration
has always been pumping the tires back up. Sometimes I
would leave the tires harder than I really wanted to,
just because of the hassle of re-inflating them. I
wasn’t happy with CO2 cartridges, hand pumps or foot
pumps—and I had no interest in a dismantled auto air
compressor. When I saw the ad for the CyclePump from
BestRest http://bestrestproducts.com/ I figured it was just what I
needed, although it wasn’t cheap ($75US). I finally
took the plunge and bought one, I’m glad I did.
It’s super easy to use, and surprisingly fast. It
varies a bit depending where you start, and from front to
rear, but 30 seconds generally gets me about a 7psi
increase. For my money it’s worth it. The customer
service at BestRest is outstanding: prompt, courteous and
helpful. Customer satisfaction is clearly high on their
list of priorities. mspeed #1023
- I made one like the one
suggested in the FAQs, Motorcycle Tire Air Pump: Cheap
But Effective. [See next section: Making a Portable Pump
ed.] I added a screen protective cover and the 12 volt
BMW socket thingy to go in the accessory socket on my
bike. I carry it in a little Pelican box. The one issue
that bothers me with this option is: if it gets dirt or
some debris in the moving parts, and they are exposed,
it's going to goof up. All in all I saved some dough and
had fun putting it together. Now Riderwearhouse carries
one for 30 bucks that looks to be just like, if not the, Airman,
and it's a good one. Will in CA
Making
a Portable Pump
See this Article for "A Cheap But Effective Motorcycle Air Pump"
General Parts
What are those Yellow or White Paint
Marks on the Bolts on the Bike?
- Those are quality control
marks used during production to indicate that critical
bolts have been properly torqued. I would not depend on
using these as an indicator of movement of the bolt
unless there were enough paint to bridge the gap between
the bolt head and the socket and to dry without cracking.
Todd #389
Where can I get Stainless Metric Bolts,
Screws etc?
- www.racebolts.com: These guys have stainless steel and
titanium nuts and bolts and trick bits. They offer a
reasonably-priced stainless steel metric nut and bolt kit
for motorcycles. I could do without the stainless
washers. But the nuts and bolts sure are nice. Look for
the MX-JL1 Fastener Kit.
- www.racebolts.com: I bought a set of these bolts last year.
They are well made, but they have large hex-heads,
instead of round Allen-head tops. Having bought them, I
find myself still using the many bolts and fasteners that
I have pulled off my bikes over the years and thrown into
a coffee can. (Did you ever notice that instant coffee
jars just don't work like real coffee cans for cleaning
parts and storage?) Many hardware stores are starting to
carry metric bolts similar to these and you might want to
consider just going to the hardware store and checking
out their selection, if you need fasteners like they have
in this kit. Richard #230: 1997 Funduro.
- Another good source for all
kinds of stuff it McMaster Carr. Not only hardware, but
shrink tubing in a plethora or sizes and styles, sheet
stock in just about any material, wire, connectors, tons
of stuff. The paper catalog is 5" thick... http://www.mcmaster.com/. Harl #380
- I replaced all the Torx bolts
that hold the turn signals, fake gas tank, etc with
regular Philips head screws and I'm a lot happier
removing them for maintenance. If I could Id replace all
the Torx fasteners on the bike with regular hex head
bolts. Its asking for trouble if you break down and don't
have the right tools to remove something. Also, the hose
clamps (on the GS) are trouble because they need special
tools to remove and reuse. echo
What Strength Replacement Bolts do I
need and How Many?
OK, I'm fed up with all those BMW bolts that are
made out of a mixture or half oxidised iron and cream cheese.
So, I thought I'd go stainless on the engine bars,
luggage mounts etc. However, despite holding an engineering
degree (I was going to get medicine but the colour photocopier
was bust) I am struggling to work out the relative strengths and
preparation required. What I have worked out so far: R rated
steel bolts have a tensile strength of 45 tons per inch square or
620 MPa. Titanium is rated at 895 MPa. A4 stainless is at 700
N/mm2 or 686 MPa. The OE "steel" jobs are already
locked in place, I had a real job getting the luggage rack off,
ended up using a stud extractor on the ones that broke. I think
I'll be investigating in a taps to clear the threads and maybe
helicoils. The helicoil is stainless wire, which again pushes me
towards using stainless for the bolts if they will stand the
load, possibly with additional load plates and bolts behind the
frame. The pillion hangers are a possible problem as they seem to
be some sort of alloy (MAZAC?) that corrodes to white where the
pint is chipped. Putting stainless through them could be a
problem, hence I think you need a coating. There is nothing that
bolts to the engine that's corroded. Rotax unlike BMW seem to use
decent bits. Andy Leeds UK #982
- Most of the bolts you will be
replacing screw into steel inserts, or tinnerman nuts,
not aluminum. I bought about $30 worth of assorted
stainless SHCS bolts in 5 and 6 mm and a few 8mm. Makes
me VERY happy to replace the crap stock fasteners. The
corners get rounded off the heads no matter what sort of
wrench you use. If Craftsman wrenches aren't good for the
bolts, then the bolts aren't good enough for me. The very
first time I put the stock piece of Shite wrench on a
bolt, it rounded the corners off. The next thing I did
(in France) was buy some good tools. When the corners
rounded off all four cheap-imitation-NyLocs that pinch
the axle, I started replacing fasteners. I haven't
stopped replacing fasteners. When I bought my bike in the
USA, the oil drain bolt on the frame was apparently so
stretched that I had to drill it out. Replaced it with a
SHCS from my spare-bolts bin. When I removed the float
bowls... replaced the bolts. Removed the battery...
replaced that STUPID hex bolt with an Allen bolt (SHCS
-socket head cap screw). It seems every time I get into
disassembling the bike, I replace fasteners with REAL
ones. I have NEVER had to do this fastener replacement
stuff before on any bike I've owned. That's about 28
BMWs, a Yamaha, a Suzuki, a Kawasaki, three Hondas and a
Hardly Ferguson. I got some 6mm x 15 (or 16) and some 6 x
25. Those are the most common. I got some 5 x 20, I
think, and cut them off when they're too long. I got a
few 8 x... I dunno, prolly 15 or 16 and some 8 x 25.
Those engine bolts are gonna be EXPENSIVE. I figger stuff
that big you can replace with standard sizes. I need the
little ones for the ST, not the Funduro. The F is nearly
done with all the ones I NEEDED to change. I get REAL
metric NyLoc nuts (chromed plated and everything) at the
bolt store near me for reasonable prices. Flash 412 (CO)
- If it's the head, then you
might want to try some better (or newer) tools. I'm
assuming that your bolts are hex, not Torx. I have some
"hex-plus" keys (that's what they're called
from McMaster-Carr anyway) which work much better than
the standard ones for not messing up the head because of
the way they grip. Also, if you have standard keys that
have rounded points, you could square off the end with a
grinder and they're as good as new. Rebecca
- I would suggest that you find
Stainless Steel screws made of, what is called 400 series
stainless (usually 410). They'd be a bit better with
aluminum. In general, stainless steel against aluminum is
ok in normal, non-salt environments. Add salt and it all
bad.... Almost all of the screws on my 98' are Socket
Head and any L, ball tip or other hex wrench is ok. There
are many types of stainless 3 are most common, 300
series, 400 series and 18-8PH Stainless. Each grade is
used for different purposes...They all have good tensile
strength, with the 300 series being the lowest of the
three. If you're not near the ocean or ride on a lot of
salt coated roads, the corrosion issue with stainless to
aluminum will not be a problem. Salt and aluminum is
always bad. The Pinion mounts... could they be cast
magnesium (rather than MAZAC)? Common usage, light
weight, easy to make. Will be similar to aluminum but a
bit lighter. I'm not sure what they are, just guessing.
SLee
- A little application of
Auntie Seize and you don't have to worry about corrosion
showing up at the party when you're having a
stainless/aluminium mixer. I also have a metric buttload
of stainless fasteners (ok, it's a half a buttload these
days after being raided by me and some of my friends)
which generally replace the Suzi Cream Cheese BMW
fasteners. I replaced most the slightly rusted cadmium
coated fasteners on my Guzzi just 'cause it looks cool.
Besides, I don't like rust. Shank
- Relative strengths are at
Keeping it all together, which is a great introduction.
Also look at Threaded Fasteners FAQ, which includes bits
about stripped threads. For an alternate explanation,
plus some good stuff on thread locking and anti-sieze,
see Threaded Fastener Concepts.
What I've managed to glean so far in rules of thumb is
this:
> SS fasteners are 80% the strength of carbon steel.
> SS comes is several grades, depending on target
environment. A is the only series (A2 is what I buy; it's
all that's available here) that is interesting to a
motorcycle owner, unless you use it in food processing
environment or park it in an acid bath. I think A
(metric) is the old (ie American) 300 series.
> Use anti-seize whenever the materials are different
> Read the label on your anti-seize to see how you
should change torque. If you don't, you'll over- or
under-tension, possibly leading to failure and dangerous
situation. Mine is Saf-T-Eze and says it reduces friction
such that you achieve same tension with 20% less torque.
Keeping it all together above goes into this matter very
nicely.
I'm interested in the screws package, Shank et Flash, or
at least the list. I've been meaning to put such a list
together for some time now, and am willing to work on it.
And Rebecca is correct about the tools; the fit does make
a difference, which is plain to see when you try to use
an adjustable anything to turn a fastener. Similarly, if
the tool is not made well, it will fit poorly and you
will pay in hassle more that what you saved on the tool.
The stock tools have done well for me for all normal
loads. They don't do well if something is seized.
Aleksander in Dubai
- On the tool side, I use
Snap-on that are generally thought to be one of the best.
My boss pays for anything not specifically bike related,
so its all in good condition.
The BMW bolts score so far is:
2 rounded cap sockets, both on the
pillion hanger, no choice but use a Allen bit in a
socket. Drill and grinder job.
3 sheared at the mid point between the
head and the thread. Studs came out with nut breaker and
vice grips and gallons of easing oil.
2 wouldn't shift at all, succumbed to
drill, grinder, nut breaker, leaver, chisel, mindless
violence etc
11 came out whole.
On the whole, I prefer hex head to cap socket as you can
still get an adjustable on or hammer an Imperial socket
on even if the head rounds. You can't always get a hex
in, particularly when the bolt is deep in a casting, like
the pillion hangers. I can get A4 stainless easily in the
UK, so the plan at the minute is:
Engine bars in stainless except the
bolt through the engine mount.
Upper pannier frames and back peice in
Titanium.
Pillion hangers in Titanium.
Pillion hangers to pannier frames in
steel (M10 with nuts very expensive) Andy #982
- Next
Where can I get Optimoly MP3, Loctite
243 etc. Are there any Substitutes?
by Todd #389/Kristian #562
A General Useful Table http://www.mypage.tsn.cc/rdd/TT/contents/SNOTS/snots.html
Optimoly Grease:
Regarding Optimoly grease, generally for fitting
seals you can just use a common automotive (motor oil compatible)
grease.
Alternatives & Feedback:
Loctite
I'd consider substituting 242 on the water pump
drain bolt if it was well prepped and clean, but I'd be less
comfortable subbing 242 for 243 on stressed engine parts. (I'm
glad I have 243 on my CS sprocket.) 243 is available from NAPA as
a stock item, or look in the Yellow Pages (or their website) for
a distributor. Industrial suppliers will be more likely to have
it in the 15cc size, but I've seen it in 5cc tubes also. The 15cc
size should be good for hundreds of small bolts. Besides being
more oil resistant 243 is considerably stronger than 242, as
strong as available without requiring heat for removal.
Alternatives & Feedback:
Sealants:
According to the Table of Operating Fluids in the v2
of the GS Manual, Sealants are:
3-Bond 1110B Surface Sealant
3-Bond 1209 Surface Sealant
Omni VISC 1002 Surface Sealant (max 200 deg C/392 deg F)
Loctite 574 Surface Sealant
Curil K 2 Heat-Conductive Sealant
Hylomar SQ 32M Permanently Elastic Sealant
- According to the Table of
Tightening Torques in the v2 of the GS Manual, the
Chain Tensioner Bolt requires just 40Nm and does NOT
specify ThreeBond. The GS .pdf manual (page 00.5)
Table of Operating Fluids lists both 1209 and Threebond
1110B. Both manuals specify 1209 use in multiple
operations throughout the manuals.
- However the specific idea of using
1209 on the Tensioner Bolt is from page
00.11 and 11.58 of the Classic Manual. ThreeBond
1209 is listed in the Table of Operating Fluids (page
00.3) in Der (Classic) Factory Repair Manual. T.
- I'd suspect that the sealant
specified (for the Classic at least) on the Chain Tensioner is to play it safe as far as
(1)oil leaks, since the tensioner port is the only
outside opening in the hi pressure side of the oil system
(for the hydraulic tensioner to work), and also acting as
a thread retainer, as losing that plug would mean
catastrophic failure in the cam bearings due to lack of
oil pressure.
- I'm surprised 1209 is
specified as Hi Temp as most of the places where it is
specified in the BMW manuals are NOT hi temp spots. The
Yamabond 4 (gray and flexible) and 5 (black and less
flexible) are not listed as hi temp but are commonly used
on bike motors. I suspect the crankcase halves (in some
bikes) that use no case gaskets are sealed with the
silver Yamabond 6 hi temp - also note that it's price is
4x the other Yamabonds. Totally overkill on the
cam chain tensioner bolt or alternator cover, might be
good for head applications, especially on air cooled
bikes.
- You can see (in the castings
of the Classic) that it would be easy to drill and safety
wire the Chain Tensioner instead. Especially if you use
less than 40Nm and/or reuse the seal washer too many
times. If you use a reasonable condition seal washer and
torque to 25-30 Nm, I doubt you'd ever have any trouble,
and a minor oil weep would not be a critical problem, as
long as the bolt did not come loose - I suspect that
you'd empty the oil system in about a minute if that bolt
fell out.
- I never know exactly what
goop to use. I can agonize over details like that for
hours, with three tubes of goop in my hands. Except for a
few critical applications like crankcase halves, and head
gaskets, I don't think it's all that critical. Outside of
coolant system applications, I tend to stay away from the
silicone form-a-gaskets in favor of solvent based - just
because I am afraid of over-application and getting dried
bits in the engine.
Alternatives & Feedback:
In trying to get a Handle on this "Mystery
Subject" that comes up from Time to Time, so I could add it
to the existing bit in the Tools FAQ I came across these. I was
trying to find a Cross-ref Chart Threebond/Yamabond/Permatex high
temp black sealant/Hylomar but there just isn't one.
Dreibond
- It COULD be that www.dreibond.com were the Original Threebond, Drei being
German for Three. They don't appear to have a 1209 in
their range though. The Anaerobic Range of Sealants
appear the most likely substitute for 1209.
Hondabond
Hylomar
- For Hylomar (Wurth
Industries) refer. http://hylomar.tripod.com/Info.html - There is no X-ref to Threebond
1209. See also http://www.valco-cp.com/Hylomar.htm
- It is: Not an RTV silicone, not an
Anaerobic, Non-Hardening/Curing - remains flexible to
absorb sever vibration. Superior vibration resistance
without locking. Probably NOT a suitable alternative,
compared to the hardening properties of 1209
Permatex
- Again, there is no X-ref to
Threebond 1209. As to the Permatex Hi Temp I actually
have several (old) tubes of that, and you will not likely
find anybody who has used it as it is a rare item
compared with regular Permatex 1 and 2. It's black, thick
(though thinner than regular tubes of 1 and 2 as it has
nastier solvents, but thicker than Yamabond 4/5), sticky,
solvent based, non silicone. It's the ONLY thing that
solved several problem leaks I have had with overhead cam
Volvo motors (they leak at the front cam bearing retainer
onto the timing belt). Good to 650F, I've used it to glue
sealed beam halogen lamp/reflectors back together.
Threebond
- www.threebond.com does NOT show Threebond 1209. So I called
the HK supplier and they said ah yes 1209, we still make
it but it's not commercially available. They still supply
it to BMW, it would seem. He is going to get me a tube,
which I don't really need, but doesn't offer up
alternatives.
- This http://www.threebond.co.jp/ja/product/series/sealants/1200list.html page in Japanese DOES show it, and
translates as: 1209:
- In silicone system most it is superior in heat
resistance.
- Content of volatile low-molecular polysiloxane is 0.03%
or less.
- The copper and the copper alloy it does not corrode
- Dennis Kirk (mail-order)
sells 1211. It's silicone based. 1104 sounds thin for
this application. Threebond 1211 and 1210 are ALSO
silicone, but I try to keep silicone out of threads, lest
the torn remnants end up in the oil passages somewhere.
Why doesn't somebody go to the Threebond website and ask their tech support what 1209 has
been superseded by?
- This site http://www.quality-cycle.com/monthly.htm supplies Threebond 1104 and say "If
you like doing your own “engine work”, then
you're absolutely Nuts if you don’t use ThreeBond
when working on your engine! OEM Supplier to HONDA &
YAMAHA and others. Use the best, same as YamaBond #4
& Honda Liquid Gasket (Semi-Drying). Why pay more
when you're buying the same thing!!! Withstands
Hi-Pressure/ Bonds Good. Do you really want to tear your
engine back down because you used something else? Use
what the Manufacturers use when they assemble
Engines.....THREEBOND!! Part #TB-1104 (Grey) Liquid
Gasket/Bond 3.5oz...................$3.95"
1104 is also Silicone based, Semi-Drying, looks like
it intended for Engine Gaskets, but could be used as a
Substitute for 1209. I'd suspect 1104 is (if it's
like Yamabond #4) is not used primarily FOR or ON gaskets
(though it certainly can be) but rather as a (non-gap
filling) sealant INSTEAD of gaskets.
Yamabond
- Yamabond is available at most
Yamaha (bike, NOT music) shops. There are several
Yama-grades. Some is flexible, some dries hard, some
higher temp. The harder stuff is usually used for
thin/zero clearance fits, like crankcase halves. (Go look
at an outboard motor sometime, look for a silvery, water
thin sealant, that looks like paint between the crankcase
halves.) The thicker, flexible stuff is better for
covers, or where there are gaps. Honda makes something
similar also. I've been using the gray Yamabond for the
tensioner bolt. You can substitute sealers such as
Yamabond (or Hondabond) for Threebond1209. It's just a silicone
based flexible plastic sealant. It's also available
via mail order from several of the catalogs.
- http://www.ntyamaha.com/images/2002shopcatalog.pdf 3.9MB Shows Yamabond Tubes.
This site (Parker Yamaha) supplies Yamabond. These are the alternatives:
- Yamabond 4 ACC-YAMAB-ON-D4
Semi-Drying Liquid Gasket Suggested Price Web Price Each
(Unless Noted) Qty Order $6.75 $6.10 Detailed
Description: Semi-drying liquid gasket seals joint
surfaces with a tough elastic film. Tolerates heat,
pressure, and vibration.
- Yamabond 5 ACC-YAMAB-ON-D5
Drying Liquid Gasket Suggested Price Web Price Each
(Unless Noted) Qty Order $6.95 $6.10 Detailed
Description: A drying liquid gasket that seals joint
surfaces with a tough elastic film. For applications with
strong vibration.
- Yamabond 6 S ACC-YAMAB-ND-6S
High-Temperature Silicone Sealant Suggested Price Web
Price Each (Unless Noted) Qty Order $22.48 $13.95
Detailed Description: This high-temperature silicone
sealant is designed for engine environments. Comes in a
silver color to match engine components. Good to
approximately 482° F (250° C).
- Yamabond 7 Grip Lock
ACC-YAMAB-ON-D7 For bonding rubber to metal. Suggested
Price Web Price Each (Unless Noted)
Qty Order $6.58 $4.39 Detailed Description: A specially
formulated adhesive to bond rubber to metal. Designed for
mounting grips to handlebars and many other applications.
It
would appear of the Yamabonds, #4 is the best substitute for 1209
Covers:
Q. I know I
have seen this discussed before but I can't remember what size
Dowco Guardian cover works best for a classic F with bags.
A. The cover I use is marked "125". and it fits
over a tall shield, a large Givi trunk, and the hard side bags.
Scott S in WA
Dielectric
Grease
Q: My question is; where should one use dielectric grease and how
much? Does this grease actually conduct electricity? Can you
apply it to the points of contact before assembly or is it to be
put on after the bits are together? Where should I not put it as
far as electrics are concerned?
A: Put it everywhere that electrical connections are
made. Use as little as possible if you think it is expensive.
Slather it on if you think it is cheap. The idea of the stuff is
just to COAT the connection. Anything more than that is wasted.
Anything less is... under-utilization.
Does this grease actually conduct electricity? Heck no. A
"dielectric" is an insulator.
Can you apply it to the points of contact before assembly or is
it to be put on after the bits are together? Smear it where ever
you think there is a bit of metal that conducts electricity and
might be exposed to air or water whenever and where ever you find
it easiest to accomplish that. If you put it on two connectors
separately and then plug them in, they WILL make contact and be
protected. If you connect them first and then smear it on, they
will still be protected as long as you get them completely
coated. Spurt a blob up into your spark plug cap before you slap
in on the plug. Slather your battery terminals with it after
you've connected the cables up. Whatever seems to make sense and
is easiest is right.
Where should I not put it as far as electrics are concerned?
Where there is no electricity, there is no reason to use
insulating grease. Where there is already insulation, there is no
reason to use insulating grease. You CAN smear it all over your
body (NOT recommended) and/or dip your entire motorcycle in it if
you can afford it. But that is wasteful and makes about as much
sense as burning premium fuel in an F650. (e.g. it wastes money
and does no added good.) Flash 412 (CO)
Where
to Buy:
- K & L Supply has a
catalog with all sorts of motorcycle tools and parts for
use by the home and shop mechanic. (I once bought an
entire set of Suzuki valve shims from them for about 20%
of the cost of buying them individually from a Suzuki
dealer.) Unfortunately, they only sell wholesale, so
anything you want will have to be ordered through your
dealer, where you will also find their catalog. Their web
site is: www.klsupply.com The web site only shows their
larger shop tools, but much more stuff is available from
their paper catalog. The next time you visit your dealer
ask to see their copy and check it out. Gearheads will be
fascinated.
Tool Humour
Tools
“Defined”
from Ian Chadwick
- HAMMER: Originally employed
as a weapon of war, the hammer nowadays is used as a kind
of divining rod to locate expensive parts not far from
the object we are trying to hit.
- MECHANIC'S KNIFE: Used to
open and slice through the contents of cardboard cartons
delivered to your front door; works particularly well on
boxes containing seats and motorcycle jackets.
- ELECTRIC HAND DRILL: Normally
used for spinning steel Pop rivets in their holes until
you die of old age, but it also works great for drilling
mounting holes in fenders just above the brake line that
goes to the rear wheel.
- PLIERS: Used to round off
bolt heads.
- HACKSAW: One of a family of
cutting tools built on the Ouiji board principle. It
transforms human energy into a crooked, unpredictable
motion, and the more you attempt to influence its
course, the more dismal your future becomes.
- VICE- GRIPS: Used to round
off bolt heads. If nothing else is available, they can
also be used to transfer intense welding heat to the palm
of your hand.
- OXYACETYLENE TORCH: Used
almost entirely for lighting various flammable objects in
your garage on fire. Also handy for igniting the grease
inside a brake drum you're trying to get the bearing
grease out of.
- WHITWORTH SOCKETS: Once used
for working on older British cars and motorcycles, they
are now used mainly for impersonating that 9/16 or 1/2 socket
you've been searching for, the last 15 minutes.
- DRILL PRESS: A tall upright
machine useful for suddenly snatching flat metal bar
stock out of your hands so that it smacks you in the
chest and flings your beer across the room, splattering
it against that freshly painted part you were drying.
- WIRE WHEEL: Cleans rust off
old bolts and then throws them somewhere under the
workbench with the speed of light. Also removes
fingerprint whorls and hard-earned guitar calluses in
about the time it takes you to say, Ouch....
- HYDRAULIC FLOOR JACK: Used
for lowering a motorcycle to the ground after you have
installed your new front disk brake set-up, trapping the
jack handle firmly under the front fender.
- EIGHT-FOOT LONG DOUGLAS FIR
2X4: Used for levering a motorcycle upward off a
hydraulic jack.
- TWEEZERS: A tool for removing
wood splinters.
- PHONE: Tool for calling your
neighbour to see if he has another hydraulic floor jack.
- SNAP-ON GASKET SCRAPER:
Theoretically useful as a sandwich tool for spreading
mayonnaise; used mainly for getting dog-doo off your
boot.
- E-Z OUT BOLT AND STUD
EXTRACTOR: A tool that snaps off in bolt holes and is ten
times harder than any known drill bit.
- TIMING LIGHT: A stroboscopic
instrument for illuminating grease build up.
- TWO-TON HYDRAULIC ENGINE
HOIST: A handy tool for testing the tensile strength of
ground straps and brake lines you may have forgotten to disconnect.
- CRAFTSMAN 1/2 x 16-INCH
SCREWDRIVER: A large motor mount prying tool that
inexplicably has an accurately machined screwdriver tip
on the end without the handle.
- BATTERY ELECTROLYTE TESTER: A
handy tool for transferring sulphuric acid from a car
battery to the inside of your tool box after determining
that your battery is dead as a door nail, just as you
thought.
- METAL SNIPS: See hacksaw.
- TROUBLE LIGHT: The mechanic's
own tanning booth. Sometimes called a drop light, it is a
good source of vitamin D, the sunshine vitamin, which is not
otherwise found under motorcycles at night. Health
benefits aside, its main purpose is to consume 40-watt
light bulbs at about the same rate that 105-mm howitzer
shells might be used during, say, the first few hours of
the Battle of the Bulge. More often dark than light, its
name is somewhat misleading.
- PHILLIPS SCREWDRIVER:
Normally used to stab the lids of old-style paper-and-tin
oil cans and splash oil on your shirt; can also be used,
as the name implies, to round off Phillips screw heads
and can double as oil filter removal wrench by stabbing
through stubborn oil filters.
- AIR COMPRESSOR: A machine
that takes energy produced in a coal-burning power plant
200 miles away and transforms it into compressed air that
travels by hose to a Chicago Pneumatic impact wrench that
grips rusty bolts last tightened 60 years ago by someone
in Springfield, and rounds them off.
- PRYBAR: A tool used to
crumple the metal surrounding that clip or bracket you
needed to remove in order to replace a 50 cent
part.
- HOSE CUTTER: A tool used to
cut hoses 1/2 inch too short.
- STANDARD SCREWDRIVER - tool
used to put a long scratch in the paint next to the slot
in a screw you just destroyed.
10 Best Car Repair Tools of All Time
Richard #230,
Pacifica, CA
My brother picked this up off the internet somewhere. It was
written for cars, but seems appropriate for motorcycles, too.
10 Best Car Repair Tools of All Time. There are only 10 things in
this world you need to fix any car, any place, any time.
- Duct Tape: Not just a tool, a
veritable Swiss Army knife in stickum and plastic. It's
safety wire, body material, radiator hose, upholstery,
insulation, tow rope, and more - in an easy to carry
package. Sure, there's prejudice surrounding duct tape in
professional competitions, but in the real world,
everything from Le Mans-winning Porsches to Atlas
rockets and attack-helicopters use it by the yard. The
only thing that can get you out of more scrapes is a
quarter and a phone booth.
- Vice Grips: Equally adept as
a wrench, hammer, pliers, baling wire twister,
breaker-off of frozen bolts and
wiggle-it-til-it-falls-off tool. The heavy artillery of
your tool box, vice grips are the only tool designed
expressly to fix things screwed up beyond repair.
- Spray Lubricants: A
considerably cheaper alternative to new doors,
alternator, and other squeaky items. Slicker than pig
phlegm, repeated soakings will allow the main hull bolts
of the Andrea Doria to be removed by hand. Strangely
enough, an integral part of these sprays is the infamous
Little Red Tube that flies out of the nozzle if you look
at it cross eyed (one of the 10 worst tools of all time).
- Margarine Tubs with Clear
Lids: If you spend all your time under the hood looking
for a frendle pin that caromed off the pertal valve when
you knocked both off the air cleaner, it's because you
eat butter. Real mechanics consume pounds of tasteless
vegetable oil replicas just so they can use the empty
tubs for parts containers afterward. (Some of course
chuck the butter-colored goo altogether or use it to
repack wheel bearings.) Unlike air cleaners and radiator
lips, margarine tubs aren't connected by a time/space
wormhole to the Parallel Universe of Lost Frendle Pins.
- Big Rock at the Side of the
Road: Block up a tire. Smack corroded battery terminals.
Pound out a dent. Bop noisy know-it-all types on the
noodle.
Scientists have yet to develop a hammer that packs the
raw banging power of granite or limestone. This is the
only tool with which a "Made in Malaysia"
emblem is not synonymous with the user being maimed.
- Plastic Zip Ties: After 20
years of lashing down stray hose and wiring with old
bread ties, some genius brought a slightly slicked-up
version to the auto parts market. Fifteen zip ties can
transform a hulking mass of amateur-quality wiring from a
working model of the Brazilian Rain Forest into something
remotely resembling a wiring harness. Of course it works
both ways. When buying a used car, subtract $100 for each
zip tie you find under the hood.
- Ridiculously Large Craftsman
Screwdriver: Let's admit it. There's nothing better for
prying, chiselling, lifting, breaking, splitting or
mutilating than a huge flat bladed screwdriver,
particularly when wielded with gusto and a big hammer.
This is also the tool of choice for all oil filters so
insanely located that they can only be removed by driving
a stake in one side and out the other. If you break the
screwdriver -- and you will just like Dad and your shop
teacher said -- who cares, it has a lifetime guarantee.
- Baling Wire: Commonly known
as MG muffler brackets, baling wire holds anything that's
too hot for tape or ties. Like duct tape, it's not
recommended for NASCAR contenders, since it works so well
you'll never need to replace it with the right thing
again. Baling wire is a sentimental favorite in some
circles, particularly with the Pinto, Gremlin, and
Rambler set.
- Bonking Stick: This monstrous
tuning fork with devilish pointy ends is technically
known as a tie-rod separator, but how often do you
separate tie-rod ends? Once every decade if you're lucky.
Other than medieval combat, its real use is the
all-purpose application of undue force, not unlike that
of the huge flat-bladed screwdriver. Nature doesn't know
the bent metal panel or frozen exhaust pipe that can
stand up to a good bonking stick. (Can also be use to
separate tie-rod ends in a pinch, of course, but does a
lousy job of it).
- A Quarter and a Phone Booth:
See tip #1 above.
Dog
Peeing on Your Bike?
Dog Do-Do on your Lawn?
Some of these might upset Dog Owners
& Dog Lovers. So please, take them with a pinch of Salt, it's
meant to be a bit light hearted !
- Peppermint oil. Cats and dogs
and fleas and ticks hate this stuff. I'd try the ground
pepper, too. And a slingshot for the dogs and their
owners works quite well. Although I prefer Steve and
Jack's solutions (the lead poisoning works really well),
a slingshot with marbles is quite effective and
non-lethal. If you wish to be even more tolerant and
open-minded, a slingshot with frozen grapes can get the
message across when caught in the act. Being unafraid to
kick the dog whilst it's pissing is always good. The
owners are responsible for their pets even if they don't
want to be. Shank NYC USA
- I've heard that cayenne
pepper works too, more potent than black pepper. For
yards, moth balls too. I used to have flowers planted by
my mailbox but now it's just weeds because of the
neighborhood dogs. One of my neighbors had a (plastic)
gravestone by the edge of his yard that said "Here
lies the last dog that crap". Rebecca
- Bacon grease. Pour bacon
grease on the piles. Dogs LOVE bacon grease. The piles
disappear as if by magic, even if the owners don't catch
on and stop letting them appear. In fact, you could be
neighborly and go out to offer the owners some bacon.
Maybe their arteries will clog and they'll be unable to
walk their dogs anymore. After the dog finishes his
"work" while you're sharing bacon with the
owner, offer the dog a piece of bacon, too. Only when he
goes for it, place it on the pile. Suggest that the owner
give the dog a big kiss for cleaning up after himself so
that neither you nor the owner need to clean up after the
dog. Flash
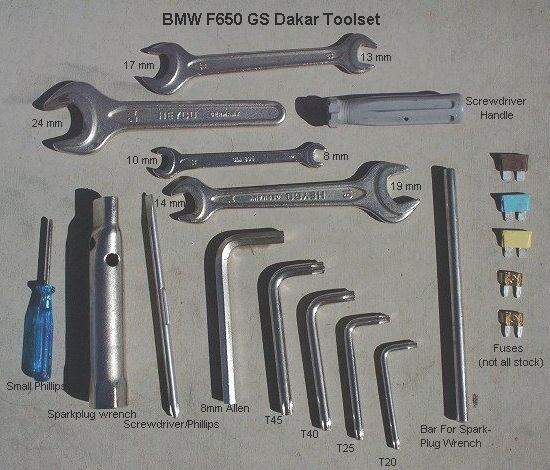
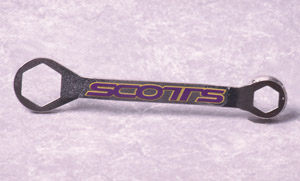

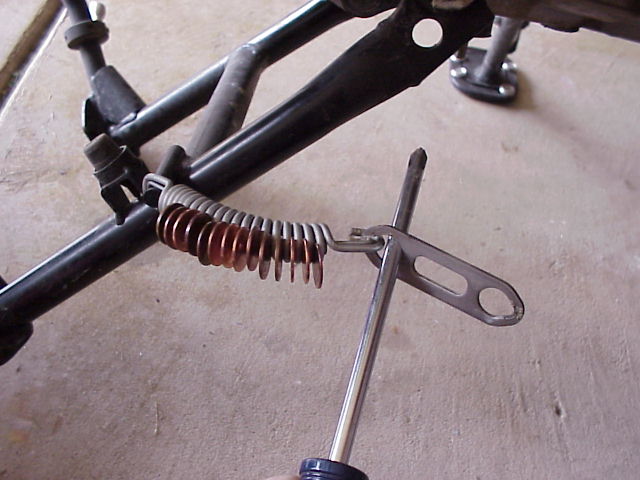


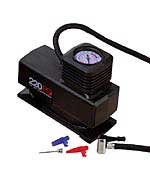
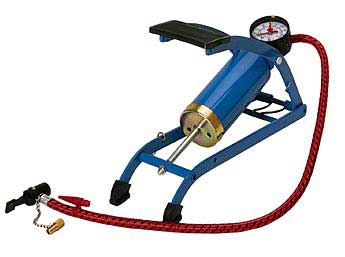
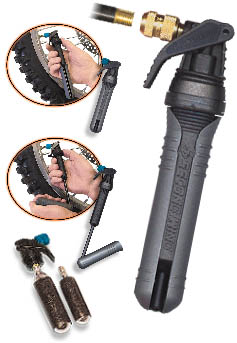
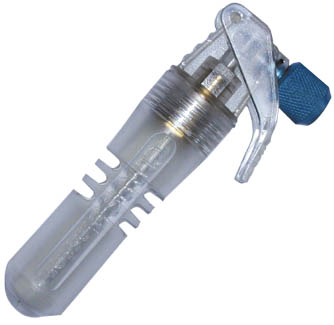
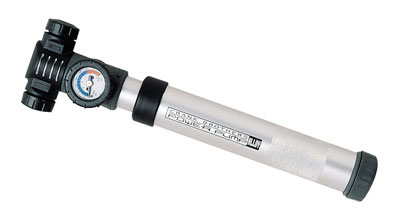
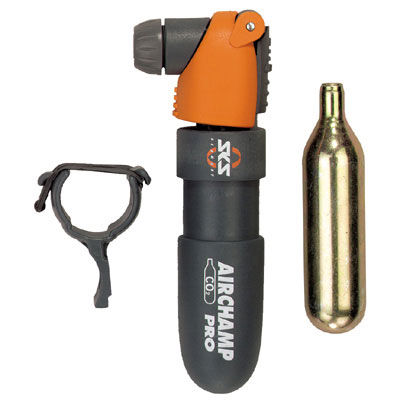
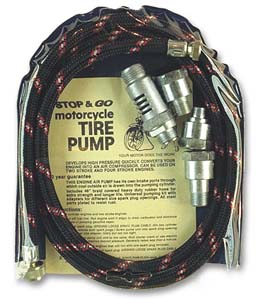
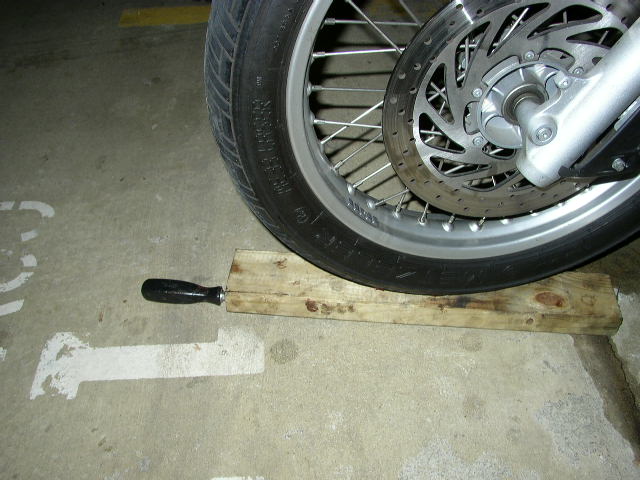
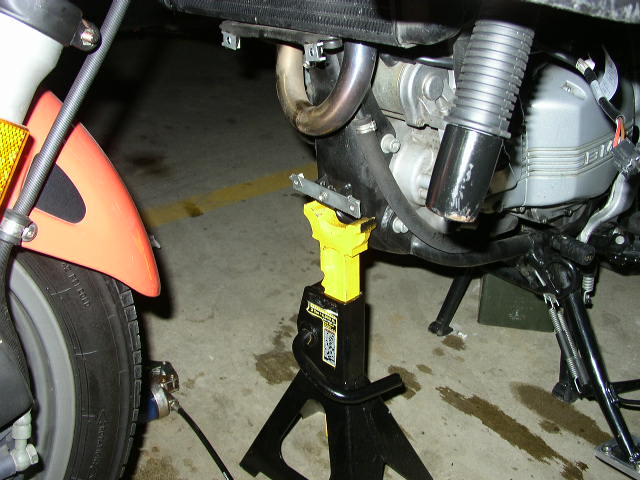
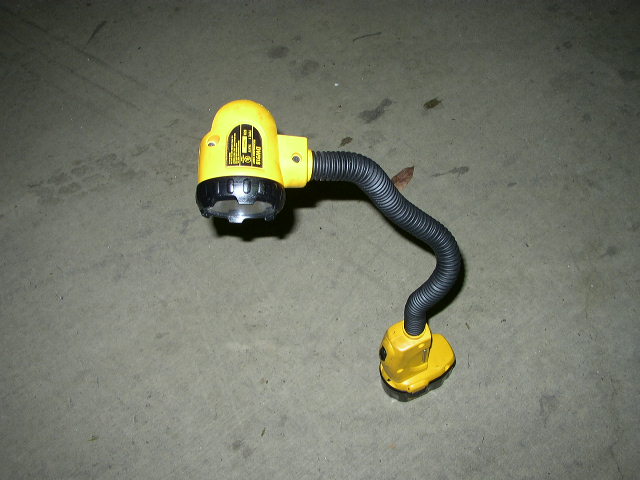
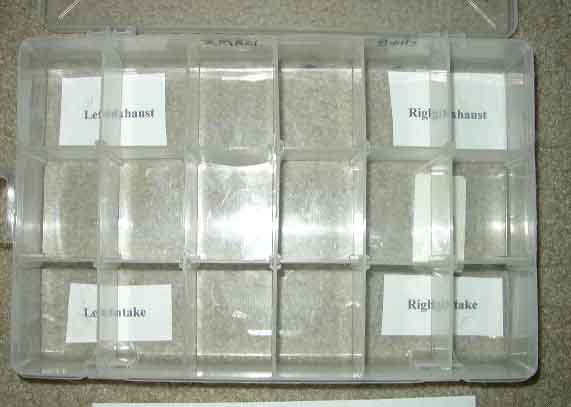
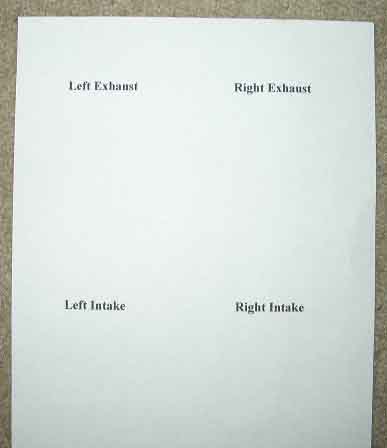
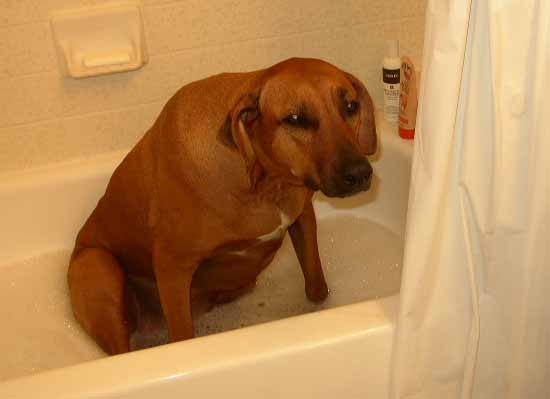
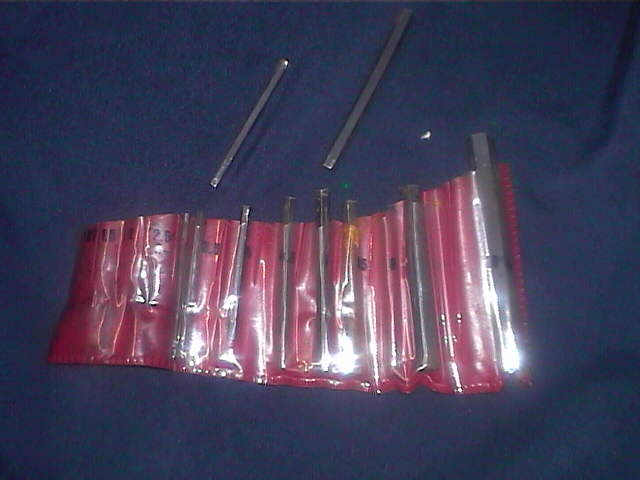
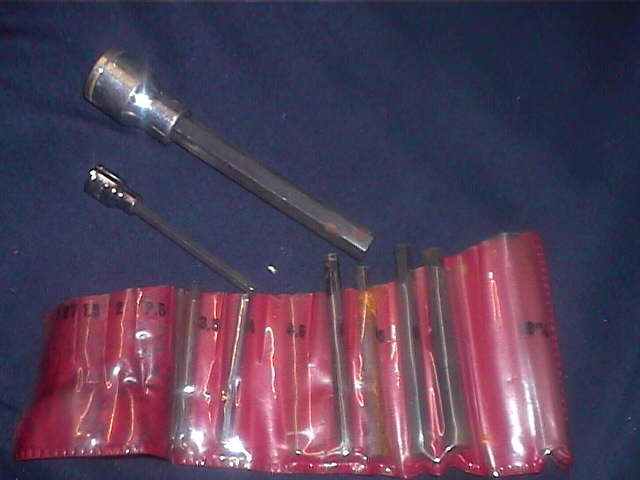
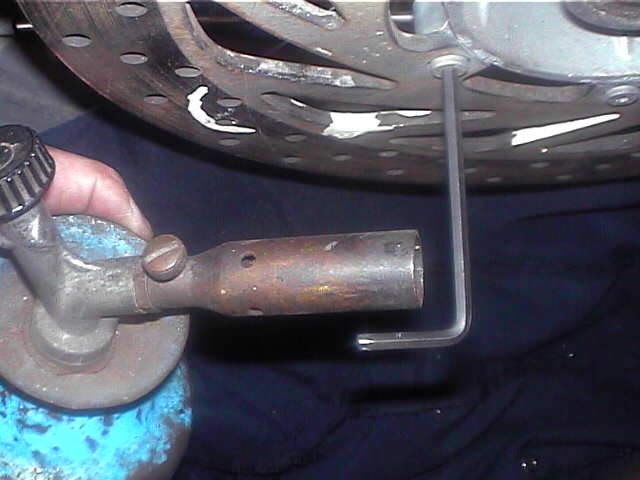
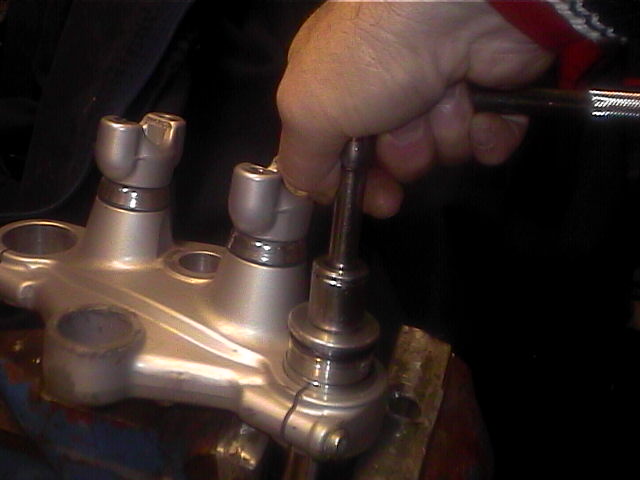
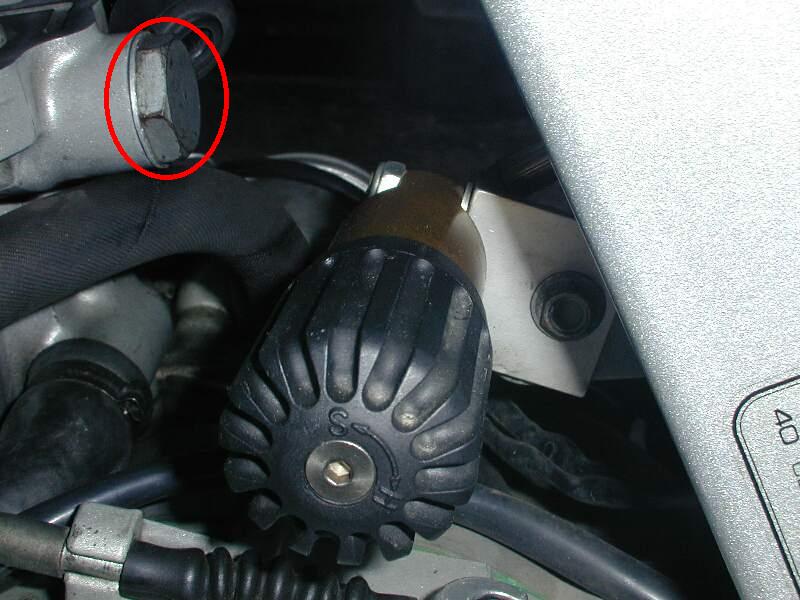