F650 Aftermarket Forks
Original FAQs by Kristian #562, BradG #1002, Scott ID #1244
Please read the Disclaimer before
attempting any work in this FAQ.
Last Updated: 3 September 2006, by Winter #1935
For FAQs related to forks, shocks, maintenance and aftermarket
options:
Introduction
There are lots of options for aftermarket fork protectors. Here's a few
different types, with some comments on each. You may not see some of the
advantages or disadvantages as particularly troublesome. It's your bike,
so you choose. This is just to give you an idea what's out there, and what
the people who have them, who have said something about them, have
said... Information on complete aftermarket forks is a little harder to
come by - please let us know if you have more information to help fill in
the blanks!
Fork and Spring details (based on the Classic F)
- The fork diameter is 41mm
- Spring Length = 20.675"
- Wire dia = 0.190"
- As for the O.D. of the spring, it's tapered more at one end. The
first full turn where the wire is not ground flat is 1.315". By the 3rd
full turn from that end the O.D. is 1.377".
- At mid spring the O.D. is 1.389". The other end is 1.360" (again
where the wire is not ground). In a couple of turns from that end it's the
same as mid spring O.D..
- There are 36 full turns of wire from end-to-end. patobravo
#1754
What are emulators?
Think of the emulators as restrictor check valves that help control the
oil flow inside of your forks. The damping action comes from forcing oil
through a restriction. I guess they wok. My bike's PO put these (gold)
emulators in with stiffer springs. I added some higher grade (SAE 10W-40)
fork oil last seal replacement. They work alright together. Nothing I
would enter competition with, though. I do not know how much they cost.
beem_dubya #1328
| From the Race Tech website (thanks beem_dubya #1328) |
|---|
Race Tech Emulators enable damping rod (conventional) forks to
duplicate the fork action of well-tuned cartridge forks. Standard damping
rod fork setup is a big compromise. They have either mushy fork action
under braking and going through dips and gullies or harsh fork action
while hitting square-edge bumps. In addition to the vehicle speed, the
size and shape of the bump are critical factors. This poor fork action is
because damping rod forks create damping by simply shoving oil through
holes. At low vertical wheel speeds the holes do not have much resistance
to the flow and therefore are mushy. As the velocity of the fork increases
the resistance to flow increases dramatically and more oil cannot be
forced through the holes. This is what makes them harsh.
Emulators were invented by Paul Thede in 1993 and are variable
orifice valves that sit on top of the damping rods. Not only do they
create a firm yet plush ride with excellent bottoming resistance they also
provide the ability to adjust compression damping. Thus, with Race Tech
Emulators installed, conventional damping rod forks are turned into forks
with excellent well-tuned cartridge fork type action.
|
Aftermarket Fork Options
Heavier Fork Oil
Probably the low cost / easy option is to use heavier fork oil. See the
Fork Maintenance FAQ for more information
on changing the fork oil. Try a 10wt oil, or may be even heavier. If you
ride a lot of dirt, particularly at higher speeds, or you carry heavier
loads on your bike you might consider even as high as 15wt.
Touratech Upgrades
Website(s):
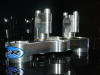
Touratech offers several upgrade options for the F650 GS models. The
most extensive upgrade is to WP forks and shocks with a huge 280mm and
250mm of travel (respectively). This upgrade includes all parts to
perform the upgrade. However the kit is expensive - but includes
everything you need including the bracket for the ABS sensor (if you have
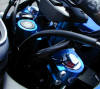
ABS). Touratech also sells fork springs for the Funduro and GS. (Note: In
the closeup image below, there is an additional reed sensor for a bike
computer. The Touratech 650RR instructions have more images of the kit
installed).
Touratech upgrade (taken from Max Kool on advrider)
|
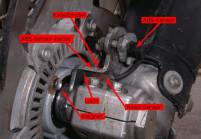
Closeup of ABS sensor (taken from somewhere?)
Is this an earlier version???
|
How much higher is the Touratech WP setup?
The upgrade takes to front fork travel to 280mm and rear shock travel
to 250mm. This is compared to about 170mm on the GS and 210mm on the
Dakar. In other words an extra 40mm (nearly 2in) of travel on the Dakar
and a huge 80mm (just over 3in) on the GS.
What are the exact model and specs of the WP fork upgrade?
The forks are the WP 4357 MXMA USD 280mm. The shock is a 4014 Fusion
with 250mm travel. You can also get an axle and brembo bracket from WP
suppliers, and also upper and lower clamps.
What are the part numbers for the Touratech upgrade?
The following table contains the Touratech part numbers for the WP USD
250mm upgrade. The first group are the components you will need. The other
groups you may or may not need depending on if you can source the other
parts from elsewhere. (Please check these part numbers!)
| Part No |
Number |
Description |
|---|
| 05-320-0180-0 | 1 | Upper fork mount
|
| 05-320-0181-0 | 1 | Lower fork mount
|
| 05-320-0182-0 | 1 | Center steer tube
|
| 05-320-0184-0 | 1 | Ignition switch mounting bracket
|
| 05-320-0185-0 | 1 | Front brake caliper mounting bracket
|
| 05-320-0186-0 | 1 | Front axle
|
| 05-320-0188-0 | 1 | Roller bearing ??
|
| 05-320-0189-0 | 1 | Bearing race???
|
| 01-300-0188-0 | 1 | Nut for front axle
|
| 05-320-0210-0 | 1 | Sensor mount (front wheel)
|
| 05-320-0211-0 | 1 | Sensor cover (front wheel)
|
| You Could Source These Elsewhere
|
|---|
| 05-320-0170-0 | 1 | Front forks WP 43mm USD (250mm or 280mm travel)
|
| 01-040-0800-0 | 1 pair | Front fork protectors
|
| 11-112-0904-0 | 6 | Spacers for fork protectors 10/6/4mm
|
| Bar Rises - Purchase as required
|
|---|
| 05-320-0183-0 | 2 | Bar mounts
|
| 05-310-0190-0 | 2 | Top handlebar clamps
|
| 05-310-0191-0 | 2 | Lower handlebar clamps/risers
|
| 05-310-0182-0 | 2 | Steering stops
|
| 01-040-0335-0 | 1 | Front brake line Stainless steel
|

Touratech Fork Clamps
| 
Touratech Front Axle
| 
Touratech ABS Mount, Spacer and Caliper Bracket
|
Using KTM WP Suspension
Thanks to atgreg over on advrider: It's not my bike but a friend
of friend, the forks are 50mm whitepower extremes from a 99 KTM. Triple
clamps are custom made, extending the rear swingarm means you get more
suspension travel for the same length of shock. This bike will have a
longer WP rear shock as well as the extended swingarm and will have close
to 300mm of travel at each end.
- The welded section extension of the swingarm = "probably not a
good (read reliable) idea...???" troy safari carpente on advrider
- Yep, it has an internal sleeve etc and has been done properly
atgreg on advrider
- given its shod with a 908rr its an 18" rear. Sounds to me like a
great way to throw away lots of $$$$... Mouse on advrider
1995 Honda XR250 Upgrade

Hi i just want tp share the installation af a cartridge type front fork
on a f650gs 2002, the newfork came fron a XR 250 1995 all fit,41mm fork
wheel and brake line. Roberto
- The only information I can dig up on the forks appears to be they
are 41mm Kayaba forks with 11 inches travel (~280mm) with 20 position
rebound dampening. Later models had 10.6 inches travel (~270mm). My only
concern would be the forks are probably not strong enough for the weight
of the GS. Winter #1935
- This upgrade may not work with ABS bikes due to the sensor mount
on the front forks. Anyone up for making a "generic" sensor mount?
Winter #1935
- i test yesterday the forks, from La Rumorosa-Laguna hanson-Valle
de La trinidad-Mexicali, it was snow in that mountain pass, mud, water,
rocks, i use it with the air preload, no change springs and it works good
for my. Please see this route is follow by many riders to mike ski rach in
Baja Ca. i will doumload from my camera the photos and send it, thanks
for the info. Roberto
CBR600F2 Forks in a Funduro
I dunno about the fool infected bikes. But a set of CBR600F2 forks will
slip right into the clamps of a Funduro. Flash #412
Cytech Air Suspension Upgrade
See the
http://www.toursforafrica.co.za/ website for more details. Has anyone
actually done this mod? Feedback would be fantastic! According to the
website you must also use bar risers.

Marzocchi USD Forks


The following appear on
http://victoria.craigslist.org/mcy/138985865.html... It is a custom
mod of a F650GS (possibly with ABS). The following is what was listed,
including the use of Marzocchi USD Forks. No specs or details were
provided:
2001 BMW F 650 GS
10.900 K km's
Steel blue metallic
Custom build and re-desiged BMW 650 GS
17" BEHR 3.50 x 17 polished front wheel with racing tire
320mm Front Rotor
Tokico 6 piston caliper
New 2005 Marzocchi upside down front fork
Pro taper triple clamps ( 6 bolts )
Pro taper handlebar positioners changers
Pro taper Ricky Carmichael 2005 handle bars 1 "tapered
ABS on both wheels
Heated grips
Custom seat
Upholstered front fairing
and more
Preload Adjusters for Front Forks
11/4/99, Peter #233
With the nifty preload adjuster for the
rear shock, wouldn't it be nice to have the same feature on the front forks.
figured out that the 91 Honda CBR 600 F2 has the same diameter of tube as our
F650 and it fits.
Since Honda is the parent company of
Showa why wouldn't it. The Honda part # is
51450-MR8-003. Peter's local dealer charged about $45.00 ea. It requires
changing the spacer and clip on the bottom (Peter guessed that the BMW has
thicker castings than the Honda). Replace the spacer with 2 1-1/4" fender
washers and a smaller cotter pin. They'll fit perfect after that little mod, and
you will be able to dial in the preload on the front suspension. EBay
occasionally has pairs listed for Honda CBR600 F2/NT 650.
Q. The FAQ talks about
using '91 CBR 600 F2 adjusters. Anyone have any idea if '94 CBR 600 F2 adjusters
will work? '97 F650, #1291.
A. Yeah, F2 are the same. Pro'lly a whole bunch of other Honda models
with 41 mm forks. Harl #380 '98 KLR 650, ex F650. Fort Collins, CO.
Race Tech Gold Valve Emulator Install
by David #476
Photos by Iceman #975 and Harl #380
10/11/01
To go along with my new
Ohlins Rear Shock, installed a pair of
Race Tech Gold Valve Emulators, Race Tech Springs, and Honda F2 Pre-load
adjustors on my fork.
Tools required:
- BMW tool kit
- Torque wrench
- 6mm 8mm 10mm Allen head sockets
- 8mm and 10mm combination wrenches
- Pipe cutter
- Drill Motor & 5/16" bit
- 24" parts picker (if you need to remove the emulator from
the assembled forks)
Removing the Stock Forks and Springs:
The install is
very simple and required very few tools. The BMW manual suggests removing the
entire front of the bike to do this, but I knew my
Steering Head Bearings
were good, so I thought that
removing the Gas Tank, Fairing
and Triple Tree was just needless work. If you have any doubts about yours,
you may as well take it all apart and replace the bearings.
First thing was
to lift the bike. I bought a motorcycle jack that worked dandy. Available at
Costco for $100, it's something I've wanted for quite some time, and this was
the perfect rationalization to buy it. It took a couple of tries to get just
the right lift, until I found a two by four under the skid plate and the two
center stand mounts lifted the bike perfectly straight. I used tie downs to
the rear rack and jack and it was extremely stable, allowing me to move the
bike around to deal with the limited space I had to work on it, which would
have been a problem with the front end removed. That said, I'm sure you could
do the job on the center stand if you wanted.
Then I removed
the plastic from the front wheel; the fender and the caliper cover. Then the
caliper itself. I made a hook from a clothes hanger bent in the shape of a 'C'
and hung the caliper from the plastic radiator surround. This keeps it out of
your, as well as harms, way. Next was the front tire. Loosen the
four bolts on the axle
keeper (no need to remove them) and unscrew the axle with the 12 mm Allen
wrench Then I removed the fork brace/Fender support.
At this point you
have the bike suspended in the air with everything removed from the forks,
which are now ready to be removed themselves. As stated previously, the manual
says the fairing and gas tank (as well as the handlebars on an ST) should be
removed, but I found this unnecessary. By simply moving the forks left and
right, I was able to get my ratchet in to undo the bolts.
First I loosened
the top bolt on each triple clamp,
(marked yellow) then I undid the fork cap, taking care to keep the spring
pre-load from shooting the cap across the room. You don't need to worry to
much about this as there is hardly any pre-load on the stock forks. (More
about this later) A word of caution here. The fork caps are aluminum with
extremely fine threads. The forks are steel, with a spring pushing up on the
cap. In order to keep from damaging the threads, especially the last two or
three, it's important to keep downward pressure on the cap as it's unscrewed.
I found a closed end wrench worked best for this, keeping downward pressure on
the cap with my finger while I re-set the wrench. Remember, you should be able
to loosen and tighten this cap by hand once the torque is broken. If it won't,
there's a good chance it's cross-threaded, so be careful. Doing it by hand
also gives you good feedback on the amount of downward pressure you using.
Once the caps are
out, you can remove the spacer, washer, and spring from the fork. Then it's
time to drain the forks. Get a container ready and open the
10mm bolt on the back of each
fork. The first little bit comes out at a good rate so be careful. (I found a
supply of oil absorbent close at hand was invaluable for this entire job,
BTW). Let it drip for a while, it will save you cleaning up a mess later on as
quite a bit is still in there when it stops flowing. At this point, put the
axle back in to keep the forks from turning and break the bolts in the bottom
of each fork leg, which hold the damping rods in place. Leave them is place,
just finger tight for now. Now take the axle back out and remove the forks by
undoing the two Allen head bolts on the
lower triple clamp
and carefully sliding the forks out the bottom.
Modification Work:
From here the
damping rod needs to be
removed for drilling. While it is possible, so I'm told, to do this without
disassembling the forks. I chose to take them apart so that I could clean
them, inspect the bushings and replace the seals. This is accomplished by
finally removing the bolts from the bottom of the forks and turning them
upside down. The damping rod and top out spring should fall out. Then
carefully place the lower part of the fork (outer tube) in a vice, and using
the upper part (inner tube) as a slide hammer to pull the seal out. In the
very bottom of the fork is a cup which goes between the damping rod and the
outer tube which is very important. If you elect not to completely disassemble
your forks, its necessary to get this cup in correctly on reassembly. At this
point I would lay out all the parts and compare them with an exploded picture
of the forks from the manual or parts book, so that you know you have
everything and you know where everything goes. This mental picture will help
you later on, when putting it all back together.
Next I would take
some time for a religious cleaning of all the parts. For the chrome fork tubes
carb cleaner and a well worn ScotchBrite pad work well. Interior of the outer
tube I used carb cleaner and a Heavy Duty paper towel, but a cotton cloth
would work well too.
Now it's time to
drill the damping rod. The instruction say at least 6 5/16" holes. The rod
comes with two, so I drilled these all the way through and added a pair above them. Thoroughly
de-burr these holes inside and out. You don't wan a bit coming loose and
landing in your seal down the road. Then re-clean them.
Next, set up the
emulator (top view).
Here's a view of it from the bottom and
side. I
found the instructions a little unclear here, but several calls to Race Tech
cleared things up. As they come from Race Tech, the emulators are not
adjusted. To do this you back the adjustment bolt off until there is no
pressure on the spring. (Kinda like a feeler gauge feel thing) Then screw the
bolt in the desired amount of turns. The instructions say two turns. A call
to verify this was for off-road (I bought a set for my Triumph which also said
two turns so I called) revealed an error. The recommended setting for off road
travel is one turn. To make a long story short, after installing,
un-installing, re-adjusting, and re installing a couple of times, I finally
settled on 2.5 turns, but I'm a heavy guy and I often travel well loaded (with
luggage, that is!) Also, this is totally subjective. One turn is soft, but in
a different, more controlled way than stock. Four turns is great, highway
driving is sweet and off road the bike tracks like it's on rails. The only
problem is that it's stiff. Unless you're a body builder who runs marathons or
Ricky Carmichael, it will wear you out quickly and isn't much fun after about
an hour. Here's a view of the
emulator in place on the damper rod.
Next, you need to
make the spacer. If you were using the stock spring and wanted to retain stock
pre-load, you would need only to remove 20mm off of the stock spacer to
compensate for the height of the Emulator. Another member of the Chain Gang,
wanting to add pre-load to the front end, simply put the stock pre-load spacer
in as is. The Race Tech spring I got was 100mm shorter than stock, but thicker
(hence stiffer) so some math was involved. This was complicated by the fact
that I was adding the additional length of the Honda Pre-load adjustor (12mm
fully out) as well. Here's how it worked out: The stock spacer (100mm)and
washer (1.5mm) added up to 101.5mm. My shorter spring meant I needed to add
100mm minus the 20mm for the Emulator and 12mm for the Honda pre-load
adjustor. Based on the fact that there is very little stock pre-load, I
decided to add 5mm as well. So;101.5+100+5-20-12= 174.5mm. I figured what the
heck and made the spacer 175mm. This is accomplished with a large size pipe
cutter available at any hardware store. Once again, this tube needs to be
thoroughly de-burred.
Reassembly:
Now it's time to
re-assemble. I placed the damper rod cup into the (immaculately clean) outer
tube, the spring over the (equally immaculately clean and be-burred) damper
tube and dropped the pair down the (immacul... you get the idea) inner tube.
Then the inner tube goes into the outer tube and with the damper rod fixing
bolt on the end of an Allen wrench (T-Handles work the best) fiddle about
until you get the threads started and tighten it down. Don't worry about the
torque at this point but remember it's only 25nm so don't make it too tight.
Next open your brand new 10wt fork oil bottle and put a little on the top
bushing as well as splash a little bit down the outer tube. (Oh yea, don't
forget to replace the drain plug first, DOH!) Squeeze the bushing lightly and
get it started down the outer tube. Now it's time for a special tool. You can
get one at any M/C shop for $40-$50 or do what I did, get 1 1/2" PVC pipe
coupler and grind the center stop out of the ID. This fits over the 41 mm
inner tube perfectly. Then I simply tapped gently with a hammer until the bush
is in. For the last little bit put the washer into the tube as well. When the
washer has bottomed out you know the bushing is in as far as it will go. Next
lube up the INSIDE of the seal with good ole #10. If you get any on the
outside wipe it off and slide it down over the inner tube. Make sure the
writing on the seal is up and you can see the spring. (another DOH!) Then I
placed fork seal tool on top of the seal and tapped gently again until the
seal bottomed against the washer. Next I lubed up the dust cover and pressed
it down over the top of the seal.
Next is fork
oil. The Race Tech spec is 120 mm down from the top of the COMPRESSED fork,
with the Emulator in, but the spring, spacer and washer out. This ends up
being about 50cc less than the 600cc recommended by the factory, but measure
it with a rule, not by volume (a hook rule, available at Sears, works great
for this). Note here: Put about 300 cc in and work the fork up and down to
expel all the air from the bottom of the fork, (Another DOH) do the same to
the second fork, then go back to the first one and do it again. Then put the
remaining oil in and measure. If you get too much in, a turkey baster works
great to remove a little bit.
Once the oil
level was set, it was ready to button up. First thing, extend the fork all the
way and make sure all the flowing oil hasn't pushed the Emulator out of place.
Put the spring in, followed by the washer, then the spacer. Note here, The
spacer needs to have a washer between it and the spring and between it and the
cap, if you're not adding the pre-load adjustor, you'll need to use the two
washers that come with the Race Tech spring (and grind them a little bit,
'cause they're too big to fit!) and adjust the length of the spacer
accordingly (The R-T washers are 2mm as opposed to 1.5 and you need 2= 4mm
instead of 1.5) The bottom of the pre-load adjuster is actually a washer, so
if you're doing this as well you won't need a washer in between the spring and
the adjuster. (Although you will need to grind it as well. Once again a little
to large for the inner tube.) At this point fully extend the fork and make
sure you only have 20-30mm of spacer sticking out the top. Any more (or any
less) means something is wrong. Most likely the Emulator has been dislodged by
the fork oil. If so remove the spacer, washer and spring and move the inner
tube up and down a little until the Emulator gets back in place.
Now for the
cap. The cap should be
put on in the "fully retracted" setting. As stated
earlier the cap is very delicate and needs extreme care. Holding the inner tube
in one hand, I let the fork fully extend. With the other hand I pushed the cap
down on the spring to get the threads started. Gently pushing down on the cap
as you turn, the cap should go on all the way to the o-ring by hand with no
problem. If it doesn't , chances are it's cross threaded. Take it off and
start over. Once you get to the o-ring tighten it down. (Save the torqueing
for later). Here's a picture of the Cap
fully extended and
fully retracted.
With both forks
done, it was time to put them back in the bike. A note here. Unless you have
a lowered bike, when you disassembled your forks the top of the cap was even
with top of the top triple clamp. This spec has been changed. The top of the
INNER TUBE should protrude 3mm above the top of the triple clamp. At this
point I just tightened the two Allen bolts on the lower triple clamp, just
enough to keep the fork in place and torque the fork cap and the damping rod
keeper bolt. Next I put the fork brace on, then the wheel. Torqued the axle
bolt, leaving the pinch bolts just finger tight. Then the top fork pinch
bolts, getting the bike off its stand or jack and, I sat on it and compressed
the forks several times. This lines up the forks and axle. Then I torqued the
lower fork bolts and the
axle pinch bolts,
then undid and re-torqued the top fork bolts.
Now all that was
left was to replace the caliper, caliper cover and the fender. And ride.
I would suggest a
short test ride staying close to home, checking for any untoward noises and
vibrations. Once your finished, park on the center stand, check all your work,
make sure everything got torqued and tightened properly and you're done.
Here are some
further Photos from Harl #380:
Emulator pre installation,
Emulator on Rod, Emulator,
Rod showing Drilled Holes
Riding Impressions:
The shock and fork
transformed the bike. Now the bike stays planted as if it weighed 100 more
pounds, but it is every bit as flickable as before. When turned into a corner,
in maintains its line much better. When passing or being passed by large trucks,
the turbulence barely affects the bike. In crosswinds the bike goes when you
point it, rather than wandering all over the place. The overall effect of the
mods is that the suspension is stiffer, but at the same time, it reacts faster
and better to input. And best of all, it's adjustable.
I'm still in the
process of experimenting, (and this process could last a long time!) but the
ability to change the suspension for Road and Off-Road, Load or no Load is
fantastic. With the exception of the Emulator, a change takes only a few seconds
by the side of the road. While my first few adjustments of the Emulator required
draining the fork oil and removing the fork caps, (I did it the last time in 35
minutes!) I don't think I'll have to do it again soon, the Honda pre-load
adjuster allows a lot of adjustment. All in all, a great investment in riding
and traveling pleasure.
AK-20 Cartridges
Here's the the response to my e-mail from Mike Hardy at Traxxion
Dynamic.
"Yes, we can certainly make the AK-20 fit. I am almost positive the our
Damper Rod Kit will drop in as well. So either way you want to go we will
be more then happy to accommodate you. Send the forks in we will hook you
up."
So it looks like I will be sending them my forks after I get back from the
rally in June. I can't wait to have the AK-20's installed along with the
Ohlin's shock. This bike should ride like a dream.
- That sounds really, really nice... how much for the front end
work? The cartridges eliminate the need for the Race Tech emulators?
I sure would like to see the follow-up to this one! Sadlsor #1444
- The cartridges are around $1k but the great thing is if you change
bikes you can switch them to the new bike for a small amount of money.
Every review I have seen on the AK-20's has been great so I look forward
to the upgrade. The cartridge replaces all the fork internals so there is
no need for the emulators. cadhopper #2041
- I suspect the AK-20 would be suitable for the Dakar but not the GS
(not sure about other bikes) since the GS does not have the threaded cap
on the forks. Can anyone comment? I think if the AK-20 is a viable
aftermarket option, I think it offers a good intermediate upgrade option.
Winter #1935
- That is an isssue they will llook at when I send them the forks. I
trust that Max and Mike will do a good job and come up with a solution but
I see no reason why the assembly can't be contained with the same clip
that currently holds the preload spacer and spring in place. Anyhow I'll
send them my forks after the rally and be the test case. Hopefully. if
there is enough interest from F650GS riders, they will develop a kit like
they have for other bikes that you can install yourself. cadhopper
#2041
Spring Options
Aftermarket spring options include:
Here are some comments from members using various springs.
Touratech in a Dakar - Forks noticeably stiffer, but not harsh. Reduces excessive dive under braking. Rides fine. Mike #639
Touratech in a GS - Much stiffer than stock. Had to reduce preload to the minimum. Street performance is much better. Brad #1002
Race
Tech in a Classic - I went with the stiffest spring on their
recommendations (I'm 99% sure that was the .90). It's pretty stiff.
Sometimes I'm amazed at how nicely they absorb bumps and handle braking
(dive virtually eliminated), other times I feel like they are just a
tad firm, usually on the smaller bumps at speed. Big bumps, they handle
well. Mark #403
Race
Tech in a Classic - For a 240 pound (~220 plus gear) street rider with
bad roads, .9's are wonderful. I feared it would seem too stiff, but it
actually seems less so, because the front of the bike moves less over
irregular roads. Todd #389
In general
terms you select spring rates (stiffness) based on two basic criteria. First,
the weight of the bike, rider and normal load. Second, for the type of riding
you do. The more weight the stiffer the spring will need to be. The other factor
is where you ride. Street riders use and need stiffer springs than off road
riders. When off road the suspension needs to respond to a greater range of
motion (the bumps are bigger and more numerous). However, be careful about using
spring rates that are common for the typical off road motorcycle like a
motocross machine. These are much lighter than our dual sport machines. That is
why weight must be included in the decision as to what rate springs to use.
It has been
reported by others that the stock springs in the F are about a .6 rating. This
may be suitable for you. For some, usually heavier riders (180+ pounds), they
are too soft for street use and may even be too soft for off road for those
carrying more than 200 pounds. In the end, the choice is a compromise if plan to
use the F as a true dual sport. Like tires, you can't have the best of both in
one solution.
Don't forget
that spring rates are related to fork oil weight. The weight of the fork oil
needs to be matched to the springs you choose. There are as many opinions as
options on this topic. Keep in mind that the stock front suspension on the F has
no adjustment for either compression or rebound damping (thus the interest in
Gold Valves). The weight of
the fork oil in a stock setup is going to have more of an affect on rebound than
compression. The stock oil is 7.5 weight. Some members report good results with
10 weight oil when using stiffer than stock springs. For off road applications
it would be unusual to need higher than 10 weight (oil that is too thick will
slow rebound so much that the front wheel will not return quickly enough).
Lastly, the
quantity of oil plays a role as well. The simple explanation is that changing
the oil level changes the amount of air in the fork. Air compression plays a
part. The less air the more resistance to compression. More
information in the Fork Oil Change FAQ on
fork oil.
If you are curious enough to want
to know the 'spring rate' of your springs you can learn how to calculate it by
reading the Spring Rate FAQ.
Comments on Diving Under Braking/Spring Installation
On the
old Airheads, front end "dive" under braking was also an indication that the
rear shocks were going (actually, the front end wasn't really diving, the REAR
end was rising due to weak shocks/springs). That said, I added the +50ml/leg
(of 10wt) oil to the fork legs (Classic...this is allowed for the lowering
kit, so it should be OK for stock), plus fabricated new preload spacers 1/2" -
3/4" longer (13-19mm for you metric folks). Front end doesn't dive any more,
but it feels pretty stiff. I may put the original spacers back in at the next
fork oil change. The stock rear shock will be out for a re-charging and/or
rebuilding this winter (has anybody identified the "generic" needle bearings
in the swingarm/linkages yet?). Marty #436-Chicago-97 F650F
- If you
think you have a problem with your sag up front, I'd see what the sag is, like
listed at the Race Tech site. If it's more > than an inch or so..... you might
want to upgrade. My short short version: $100, Race Tech .9's with 22mm
preload. Don't trust their shipping dates. You
guys looking to control fork dive thru oil viscosity and oil level will get
only limited satisfaction when what you really want is stiffer fork springs.
Look at it this way - if you have anything more than (or near) an inch of fork
sag from the bike on centerstand (forks fully extended) to it coming to rest
after bouncing with your weight on it, you can benefit from stiffer springs.
Our springs are pretty soft, and if you are a big guy, with springs a couple
years old.....you might go for the upgrade. Btw, I know our riding style is
completely different, but looking at your photos of how you load the bike (I'm
both impressed and frightened!), and knowing that you are not a small guy....
if you are still running on the .6 OEM fork springs, you really owe it to
yourself to upgrade stiffer. I'm not one for expensive suspension crapola, but
once I got the preload right, stiffer front springs made a huge improvement to
the bikes handling. The OEM rear shock can handle things well enough up to max
preload, but the forks are way too soft, and add any load and you lose much of
the travel. I marvel at the way I go over potholes now, without any fancy Gold
Valves or any of that hype. Now when I hit something, the suspension moves,
not the front of the bike. Despite being overpriced, as a painless "drop in"
upgrade, the springs were worth it. Just a suggestion. I'm certainly no
suspension expert, and would readily defer to someone like mtiberio in almost
any debate on the subject, but here goes. I don't believe in the Progressive
spring argument, unless you have no ability whatsoever to tune/modify.
Progressive wound springs are just a "one size fits all" mediocre at best
compromise. And all too soon, the lighter windings begin to sag, which ruins
the whole point of the upgrade. That leaves you (AFAIK) with the Wunderlich
(or was it Touratech?) or Race Tech
http://www.race-tech.com/ springs. I went with Race Tech, as they have
more info on their website, how to check the sag and all that, but some of the
California shops which are sources for the Wunder/Toura might be more
accessible to you. Our stock springs (Classic and GS, not Dakar) are .6
(kg/mm?). Race Tech sells .8, .85. and .9 springs. According to their
trusty chart you could use any of them depending on your weight. I went
for the .9's (I'm 215 lbs nekkid) on their recommendation. Started with 30mm
preload when the OEM was about 20mm. Too much preload, the bike stood too
high, fully topped out the forks even with my load, and manoeuvred weird at
full steering lock. Went with 22mm preload - gave me a tiny bit of sag, which
gave me back the right steering angle, far less brake dive, and does NOT
bottom out despite repeated impacts going down stairways while braking. I'm
quite happy, but I have to admit that I still wonder what the .80's would feel
like, probably with 22-25mm preload. Compared to the very soft stock .6's, I
cannot see how you could go wrong with the .8, .85, or .9's, if you are
willing to adjust the preload a bit. Of course that's assuming you will put up
with a slightly stiffer ride while cruising. If I had more fork travel say
11") or didn't abuse the bike so much, or rode Loong distances, I might try
the .8's. I'd love to compare the ride on side by side bikes sometime. Is this
of ANY help? Suspension is pretty subjective, even for the Artistes - I've
seen the pilots and the suspension guru's test and argue in circles more than
any other track aspect I can think of, and I don't pretend to understand half
of it. Hombre Sin Nombre.
- Don't
panic about 10wt. I'm running 20wt in my classic - (yes another mistake by a
bike shop :P) However the results are very good, much better road handling (no
front end twitch) and it's bearable off road. Pete.
- When I
changed oil viscosity, I couldn't tell any difference in brake dive. but the
ride did get a bit more harsh. I only went from 7.5wt to 10wt. new springs
made all the difference in the world. as Todd indicated, the stock setup is
for someone who weighs about 150lbs, and after 2 yrs, probably more like
75lbs. My front end is absolutely fantastic, but I paid the price. new
springs, cartridge emulators, new bushings and seals, and finally, a fork
brace. altogether, about $500 in parts. Mark #403.
- Big ticket item but can make a hell
of a difference. At this point, I have never really messed around with
suspension alterations, other that I'm certainly no suspension expert, and
would readily defer to someone like mtiberio in almost any debate on the
subject, but here goes.... I don't believe in the Progressive spring argument,
unless you have no ability whatsoever to tune/modify. Progressive wound
springs are just a "one size fits all" mediocre at best compromise. And all
too soon, the lighter windings begin to sag, which ruins the whole point of
the upgrade. That leaves you (AFAIK) with the Wunderlich (or was it
Touratech?) or Race Tech
http://www.race-tech.com/
springs. I went with Race Tech, as they have more info on their
website, how to check the sag and all that, but some of the California
shops which are sources for the Wunder/Toura might be more accessible
to you. Our stock springs (Classic and GS, not Dakar) are .6 (kg/mm?).
Race Tech sells .8, .85. and .9 springs. According to their you could
use any of them depending on your weight. I went for the .9's (I'm 215
lbs nekkid) on their recommendation. Started with 30mm preload when the
OEM was about 20mm. Too much preload, the bike stood too high, fully
topped out the forks even with my load, and manoeuvred weird at full
steering lock. Went with 22mm preload - gave me a tiny bit of sag,
which gave me back the right steering angle, far less brake dive, and
does NOT bottom out despite repeated impacts going down stairways while
braking. I'm quite happy, but I have to admit that I still wonder what
the .80's would feel like, probably with 22-25mm preload. Compared to
the very soft stock .6's, I cannot see how you could go wrong with the
.8, .85, or .9's, if you are willing to adjust the preload a bit. Of
course that's assuming you will put up with a slightly stiffer ride
while cruising. If I had more fork travel say 11") or didn't abuse the
bike so much, or rode Long distances, I might try the .8's. I'd love to
compare the ride on side by side bikes sometime.
- I have
the Touratech springs installed and the RaceTech emulators. I did the springs
first, and switched to 15 wt fork oil at the time. Night and day. Huge
improvement, as in a different bike. I would say that this is 90% of what can
be done to the front end. Emulators? Well, they work, by letting you control
rebound and compression damping separately. Of course, to change the
compression damping, you will have to pull the fork caps, remove the springs,
fish out the emulators, make your adjustments, and put everything back
together. But mine worked pretty slick right out of the box with the RaceTech
supplied settings. Where you will notice the improvement is in washboard type
surfaces at speed, which for me isn't that fast. But the front end is much
more supple. With the emulators, I was able to drop down to 10 wt fork oil.
Best bang for the buck? Springs and oil, definitely. Do the emulators if you
want to. And get some fork boots. F650's eat fork seals without them. I
haven't had any real complaints about the stock rear damper. The springs a
little soft, but other than that I think it is a pretty nice unit. Ohlins are
great, but they want your left nut in exchange. I don't think the Dakars have
nearly the suspension deficiencies that the big GS seem to have (to hear about
it here). But then, we are lacking an additional 200 lbs of "road hugging
weight", and Boxer guys are idiots anyways. Jinx on Advrider.
- I think
that the most common upgrade is the Touratech progressive fork springs and
replace the factory fork oil with some 10wt. I can't afford Ohlins forks
either but the progressive springs have made a big difference. As for gold
emulators-I haven't heard of anyone putting them on or how much they are.
Progressive springs is probably the best 'value-for-money / noticeable-benefit'
option. Zahnradkopf.
- I
disagree w/ the Big Black Cat. Get the emulators. Keep your springs. Run 10 or
7.5 oil. Important Notes and Limitations of Free Advice:
1. I've ridden an old F650 but only briefly. The forks sucked.
2. I rode an R100GS for ten years. Added Fox Shock and ProgSusp fork springs.
Big improvement.
3. I put the emulators in my KLR. Frickin' bloody wow. They made a much bigger
improvement in the KLR's performance than the PS springs made in the GS's
performance. For the KLR, the emulators add 14mm preload, which makes the
total preload about 30mm, which is a lot, but the sag is about right.
4. You may need different springs. Depends mostly on how much you weigh.
There is a process for tuning suspension:
1. Get correct springs. Spring rate is most important. Length can also matter.
RaceTech has a spring rate calculator.
2. Set sag to 20% to 30% of total travel by adjusting preload.
3. Adjust ride height to tune F/R weight distribution and steering head angle.
Set ride height by changing shock linkage (if your bike or shock has it--most
don't), sliding the fork tubes up in the triple clamps, or by adjusting
preload. The last method is okay only because the spec for sag is so broad.
4. Adjust damping.
I'm no expert on this, but the process works, even for me. Chasing suspension
settings around without doing it in order is like trying to fettle the carbs
on an old twin without first setting the valves and ignition. That said, just
installing the emulators made a huge difference in the KLR. Undoubtedly the
best mod I've ever made to a motorcycle. The improvement was quite dramatic.
Stephen, KD5SSU.
- 650
Dakar. The single most useful mod I'd consider is Touratechs stiffer fork
springs. Apart from the pathetically weak headlight / front fairing assembly,
I still think it's a great bike. Cheers
Jeremy. Jaz #1126.
www.horizonsunlimited.com/tstories/andrews.
Touratech's Progressive front springs Installations
TT spring installation
I'm received the TT Dakar springs yesterday and will try to install
them tomorrow. Feel a bit unsure about it and since I'm going away on a 1
week offroad tour this satuday I don't want to mess anything up. Checked
the faq but found no description, probably because it's so simple, but I
like to make sure anyway.
To install the springs, do I just remove to caps (and screw) on top of
the fork legs, pull the old springs out and replace them with TT springs?
My plan is to start with replacing the springs and then maybe later change
the fork oil. bjorna
Scott, ID #1244: That's about it! However, they do recommend a
different oil level; if the oil looks dirty, you may as well change it at
the same time.
Oil Level With Progressive Springs
I just installed a couple of Touratech's progressive springs. Does
anyone know how much oil I must remove from the fork legs for them to work
properly? If no one does, can you come up with a method of determining
this accurately? What are the potential problems I might face by running
the bike with too much oil in the forks? Mexico Juan. Actually they do
displace a significant amount, I think. Not only is the wire thicker, but
it has more coils!!! Balam
Conclusion on oil level with progressive springs:
Over the past few months it has been posted a few times that the use of
progressive springs in the front forks should be done with reduced oil
levels from stock. Here is what I found after running Touratech springs in
my standard GS in both states.
- with stock oil levels - very firm ride, so much so I reduced pre
load to a minimum to compensate. It was acceptable on the street but too
harsh off road.
- reduced oil by 50 cc a side - I retained the short pre load
spacers. The ride is much improved off road. I'm convinced now this is the
correct approach with these springs. There is a bit more dive under
braking on the street but still way better than stock.
Side by side with the OEM springs the Touratech are clearly going to
displace more oil when installed. The exact amount I never bothered to try
and calculate. Now I'm wondering which is the correct way to install these
springs. Should the tightest coil portion be on the top or the bottom?
This would affect the displacement of oil some but I can't imagine it
would affect performance otherwise. The air column size is what is key.
I'll make a dipstick from a coat hanger and measure oil level on the
center stand with no load on the front wheel. Always good to start from a
known and adjust from there. BradG, N. CA., 2001 F650GS - Inmate
#1002
Feedback:
- One way
to solve this problem, would be to install the stock springs with the correct
amount of oil and measure the distance between the top of the oil and the top
of the fork tubes. Then remove the stock springs and install the new
progressive springs and take another measurement. If the oil level is higher,
then remove the amount of oil to bring the level back to the same distance as
with the stock springs. Forget this calculation stuff. I sure couldn't
calculate the amount of displacement that results from various lengths, wire
thickness and the number of coils for different springs. Richard #230: 1997
Funduro
- Oil
level should be measured in distance, not by adding a given amount of oil (as
the BMW instructions state). Everything else I've read has always quoted the
oil level, not a given quantity, and there are different ways of measuring the
level. For instance, my KTM w/upside down forks, you measure the level with
the spring in and the fork completely compressed. however the instructions
from race-tech for the F650 (from memory here...) were to measure with the
spring in and the fork fully extended. either way, it's an oil level that
matters, not an oil amount, so which way the springs are in place shouldn't
matter. there may be a difference in the amount of oil used, depending on
which way the fork springs are installed, but the measurement should be made
in mm's not cc's. Richard's got the right idea...find out what stock oil level
is and go from there. there are cheap tools available for setting oil levels.
mark #403
- WAY too much oil will blow your fork seals. Flash #412 (CO)
- Do they displace
significantly more fork oil volume than the stock ones? (hard to believe) Or
"bottom" out later (spring length when coil bound + preload spacer
differences). I would expect (assuming that the answer to those two questions
is "negligible") that the change should be minimal. And on the non-lowered
Classics, another 50 ml/fork leg is available, as that is what is recommended
for the same fork in the "lowered" configuration. Check the
FAQ for the OEM recommended fork oil volumes.
To be really accurate, you would need to mic. the spring wire, count coils,
and determine the depth that the oil covers the springs. Calculate the volume
difference between the two different springs. My guess is that the new springs
are just STIFFER by design. Marty #436-Chicago-97 F650F.
- I have the TT
springs too. I put the normal amount of oil in them and have had no seal
problems. I found them to be a bit too stiff and made pre-load spacers that
provide the minimum amount of pre-load. This gives about the right amount of
sag. I also went to 10 wt oil. I may try reducing the oil quantity by a small
amount to see if that will soften them up a bit. Yes, I know that excess oil
(less air space) increases compression forces. I read in the FAQ were someone
had determined the difference between the springs to be very slight. Thus I
put the normal amount of oil in. But the springs seemed much stiffer then I
expected so it may indeed be necessary to reduce the oil. I suppose one could
measure the air column with both springs and just adjust the oil quantity so
that the oil LEVEL was the same. I'd have to fee real inspired to go to that
much work but I might. I'll post if I do. The TT springs are of course
designed to be stiffer. You can tell by just comparing them to stock. They
appear quite robust. They were just so stiff that it did not make any sense
for any kind of off road application. On the road they were tolerable. The
preload spacer I'm using now is just long enough to allow me to install the
fork caps and still have some pressure on them. I still think that they are a
bit too stiff for off road but I spend more time on then off so I opted for
that compromise. Brad, N. CA., 2001 F650GS - Inmate #1002.
Aftermarket Triple Tree
by beem_dubya #1328
I installed a custom triple clamp on my Dakar. Replaces the stock
set perfectly, switches, bar height, ignition, fork lock, etc. Anyone with an
'01 or newer GS should see my pics. Anodized blue, two top clamp bolts per side,
vibration isolated bar risers, mount for the BMW power plug next to the ignition
switch, SWEET. You can get the bar risers in several heights, sized for stock or
aftermarket bars (Pro-tapers, etc) and the whole thing can be done in several
colors.
Why do we modify our bikes at all? To make it better. (if only
in our own minds) I installed it because the first one I had seen (on the
counter at Engle's) it seemed cool. Then after riding out to Emig Racing and
meeting with Gary, it seemed to be a sensible mod. Stronger, adjustable bar
heights, power plug in a more accessible area for my GPS, etc. Gary had made the
prototype for his Dakar, shown me the bike and then we talked at length about
it. We talked about why he made it, how it rode, strength, etc. Gary is very
experienced both in dirt riding and machining which leads me to trust his ideas.
I loved it and thought it was a great idea. I am going to do suspension upgrades
but am still in the research process. (WP, Ohlins, etc) Then there is the custom
factor. Nobody else has one and it sets my bike apart. Gary of course has one
(silver) and he has sold others, but as of now, this is the only one made
public. (as far as I can tell) It's different.
So how weatherproof is that cap on the end of the power plug?
And if water gets in there, does it drain out through the bottom?
I had the
exact question for the the manufacturer, Gary Emig. He reported no problems to
date and neither have I. He rides an 02 Dakar, KTM LC4 and others with the same
set-up. I rode to a local BMW club meeting the other day in 38 degree pouring
rain and had no problems. I'll report any long term successes and/or failures.

 For
anyone interested, the website is:
www.emigracing.com
For
anyone interested, the website is:
www.emigracing.com
Feedback:
- My only question is "why". I'm assuming from your post that
everything is pretty much stock, save the power plug. Seems like an awful
lot to simply change bar height or handle bars. Not that really cool
stuff doesn't have it's own intrinsic value. (And this is really cool)
Did you change forks, wheels or anything else. The reason I ask is that
I'm contemplating grafting a sport bike front end on an ST and this would
be an elegant (if somewhat expensive) solution to the different diameter
and spacing of the fork legs. David#476
- I emailed Paige at E-R, and she replied they are available for our
bikes as a special order (3 - 4 weeks), but include the key switch mount
and integrated power port (accessory plug). You can specify solid or
rubber mounted bar mounts, mounts for 7/8 or 1 & 1/8 bars, various bar
heights, forward and rear bar positions. *If you click on, say, the H*nda
link on the website, you can see pix of the different anodized colors, and
they are shown with the bar mounts. Sadlsor #1444
- After almost two years of riding in all terrain and all weather,
no problems to report. beem_dubya #1328
- I've had the anodized blue Emig Racing clamp on my '02 Dakar for a
little over a year now and have had nary a problem with the set-up. I
still say it is an excellent upgrade for strength, durability, custom
sweetness and worth the $$$, IMHO of course. I removed most of the front
end to do the Touratech spring mod, with some much needed clean-up, and
everything seemed to be in perfect condition. The Dakar was my only source
of transportation from February through December last year and had seen
many miles of street, dirt, rain, sleet, etc. and the clamp never let
loose. It still looks brand new and sets my Dakar apart as well. If you
need any other info, let me know. See if this link works for the original
post with pictures. beem_dubya #1328
Adding Preload Spacers
by Marty #436-Chicago-97 F650F
On the old Airheads, front end "dive" under
braking was also an indication that the rear shocks were going (actually, the
front end wasn't really diving, the REAR end was rising due to weak
shocks/springs). That said, I added the +50ml/leg (of 10wt) oil to the fork legs
(Classic...this is allowed for the lowering kit, so it should be OK for stock),
plus fabricated new preload spacers 1/2" - 3/4" longer (13-19mm for you metric
folks) from PVC tubing. Front end doesn't dive any more, but it feels pretty
stiff. I may put the original spacers back in at the next fork oil change.
To stiffen up "the front wheel", fabricate some
slightly longer preload spacers for the front forks. Cheap fix. I'm assuming
that 95 and 97 forks are similar or identical.
The preload spacers are thin walled pipe (think
car exhaust pipe, but smaller diameter). Pretty hard to stack two of them end to
end inside the fork and expect them to stay. Maybe better to use a stack of
washers, but stay away from plated ones (the plating could flake off and do bad
things to the dampers?). PVC pipe seems to be working OK, and is cheap.
When getting your PVC make sure you get the
thicker wall pipe. In the US we have two types. One thin and one thick. The wall
should be about 3mm thick. Given that all the parts will be coated in oil you
can probably use stainless steel washers. The plated washers are usually plated
with zinc.
As BG mentioned, the plating is usually zinc
(galvanized) or similar to prevent corrosion. He's right on about getting the
thicker walled PVC. You could also use hollow metal closet rod (idea from
another inmate) if you can find the right size (and again, be aware of plating,
probably "chrome" in this case). Be sure that you clean up well whatever parts
you put in there after cutting, you don't want any metal or PVC "sawdust" in
your hydraulic forks!
Reducing Fork Tube Torsion during Spring Compression
Draft FAQ. Not Ready for Prime Time
"Just Yet"
Harl #380, Fort Collins, CO.
This was posted on another site I frequent.
A coil spring by design is a torsion spring; however, due its wound-up
design, a coil spring wants to rotate one end when compressing and expanding.
While not a big problem on cars, since the coils are short and rigid, on a
motorcycle the coil spring action is noticeably crippled by the amount of
friction the spring has to overcome to turn.
On many bikes that forces the spring to bend sideways, and
if not possible, to distort unevenly. Also there will always be the tendency to
twist your two fork tube relative to each other, which of course is almost
impossible, resulting in insensitivity of the front springs and the tendency of
front end deflection.
Put a removed, complete forktube on top of a bearing, put
another bearing on top of the tube and push down on the top bearing; you'll be
surprised how much the top tube rotates out of its original position.
Or do a hard front brake only stop while trying not to put
any steering input into your bars, and you'll notice that virtually any bike
will always turn in the same direction due to fork deflection (even with two
brake discs).
So I did what many road race teams and some SX/MX teams do
and installed a bearing on top of each front spring, allowing the springs
to rotate freely on one end.
The bearings are only about 1/4" thick, so there is no need for change in spacer
length. (That quote is from the guy selling the bearings) Furthermore
they are 32 mm in diameter, so they self align. Also, the bearing sides (contact
points) are so wide that, mounted on top of the spacer, the spacer sits entirely
on it and the force transmitted from the spacer is evenly transferred onto the
tube cap, preventing those ugly offset indentations you probably have noticed on
your end cap.
It's apparently 32 mm in diameter and 6 mm thick. Beyond that I don't know. It
must be akin to a Lazy Susan bearing. I'll let you know more when I get them.
The diameter might be a tad small for an F since I'm getting them for 38mm
forks. But at least I'll have some idea of a bearing number which usually
indicates something about it's application.
OK, So What Bearing do I need?
- I poked around on
the McMaster Carr website. It's got to be some sort of thrust bearing.
Basically two flat "races" with caged balls or needles between them.
- Use whatever thrust
bearing (a thrust bearing is solely for axial loads) you have handy. The
height of a needle thrust bearing is a lot less than a ball thrust bearing,
but a needle thrust bearing is a misnomer. A "cylinder" rolling in a arc
around a centre is not rolling. The middle of the cylinder is (theoretically)
rolling at the right speed, the "inner end is rolling too fast and the outer
too slow - Whatever thrust bearing used, it works. I have always used thrust
bearings in my front froks with coil type springs and never thought of telling
anyone as it was a matter of course. Another matter regarding forks; have you
ever tested how much force you have to use to overcome the resistance caused
by the Fork Seals? When you have the forks dismantled, try to put one of the
"legs" on a scale and see how much force is needed to start compressing the
fork, without a spring inside. (just to overcome the braking force of the
sealing on the inner tube). It is a LOT. I once used 2 Seals each side prior
to a LONG ride. The "start movement" force was nearly 5Kg each leg. Needless
to say I removed the extra set after a short test ride and has always after
used Seals with soft rubber and weak springs. The pressure makes the
lip seal. A small amount of moisture does not matter, except it attracts dust.
Haakon#626 (Norway, F650GS)
Alternative to Bearings?
- Two steel washers with a Teflon washer sandwiched in
between would do the same thing with less thickness and co$t le$$, too. Go
with the nylon from Ace Hardware. Flash#412
Feedback:
- After I ruined a
very rare and hard to get spring on a Webb fork, I just decided to prevent it
from ever happening again. On one of my Guzzies, bought used, one of the
springs looked like a corkscrew and had punctured the damper unit. If it does
any difference or not for the handling I can not say for sure. The setup I
have on my GS is just 7mm high so I do not think the extra preload matters
much. Haakon#626 (Norway, F650GS)
- "The bearings are
only about 1/4" thick, so there is no need for change in spacer length." Harl,
I'm not sure, but isn't that about the full amount of adjustment on the
pre-load adjuster? Not what I would call an insignificant amount. Of course
that would only help with the stock fork setup. I tried surfing Kamen and SKF
website, with no real luck. When I used to replace expensive SKF OEM bearings
in Volvo boxes with cheap SKF bearings in SKF boxes I used to just head down
to Kamen with Bearing and Micrometer in hand and figure out what the part
number is. I'm sure any bearing supply house could come up with something. If
you do the mod, let us know how it works out. David #476, '99 F650.
- The McMaster Carr
site had quite a few different thrust bearings. Some contain bearings, others
are just simple washer types. Most of the ones I saw that would handle more
than a 100 pounds of thrust were $20 - $50 each. I did find one that is a flat
ring of needle bearings that requires washers above and below for about $10 a
set. I'd post the exact links but the site uses frames so you just have to go
there and search for "thrust bearings" if you want to see what they have
(search box is in the upper left on their home page). I believe this mod falls
into the category of things you do when trying to get that last %5
improvement. I think it is only going to be noticeable by very experienced
riders on smooth, track like conditions. Love to hear the results if anyone
tries it. Brad, N. CA., 2001 F650GS - Inmate #1002
- "I believe this mod
falls into the category of things you do when trying to get that last %5
improvement. I think it is only going to be noticeable by very experienced
riders on smooth, track like conditions. Love to hear the results if anyone
tries it." I quite agree. OTB says that she has seen a Delrin spacer/washer
used in race car suspensions between the spring and the chassis. The next time
I pull my fork cap off, I am gonna measure so I can put a nylon & steel washer
sandwich in there.
- Hi Flash, it is none
of my business, but you know- you can NEVER get a sagging fork back to spec.
with a spacer. If the spring is permanently compressed a spacer will just
raise the front? but it will still bottom out. The efficient "travel" of the
spring will still be the same. The only (almost) real cure (if you do not want
to replace the spring) is to put in another spring with a rate a bit higher
than the sagging one. You will still go coil bound earlier than with a new
spring. Haakon#626 (Norway, F650GS)
- Thank you, Haakon,
I'm aware of that. Harl gave me a set of heavy duty springs and some PVC pipe
with which to make spacers when I mounted an Ohlins on the ST (NewMexEd's old
bike). I just haven't gotten around to installing them due to cold weather,
travel and other projects and things going on in my life.
- " It certainly is
less than the range of the Honda preload adjusters, if that's what you're
talking about" That's it exactly. I looked at my forks last night on my way
home and you're right, each mark is about 1/4". But I notice (or imagine) the
difference in 2-3 turns on the pre-load so I personally would modify the
spacer if I put in the bearing. I'm thinking of whacking some length off the
next time I do my forks anyway, as my current set up gives proper sag on the
empty bike with the adjuster backed off all the way. Don't plan on doing any
touring on the fully loaded F in the near future (which is why I set it up
that way), so I'm thinking if might be nice to have a little more range of
adjustment. David #476, '99 F650.
Forks By Frank
Another non-OEM fork suggestion - Forks by Frank:
http://www.frankmain.qpg.com/.
I've never used them, but heard good things - IIRC Flash has also
recommended them. Marty #436
- If it helps lend some credence to the company, I bought a set of
tubes from Frank close to 15 years ago for the R75/6. They've been around
(the new forks and the company) for a good long while. borg #1716
GS to Dakar Forks Conversion
I am trying to change out my GS forks for Dakar parts. It is the trying
part that is my problem. I bought Dakar tubes, damper rods and TT springs.
The stock little spring that goes in under the damper rod doesn't fit into
the Dakar tubes. Does the Dakar not use this part? Also, the TT springs
are shorter than my stock GS springs. The only thing that I can figure on
this is that the Dakar doesn't use as much of a pre-load tube or none at
all.
More trouble. I just tried the damper rods in the tubes. They are snug
and the fiber ring that goes on the damper rod doesn't fit into the tube.
The Dakar tubes have a slightly smaller inside diameter.
- The Dakar tubes are 31 42 7 660 357
- The damper rods are 31 42 7 660 360
- Touratech springs are 040-0457
gordy
Have you looked at the parts
fiche(s)? It seems that the part number for the small compression
spring (item 10) is different between the two models. Is the fiber ring
you mention the "piston ring" #8 p/n ...660 365 as shown in the fiche? It
looks like there are two different part numbers for this ring between the
GS and Dakar so you may need to order these.
Seems like you will have to compare the two lists of parts
between models to see what else is different. I suppose it is possible
that only the part numbers are different but as you have already
discovered some don't fit so it implies there are differences. The good
news is the lower tubes are the same so you just need a few more items to
make the conversion.
As for the TT spring length just make your own pre load spacer
from some PVC and SS washers so you can dial in the amount of sag you
want. bg #1002
GS and Funduro Forks
Anyone know if BMW F650GS forks and BMW Funduro forks are
interchangable? cdnabn49
- I know this is old but the answer is no Komatias
Aftermarket Fork Opinions
Pros-Cons of TT Progressive Fork Springs?
I used to bottom-out the forks when riding off-road. Then I blew a
seal. When I replaced the seals, I also changed from 7.5wt to 10wt oil.
This made a big difference in fork stiffness, with less bottoming.
However, the front is still a little soft in the ruts, and I was about to
order a set of Touratech progressive springs. Then I read the FAQ and
found this comment: "They were just so stiff that it did not make any
sense for any kind of off road application."
Anybody have any comments on that opinion? Are the springs' princpal
function to minimize brake-diving, and not so much for off-road bumps?
Also, the TT site says to use 15wt oil with these springs. Would the oil
alone minimize bottoming? (i.e., maybe I should try that first?) Scott,
ID #1244
- I have them and they work great. Yes they are quite stiff, but if
you want to ride a 450lb dirt bike with 5 inches of travel and don't want
to bottom out, then you need them stiff. gsatlanta
- I'd suggest you try the 15w first. It's easy, cheap, and may be
all that you are needing. There is always the springs options if you're
still not happy. I ran 10w in my Dakar forks, and it did just fine for me.
I don't know how the Amsoil ATF that I just stuck in there will do, since
I haven't been off-road with it... yet. dmemt #1464
- For the price, the TT springs are possibly best upgrade I've done.
I also like the TT footpeg relocation kit, although the cost:benefit ratio
is not quite as impressive as the springs. Scott, ID #1244
Hey, I have read the faqs on this topic a few times, but I'm just
following up here... I have heard reports on the touratech progressive
fork springs with diff. weights.... Just curious if this is worth doing
for a f that mostly runs pavement,,,, Jacool3
- Yes. David, #476
- From TT site: "Fork Springs F650GS Standard Part Number: 040-0458"
"Use 550ml, SAE15, Install with tighter-wound coils down" Scott, ID
#1244 [Ed note: It appears TT updated their site... it now states
"tighter-wound coils UP"]
Aftermarket Fork Protectors
What diameter is the top of the fork leg?
- (I think that the stanchion is 41mm, if not please correct me). I
want to get gaitors to put on this weekend when I am replacing the
steering head bearings AND the fork seals.
- The 41mm fork diameter is all you need to worry about for fitting
the gaiter. If it's any help to you some folk just secure the gaiter at
the top because it' not so easy to secure it at the bottom, because of the
odd shaped fork-brace. Andy Smale just lets his fall loose at the bottom
and if they are long enough at full fork extension then they work fine. At
least he says his work fine. He got them at an Off-road/Moto-cross shop.
Trevor, Bristol, UK, 01 GS, C.G. member #999
- Looks are subjective!
Q. Do the Classic Fork Protectors fit the GS/Dakar?
A. Yes but there is ONE very IMPORTANT
difference. In their wisdom, BMW made a Fork Brace which basically leaves no
room at the bottom of the Gaitor, on the Stanchion, for fitting Gaitors or
protectors. However Stuflinn reports "BMW fixed the problem with machining for
us. I just bought a 650GS, and then purchased some MSR fork gaiters for it. Of
course the stock fork brace needs to be machined to make room for the lower
gaiter. On the new GS that is in dealerships, the fork brace is designed for
gaiters, and is sharply raked upwards in the center. This should also throw more
air up into to the radiator. The pieces is outrageous for what it is (about
$90.00), but it is a turn-key solution."
Q. If I installed a GS Lower Fender Kit, can I still fit the Gaitors
on?
A. No, not without modifications. The Low Fenders, with the exception
of the one from Wunderlich, all either push the OEM Brace UP or replace
the brace with a similar one so it makes it even harder to install
Gaitors. See the Front Fender Mods
GS FAQ for further details.
Is there a quick way to install gaitors?
I recently bought an '03 Dakar and just changed the oil & filter today
(thanks to the FAQs). My next M&M task, based upon all I've read here, is
to install fork gaitors. I picked up a set from MSR yesterday...but I have
a question: Is there an abbreviated method for removing the forks just to
slip on the gaitors or do I need to go through the entire process outlined
in the Fork Oil Change FAQs? I searched the forums and the FAQs, but only
saw mentions like 'it only took me 45 minutes and 1 beer to install my
gaitors'. Any step-by-step instructions out there? The seals on my bike
are fine (only 2300 miles) and I probably will save changing the fork oil
to 10wt until after the summer -- I'm too anxious to begin exploring all
of those wonderful unpaved Rocky Mountain roads. Douglas80210
#1798
- It's an easy job. Remove the front wheel (put a jack or stand of
some sort under the motor to keep the bike from falling forward) and the
brake caliper. Loosen the bolts on the triple tree and slide the forks
out. You'll need to grind the fork brace a little to get the boot to fit
between it and the fork, or you can trim the boot to fit around the brace.
More instructions here. It's a cheap and worthy mod. SScratch #1082
- And before you tighten the top bolts, you may as well pull the
caps, drain the bmw swill out, and stick 10w oil in. It's well worth the
extra 20 minutes it'll take ya, especially since you mentioned "unpaved".
dmemt #1464
Wrap-Around Neoprene/Rubber Fork Protectors
NOJ Inc.
These are generic Neoprene wrap-around and Velcro on Type, for any
Bike. On my Bike they look like this:
Advantages:
- Easiest to install and remove. You don't have to remove theforks.
- Unbreakable.
- Easy to wash.
- Can move from Bike to Bike.
Disadvantages:
- Will eventually lose Velcro-Grip
- Not Full length. i.e. Stones could hit and scratch the stanchion
above the Protector.
- Can trap Dust/Dirt scratching the Stanchions or allowing Dust into
the Fork Seals.
Wojtek #212 uses Neoprene Fork Guards made by Noj, Inc.(1-800-456-0485
or 1-612-926-8144). They come in several colours and work and look like
the ones Glenn Metcalf has made. They cost $14.95 a pair and there's a
$2.00 shipping charge.
Also available from:
Road Rider MC
Accessories.
sales@roadridermca.com
Cost : $14.95+Shipping.
Home Made Wrap-Around Protectors
If are Fork boots too expensive and too difficult to install, then
Glenn Metcalf has a solution. An inexpensive alternative is to make your
own. Glenn says his wife got out the sewing machine, and using soft-backed
vinyl and some Velcro, made a pair of fork boots for his red F650. Off and
on in a jiffy! See
photo.
Seal Savers
I use neoprene fork boots from
www.sealsavers.com. I had to grind
a little off of the fork brace to get these fitted on the bike.
andy112652 #1481
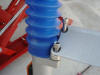
Concertina (Closed) Type Fork Protectors (Gaiters)
These are Full Length protectors like a concertina, made of either
plastic or rubber. They look like this:
Gaiters (Concertina Type Protectors) - 1
Gaiters (Concertina
Type Protectors) - 2 (Marty #436)
Advantages:
- Don't Trap dirt as they do no contact the Fork Stanchion. They
have a little hole at the bottom to expel air as they are compressed.
- Full length. i.e. The entire stanchion is protected.
Disadvantages:
One option is /6 BMW boots on (part no. 31 42 1 234 908) available from
your BMW Dealer. BMW 100 GS 1988 model part # 31 42 1 458 220
GS Installation Report 1
by Gerry #951
Q. Can I fit gaiters to my GS Dakar without modifying the fork
brace?
A. Yes, but it's not the easiest of tasks
- Bob's BMW sells a fork gaiters (boots) that will cover the length
of the forks. Their part number is 1950 and the description is "Fork Boot
Blue K". Othe colors will have a slight different number. The cost
(July/2002) is $9.95 and you"ll need two of course
- The boots appear to be a good quality product. Each one has two
sets of two holes on each side to facilitate drainage and allow air to
escape when compressed.
- They will also sell you the clamps if you don't want to go to your
local hardware store. Those are items 07 12 9 952 119 and 07 12 952 123 @
$1.39 each. You'll require two of each.
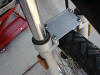
- Picture 1 shows how tight the space is in between the fork and the
brace. There's not enough room even though picture 2 show that it's
possible to fit one side with the bolts in place. The problem is that the
other side won't fit. It's just too tight.
-
- Removing the forks is simple. Remove the front wheel and loosen
the upper and lower fork clamps on the non-brake side. Slide the tube down
and off and slip the boot over the top. Reverse to re-fit.
- The brake side is slightly more complicated. There are two bolts
holding the brake calliper on and when you take them out, the calliper can
be moved out of the way. Loosen the clamps, remove the fork, slide the
boot down, and reverse to refit.
- Both boots should be fitting loosely over the fork seals and we'll
need to do a little trimming to fit them. Fit the brace loosely in place
and mark where you need to trim. Picture three is a little dark but if you
use a "Sharpie"-type permanent marker, you can mark a line to use as a
guide for trimming.
-

- Picture 4 shows the small amount of trimming necessary to fit the
brace into place. It doesn't take a lot!
-
- After you’ve trimmed both sides, the real challenge is getting the
brace into place with the hose clamps. One side is fairly simple since you
have a little wiggle room to use.
- The other side will be more difficult. I used a small screwdriver
to drift the hose clamp down and in between the boot and the brace. Take
your time and make sure you use the smooth side of the clamp (as opposed
to the side that is used with the screw to take up the slack) that gets
pushed down in between that area. It's tight but it'll work.
- Take time to fit both the upper clamp too. Picture 5 shows the
final fitting.
-

GS Installation Report 2
by BradG 1002
- The 90/100 model boots are thinner then the 5/6 model ones and
made of a different material but both are black.
- I was able to install the 90/100 type on my GS without
modification of the fork brace. I got the idea from a Dakar I saw with
them installed.
- The are long enough to work on both models of GS. Can't find my
receipt or I would give you the part number.
- Installation is a breeze.
- You'll need a stand unless your Dakar has a center stand.
- Remove the front wheel.
- Loosen the triple clamps and the forks slide right off.
- You should slide the boots on and put everything back together
including the brace.
- The boots should just fit in the gap left between the brace and
fork. The boots won't go clear down on the bottom but the overlap is enough.
- I used black tie wraps top and bottom to keep them in place. I
think I left the brace a little loose until I was done to allow some
wiggle room.
- The boots have several vent/drain holes top and bottom.
- The downside is that the BMW boots are pricey. I think I paid $25
each.
- The main point here is that if the boot is not too thick you don't
have to modify the brace.
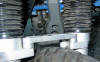 Gaitors on the GS with NO low Fender.
GS Fork Brace Alternative
After about 22K miles, the fork seals on my GS finally gave out despite
all diligent attempt to keep the fork tubes clean by a good, frequent
wiping with WD40 between runs. This was a real good time to think about
installing fork boots so I opted out for this kit from Wunderlich (Part #
8160394) that, albeit being pricey at $120 from Santa Cruz BMW, fit the
bill and looked good on the bike. Ken_WVHills #1405
- Based on the issues with the fork seals I installed the Wunderlich
setup as well. I have the low fender and was able to keep it. In order to
do so, I had to grind flush the heads of the bolts that hold the fender to
the plate in order to let the Wunderlich brace sit flat on top of it. I
put the Wunderlich brace right on top of the fender plate and used the
long screws that came with the kit on 3 corners and used a slightly longer
one on the back left one, long enough to stick out underneath about 3/8".
I then put the brake line guide on the bolt sticking out and used a nut
and a little bit of loctite to hold it on. If you want a picture or two
let me know. zdkayaker
- My bike had the low fender which comes with a black plate and then
there was a brace on top of that. From the paperwork I got with the bike
(it was used) it's a GS Technik brace. It angles upwards from the front to
the back of the brace, I guess to direct more air onto the radiator?
Anyway, because of this angle it sticks above the top of the fork seals.
To get on a set of fork boots I would have had to do a lot of grinding.
The better solution to me was the Wunderlich brace and boots.
zdkayaker
Dual Star
Does this sound right for fork boots for a classic? The company is
called Dual Star rather
than the daystar mentioned in the faq. I measure
that I need something that will go over the approx 60mm diameter of the
top part of the stanchion and is at least 22 or 23cm long. Do you think
the part number below is an appropriate size? I've never fitted boots so
not sure what kind of slack needed etc....and the compressed length of 2
and 3/4 inches would mean that "at rest" the things would have to extend
to about 3X their collapsed height.
For conventional forks with up to 13 of travel:
Fits upper tube dia of 40mm - 48mm
Fits lower leg dia of 51mm - 64mm
Collapsed height 2ľ
20-01085 ... johnny canada #1088
- Dual-Star is located just North of Seattle in Mountlake Terrace.
They are really nice folks and go out of their way to make sure their
products work for your application. I perfer talking to them on the phone
or in person rather than trying to navigate their web site. They have alot
more info and products than their website would indicate, at least that's
my impression. Why not give 'em a call and see what they have to say.
CascadeThumper #1653
- Barry - The boots for the R100 fit them perfectly; I think the
part # is in the FAQs, but you have to pay more for them as the Rondel is
in control. Greg #1245 SEVa
- The part # on the website is 20-01085. google "motorcycle fork
boots" I think it's the second hit. On the package it says, "
F00069-BK-03. I used the first part # to order. johnny canada #1088
- Ah Ha! Dual Star, not day star. Gotcha. Thanks wontco
#2003
Shield Type Fork Protectors
Another option for a fork protector are ones from Triumph. The Triumph
fork deflectors install in minutes and look professional. Check you local
Triumph dealer for A9641010 (Fork Protector Kit, T509, Tall Deflector) or
A9641005 (T509, Short Deflector) See picture on left..
Tall Deflectors:
Triumph
Shield Type Protectors - Off Bike 1
Triumph
Shield Type Protectors - Off Bike 2
Triumph
Shield Type Protectors - On Bike 1
Triumph
Shield Type Protectors - On Bike 2
Short Deflectors:
Triumph Shield Type
Protectors - On Bike
Advantages:
- Easy to install and remove. Just Two Bolts. You don't have to
remove the forks.
- Can move to another bike with the same Stanchion size
- Easy to wash.
- Don't Trap dirt as they do notcontact the Fork Stanchion
Disadvantages:
- Can probably break more easily than rubber or neoprene Gaiters,
particularly after a while in the sun, when the plastic becomes hard &
brittle.
- Not Full length. i.e. Stones could hit and scratch the stanchion
above the Protector.
Triumph Protectors
by Kristian #562
Without the Low Fender the Triumph Fork Gators will JUST fit the
GS/Dakar after a fashion, but will NOT be able to be installed properly,
because of the existing fork brace.
I had them on my GS, but their purchase on the stanchions was only on
about a 5-6mm lip at the top of the stanchion. Even rubbed a bit of grey
paint off. i.e. the do not sit properly over the full depth of the
protector seating band.
When I installed the G&G Low Front Fender even THAT lip
disappeared. I'm thinking about some sort of Holder, but haven't got
around to it yet.
Touratech Shield Protectors
Here are 2 pictures of the new Touratech Fork Protectors, TT# 300-0145,
for the 2001-present 650 GS and Dakar; they are mounted on my 2002 GSA.
These provide more protection than adapting the Triumph models (that only
go ca. 2" up) and should not interfer with the air flow to the radiator
(and thus not void the BMW warranty).
Last year I experienced overheating with my fork boots on and the
disappearance of same when they were removed. Admittedly, this was during
a summer ride to Georgia, but nonetheless, I wanted fork protection
without the potential cooling problems (no comment here Flash). So I just
installed the new Touratech fork protectors.
It took me about 15 minutes to install completely (instructions in
German, and I don't speak/read German, and no English version on web site
yet). There were LOTS of extra parts (which confused me...am I installing
correctly?) that I suspect are for newer bikes with the low fender
(spacers, new torx bolts, etc). $67 US, plus shipping and since I'm one of
the first with them, it took 4 months! We'll see how they work (mud is
still a problem), but they protect a lot more than the Triumph ones (see
FAQs), and fit perfectly (and hence the heavy TT price). Greg #1245
SEVa
Wunderlich Fork Brace for Gaitors
Wunderlich
- A&S BMW offers a neat set from Wunderlich especially for
the GS. This includes a new fork-brace that provides the required
clearance (which is the problem with simply fitting existing after-market
boots to the GS). $129.95.
Direct Link. No endorsement of A&S BMW is made or implied.
- There are some Wunderlich Gaitors available through
Direct Link BMW
of Santa Cruz County. I don't have them yet, but I read about them on this
board several months back -- one of the benefits of this set is they give
you machined fork brace so that you don't have to do that tweak yourself.
Chuckles #912.
BMW Fork Protectors
I know there are some BMW options as well listed in the FAQ but can
anyone tell me what dimensions I should measure to see if some "off the
rack" gaiters will fit? johnny canada #1088 - for a classic
- The 11 rib bmw /5 gators work best. I have had mine on since new
with the original seals going strong. Steve#417(in,us)
- When I first got my 98F I was living in Saudi Arabia and there was
a lack of bike shops so I measured my forks and went to the S*zuki shop
and ended up with a set that fit perfectly. I have no idea what model they
are off and this part number might be obsolete by now but it's -
"S*zuki-51571-40300" They have been on there since late 98 and still look
fine and my fork seals are still good. Doc
- And each one costs more than a pair of Daystars. I have had
Daystars on my bike ever since the 35 year old BMWs I started with ripped.
I've never needed to replace a fork seal on any F650 with gaitors.
Flash 412 (CO)
Fork Protector Opinions
Classic Fork Protector Opinions
Q.
I'm contemplating the purchase of some fork boots for my
GS, primarily at the suggestion of a good friend and well-seasoned rider. With
the variations of climate we have here in the Midwest, he thinks it would be a
wise addition to my bike -- and I tend to agree with him after riding through
quite a lot of weather and seeing some unique conditions both on and off road
this last year. For those of you having experience with them -- what are the
pros and cons? Anything in particular to be mindful of when riding with 'em?
Installing 'em? Maintaining 'em? Just curious. Any observations would be
appreciated. Thanks.
- BMW /5 and/6 gaiters work well-I have a pair on my 1999 F650.
DWM #365
- I just installed Gaitors from 88-89 R100gs They are a perfect
fit for the classic. Bill #391
- Buy Malcolm Smith Racing #152303 MSR Racing Fork Boots, Black
(or other colors, but I dunno if they have other numbers). They're $15.95
a pair. They're LOTS easier than BMW /5 fork boots to install. There is
NOTHING to maintain. The pros are that you will never need to clean your
fork tubes which will never get nicked from rock throws therefore making
your fork seals last a very very long time. Cons?... $15.95 and about 3/4
hour to install. If you do it while you're changing your front tire... add
about a half hour to that job. I got mine Thursday afternoon at Fort
Collins BMW / Ducati. Drop Sparky a line at
jason@bmwducatifortcollins.com and he'll fix you up. Or call
970/223-2829, but they're closed Sun and Mon. The /5 boots took me about a
fifteen minutes per boot to install. The MSR boots take about thirty
seconds to install. No lie. Harl was present when I installed them. We
looked at each other and LAUGHED at how easily the MSRs went on. He said,
"They're LOTS easier than /5 boots! I'm doing fork seals on Nancy's
bike real soon. I have GOT to get some of THEM.". What I meant by how
long it took to install the BOOTS was after the forks are all apart.
Pulling the /5 boot down over the lower leg is a B*I*T*C*H. The MSR just
slips on like it was made for the F650. Sparky told me that they try to
put them on ALL the GS and Dakars they sell now because it really is a
no-brainer that an offroad bike should have fork boots. Flash #412
(CO).
- Just installed fork boots on my brand new Dakar following FAQ
pages. My boots are from Cycle Gear and $29.99. Snipped off the lowest
straight portion of boots (opposed to slanting bulging part) immediately
next to fork bridge. Easy job (1 beer). Having no center stand yet
(waiting for my pay check and will get one from one of Product Evaluation
page), I dug a hole for the rear tire to go in. All done in 45mins not
including buying the boots (took 2 trips to different bike shops). Tomn
SF, CA.
- Fork Gaiters. There was a thread (on the old board?) about gaiters
voiding some warrantee. Namely the cooling system. I ordered a set of
gaiters, then read this thread, and in my paranoia the gaiters are still
sitting in my garage unused. Eventually I'll put them on, just not yet.
Seacuke #1214
- For those that are worried about cooling, you can buy neoprene
covers called sealskins or mudskin seal savers. These don't have the same
profile as accordion boots. I've got the mudskin on my bike with the
summers racing fork brace, and they work very, very well. unlike boots,
they wont suck in dust when they are extended. These could be used
without the fork brace with a zip tie. Check out
http://www.srcinc.net. mark #403
- I know of an owner who had bugs dried out on his tubes on an
extended trip that took out his fork seals. It was warrantied tho...
FWIW. Seems like a little wipe down while fueling could have prevented
that...bwfox. Chaingang Member #1131
- I purchased the MSR Fork Boots, and the fit is O.K., but not
perfect. They fit perfectly over the lower forks, and snug tight at the
top. My only complaint is that they fit tight enough to touch the fork
tube, so they bunch up a bit. If I were to do it over again, I'd probably
WD-40 the upper tube thoroughly before installation. If you have a new
2003, you might be lucky enough to have the new fork brace. I bought in
November, so I needed the new style. The cost was about $80.00, but it
works perfectly for the boots. Total cost was about $95.00, and the
installation was a piece of cake. Stuflinn
- Then there is always the cheap "Noj" (spelling?) fork
tube wraps. They don't look as good as fork gaiters but work just as well,
install in seconds and can be removed for washing. My daughter has been
using them on her VFR700 for the past 16 years and 80,000 miles and there
is not a ding on the fork tubes and she still has the original fork seals
- in spite of the suspension using an air-pressure assist for the springs.
Richard #230: 1997 Funduro
- The BMW Fork boots are expen$ive...I'd go with the MSRs for the
price. I followed the advice in the FAQs w/o a problem. They didn't seem
too difficult to install, so if the MSRs are that much easier then it
seems like a no brainer. Andy #618 (MD) 99F.
- I used "Factory Replica" aftermarket gaitors available
at any off road MC store. I used the size for mini mx bikes as our forks
are about the same size as these. At the bottom, I used the hose clamps
from a Suzuki DRZ-400. The drawback to these is you must remove the forks
to install them. David #476, '99 F650.
GS Fork Protector Opinions
- I installed rubber boots from BMW 100 GS 1988 model part # 31 42 1
458 220 on my F650GS. They fit well, even it the total length doesn't
cover all of the chrome tube. Unfortunately, the cross brace must be
modified to allow installation of the hose clamp. The clamps will
guarantee, that boot stay on, regardless of riding terrain. Jerzy
- I got the Gaitor kit (faltenbalgkit) from Wunderlich. It comes
with a new, nicely made and TÜV certified, brace to accommodate the
Gaitors. Just a wee bit more expensive than what my dealer wanted to
charge me for Gaitors only. Taking off the forks is no big deal, the whole
operation took me about two hours. Oyvind #1052
- I picked up a set of fork boots at a local (non BMW) shop that
sells a lot of dirt bikes and stuff for them. Had them on for 30,000
miles now on my Dakar with the original seals still working quite well.
Homeless (CO)
- I went down to the Yamaha shop and got a set of MSR boots for my
01 Dakar! They were $16.00, fit perfect and are extra cool cause they are
almost the same blue as the Dakar.......You still have to modify the fork
brace just a hair though. Scotty FT. W, TX. #1078
- Fork Gaitors with the low fender. I previously mounted a Touratech
low fender kit on my Dakar. Unfortunately that kit is designed using the
stock fork brace and doesn't allow enough space to attach fork Gaitors. I
have now had a custom "fork brace/low fender mount" made for me
that does it all. Pelle, Sweden.
- Happy Trails.
www.happy-trail.com. Makes a replacement for the fork brace that
bolts on in the same holes but leaves room for the fork boots to slide
over the top of the sliders. I am going to do this also. You are right a
dark blue fork boot, (gaiter), would look good on the Dakar. Hope this is
of some help. Bert. Chaingang Member #1131, 02 F650GS, (Wife's), 03 F650
Dakar.
- I have a Pair of Ariete Pro Fork Gators mounted on my Dakar.
Perfect application. I've used these same boots on lots of K's as well.
My friend machined clearance on the fork bridge on his Bridgeport but it
could be done on Drill press with a sanding mandrel as well. My Digital
Camera is on it's way back home and I would be happy to send a Jpeg or
2.Cost for the boots $40.00 from Freeman's Cycles in Beverly Mass. I also
mounted the new and improved low G&G Technik front fender at the same
time if anyone would like to see that setup. The fork boots needed to have
air bleed holes punched in them to let air escape. I used a leather punch.
Five small holes on the back side on the lowest pleat did the job.
Freeman's phone is 978-922-6668 ext. 4. They are in stock usually. Gary #710
- I just put my Gaitors on and it using the one for the newer
R100G/S. There are two gators for the R100. Get the ones for the newer
model. Supertech. Dakar
- Just installed fork boots on my brand new Dakar following FAQ
pages. My boots are from Cycle Gear and $29.99. Snipped off the lowest
straight portion of boots (opposed to slanting bulging part) immediately
next to fork bridge. Easy job (1 beer). Having no center stand yet
(waiting for my pay check and will get one from one of Product Evaluation
page), I dug a hole for the rear tire to go in. All done in 45mins not
including buying the boots (took 2 trips to different bike shops). Tomn
SF, CA.
- I installed the Sealsavers on my '01 Dakar two years ago without
any brace mod. I used thin zip-ties at the bottom and glad to report they
have performed very well in harsh conditions without any problems. Not bad
for a $20 fix IMHO.
MSR Fork Boots on a 2005 GS
I ordered a pair of thje MSR gaiters (part number is posted in another
thread) for my 2005 GS. Yesterday, I took the forks off, carefully ground
some meat off the brace and tidied it up with my Dremel so the gaiters
would fit. I put the gaiters on (using slighly soapy water to ease
installation) and discovered that each fold of the gaiters is so tight
that they tend to 'bunch up' on the fork tudes as the tubes move up and
down. I was hoping they would have better clearance on the fork tubes.
Does anyone have recommendations for gaiters (boots) with more clearance
for the tubes? Thanks. lagondacoupe
- That's about how they fit, alright. If you put a wipe of oil on
the tubes, then they don't bunch as much. Scott, ID #1244
- BTW, I was considering getting a pair of gaiters also, but decided
instead to buy a set of front fork protectors from Touratech. It is
basically a metallic shield mounted in front of the forks to protect it
from rocks. No need to remove the front wheel to mount them and the shocks
are still accessible for wiping down and inspection. A.T. #1625
- I don't know if they were MSR or not, but I had a pair that did
that as well. The Daystar "Factory Replica" boots for mini-cycles that I
use now don't. dlearl #476
Fork Protectors and Warranty
What's the Story with BMW not Accepting any Radiator/Cooling Work on
Warranty with Fork Boots?
- I purchased a fork gaitor set complete w/new fork brace directly
from Wunderlich about a year ago. Some months later I received a letter
from Wunderlich's marketing department, saying that BMW was claiming that
fork gaitors might restrict airflow to the radiator/engine, and that any
warranty claims related to overheating would be rejected if fork boots had
been installed. Wunderlich further wrote that their own tests had shown
no signs of overheating, and wrote it off as "misgivings" from
BMW. I still have my gaitors on, and do not intend to get rid of them.
Oyvind #1052, Bergen, Norway.
Hot Topic - Feedback on the issue
- I had ordered fork boots thru my dealer, but when I went to pick
them up, a different parts person told me of the memo issued by BMW that
stated they would not accept any warranty claims for overheating if fork
boots were installed. He then refunded my money. '01 Dakar -- Nashville.
SScratch
- I recall someone saying in a previous post that they'd been told
that BMW wouldn't cover under warranty any radiator or overheating
problems on bikes where fork boots (gaiters) had been fitted, presumably
because the fork boots slightly restrict or modify the cooling airflow to
the radiator. Trevor#999
- 1) BMW does not install fork boots. 2) Many (most?) folks who buy
the bike DO install fork boots. 3) BMW CLAIMS that fork boots cause the
bike to overheat, a phenomenon not observed by the Chain Gang in general.
And BELIEVE ME, we WOULD say something if it were true. 4) BMW then uses
"owner modified vehicle, fork boots installed" as an excuse to
dodge legitimate warranty claims for things like defective radiator
and/or leaking water pump. Q.E.D. If you DON'T have fork boots, you'll get
a nick from a rock chip which will take out not only your seal, but quite
possibly require the fork tube to be replaced. THAT is not covered by
warranty either. Anyone with any sense would much rather take their
chances with the seals UNDER the boots. Pretty soon owner-installed
non-factory BMW handlebar streamers will make your entire warranty null
and void. So much for the "legendary motorcycles of Germany"
slogan. The sphincters in charge now are taking it in an entirely new
direction. Flash#412
- Anyone getting the feeling that BMW doesn't want any company but
theirs to design improvements to their bikes, or to sell any accessory for
BMWs? I'll bet that if they had decided to install fork boots on the GS,
or to sell them as an official accessory, there would be no problem - even
if there was overheating, it would be your fault for not using the
official BMW radiator fin cleaning soap, dissolved in distilled water. If
the coolant system is so delicate that it can't handle a slightly wider
fork tube in the way of its airflow, I would say that the coolant system
design needs to be improved. After all, doesn't it need to be able to
absorb a bunch of bug hits during the summer, without overheating? Richard
#230: 1997 Funduro
- Sounds like another BMW 'snow job' you would think that radiator
guards would have more effect on the cooling system than fork boots. I am
in the process of making a set of guards, guess I will have to be wary of
the marginal performance of the BMW cooling system :-) Jack, F650GS,
Queensland, Australia.
- When I took my '03 in for it's 600 mile service, I asked if they
had heard anything on this. Not only had they not heard anything, there
were no releases from BMW NA that they could find on the subject either.
As for warranty, they said it would have no effect as far as they were
concerned as long as the boots were not some home made monstrosity that
worked in some way other than a standard fork boot. They did, however, say
that without proper installation and maintenance, dirt could become
trapped under there and take out your seals. If this happens, then they
will probably not cover this problem, which seemed fair enough. I
routinely raise the boots and make sure everything is clean and lubricated
under there. stuflinn 2003 GSA, Pittsburgh, PA.
Has anyone had trouble with over-heating after installing fork boots?
- Not at all. Of course it's not summer yet but at 80F it was doing
just fine in the stop-and-go. 2001 F650GS, Aurora, CO. chppdlvvr
- Could you have possibly damaged the radiator taking the
forks on and off? Or loosened a hose? David #476, '99 F650, Las Vegas, NV.
- FWIW, when I installed a Wunderlich high fender mount and Acerbis
fender (which almost COMPLETELY covered the radiator) I noticed the fan
coming on more often, but the oil temp never varied from it's pre-fender
norms. I've had fork boots on for two years now and never had any
overheating problems. Because it's so hot here in the summer, I've gone
back to the original fender. (and t-66s don't need the high fender). David
#476, '99 F650, Las Vegas, NV.
- BMW (ok - George in Alaska) installed my fork boots. never
a problem with overheating. y_kiwi Lance, #1303, '01 F650GS, '96 G650ST.
- Foothills BMW of Denver installed my Wunderlich fork brace and
boots. BTW - I've never had an overheating problem with the fork boots
and home-made radiator protectors made of steel mesh. Rod CO '02GSA rpozak
- BMW, AG, is a company with a factory in Spandau, Germany. BMW of
Denver is a Colorado company that sells products from Germany along with
other products and services. Your fork boots were not installed on your
bike in Germany. BMW, AG, did not install your fork boots. Flash#412
Fork Gaitors Void Warranty (GS/Dakar)?
I just received a letter from Wunderlich. Apparently, if you fit the
Wunderlich Gaitors then BMW claims that, "the external temperature
sensitivity limit of the engine is lowered, which could cause damage
under extreme conditions. Therefore BMW are refusing any related
claims." Wunderlich goes on to say that "none of our repeated
tests, nor consumer feedback have confirmed these misgivings." Well,
I'm not removing mine and having to replace the seals every 10' km again!
Oyvind #1052 Bergen, Norway.
- BMW claim fork gaiters reduce the air flow to the radiator
and cook the engine! Imagine how dangerous a leaf or crisp packet over
the radiator would be! These clowns are obviously on something or the
radiator is too small already. Andy Leeds UK #982
- Wouldn't the same be true of radiator guards? The Touratech
item in particular seems to cut off some surface area. GSTimRugbyUK
- I had the fork Gaitors and the Touratech radiator guards on
my bike and I did have cooling problems. I have removed the radiator
guards - as a precaution. Warranty service discovered a faulty thermostat.
an $18.50 part. When I think about this whole thing I get madder than a
cat in a pool. I'm constantly obsessing about my fan. It ALWAYS goes on on
the way home from work. I always think I'm just about to boil over. I've
burned through two fans and had warranty on both. I have fork boots and
used to have the Touratech radiator guards on there, and I'd like to put
them back. Why will this cause the engine to overheat. Does the radiator
suck that bad? Is there a way to make the coolant constantly circulate
through the radiator? chrislindau
- That sucks. Well, I know I'm not putting them on until I'm
out of the warranty. At least BMW replaces the fork seals as a warranty
item. Annoying as it is. My fan goes on a lot too. Richard, you're in
Pacifica, so that doesn't count. Flash, when not moving, usually the
engine doesn't produce as much heat anyway (unless you're doing burnouts
;). Or are people overheating standing at idle? But yeah, I'm sure Gaitors
have a bad effect on cooling, I just doubt that it's that much. And don't
forget to place your aftermarket horns / lights / whathaveya out of the
radiators airflow. its_xls 2001 F650 GSA
- If the F650GS engine cooks bcoz of fork Gaitor.... I really
feel sorry for all of us. But if BMW came up with such idea of voiding
warranty..... they have no confident in their product. Honestly I have
never heard an engine cooked bcoz of fork Gaitors. anyone heard it b4?
Cheers scx
- Riddle me this, Batman... if the bike is not moving... how the
heck can Gaitors have any effect on impeding airflow to the radiator? BMW
is a bag of sphincters. Flash 412 (CO)
- Sounds like a communication error to me. I know I have gators
and have had cooling system warranty works done. This needs to be reread
I am sure. Steve 1130 Or
- Sounds like BMW is dodging a warranty issue again...wanna bet
next year's model has a bigger or thicker radiator? Flash...don't
construe this as supporting BMW. My understanding of engine heat
management is that heat output increases as the THIRD power of engine
RPM/load/road speed (pick one). The radiator's cooling capability
increases as the SECOND power of road speed. No speed = (essentially) no
cooling. Therefore, radiator fans were invented to "simulate"
road speed (unfortunately, F650 fans frequently "simulate" NO
road speed:-)) ANY blockage of the radiator (Gaitors, bugs, mud, etc) will
diminish the radiator's cooling capacity. But it seems obvious that the
F650 cooling system is marginal at best (seems to be another BMW weakness,
ranking right up there with perpetually substandard seats and sidestand).
Marty #436-Chicago-97 F650F
- This is nuts. I have had my fork boots on my bike for the past
4 years and my fan only goes on about once a year (after about 15 minute of
idling in traffic). How could the design of the coolant system be that
air-flow sensitive? And if it is, why would it be designed that way?
Richard #230
- This is one of the most stupid things I've heard lately!
Imagine what a little dirt or mud would do... Well sir, you got your
offroad dirty, why your warranty is void.... They don't want anyone else
to sell you stuff for your bike, and they are idiots to think that we
won't understand this! rakaD
- I can attest to this as well. I just got my 30,000km service
done in Perth, Australia, and they dinged me on my gators, saying that if
the engine over heated it would not be covered by warranty. So its
definitely a global BMW thing. Having said that, I have been riding for
hours on end in some of the hottest deserts in Australia (officially over
110 F in the shade, assuming you can find any), with the Touratech 39L
tank (which blocks airflow) and not once has the bike overheated, even
after hour long climbs up soft sand-dunes at high revs/low speed. The temp
warning light did not come on once (hope its not broken). rodskogj
Overheating Feedback
OK, so we've debated this issue regarding BMW's service bulletin that
says fork gaitors on a GS (2001 and newer) can cause overheating and void
the warranty, etc. Right, so I've had gaitors on for ca. 1.5 years and
never had a problem. That is, until this summer back in Virginia (recall I
was in California for much of last year on sabbatical). Before the James
Bay trip, I did a "test run" down to Savannah, Georgia (500mi) under very
hot conditions (97 °F); slab for most of it. I had just done the usual
checks, including coolant, and all was okay before I left. When I got to
Savannah the coolant was gonzo (well, about one liter was gone) and the
bike was overheating. I called my dealer (still warranteed) and they said
"get rid of the gaitors, but we didn't see 'em on the bike (wink, wink)".
I cut 'em off, replaced the coolant lost and returned a few days later (at
a meeting in Savannah) with the temps in the 90's again, BUT no
overheating at all. Hmmmm, maybe Satan is right. The James Bay trip was
cool after we got north and I had no overheating. I discussed my empirical
observations with Ike, who felt that the radiator surface area (not the
radiator itself) seemed small in comparison to his classic, so maybe the
gaitors do restrict the ventilation enough under very hot conditions
(i.e., where we both live!).
So, I thought I'd share these observations. Just to cover my bases, the
bike is well maintained, proper oil, etc., and ridden at sane speeds on
and off road. Greg #1245 SEVa
- Speaking of overheating, at Chief Joseph rally I noteced a few
650's appeared to have spewed coolant onto the left side of the case..
also, I noticed that one of the vendors was selling an additive (Super
Wet?) that would increase coolant effectiveness significantly.. would have
bought some but no room.. I wonder what kind of motor oil they and you
were/are using. motoplaner #1671
Don't know about them GSs but on a Classic, that'd be ALL the
coolant and I would imagine that if ALL the coolant had mysteriously
disappeared then perhaps some overheating might occur. I would also think
that if the coolant had reached boiling temps, the overheat light may have
come on. An engine can overheat while still being full of coolant, the
coolant not getting cooled enough to keep the engine heat down at
reasonable temps.
Not to trash your observations Greg, it's just that you may
have lost coolant due to some other reason. My Classic every now and then
thinks it's an old British car and just pukes coolant outta somewhere and
then it doesn't do it again for awhile. Thing is, I likes my gaiters and I
ain't takin'em off for no one, not even Ike when he's all gussied up for a
night on the town.
- Greg, there is a possibility that you may have a sticking cooling
system thermostat. This can show similar symtoms. Pull it out and drop it
into a sauce pan of water, fire up your stove and bring water to the boil.
You could get techo and use a thermometer to see the temperature that it
opens at. Main thing is, it opens FULLY, before the water boils. If not,
it cactus and you need to replace it. jack
Do Fork Boots Cause Overheating on Classics/ST?
Am I understanding the FAQ's correctly? The Classic F's do not have
fan/overheat problems associated with fork boots? Only the GS and Dakar
experience overheating? wontco #2003
- The classic F650 has a radiator which is at least twice as big as
the F650GS, so no overheating problems there. Trevor #999
- I've had the accordion type on my '99 for a year and a half and no
problems that the bike complains about. Protect the fork seals and look
better at the same time. Win/win. Otter
- I've had the accordion style on since 98 and never had overheating
problems. 3 years of that in Saudi Arabia and 5 in Australia. You'll be
right Doc
- I've been running fork boots on my 97 for about 1.5 years. No
overheating problems. Will in NM #1566
I had no idea 10 weight fork oil made such a
difference.
Switching to 10 weight should be mandatory for all riders
over 150 lbs.
Thank you, FAQs! What a difference. Tempo
#1908
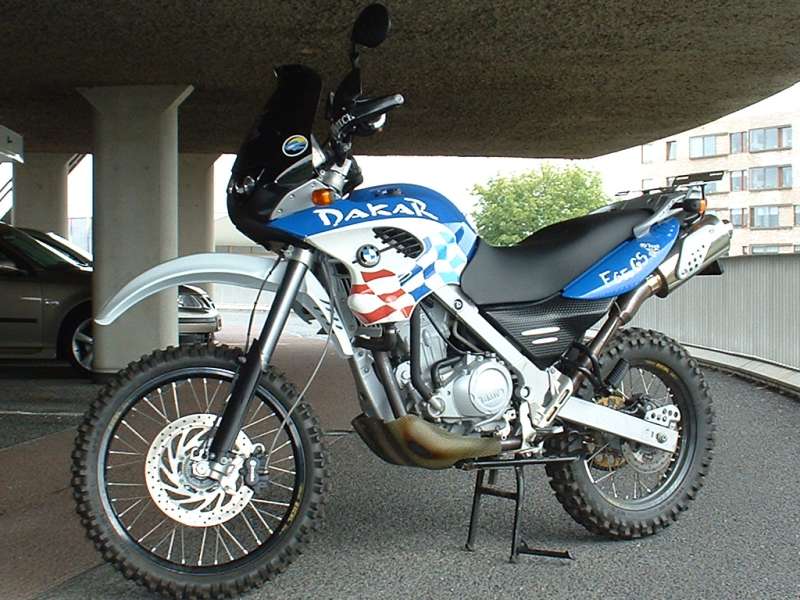
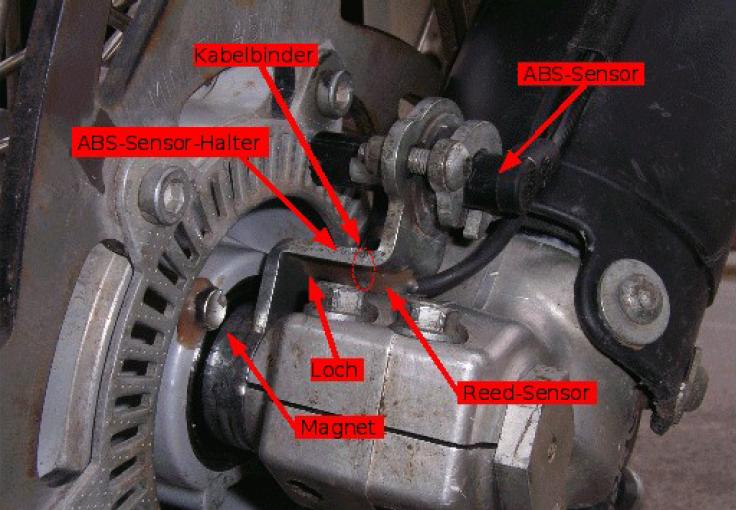

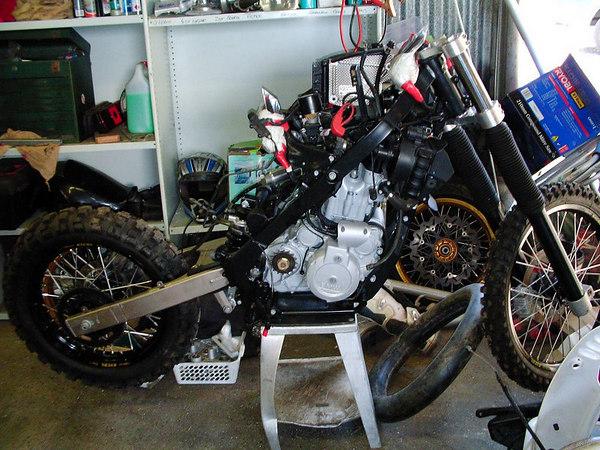
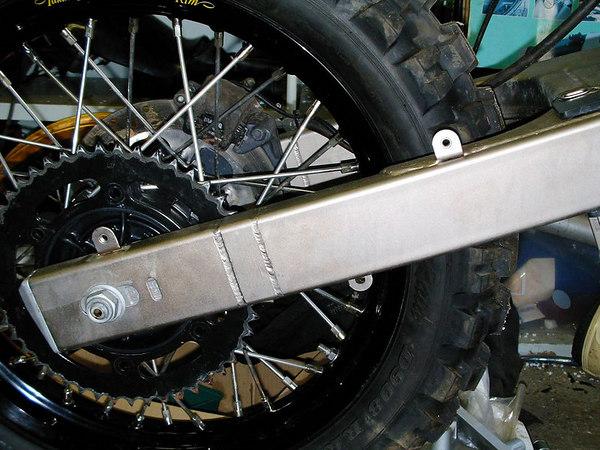


 For
anyone interested, the website is:
www.emigracing.com
For
anyone interested, the website is:
www.emigracing.com

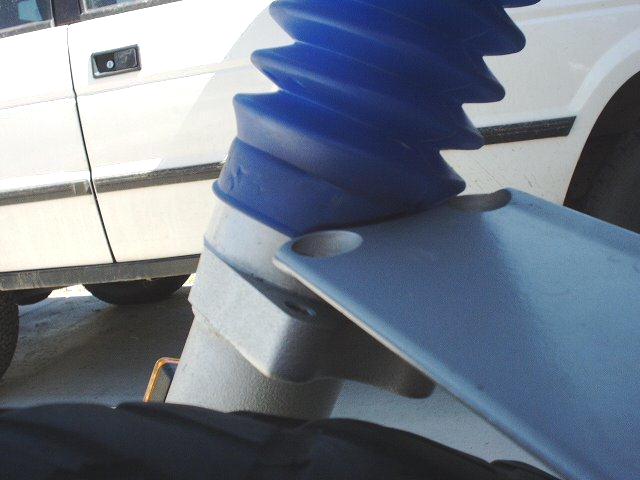

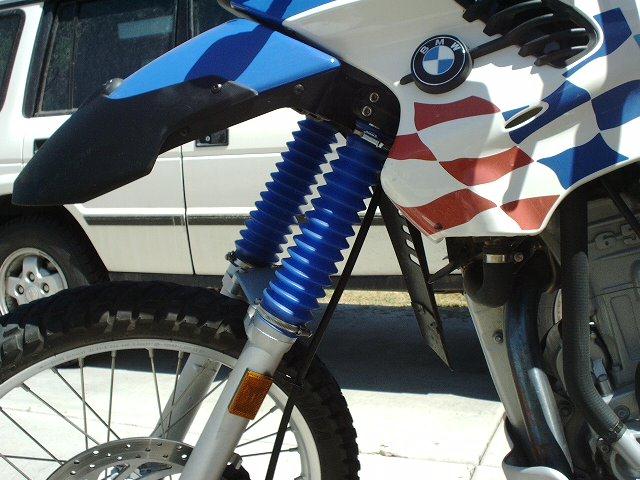
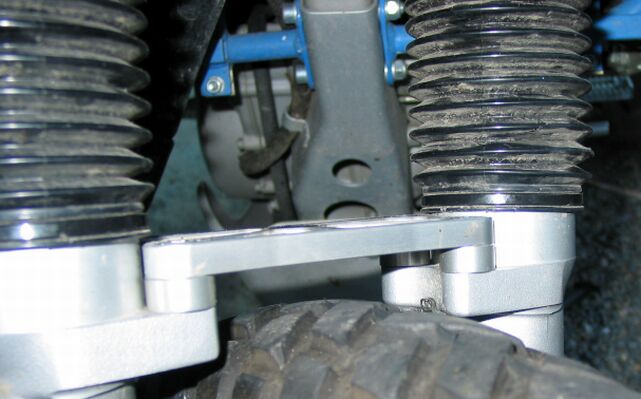 Gaitors on the GS with NO low Fender.


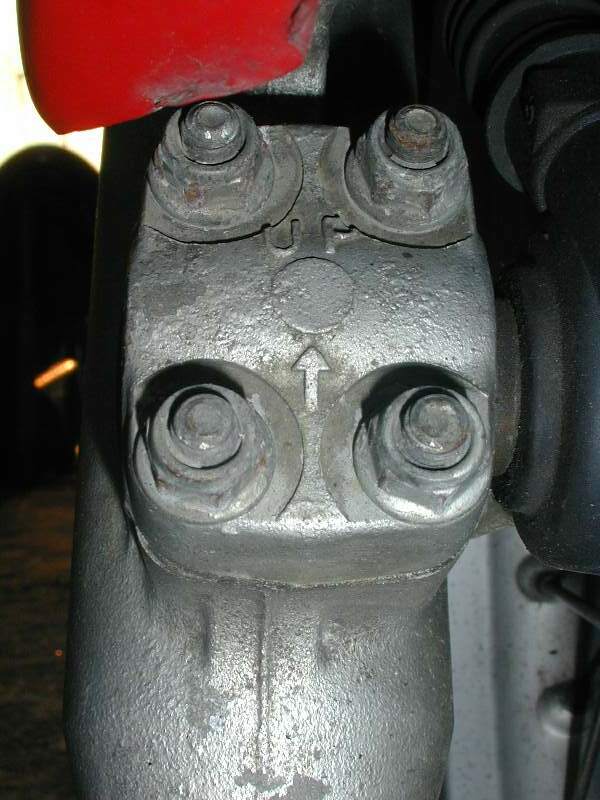
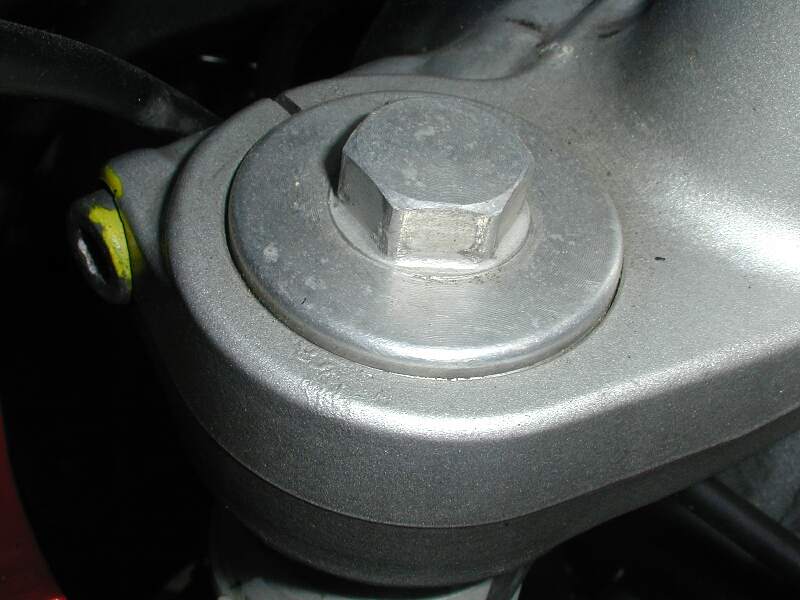
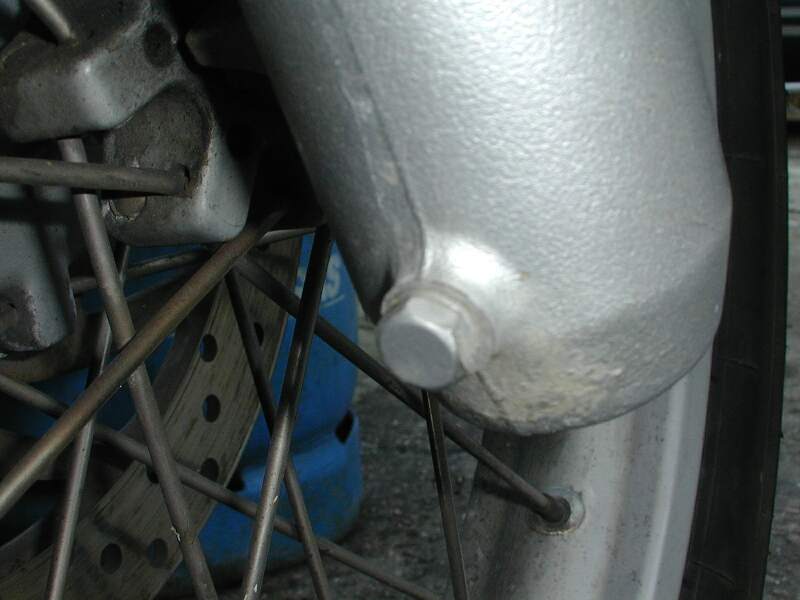
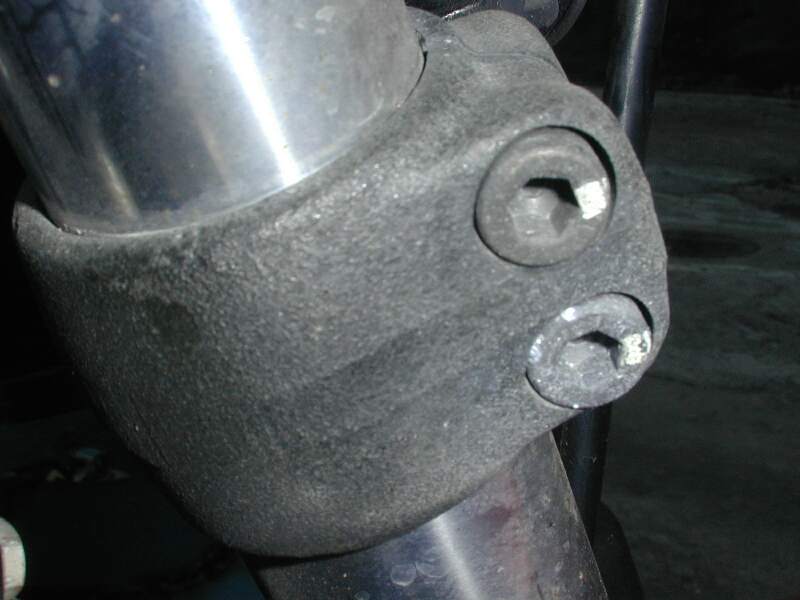
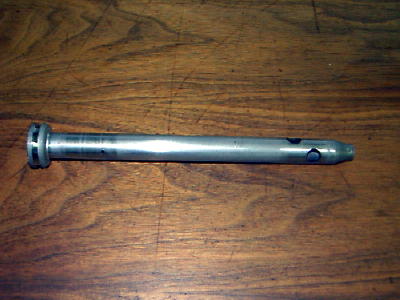
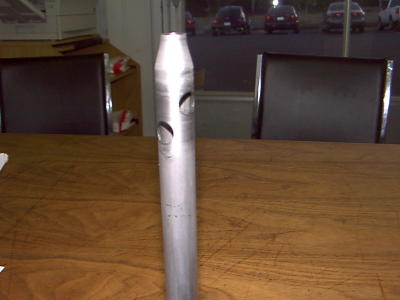
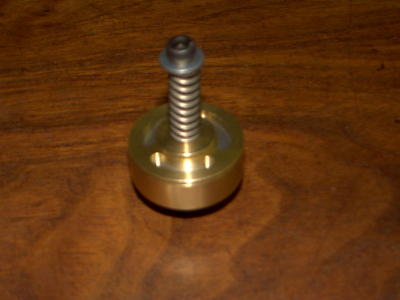
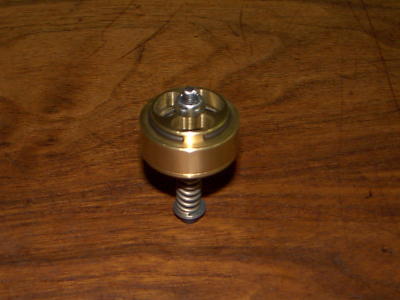
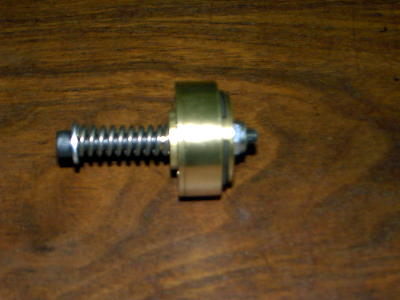
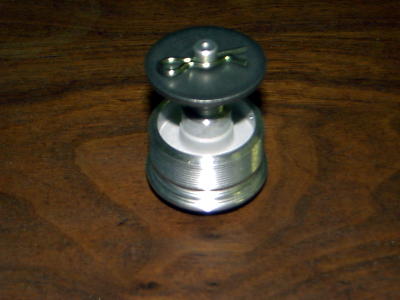
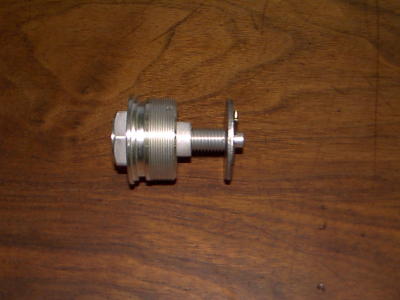
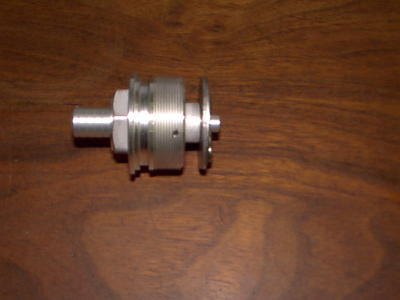
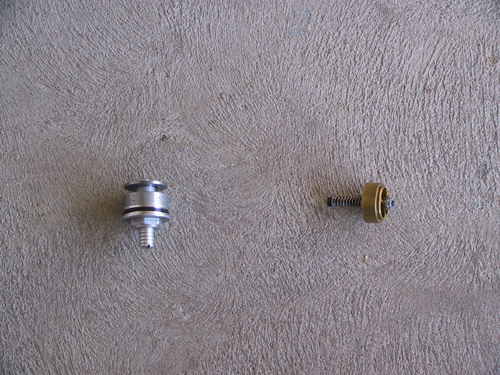
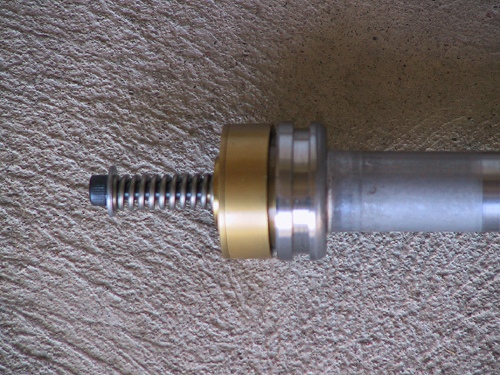
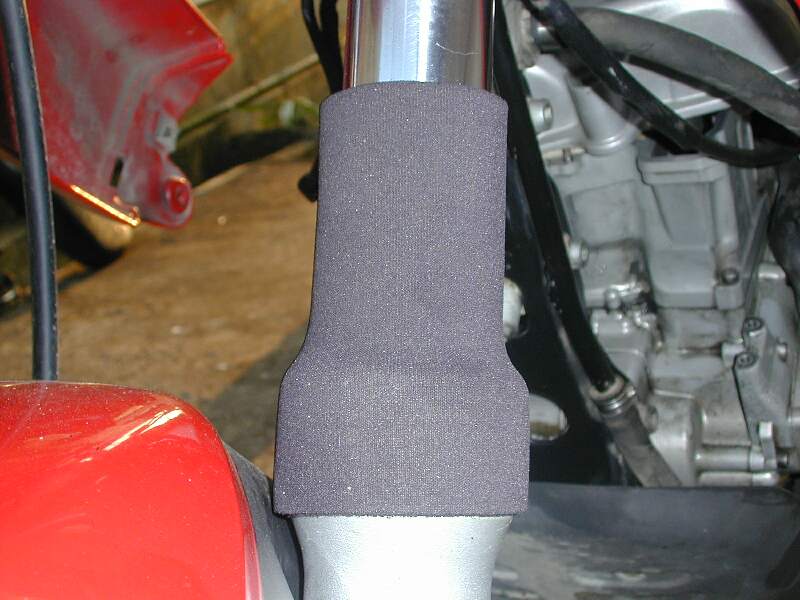
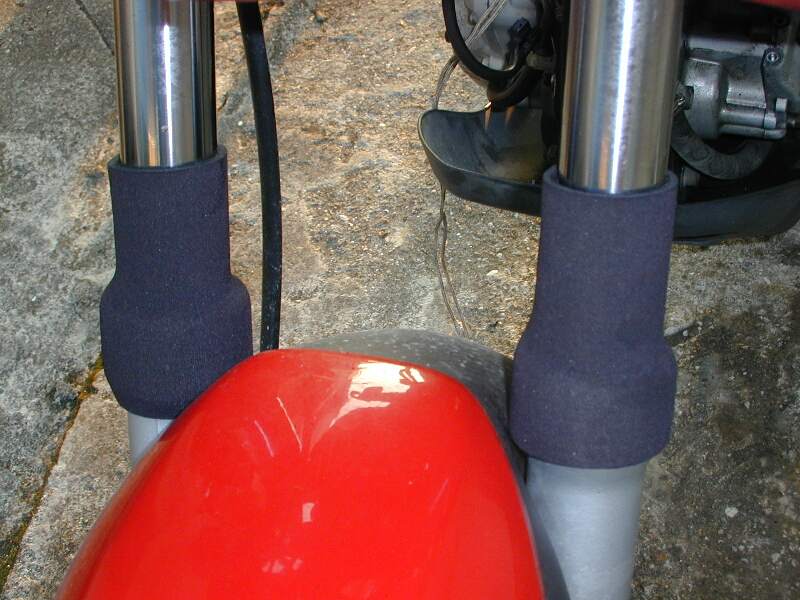
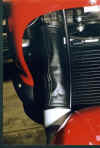
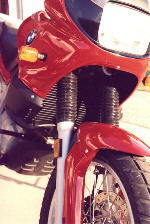
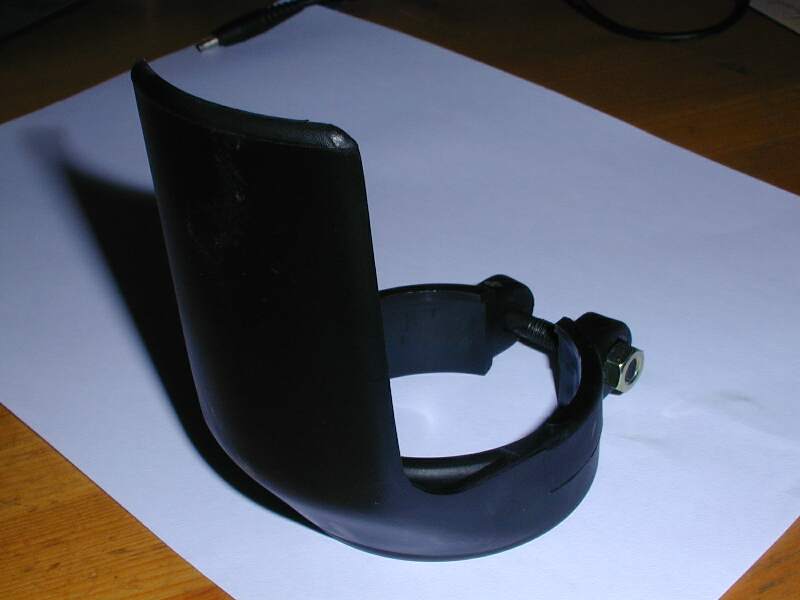
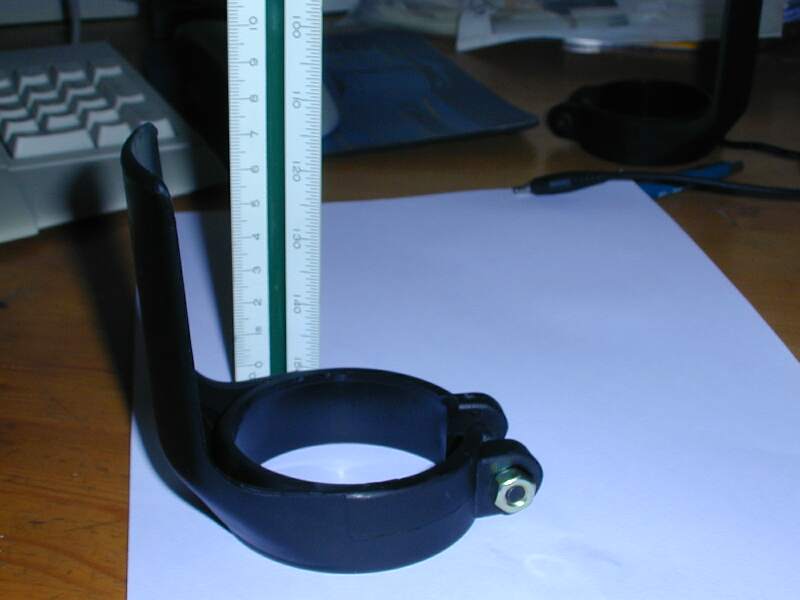
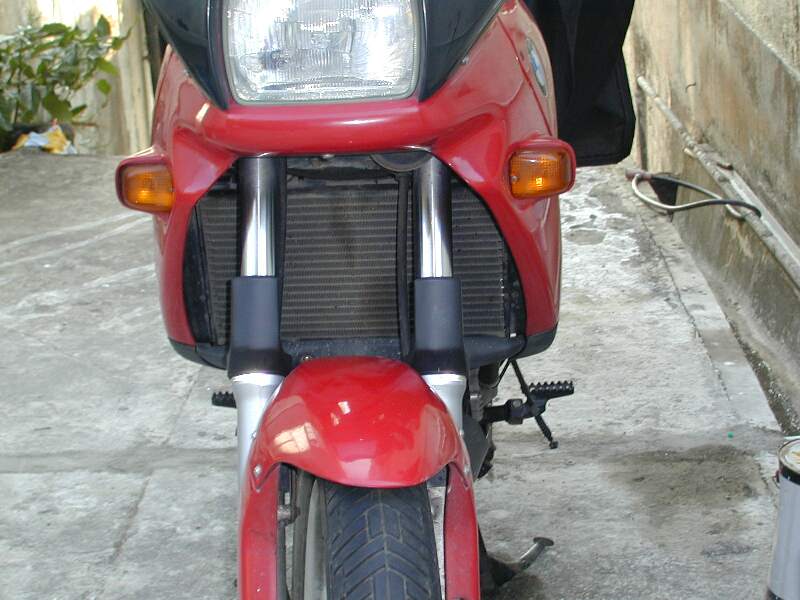
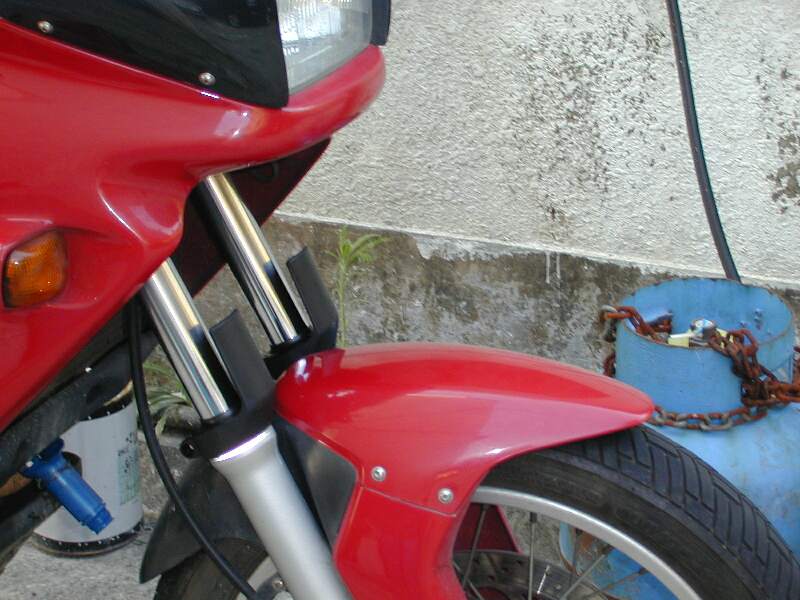