Since most GS's are relatively new bikes with lower
mileage, I'm going to skip the fork seal replacement for this upgrade, to make
the discussion simple. If you want to replace the fork seals, the procedure for
changing them is the same as for a pre-GS F650. The
Fork Oil Change FAQ (for
Classic F) and the Fork Seal FAQ GS
Dakar may also be of some use.
This FAQ is limited to the GS/GSA at present as on
the Dakar, the fork tube caps are threaded. I'm also not positive the damping
tubes have the same holes in them as the GS's. See below for more information on
the fork tube component differences between the Dakar and the GS.
-
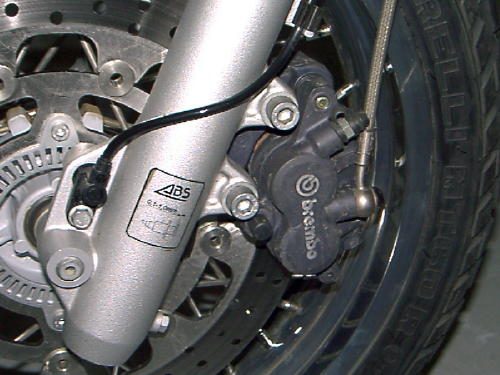
Start by lifting the bike off the ground to remove the forks. Remove the
two bolts holding the front brake caliper to the fork leg, using the 8mm
Allen. The
caliper can be kept out of your way by tying it back with some wire. If your
bike has ABS, you'll need to remove the speed sensor. Remove it with the 10mm
socket, and pay attention to a small spacer/washer that may be between the
sensor and the fork leg.
-
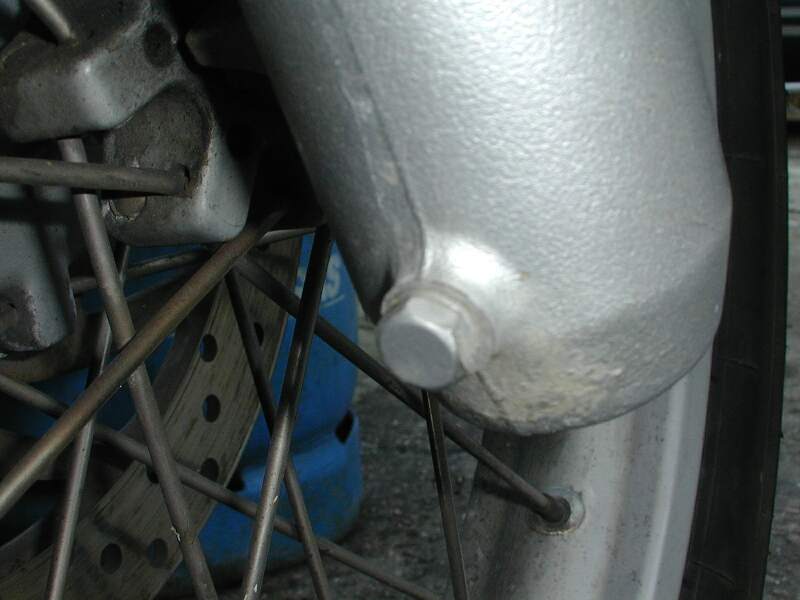
On the bottom of the fork, there's an Allen bolt, which holds the damper
tube to the bottom of the fork leg. Loosen it enough just to break it loose, not
enough to let fork oil drip out. This bolt can be tight, so loosening it when
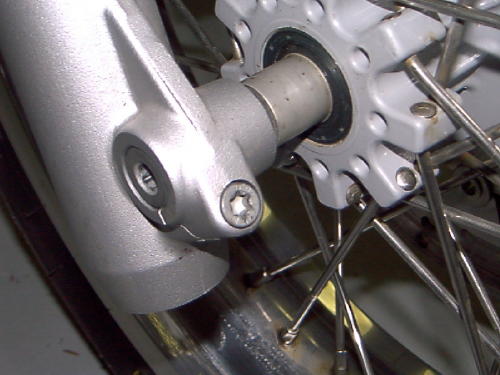
the fork is out, or with a worn Allen socket can be difficult. Loosen the axle
clamp with the #45 Torx Bit. Unscrew the axle with the 8mm Allen, and slide it
out to release the wheel. Watch for spacers, there's one on each side, that can
drop down when removing the wheel.
-
Now's a good time to drain the forks of their fluid, OEM fluid is 7.5
weight. With a 10mm socket, loosen the
drain plug. Have a drain can available, and while holding it close to the
drain, remove the drain plug and allow the can to catch the fluid. If you set
the can on the ground first, you're going to miss the can, Murphy's Law applies.
After they are completely drained, re-install the drain plug and tighten to 4.4
ft lbs or 6 Nm.
-
Remove Fork brace with 6mm Allen.
-
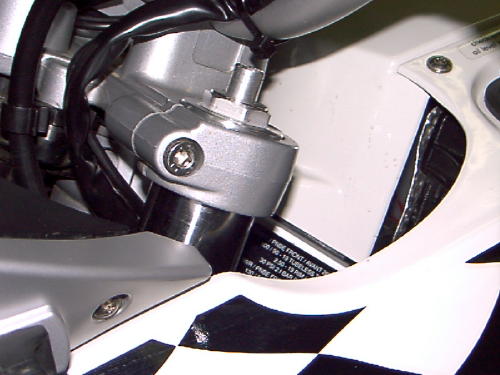
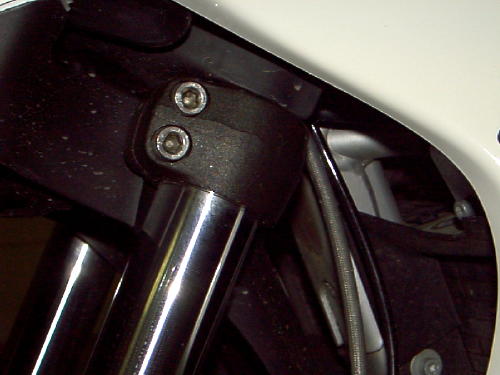
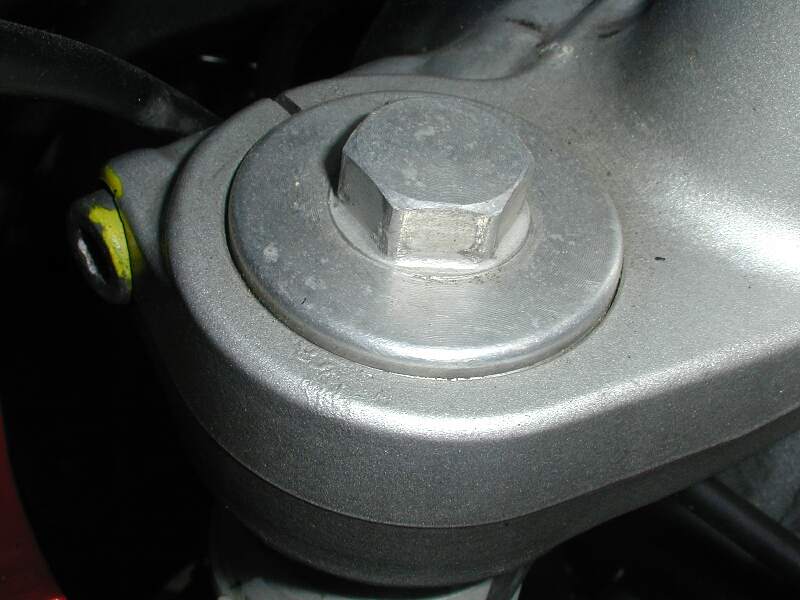
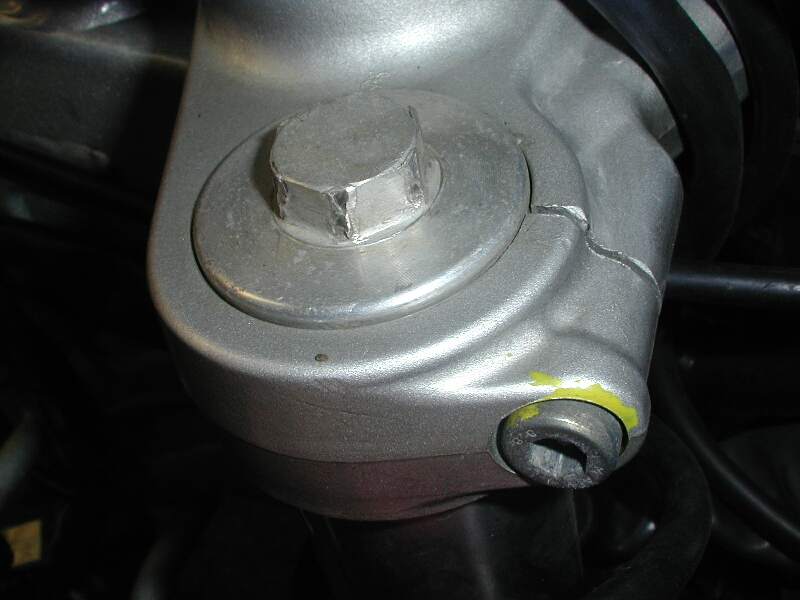
Next, loosen the three fork clamping bolts on the
upper (1# for each fork, marked yellow) and
lower (2# for each fork) triple clamps with the 6mm Allen. The Allen socket
you use should be fresh, a worn one can strip the Allen hole when loosening or
tightening. When loosening the third bolt, keep a grip on the fork tube, as it
will slide down and drop on it's own, once loosened.
-
If you decide to hold the fork tube in a vise, you'll need to use wooden
or plastic protectors, to protect the finish of the fork tube. Any nick in the
fork tube is bad, it can ruin the fork seal. Clamp it toward the top of the
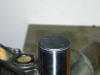
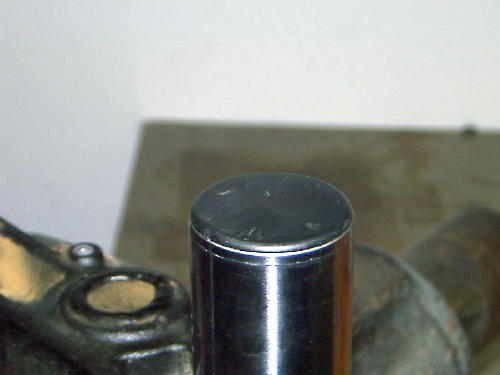
tube, and just snug enough to hold it still. Remove the black plastic dust
cover, it pops out with your fingernail. With one thumb, push down on the fork
cap against the fork spring pressure, to expose the inside retaining Circlip.
While pushing down slightly, use the mechanics pick to get behind and pop out
the Circlip. Be careful to have a hand on top, so it doesn't fly into orbit.
Remember, Murphy's Law takes no day off.


-
This will release the fork cap up above the fork tube with the pre-load
spacer under it. Remove the fork cap, the pre-load spacer (looks like a piece of
exhaust tubing), the washer and then the spring. Remove the fork from the vise
and compress it to bottom it. While it's laying flat on a work surface, remove
the Allen bolt from the bottom of the fork leg, and notice a copper washer that
should be on the base of this Allen bolt. While keeping the fork compressed,
slowly tilt the fork upside down till the damping tube slides out, and set the
fork assembly aside.
-
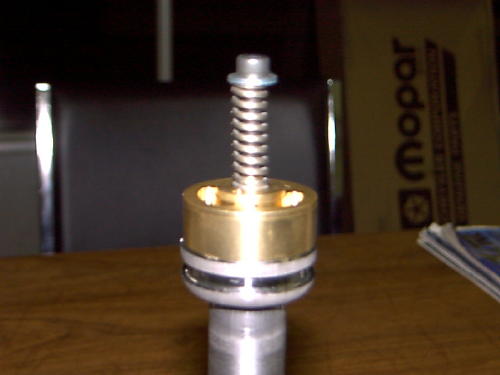
Carefully remove the damper tube piston ring, and set it aside. Trial fit
the emulator to the damper tube top cup. If the fit seems loose, there are snap
rings in the kit that fit around the base of the emulator. This expands it's
diameter, for a closer fit, and I used them on mine.
-
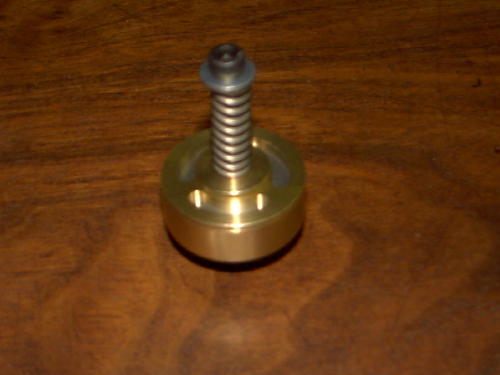
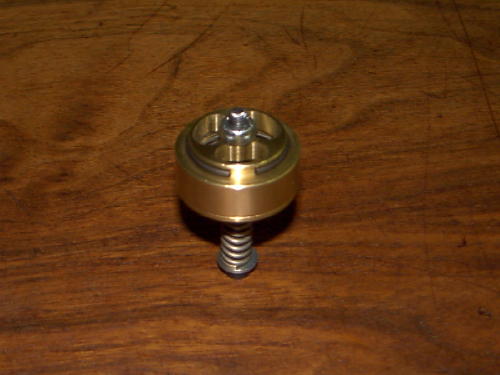
The emulators need to be adjusted before their installation. Loosen the
3/8" locknut on the bottom side, and unscrew the Allen adjuster until the
adjuster spring is neutral. Turn the adjuster to two turns in, for an initial
setting.
-
Re-mount the fork into the vise, and leave the fork compressed. Pour
550cc of fork oil into the fork tube, and pump the fork assembly to get the air
pockets out of the fork. When you can't see bubbles looking down into the tube,
you're done pumping. Drop the emulators into the fork tube, and let them settle
down through the oil. With the fork compressed, measure from the top of the fork
tube to the top of the oil level. RT calls for a fluid height of 120mm from the
top of the fork tube, so adjust this fluid height accordingly. You may wish to
consider changing the weight of your fork Oil to 10 wt.
-
Extend the fork leg, and add your choice of spring, RT recommends their
springs for a higher tension. The washer goes back in, then the preload tube,
then set the fork cap on top.
-
If you want a factory pre-load, you need to cut off 12mm (the height of
the emulator) from the pre-load tubes. Hacksaws rarely cut straight lines, so if
you have access to a tubing cutter, use it to make your cut. Many owners may not
have a large enough tubing cutter available. If you must use a hacksaw, fit a
stainless hose-clamp around the pre-load tube and tighten it down at the line to
be cut. The hose-clamp will act as a guide, then use a flat file to clean off
the sharp edges.
-
RT calls for a pre-load of 20mm, which means you're going to compress the
spring 20mm as a head start. Measure the distance from the top of the fork cap,
to the top of the fork tube. Since the top of the fork cap sits recessed into
the fork tube by 10mm, cut the pre-load tube so the top of the fork cap top will
sit 10mm higher than the top of the fork tube. Now, when assembled, the pre-load
is 20mm. Push the fork cap down against the spring, and re-install the retaining
Circlip.
-
If you have a Dakar, there are a couple of differences. First, the fork
tube caps are threaded in, like the Classic F, not held in with circlips. Loosen the upper fork
clamps first, so you can remove the
caps. If you don't loosen the upper clamp, you'll end up
stripping the hex off the cap, since the clamp squeezes on the threads. When
tightening the cap during re-assembly, tighten the lower triple clamps first,
then tighten the fork caps, and finally tighten the upper fork clamp last.
-
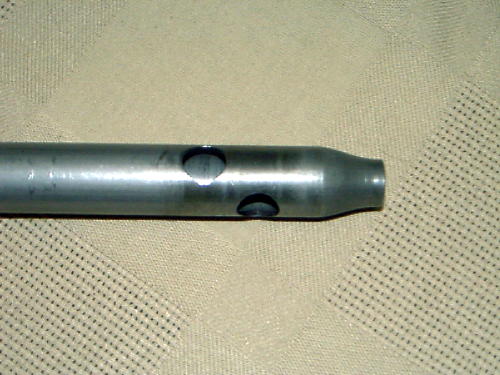
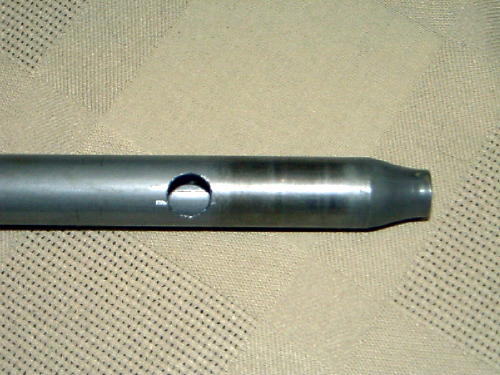
Another difference may, or may not, be a difference in the Dakar damper
tube holes. Since I've never seen a Dakar fork apart, I'm assuming the damper
tubes are probably longer, but have the same holes. If they do, drill the same
12mm hole in the same place in the tube. If they're smaller, you'll need to a
drill different sized hole(s). Basically, if there's a difference, post the
difference, and I'll reply with an answer.
-
Since the Dakar has a longer travel in the fork, It may require
more fluid for an initial fill, and perhaps a larger distance from the top of
the fork tube, for the fluid height. Since the stroke is longer, it may require
a larger air volume in the top of the fork. I'd guess 140mm from the top, or the
factory setting. The higher the fork oil level, the more resistance to bottoming
(inner fork, air compression).
-
I had to replace my fork tubes on my 7/00 2001
F650GSA. The part # from BMW is 31 42 2 345 376. This is the same part # used
for the pre GS F650's. The fork tubes are identical in dimensions,
except the fork caps are different. The pre GS uses
fine threaded (1.0mm) screw in caps, the GS's use non threaded plugs held in
with internal snap rings, and the GS Dakar's use coarse (1.5mm) threaded caps.
So if you order tubes for a GS, you're going to get threaded tubes for a
pre GS. BMWNA doesn't have a clue about this, it has taken me two weeks
to sort this out. Until they supply the correct (Dakar) tubes, the
current replacement requires pre GS fine threaded caps, or the
Honda F2 adjustable caps.
After searching through the Race-Tech site I was surprised to find no
listing for the for the 04-06 GS. All the FAQ's also seem to only address
the older models. Does anyone know if the FEGV S4101 emulator's will fit
into the 06 GS (non Dakar) forks or are springs and oil my only choice?
... It appears after looking at the parts fiche on the A&S BMW website
that the 99-05 GS and the 05-up Dakar models use the same damper rods. The
04-down Dakar model has a different part number for the damper rods.
cadhopper #2041
I just received the TT springs for my GS. Next step is to get fork oil and
decide how much to use. I've read the spent-shun knowledge and experiences in
the FAQ which were very helpful. The reason for the upgrade is excessive dive
and sag. First I should say that I am a big boy - scaring the h*ll out of 300
lbs., just over 6 feet tall with a 32 inch inseam - seat height is not a problem
for me. My fork sag is about 2.1" (~53mm). The bike has about 10k mi. and is
mostly road ridden. The FAQ says it should be set to about 1" (~25mm). Touratech
recommends 575ml of SAE 15. The FAQ says 600ml of SAE 7.5 or 10. I think the
25ml difference is because the TT springs are larger. I guess I'll start with
575ml of SAE15 and see how the bike handles and see how much sag I have. If the
sag is more than an inch, should I add a little more fluid or put a longer
preload spacer in? The rear seems to work fine with the re-bound and the
pre-load both set at max. Any wisdom is appreciated. Kevin #1092 Black 02 GSA
-
I just finished my conversion. Ohlins Dakar shock and Dakar forks with
Touratech springs. I did not have any problem with the shock, other than
working around the abs box. I have got around 200 miles on the setup so far
(mostly dirt) and it seems to be working fine. I still have the 19" front
wheel. I bought the complete legs. I wanted to keep the standard GS parts
intact in case I wanted to switch back. Got the shock through Mr. Eds at a
good price, 750 versus 1100 list. Forks were around 800 versus 2K for the
Touratech w/p forks. So far I love the change. Much more confidence inspiring
on rough roads. I have only bottomed out once in a few hundred miles instead
of the previous 2 to 3 times every ride. A small price to pay for my lack of
foresight in not getting the Dakar in the first place. Mike819 in Reno 01 GS
-
Another thread I started earlier today discusses this. Not stated there is
that I used 10 wt oil and my riding weight is about 200. First I would get the
oil level correct as Richard and Mark suggest doing in the other thread. Then
I would make some PVC pipe pre load spacers starting at the same length as the
OEM ones and start testing. The PVC is easy to cut and if you screw up you
still have the steel ones for back up. My spacers ended up as short as I could
make them and still have any tension on the spring. Yours will need to be
longer of course. Adjusting the oil level is going to have a different affect
on handling than changing the spacer length. Too much oil results in a smaller
column of air and that compresses less so it has the affect of stiffening the
forks during the compression stroke. The spacer length will let you dial in
the sag you want. I'm no expert of course so YMMV. In my opinion, if you use
the bike on a variety of roads, especially off road, precise tuning is not
practical. The requirements vary too much between them. In keeping with the
design of the bike itself I just aim for a decent compromise. BTW I'm not sure
setting the rear compression damping to maximum is the best way to go. If you
have not tried it yet I would back it off some if you find the bike hops
around any on the bumps (1/4 - 1/2 turn). Another thing I would suggest.
Compare the length of the OEM spring and the TT ones. I betting the TT springs
are longer by noticeable amount. I can't recall exactly by how much but mine
were longer which added to pre load so much I couldn't get the caps back on.
Brad, N. CA., 2001 F650GS - Inmate #1002
-
I added the
Ohlins to the rear and LOVE IT! I also did a RACE TECH cartridge emulator
install to the GS fork tubes and added a bit of preload to the front
suspension. I still have the 19" front wheel but am considering moving up to a
21" front wheel. The front has only bottomed out once or twice. I did not add
a chain roller but you will have to modify the center stand. I have 6000 miles
on this set up and it works great. Race tech added 20 mm of preload to the
fork and so the forks are now 15mm shorter than the Dakar forks. That's about
a 5/8 inch difference. The forks may not have as much travel, but they work a
lot better and are less bouncy. I would like to eventually get the whole Dakar
set up for the front end - but so far I can't decide whether to go with the
Touratech setup or not. chrislindau
-
My big question
is for Chris. How does the RACETECH modification add to front suspension
length? Did this include new upper fork tubes or does the cartridge change
include a longer rod which lets the slider move down on the upper fork tube?
As for pre-load, all that is going to do is reduce sag. The bike may sit a bit
taller as a result but no way reduced sag alone makes up for the ~1.5"
difference between the GS and the Dakar (the BMW web site does not seem to
display the Dakar specs any longer but I remember 1.5"). Brad, N. CA., 2001
F650GS - Inmate #1002
-
Maarten, I'm
looking to do the same thing to my bike. I emailed Touratech in Germany about
this, asking the same questions as you; they return emailed me saying I needed
a new "lateral upright" which shed no light on the matter and Touratech USA
was of little help. I'm guessing that one of the rear suspension components
(either of the smaller levers connecting the swingarm to the shock) must
change but don't know which one although from reading this string, it seems as
though people are doing just by changing the rear shock. There's a little on
this topic in the FAQ's but it's limited. Iceman says you need to weld a chain
wheel bracket to the frame; he doesn't say where but I'm guessing it goes
below the bottom edge of the chain to keep it from hitting the frame when the
swingarm is down though reading this string, it would appear this is not
necessary. Do you have any more info on this? I would also think a different
calibration may be required for the ABS controller and maybe the ECM if you
change to a 21" front wheel. It was mentioned that the front forks could be
modified, but not how. I was hoping to hear from someone who'd actually done
the conversion. You seem to have answered my question in part. I guess I
really need to take one fork apart and do some measurements to figure out what
to do. I'd go down to the dealership and compare part numbers on the
microfiche but the dealer here is pretty hopeless and getting the parts people
to help out like that is unheard of. I want to do the conversion but want to
spend as little money as possible doing it so hopefully converting my current
forks rather than buying new ones will save me some money. Thanks, Nathan 02GS
-
I guess Touratech
wants to sell their WP suspension setup. When installing their 250mm rear WP
shock on a Dakar, no new parts are necessary. I tried to find any differences
between the GS and Dakar parts but couldn't find any. As some people explained
here the longer shock should fit the GS, no new parts needed. Does anyone know
how much longer the Dakar shock is? My guess it's about 10mm longer. As for
the chainwheel bracket, you don't have the weld it to the frame.
Fabricate a piece of metal strip and connect one side to the two lower bolts
of the right footrest support. Bent the strip upwards following the contour of
the frame and connect the other side to the rear brake cylinder support. Now
weld the chainroller to the strip. (not so great explanation but i hope you
get the idea) There's a picture on DHP site under modifications showing the
Touratech footrest and the chainroller. I don't have ABS on my bike but i
guess there is no differences in ABS hardware between a GS and Dakar. Hope
this helps a little. Maarten.
-
The real
differences between the GS and Dakar suspension are the fork tubes and damper
rods. Might be some spring rate or coil dimensions difference, too. Damper
rods for a classic are about $90 if memory serves, so that's ballpark. No idea
on the fork tubes, but I'll bet they're pricey from Bring More Wallet. You'd
probably be better off buying DHP's Dakar forks. Harl #380
-
Used forks are
certainly a way to go. They may not always be available. I'm pretty sure there
are a few people out there that would do it if the cost was reasonable. The
whole new fork is $475 each (per BMW). Here are some prices for the big items:
Down tubes ($172 ea. per BMW); Caps for them (the Dakar's are threaded, or buy
Hondas with pre-load adjustment for $40 ea.) springs (go aftermarket on these
anyway, about $50 ea.) Damper rods ($109 ea. per BMW) That may be all there is
to it. The bottom sliders are exactly the same. The diameter is exactly the
same. So for $371 ea. you can convert. That is only a saving of $104 ea. or
$208 on the set. You might get a discount on the $475 so it might be less.
Unless you like working on stuff yourself it is obvious the way to go is a
whole new fork or a good set of used ones. I would do all the work and a Race
Tech mod at the same time so personally I would just buy the parts. It could
always be converted back if need be. Brad, N. CA., 2001 F650GS - Inmate #1002
-
You may want to
check with Forks by Frank to see what he might be able to provide in the way
of NON-BMW fork tubes. Marty #436.
-
Parts list error.
The Honda adjustable fork caps will not fit the Dakar tubes. The Dakar has
threaded caps but use a coarse thread. The pre GS fork tubes use the same fine
thread as the Honda's, and are also identical to the GS tubes in dimension,
except for the threaded cap (the GS uses a non threaded cap held in by
circlip). If you want preload adjusters on a Dakar, the caps can be center
drilled for air fittings. If you bend your non threaded GS fork tubes, you may
get threaded fork tubes (pre GS style) as replacements from BMW by accident.
When I ordered mine a year ago, BMW had the wrong numbers and were sending the
wrong tube. I spent two weeks trying to figure out what was up, and no one
connected to any part of BMW knew why the new ones were threaded. They may
have updated the part numbers by now, or perhaps not. If you want adjustable
Honda caps, you need to use pre GS tubes. If you want to run a 19" front
wheel, and want improved suspension, keep it simple. Buy good springs, Race
Tech emulators, and use 10w fluid. This is what I run, and I rarely bottom the
forks, if ever at all, and it's the best front end action I've ever had. If
you want taller Dakar suspension for more travel and to use the 21" front
wheel, the true cost is only fork tubes and damper rods (BMW calls them
tubes). The cost of real springs and the emulators are an improvement to any
of the F650 front ends, and should be considered for anyone wanting an
improved front end. If you want to cut corners, have a sleeve welded in the GS
damper rods to extend them to Dakar spec. A properly welded sleeve will be no
weaker than the 8mm bolt that holds it to the fork leg. If I remember
correctly, they have a factory weld on them to begin with. Iceman.
-
Thanks for the
clarification on the fork caps. Too bad. Installing air valves in the OEM ones
sounds possible. Wonder if anyone has done it on a Dakar. No matter what, the
conversion to Dakar tubes will require a new cap. The standard GS tube cap is
clipped not threaded. I'll have to get a price for it. I think you're going to
need new springs for the Dakar conversion. You could install a longer pre load
spacer but will the shorter spring have the compression range needed, I don't
know. That's 6.69" v. 8.27" (or 40 mm increase in travel). My Touratech
springs were longer by 20mm than the standard OEM springs. That might be close
enough. Brad, N. CA., 2001 F650GS - Inmate #1002
-
I have the TT springs (Orange Props to K7lro - Thanks, chief!) and I use 15wt oil.
Yes, it's a stiffer set up. Yes, the bike will require more rider attention. The TT springs/15wt set-up is best suited for high speed riding over two track terrain. You'll track through stuff a lot better without feeling like you've surrendered rider input to the terrain's desires.
Flipside.....In technical terrain, you'll need to be up on the pegs a lot to prevent getting bucked off. Mashing into steep transitions will have a tendency to wake you up from the total bike rebound. At your weight, I suspect you'll be fine. My little bantam a** (160lbs) has to really be 'nuts-on-tank' to mitigate getting tossed off.
The trade off......Anything less in the forks will have you bottoming out on those sharp transitions in technical terrain and schwacking your wheels when you gotta hit the throttle to power through stuff. With a soft (near stock) set-up you'll stall your momentum trying to clean an obstacle. For the times I've been bucked off, I gladly accept those for the times I've been able to clean some tough stuff and the hundreds of times I've ridden two-tracks at insane speeds.
From Touratech website:
Fork springs BMW F650GS Dakar $111.30
Progressive and harder than the original springs
No bottoming
Better reaction
Better damping with off-road use
Easy to fit
Use 575ml, SAE15, Install with tighter-wound coils down
And that's it. Don't forget to anneal your copper washers if you're not able to run to the store and get some new ones. That tip came from the ever-helpful Haakon. -NothingClever
-
Installed a set of TT fork springs today. The stock Dakar spring is 475mm long, and the TT spring is 470mm. I'm starting with #10 oil, and will try the TT recommended #15 if I still bottom out with the #10. Also, I'm using 575 ml of oil (per TT), not the 550 ml shown in the BMW owner's manual. After installation I have 30mm of sag, whereas I had 25mm with the stock spring. I suppose this is because the stock spring is 5 mm longer than the TT? -Scott, ID, #1244
-
The stock springs I removed were certainly not wound progressively.I replaced them with 'progressive springs'(Wurth actually)from Touratech ordered through Motorworks(www.motorworks.co.uk)About Ł65 IIRC.Handling on tarmac much improved and dive on braking much reduced.Well worth fitting IMHO.Not tried offroad yet. -tall tony, '02 F650GS Dakar


