F650 (Classic and GS) Rear Shock Installation
compiled & edited by Kristian #562
Please read the Disclaimer before
attempting any work in this FAQ.
Last Updated: 21 Feb 2007, by Winter #1935
For FAQs related to forks, shocks, maintenance and aftermarket
options:
Introduction
Depending on how you load it, the rear Shock on the F can go in as
little as 20,000 miles. Some have replaced the Stock Shock at 40,000
miles. For a List of Shock Suppliers other than Ohlins and for information
on Various Springs you must Specify for your Weight when ordering
an Ohlins, see the: Aftermarket Shocks
FAQ
by Richard #230, May '01
I recently installed a new Ohlins
Type III (BM 423-46DRS) rear shock on my bike.
This is the type with a hydraulic pre-load adjuster and a rebound
adjustment, but no remote reservoir or compression damping adjustment. I
bought it from Mr. Ed's MotoAccessories. By taking advantage of their
"Chain Gang Buy", I was able to purchase the shock for a total
price of $570.
It took me 5 hours to install (it should take you 3 hours) and I had no
problems. Everything was obvious and no special tools or parts are needed.
Preparation
Tools
You will need:
- A 3/8" torque wrench
- an 8 inch 3/8" extension
- an 8 mm 3/8 inch drive hex wrench,
- a selection of 3/8" drive socket wrenches
- Bearing grease - I used BMW No.10 grease to grease the
suspension linkage needle bearings. (I did not remove the bearings, as I
tend to lose small parts. I just packed more grease into the
bearings)
- You'll also need a 10mm Allen wrench.
Tightening Torque Values
- 50 NM for the upper shock bolt
- 30 NM for the lower bolt
- 80 NM for the tension strut to the deflection levers (the long bolt)
- 50 NM for the bolts fastening the deflection lever to the frame
and for the tension strut to the deflection lever and swing arm.
To summarize: The longest linkage bolt gets 80 NM, all other bolts get
50 NM, except the lower shock mount, which gets torqued to 30 NM.
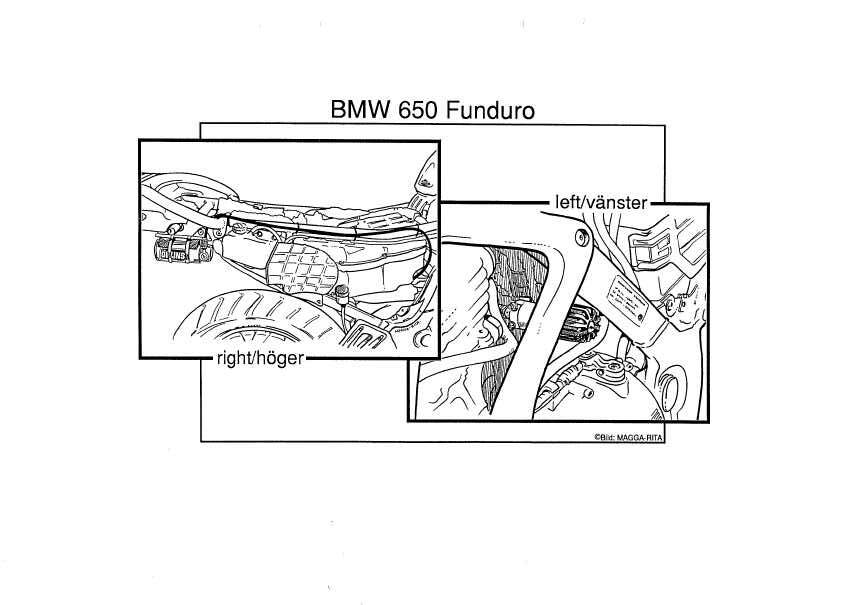
Procedure - Classic F650
Overview
I removed the rear wheel, but not the swing-arm. I removed all of the suspension
linkages and greased all of the needle bearings, which may not be absolutely
necessary, but seems like a real good idea to me. With the linkages gone, the
shock just falls out of the bike, when both the shock's lower and upper mounting
bolts and the small pre-load adjuster bolt located behind the cylinder on the
left side of the bike are removed. I noted that my upper shock bolt did not have
a washer on the left side, as shown in the service manual. The upper mounting
bolt can be reached without removing the battery box, by using a hex (Allen)
wrench fitting for a 3/8" drive, mounted to a long extension rod and taped in
place to keep it from falling out, while it is threaded past the battery box and
hoses. (Sears and hardware stores sell these (socket-type) hex wrenches for a
few bucks.) Otherwise everything seems straightforward. The right linkage bolt
must be removed before the left, to have enough room to be able to withdraw the
left bolt. Also, the lower plastic chain roller (which I had never seen before)
must be removed, before the adjacent bolt can be withdrawn from the suspension
linkage. My roller looked like new, but if yours is worn, now is the time to
change it, so you might want to buy a new one before starting the job.
When installing the new shock, you will need to take the aluminum Ohlins mount
off of the pre-load adjuster and thread it between the right frame and the
air-box. The adjuster hose gets run along the right frame rail and fastens to
the front rubber charcoal canister mount, after re-installing the adjuster
bracket (no problem there, as my canister has been missing for 4 years). This is
for the budget shock with no compression damping, only remote pre-load and
rebound. If you have the remote reservoir shock, the reservoir gets mounted here
and the pre-load adjuster is installed in the stock position.
I am enclosing pictures that I took while doing the job, including a
comparison of the new Ohlins and the old stock shock, the mounted adjuster
and of the completed installation. (Get Pictures from Flash#412)
Finally, I highly recommend using waterless hand cleaning
"Scrubs" towels (available in hardware and paint stores, as well
as through Whitehorse Press). Not only do they do a good job of removing
chain oil from your hands (much better than Goop or soap), but they really
work well cleaning chain oil and dirt off of the suspension parts and
swing-arm. Just look at my pictures of my bike with 22,000 miles on it,
after being cleaned with two of these towels.
| Installation Tip |
|---|
|
After installing the Ohlins 46 HRCS I have this to add to Richard's
comments. With the remote reservoir version, the reservoir itself is
mounted where the charcoal canister was and the pre-load adjuster goes
where the original one was mounted.
David #476, 11 November 2001
|
Parts to take off to remove Existing Shock
- I chose not to remove the rear tire, it didn't look like I needed
to, but in hindsight I think I would if I had to do it again.
- Having the tire removed gives a little more working room and
allows better access to the swing arm link. It also make the swingarm
easier to lift when it comes time for reassembly.
- I also elected to remove the battery. Like Richard said, you could
probably work around this, but I needed to do some battery maintenance
anyway so I removed it along with the box. This give you a ton of room to
work on the top shock bolt, more important when trying to get the bolt
back in than while taking it apart.
- With the 46HRCS the exhaust must be removed as well, as the remote
reservoir must be threaded through where the muffler meets the header
pipe. Be careful of the sealing gasket inside the muffler. It is pretty
delicate and easily damaged.
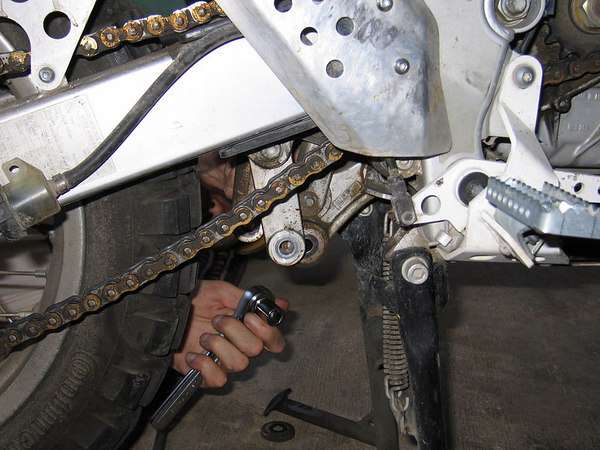
Removing Existing Shock
- With all the bits removed, I removed the pre-load adjuster from
its mount and placed it behind the shock.
- Then I loosened the top shock bolt and removed the nut and
washer, leaving the bolt in place to hold the shock.
- Then I removed the bottom shock bolt. I figured it might be
easier to get if off with the shock and link mounted than without.
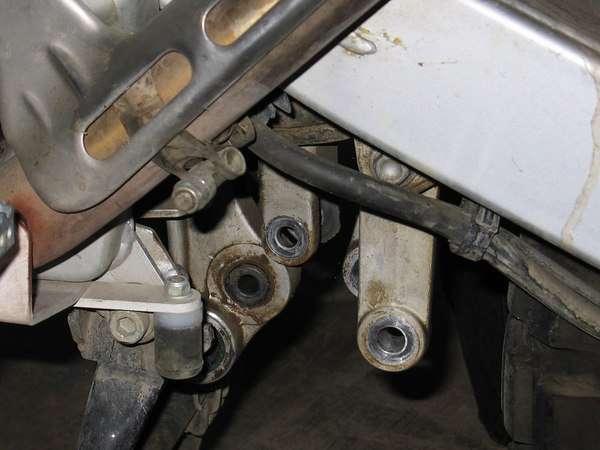
- Then I remove the forward most bolt and nut and the rear most nut
and bolt from the swing arm link. It took a large screwdriver to pry the
forward bushing from the mount on the frame.
- Once this was done, the shock was loose to come out.
- I removed the top bolt with one hand while lowering the shock and
pre-load adjuster out the bottom.
Installing New Shock
- Installation starts with threading the remote reservoir up and
into position.
- Once the reservoir hose is pulled through I raised the shock up
through the hole enough to get the pre-load adjuster in place.
- With it was close I raised the shock up and put the top bolt
through to hold it in place.
- Then I attached the pre-load adjuster to the stock mount. Next, I
attached the reservoir hose to the bike.
- The instruction referenced a drawing that was not included in my
packaging so I improvised. (Ed. I asked Ohlins for it. Here it is
Ohlins Routing)
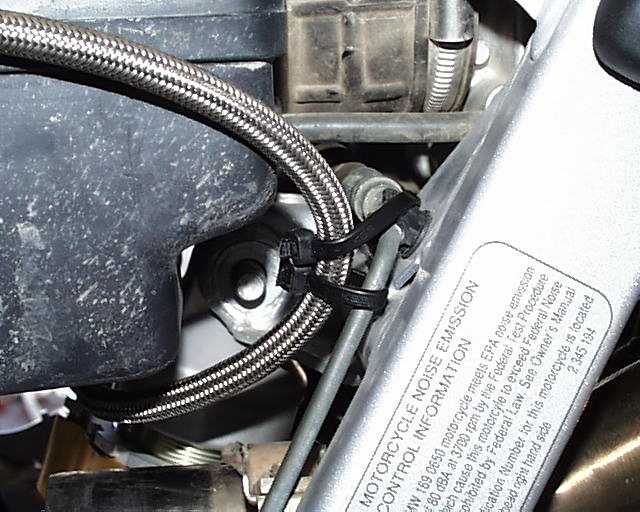
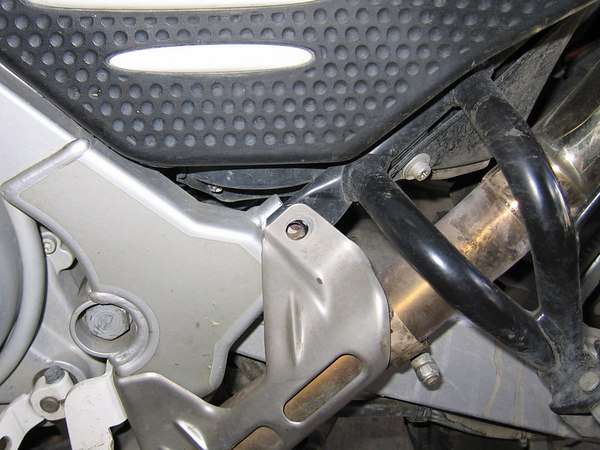
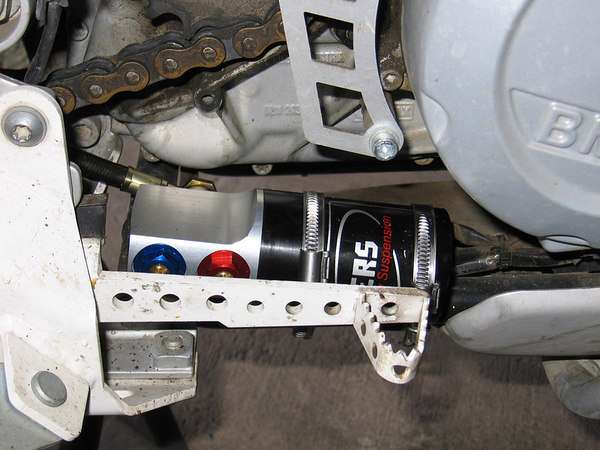
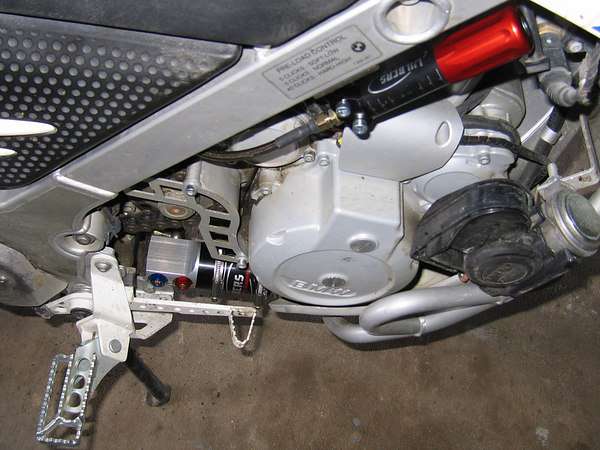
- The instructions said to run the hose to the reservoir along the
frame but that's not exactly how I did it.
- As you can see from the pictures, the hose comes out of the frame
between the bottom of the airbox and above the exhaust pipe.
Routing1,
Routing2,
Routing3
- From there I fastened it to the airbox bolts with two 3/8ths inch
cable clamps, ran it under the airbox snorkel, fastened it with another
cable clamp on the nut holding the plastic cover under the radiator
expansion tank then up and over to the reservoir in place where the
charcoal canister was.
For such an expensive shock, I was dismayed at the cheesy-ness of the
reservoir mount. Basically a couple of hose clamps (one of which was
broken!) and some rubber mounts.
When I can find a supplier, I will mount the reservoir with 2
Cable clamps to the original canister mount.
Cleaning & Re-Greasing the Link Bearings
With everything in place, I set to cleaning and re-greasing the link
bearings. A word of warning here. It's best to do this in a nice clean
workspace. Prepare for the eventuality that some of the needle bearings
will go flying. They almost always do and if you lose even one, the
bearing has to be replaced.
- Setting out an old sheet or a newspaper will help you find that
stray one if the need arises.
- Lacking anything better I sprayed the bearings with CRC
Brakeclean, then compressed air until they were clean and dry.
- At this pointroll the bearings with no grease in it. If it rolls
freely with no binding you're in luck. If it binds or catches at any
point in its circumference, then it should be replaced.
- Then I applied Old Number 10, a lot of it. A good rule is pack
them with grease until you think you have too much, then add a little
more.
- With everything clean and lubed I replaced the link and torqued
the bolts to specs.
- BTW, do the bottom shock bolt first as it become inaccessible with
the other bolts in place.
- Then I replaced all the bits, taking the opportunity to lube all
the rear brake/chain wheel stuff and refill my battery and clean the
inaccessible parts of the muffler.
Finishing off
Once the bike is all back together, it is time to adjust. The fun part
is now you can adjust the compression and rebound damping as well as the
pre-load. The shock comes set to your weight and driving style, but some
fine tuning was needed with mine.
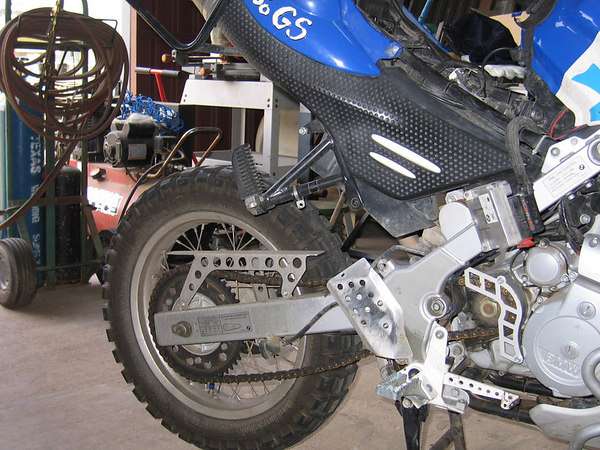
Procedure - F650 GS-Dakar
- I think I ordered my shock a little long. I now have about 18" of rear wheel travel.
- Thump had a great idea of not taking the whole rear frame off which means you don't have to disconnect your fuels lines, etc. First remove exhaust from the pipe and take off your rear brake reservoir. Then take out the bottom two subframe bolts (one on each side)
| Note: The BMW Manual also suggests this method. However it suggests tying a strap to the rear sub-frame cross bar, and tie it to the steering. You will need to chock / secure the front wheel to prevent it from moving, and the BMW manual suggests placing some foam / something to protect the bike from the strap.
|
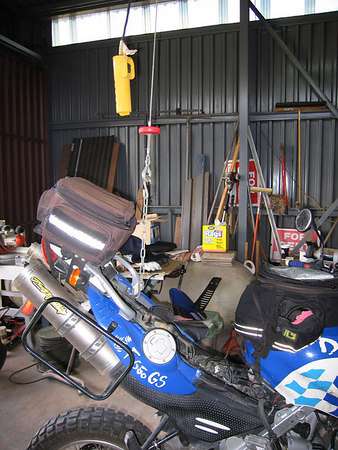
- Now loosen the front two and then use an overhead winch to pivot the frame up until you can reach the upper shock mount bolt. You could easily rig something with a rope if your garage is like mine and doesn't have a winch in the ceiling.
- We had to remove the brain and a few other things out of the way for it to pivot high enough but this only took about a minute. No fuel lines or anything difficult.
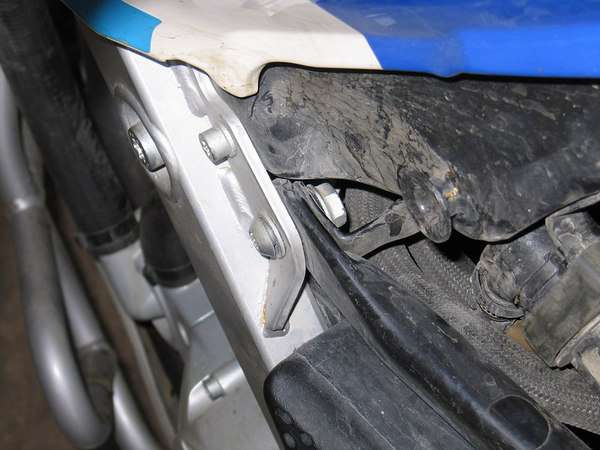
- Next take the bolt out of the dog bone. Mine was the fully threaded type and was bent (see the Shocks - Maintenance FAQ for more information on this known problem). Time for a trip to the bolt store. And then unscrew the lower shock mount bolt. Remove the bolt holding your remote preload adjuster on and then the shock will come right out with a little wiggling.
- I have an 01 without ABS so the reservoir is right behind the engine. We evenutally had to remove the upper two bolts the frame was pivoting on in order to get enough space to get the reservoir out. Those of you with ABS who have the reservoir mounted on the right frame won't have to worry about this.
- Next was a late lunch break. Mexican chicken, rice, beans, tortillas and beer. And some green salsa that will set you on fire. Damn fine eats.
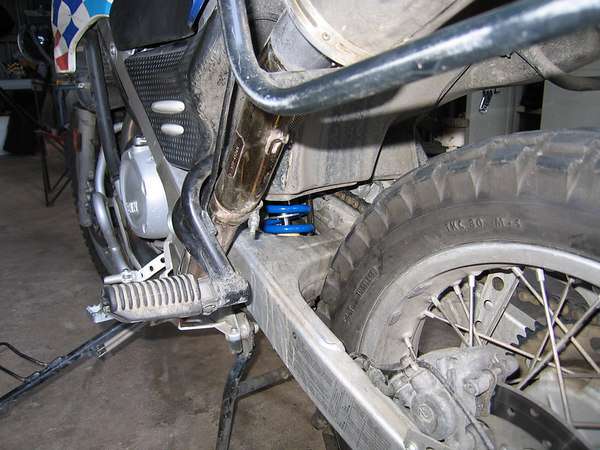
- The install went much quicker now that we knew what we were doing. The Wilbers reservoir mounts way down low on the frame and the preload adjuster uses the same holes as the stock one. It was a straight bolt on job without any issues.
- Final picture