Misc. Braking Questions FAQ
compiled & edited by Kristian #562
Please read the Disclaimer before attempting any work in this FAQ.
Problems & Solutions
Aftermarket
Brake Parts
Misc. Brake Questions
Other (Separate) Brake FAQs:
Bad master cylinder, caliper or brake
fluid?
Problem: I recently bought
a 2000 F650 and after about 50 miles, the front brake lever went
all the way to the bar. I could pump it up, but after that first
occurrence, it frequently, but not always, went to the bar. Took
it back to the dealer and they said the master cylinder needs
replacing (after the technician originally thought they were OK,
because of the intermittent problem). While waiting for the part,
I read the brake FAQ and decided to change the fluid in both
front and rear brakes, as the brake fluid was the color of coffee
... actually more like espresso!. Now, I've ridden the bike about
10 miles and the brakes seem nice and tight. Is it possible that
I really do have a bad master cylinder, or could changing the
brake fluid fixed the problem? Also, if the brake lever goes to
the bar, how would one know if it's a bad master or front
caliper?
Solution: Well, after
changing the "espresso" brake fluid to "gin"
color, I went out and practiced panic stops from 25 to 45 mph,
and brakes are still working fine, so I'm inclined to think it
was bad fluid and not a bad master cylinder. Phoenixtoohot
Feedback:
- It sounds to me like you had
a lot of air in your fluid. My fluid looked just like
that the first time I changed it, less than a year after
the bike was assembled by the Italians. Maybe they were
using espresso. If it was me, I would change out the
fluid once more, just to be sure that you got all of the
expresso out of the lines. A careful bleed of the brakes
will easily get all of the air out of the lines and if
the brakes feel fine then, that was your problem and I
would worry about the competence of your mechanic. In my
limited experience, a bad master cylinder will cause the
brake lever to slowly come back to the grip over a period
of time, not come back immediately - that indicates air
in the line. Richard #230: 1997 Funduro
- "Even bad brake fluid
wouldn't let the lever come all that way in"
BZZZzzzttT! A few small air bubbles in the brake fluid
sure will allow the lever to come to the bar. Brake fluid
absorbs water from the atmosphere. Brake fluid can reach
temperatures higher than the boiling point of water.
Steam/water vapor bubbles are more or less the same as
air bubbles once they form in your brake line.
- "Even bad brake fluid
wouldn't let the lever come all that way in" Not
true. Had this problem with rear brake after braking a
lot. Changed the fluid, solved the problem... If your
problem happens after some braking, than I would go for
the fluid. gim '97 F650, Waltham, MA.
- I once used brake fluid from
a tightly closed container that had only been opened once
before, some 2-3 months earlier. Soon after, on a trip
with some "inspired" riding I suddenly lost the
rear brakes, due to vapor lock. When I had the brake
fluid checked (I really did not think it could be the
fluid, but found no other cause) we found a too high
water content. Brake fluid is highly hygroscopic (Absorbs
water). haakon#626 (Norway,12-1999- F650GS).
Rear
Brake Failure?
Change your
Fluid REGULARLY! Check your Brake Hoses!
Feedback:
- Coming back from Santa Cruz
today when, after a lot of breaking on rt 9 (beautiful
ride with lots of curves in the woods), the pedal went
all the way down with no braking at all. It happened
progressively, but fast. After the third time after I
felt the pedal somewhat different, there was no more
braking action. I thought the brake line broke, leaking
fluid. NOPE. It was just the temperature. After waiting
for half an hour (adjusted chain tension in the meanwhile),
the bike was fully back to normal. Is it possible the
problem was caused by the fluid ? I believe that it
hasn't been changed for a long time (never by me at least
:( )...I plan to bleed the brakes anyway, but it would be
nice to know if this problem can be caused by old fluid.
If this is not the case, then I have to try to brake less
the next time :) gim (orange '97ST)
- Brake fluid is hygroscopic,
it absorbs water from the air. This is one reason you are
supposed to change it annually. Water lowers the boiling
point of brake fluid. When it boils, there are gas
bubbles in the lines. These compress when you apply lever
instead of moving the pads. When it cools, they go away.
Don't use your brakes so much. And change your brake
fluid. Flash #412 (CO)
- Had the same problem.... the
fluid in the stock bike sux. Flush the system had new Dot4
put in ....never had problem again. scx
Brake
Mount Failures?
Only ever heard of ONE instance. ed.
Instance 1
OK, right to the point here. I have just had the sh*t
scared out of me by a brake mount failure that caused a total
loss of the front brakes at speed on my 98 F650ST. I went to
brake at 30-40mph and there was a CRACK followed by the clunk of
my entire front brake caliper assembly rotating out of place on
its remaining mounting bolt resulting in no brakes and a floppy
brake lever. On examination the lower of the two caliper mounts (where
the caliper is bolted to the fork leg) had fractured vertically
through the bolt hole, leaving the caliper hanging on via the
upper mount and the break pads totally dislodged and hanging
loose.
Q1. Has anyone heard of it happening before?
Q2. Is this a known issue?
Q3. Is this something that BMW should know about?
Q4. Is this a weld repair or a new lower fork job?
I would advise anyone to take a close look at the
brake mountings on the forks and check for cracks just in case.
This was really sudden and with no warning. Had it happened at
motorway speeds I would not be here to make this post. I have
just had all the covers off this and taken a look in the cold
light of day. The good news appears to be that the mountings to
the fork leg are ok. The bad news is that it is the caliper
mounting plate that has failed. This plate connects the caliper
to the forks and mounts two pins that allow the caliper to move.
The mounting for the lower of these pins has fractured vertically.
You can see a diagram above of the brake assembly. The mounting
that has fractured is just below the lower of the two bolt holes
on fig. 3 (see above). As you can imagine, my BMW dealer is
taking a real interest in this and will be looking at this ASAP
with a view to kicking it up the BMW ladder if there is no sign
of external forces at work. MrWolf, Dave-O'C-98 F650 ST
- <Q1. Has anyone heard
of it happening before?> Not that I know of.
<Q2. Is this a known issue?> Obviously not.
<Q3. Is this something that BMW should know
about?> Absolutely. Based on the history of the
bike, I would possibly involve a lawyer as well. Who has
maintained the bike? BMW Factory service? You personally?
A previous owner who's work no one can verify? If I had
to venture a guess, I would suspect someone has radically
overtightened that bolt, although I'm not completely
ruling out that a completely normal outer fork tube
torqued to the proper specs would break.
<Q4. Is this a weld repair or a new lower fork
job?> Given your experience, would you ever really
trust a repaired bit? I would work on a replacement,
preferably on BMWs dime. David #476, '99 F650.
- I would not use welding as an
option for this repair given the importance and the
nature of it. Will in CA
- I'd love to have a look at
that fracture. My guess is that you'll find an inclusion
(looks like a chunk of slag). Marty #436-Chicago-97 F650F
Leaking
Brake Line?
- I posted an earlier message
this past Tuesday (24-Sep) about a possible rear brake
line that was leaking. Well just for the hell of it I
bled the rear brake line as per FAQ (many thanks to the
contributors). After the job was completed I found that I
had drops of liquid under the bike. Shining the light
between the rear wheel and the engine while depressing
the brake pedal quickly illustrated that there was indeed
a leaking brake line. In front of the rear wheel and
behind the transmission the rear brake line has some
fittings to join two separate pieces of brake line. It is
the fitting that is leaking. So off to the dealer for a
warranty repair for a 2001 F650GS with 14500km (9000
miles). Perhaps first I will try to see if I can tighten,
if it is lose, the fitting. Though it looks very crowded
at the fitting. Rodger#1046
- Took the MC to the dealer
this morning. Dealer has concurred that the rear brake
line is leaking. The whole brake line will be replaced
under warranty. The parts were ordered today (Monday) and
could arrive within a couple of days. Rodger Lucas (#1046)
2001 F650GS 14500 km (non ABS).
- Next.
Leaking Front Master Cylinder?
If it leaks, it will quickly corrode metal parts,
including allows and strip paint. Clean it up quickly and fix it!
Causes:
- Reservoir Overfilled.
Solution. Take out some Fluid with a CLEAN Turkey Baster
or Better yet, BLEED some fluid out.
- Seal Problem #1: There
is a bit of rubber, from one of the punched holes on the
diaphragm, that is still attached, but on the inside, so
you can't see it. It raises the lip of the seal enough to
cause leaking. btw, CHECK for splits or defects in the
sealing lip of the Diaphragm first. If there is a defect,
that's where it's weeping from, and you will need a new
diaphragm. No amount of sanding of the lid will help you
if the Diaphragm is split or has an extrusion (manufacturing)
defect.
Solution.
Undo Screws, Check Diaphragm, Reinstall. Do NOT
Overtighten the Screws. If the Seal is good, it will seal
just fine. One
thing you should always do is to coat the threads of the
master cylinder lid screws with anti-seize compound. If
there are any screws that are going to corrode on your
bike it is going to be these screws. (Richard #230). If all else
fails, replace the diaphragm and make sure that the vent
grooves in the top of the master cylinder cover are clean.
- Seal Problem #2:
Rubber diaphragm under the lid was not re-installed or
tightened (most likely too tight) correctly, or if
there is a problem with the vent holes under the cap.
Solution.
Undo Screws, Check Diaphragm, Reinstall. Do NOT
Overtighten the Screws. If the Seal is good, it will seal
just fine. If all else fails, replace the diaphragm and
make sure that the vent grooves in the top of the master
cylinder cover are clean.
Feedback:
- Brake oil container overflow
Hi! I had a short ride around town last night along w/ my
buddy. I rode a 2002 F650GS (non ABS) while my friend
brought an F650CS w/ ABS (my old bike). After stopping
for a short break, I noticed that both our brake oil
reservoir (on the right side of the handlebar) had some
oil stains. Probably from an overflow. I'm going to have
both of our bikes checked tomorrow and I hope the
mechanic can solve our problem. Our bikes are still new
and we've run only about 500kms each. I got both bikes
from the same bike dealer. Just curious, can there be any
other reason for the oil overflow aside from maybe the
bike dealer put too much brake oil? Has anyone have this
same situation? Jagged.
- I have a problem with brake
fluid weeping out of the front master cylinder. (this is
for an '03 CS w/ 7k). Within a couple weeks of having the
bike, someone pointed out that fluid was weeping out, and
claimed the dealer must have overfilled the reservoir.
This was ~1500 miles. I flushed the fluid for both front
and rear cylinders, and I haven't had any more weeping
until now. I've put about 1500 miles on the bike since
early march, but the weeping didn't start until yesterday.
Just a drip yesterday, but several drips today. The only
thing I can think of is temperature - it warmed up nicely
today. But why didn't I have any weeping last season? I
changed the fluid at the height of the summer heat. If
anything, shouldn't I need to top the fluid up due to
brake pad wear? I can remove some fluid easily but I want
to make sure I'm not experiencing an underlying problem.
(It is leaking From the weep holes. I think it might also
be leaking from the front of the cover seal, but I'm not
certain that wetness also originated from the weep holes.
Since it's coming out the weep holes, I thought it was a
fluid-level problem. Thing is it's weeping out the weep
holes, so do I really have a leak problem? If there was a
problem with the seal I'd expect fluid to leak somewhere
else). Thanks for the tips! wicked94pgt BBG#22 F650CS,
Natick, MA
- My GS wept from Day 1.
Problem? There was a bit of rubber, from one of the
punched holes on the diaphragm, that was still attached,
but on the inside, so you couldn't see it. It raised the
lip of the seal enough to cause leaking. Solution 1. Pull
the diaphragm out of the cap unit and check it thoroughly.
Solution 2. I also got some VERY fine wet and dry and
sanded a smidgen off the outer edge of the cover (after
removing the rubber diaphragm), so that I was sure the
lid wasn't engaging the reservoir top before the seal
could seal properly. If you do that, do just a VERY small
amount and CLEAN CLEAN CLEAN CLEAN it of all filings
before replacement. btw, CHECK for splits or defects in
the sealing lip of the Diaphragm first. If there is a
defect, that's where it's weeping from, and you will need
a new diaphragm. No amount of sanding of the lid will
help you if the Diaphragm is split or has an extrusion (manufacturing)
defect. (Is rubber extruded?). Kristian#562
Front
Master Cylinder Rebuild?
Q. The front brake plunger on my '94 Classic
F is sticking. Does this mean that it is shot and really should
be replaced or can it be stripped and greased up. I saw on the
Motobins website that they only supply the master cylinder and
throttle assembly as one unit. Is this correct? Pat#1210
According to the GS Manual this item should be
replaced (Front/Rear Master Cylinder Cup) every 40,000kms
for Bikes WITH ABS. This Boot can be replaced.
The BMW part #'s:
- The Classic Part No. for
the Boot is Unknown.
- The GS Repair Kit Front
Master Cylinder (What is IN it is unknown) is 32 72 7 655
396
- The GS Repair Kit Rear
Master Cylinder (What is IN it is unknown) is ALSO 32 72
7 655 396. (So it looks like the Piston is the SAME for
Both F/R).
- Chances are the Classic
uses the same as the GS and that SOME other bike uses a
Similar Piston. Anyone?
Feedback
- Theoretically the master
cylinder and caliper can be rebuilt. I tried to buy a
rebuild kit for a leaky BMW master cylinder and was told
that they don't sell master cylinder rebuild kits, I
would have to buy a new master cylinder for some
astronomical sum. That was a different BMW than my '99
Classic. So, I'd imagine that there is a rebuild kit for
the master cylinder but that no dealer outside of BMWAG
has one in stock and they can't be shipped overseas for
national security reasons. I think your front brake
caliper probably just needs to be cleaned. Shank NYC USA
What about Sticky Pistons/Dragging or
"Binding" Brakes
by Andy #982,
Mark #403 & Kristian #562
Severity: It can be dangerous, so fix
it soon! Here are some examples:
- Rear brake catches fire.
First I sign is when I went to change gear and the bike
starting slowing at rapid rate. BMW surging I thought.
About 5 miles later I stopped at the traffic lights and
motorist behind start waving at me, this when I
discovered that rear brake assembly was on fire, not far
from the fuel tank under the seat. Bloody quick dismount
from bike and called the fire department. Five minutes
late two fire engines arrived! Communications problem?
Only real damage seems to be the rear brake assembly and
speedo sensor. The bike has only done 14,000 on mixture
of dirt and highway (no speed limits in my home state of
NT). Has any one had problems of rear brake overheating?
I was only doing about 125 KPH at the time of the problem.
Iain
- I've had problems with the
rear brake sticking, thus causing overheating, but
thankfully not as serious as what you experienced. It can
get pretty hot real quick. Oyvind #1052, Norway
- No fire, but really hot.
Having the rear brake adjusted with too little slack will
do this. You get the brakes hot, the fluid expands a
little and the pads are always touching, which makes the
fluid hotter, which makes the pads push harder on the
disk. Pete
Generally:
- The brakes drag (slightly) to
stop anything getting between the pad and disk that might
cause scoring. Its simpler for the OEM than fitting any
other sort of protection to the pad/disk.
- If the wheel spins freely for
maybe 10 seconds (or less, even a 3-4 good rotations)
after a good shove, all is OK despite some slight rubbing
(not squealing) noise.
- If it is dragging, in other
words it gets hot to touch even if you do NOT use the
brake, check the fluid level before anything else and see
if removing some helps. Stay within the sight glass
limits, but you'll find half full to low may be better
than full.
- If you've played around with
your forks/axle lately, you may have put the bike
together with a slightly different wheel position.
There's a surprising amount of variation in how the forks
will come to rest with everything loosened up, and how
they will end up when you tighten the triple clamps, axle
pinch bolts and fork brace. If you tighten things up with
a slightly different angle than you had previously, you
can get additional brake drag until the pads "seat"
themselves again to the new position. See the Front Wheel Removal FAQ for tips on how to put the forks
back properly and the Rear Wheel Removal FAQ for the rear.
- For the Rear Check the Brake Plunger moves freely. For the Classic,
Undo the The Allen Key Screw (i.e. the Brake Pedal Bolt). Take
it off the Axle and Grease the Axle, and the Plunger and
connections. Put some Vaseline or Grease in the rubber
boot.
- Next check Check the Rotor is
not Warped. They warp easily if they get too heat for too
long or they are dropped when you do a wheel change or
any maintenance work e.g. Bearings. Here are some New Rotor sources.
- Next idea is to replace the fluid and bleed. Old fluid with water in it can
expand under heat before it all goes spongy.
- Next idea is to check the
Pistons are CLEAN. What often happens is that as the pads
wear the pistons extend further and further out of the
caliper until you change the pads. Then with new pads you
push 'em back in again. But if you didn't clean the
piston's at all, all that gunge ends up going back into
the seal and can cause the piston's to "stick"
somewhat.
- Don't forget to ALSO check
whether or not the master piston returns completely!
- After that its strip down and
new seal time at which point you'll want to check the FAQ
or maybe see a mechanic. If a seal kit is available, just
get a clean place to work and replace every seal in the
kit. Clean everything as you go, you are looking in
particular for anything that might prevent fluid getting
back to the master cylinder. Lift the rear wheel up an
check if the brakes are slightly on even if you're not
breaking. If they are, this often causes over heating and
you have to overhaul your brakes, which isn't very hard.
If you find any inside dirt coating the brake cylinder or
piston then polish it away using a light rubbing but
never polish in and out, go around and around or you may
cause leakage through micro scratches. Then use new
gaskets/o-rings.
Feedback/Suggestions:
- Sticky M/C piston sounds very
strange. Brembo makes a special piston Vaseline for that.
I'd buy a rebuild kit, pop the old piston out (hammer and
ten penny nail are all the tools you'll need), lube up
the new one, slather the seals and pop that in (hammer
and 11mm socket (or close enough) are the tools you'll
need). I still say that if you are getting drag on the
front brake, you have mung and debris on your caliper
pistons preventing them from seating all the way. Take
out the pads, pump the lever a couple of times to get the
pistons to stick out a little more than usual. Spray
profusely with brake cleaner, get out of there before the
fumes go to your head, when the fumes clear, open bleed
valve (or take the top off the M/C reservoir) and cram (and
I mean CRAM!) the pistons all the way into their bores,
use a C-clamp if you have to (I've done it in the past),
then put in the new pads, make sure the reflex pins are
pushed all the way into their bores as well (and make
sure the reflex pins are substantially greased up and not
sticking in their bores). Don't forget to to put a lil'
grease or Auntie Seize on the backs of the pads to
curtail squealing. And THEN, if you still have a bit of
brake drag, go for a ride. I put on stainless lines and
new Galfer pads this weekend, I had some front brake drag
initially but after bedding in the pads a la Method du
L'iclair (Flash), no more front brake drag. Shank
- Further to my recent postings
about my front brakes (sticking plunger binding discs etc)
I have the following update: After replacing the pads (the
old discs still had life left in them) and bleeding that
God 'awful brown gritty stuff from the lines and
replacing it with nice clear brake fluid my pads were
binding on the discs. I took the whole thing apart again
but to no avail. Fearing the worst for my master cylinder
and calipers I took it to the shop. They stripped them
down as best they could, cleaned the caliper pistons
copaslipped the back of the pads and again bled the
system. This still didn't fix it, so last night I put the
old pads back in and lo and behold problem gone. One of
my colleagues at work ('91 K100) suggested that the
pistons had corroded on the outside (the bike had been
laid up for some time before I bought it) so since the
new pads meant pushing the pistons home they simply
jammed in the bore. Logical? Pat #1210.
- Logical? Possibly. But
sticking pistons is what I suggested upon your first post.
And I still stand by that statement. Take the pistons
out, ScotchBrite' em real good and (please read carefully)
lube the slide pins of the caliper, these can also
contribute to sticky brakes when new pads are put in. Ok,
so replacing the new pads with old has temporarily fixed
the problem. What are ya gonna do when the old pads have
no more meat left on'em? Shank.
- Bound rear brake. After
removing my rear wheel (Classic '97) and replacing it. I
checked the brake whilst on the centre stand by pressing
it down checking it had come on and then checking that it
had released. Riding to work this morning all went to pot
:( After using the break a few times it started to bind.
it just is not releasing, luckily I only had 500m to go
after they bound (was really lucky with the lights) and
was able to go really slow after that. There was no
pressing the pedal when the wheel was off. That is a
silly thing to do. All I did was the wheel off, change
tyre, wheel on procedure that I have done loads of times
before. Normally it is all hunky dory. Even this time,
the wheel went on first attempt. It is straight, that was
checked and rechecked. I know I can release the brake at
the pedal end with the bolts. But is this just going to
mask a problem or is it the correct fix? So, my bike is
outside work, the rear break is pretty much locked,
questions are: 1, What do I do to unlock it? 2, Why did
it happen?.
- What xls said, check you
didn't lose the L or R Spacers when you put the wheel
back on AND check the brake caliper mount on the swingarm
is nice and loose but in position on that little lug
before you go tightening up the main axle nut. Good point
Chris, James I put a dab of Copaslip (a sort of copper
impregnated "dry" grease on those pins to help
it along. (Don't get near PADS.!). Try that first, then
remove the wheel and recheck. Check Alignment at same
time, sometimes goes on skew when torquing main nut,
unless you have third hand to push k.
- Make sure the pads are not
stuck on the retaining pins as well. You should be able
to move them slightly independent of the pins. I also
just thought that if your rotors are worn and the pads
are supposed to fit between the lips at each edge perhaps
a pad is riding on a lip. The goal should be to have the
pads riding on the pins and against the rotor in the same
way as before you pulled the wheel. Chris in Santa Cruz,
CA #782 - 30-Jul-02
- Bound rear brake - Answer.
Ok, I have found the cause. After checking the wheel/axel
end all seemed OK. I went to the brake pedal end,
detached the brake pedal from the brake plunger and moved
it up and down. It was sticking, definitely not rising by
itself. So, I worked the pedal up and down a little, It
is now not perfect but it is better. A clean / grease up
of the area is in order. : J@mes NZ #848.
- *Sigh* We've gone over this
before, I'm SURE it's in the FAQ somewhere, but for those
of you city folks just too damn busy to read the FAQ,
read on and, please, if you would be so very kind........BLOODY
PAY ATTENTION!!!
- Take the pads out.
- Remove the caliper from the
fork slider.
- Pump the brake lever to get
the pistons out far enough to see a clean spot on them,
BUT NOT TOO FAR!
- Spray profusely with brake
cleaner, use two cans if you have to.
- Take whatever brake fluid
remains in the reservoir out, use a turkey baster, eye
dropper...whatever or simply use the Flash method and
turn the bike over to get it out.
- CRAM the pistons ALLLLLLLL
the way into their bores. (now here's the REALLY
important part, please pay attention)
- Remove the piston assembly
from the back assembly. Yes, they do come apart.
- Go ahead, give a good try,
they'll come apart. Nope, you won't break anything.
- Clean the mung, bung and
grunge off the slide pins. Grease them profusely. Use
lots of grease. No, MORE than that. That's it, grease it
up good. While you're at it, fill the lil' rubber booty
thingies with grease.
- Now put the slide pins back
into their lil' rubber booty thingies. Yes, cram'em in
there. No, you're not going to break anything Yes, you
are putting the caliper back together.
- CRAM those slide pins in
there. So what if some grease comes out, wipe it off. No,
you aren't going to hurt anything. Sheesh. REALLY cram'em
in there. Ok, pull'em out a bit, make sure there's some
resistance. Now cram'em back in there really good. NO,
REALLY cram them in there. Keep cramming. I don't think
they're all the way in yet. (Don't ya just hate it when
ya hear that?)
- Ok, when you see the lil' hat
part of the lil' rubber booty thingies pulsing with each
cram, they might be close to being all the way in there.
- Try squeezing the lil' hat
part to poot out the rest of the air trapped in there.
Now cram'em in some more. Oh come on, put some
testosteronized muscle into it, CRAM'EM!! Sheesh, how can
someone so limp-wristed ride a bike? I said, CRAM'EM IN
THERE LIKE A MAN, DAMMIT!!!! Very nice, now stop yer
crying.
- Put a light coat of grease on
the part of the pistons which face the pad.
- No, you won't hurt anything.
Yes, grease on the pad surface or the rotor is bad but
you are not putting grease there. Put a light coating on
the backs of the pads. Just a LIGHT coating!
- Ok, now grease the leaf
springs, LIGHTLY.
- Grease the pin that holds the
pads in a bit. LIGHTLY. Just a nice light coating, helps
the pads slide on the pins, reduces corrosion ("rust"
for you simpletons).
- Now put the pads in the
caliper. CAREFULLY, you don't want the pad surface
touching any of the surfaces you just lightly greased.
- Ok, drain a little gas from
the tank, put the gas on a rag and wipe off the pad
surface and try again. Good, now it's all back together.
- Put the caliper onto the
rotor.
- Torque the caliper to the
fork slider. Yes, a whole 50Nm. No, I don't know the foot-pounds.
Foot-pounds are STOOPIT, get a torque wrench that reads
Newton-meters. Sheesh. Come on, Torquemada was Spanish,
he don't know nuffin'bout no footy-pounds.
- Yes, it's spozed to make that
sound when you torque it properly. NO, don't touch the
brake lever yet.
- Put some brake fluid, FRESH
brake fluid in the reservoir. NOT TOO MUCH!! You really
don't wanna fill it up all the way. Pump the brakes up,
slowly.
- Yes, if you pump it quickly
with the reservoir cap off it will shoot out brake fluid
onto your tank just like that. Best to pump slowly, with
the cap on and a nice clean WET towel on your tank. Yep,
that's it.
- Ok, now you feel some
resistance in the brake lever? Good. Take the reservoir
cap off, fill with brake fluid to JUST BELOW the top of
the sight glass.
- Push the rubber bladder
thingy in the reservoir cap back into it's non-expanded
shape.
- Put the reservoir cap back on.
Screw it down.
- Pump the brakes up. Release
the lever. Spin the wheel. It should spin freely with
only the slightest drag if any. Now, wasn't that easy?
You're welcome. Now give me my fifty bucks you twit and
get outta my way. Shank (eloquent as always, ed)
- Contrary to what Andy says,
my front tire has never spun for 15 seconds before being
dragged to a stop by the front brakes, not even when new.
I MIGHT get a few full rotations out of it on a good day.
If you've played around with your forks/axle lately, you
may have put the bike together with a slightly different
wheel position. I've done this several times while trying
to get the front wheel lined up properly. there's a
surprising amount of variation in how the forks will come
to rest with everything loosened up, and how they will
end up when you tighten the triple clamps, axle pinch
bolts and fork brace. and if you tighten things up with a
slightly different angle than you had previously, you can
get additional brake drag until the pads "seat"
themselves again to the new position. The last time I
straightened my forks in the clamps, after riding for a
long time with them just the slightest bit askew, my
brakes dragged horribly for a day or two, and eventually
everything was fine again. it may not seem to make much
sense, but the tolerance between the pads and rotor is
virtually nil and my experience playing with the fork
position has been consistent with it's temporary effect
on the brakes. As they say, YMMV. Mark #403
- Rear Brake riding the disc.
Yes, it's happened to me, twice. Each time I replaced
rear brake pads on my '99 Classic. There were two things
that were wrong:
Problem #1: The slide pins were sliding as intended.
Reason: Not greased properly at the factory (natch,
Italian bike).
Solution: Pull apart caliper, sand off rust on slide
pins, slather with copious amounts of BMW #10 (which I
find superior in resisting water and oxidation).
Problem#2: Caliper piston did not want to return to
"home" position all the way into it's bore.
Reason: Lots and lots of dirt, sand, mung, pigeon
excrement, and various other detritus indigenous to NYC
stuck to exposed sides of piston not allowing it to
recess fully into it's bore.
Solution: Take pads out, pump pedal SLOWLY and SLIGHTLY
to expose piston a little more than usual. Spray
profusely with lots and lots of highly toxic ozone-depleting
brake cleaner spray. Let it dry. Then cram pistons back
into the bore. Make sure that brake fluid reservoir is
NOT overfilled at this point. Which could also be a
reason why the piston would not want to recess fully into
it's bore.
A slight slather of BMW #10 (or axle grease or Auntie
Sieze's salve) on the backs of the pads (the part that
DOESN'T touch the brake disc) can keep the squealing pigs
of braking from singing their song. Good luck. Shank NYC.
- I've had problems with my
rear brake sticking, resulting in severe heat up, brake
pad wear and a potential fire hazard. It turns out that
dirt has gotten under the rubber boot of the rear master
cylinder and stops the master piston(?) from returning
completely. It's a warranty repair, including changing
the worn pads, since there is no periodic maintenance
prescribed for the master cylinder according to my dealer.
Hmm, being too impatient to wait for my appointment at
the dealer, having a slow day at work, and with a good
riding opportunity coming up this weekend, I decided to
have a look at the master cylinder myself. I won't have
the brake fixed by Friday if I don't do it myself, and I
won't do the trip without a functioning rear brake, so I
really don't care that much if I loose some Kroner worth
of warranty parts. After disconnecting and removing the
master cylinder, I tried to blow out the piston with
compressed air. No Luck. I then used a thin dowel (2.5 mm)
through the brake pipe connection at the top and
carefully tapped out the piston. The piston slides in a
nylon liner, and it seems this liner has become slightly
disfigured and pinches the piston so it couldn't slide
all the way back. I applied some Brembo mounting fluid
from the repair set for the rear master cylinder, (which
consists of a small gasket and a sachet of mounting
fluid, and is of course grossly overpriced), and
reassembled the cylinder. Working the piston up and down
inside the cylinder, I was able to take enough nylon off
to make the piston move freely again. I have no idea why
this has happened, but I suspect there may be some
corrosion of the aluminum behind the nylon, due to road
salt perhaps. Another option is that the cylinder has
been damaged in a fall when off-roading. This seems less
likely, since I always fall down on my left hand side (no
kidding (well, there was this one time...)). Sorry, no
pics. I don't have a Digital camera (yet). Perhaps the
most important lesson to be learned is to also check the
master cylinder in addition to caliper and piston if you
ever experience sticky brakes. Removing the rubber boot
at the bottom of the master cylinder and looking up,
you'll see a white nylon sleeve and a black piston which
slides inside it, held in place by a locking ring. The
piston should slide all the way down to the locking ring
when the brake is released, if not the brake fluid will
not be able to return from the caliper and the brakes
will stick. As the sticky brake heats up, the brake fluid
expands and increases the pressure and thus the braking
action. I reckon whoever it was that reported their rear
brake on fire a week ago (?) must have had the same
problem with the master piston not returning completely.
Oyvind #1052, Norway.
- Next.
Other reasons for Brakes heating up
Caliper
out of Alignment
Problem: Caliper torture. I
already have a warped rotor, I confirmed I have a minor hub warp
(.05-.06mm) problem, and I don't want to tighten the rotor any
more than I have to, as I have had previous problems with rotors
warping due to overtightening. I'm trying to shim the mounting
points (actually, just 1 or maybe 2 spots) on the hub as flat as
possible, before I tighten the rotor to it, and the rotor starts
going thru heating and cooling cycles. I'm tempted to go for
Loctite 243 (for removal without heat) and maybe 10Nm. But I did
measure, and it looks like the longer GS will fit the Classic,
and if I ever have to do this again I will order the longer bolts.
I've been looking at those seating clearances also. They might be
affected if the spacer were the wrong thickness (unlikely), if
the wheel bearings weren't fully seated (mine are fully seated,
crushing/holding the wheel bearing spacer in place, OR if the
rotor mounts cut into the wheel hub are machined too deeply,
causing the rotor to be seated farther inboard, which is what I'm
think may be my problem, but is much harder to check without
disassembly. If that was the case, I could make the axle spacer
on that side a few mm thinner to shift the rotor outboard. As it
is, for my caliper to fully release off the inboard side of the
rotor, the caliper has to slide inboard EVERY SINGLE BIT that is
available, including compressing/crushing the slide pin guide
bellows. When the bellows expands/pushes ever so slightly (we're
talking about less than a millimeter), as is it's rubber nature,
the caliper binds that tiny bit.....actually the front caliper
releases even less, and binds more, but has never even gotten
warm to the touch, despite the rotor getting hot when used hard.
If the rear caliper weren't so consistently too hot to touch, to
the point where I worry about the rubber seals, I'd ignore it.
The brakes have always worked perfectly, except for the heat. And
without actually dissembling the caliper (which I won't do unless
I have spare seal rings) I've tried all my tricks - I've flushed
the caliper 4-5 times, expanded out the pistons and cleaned/sprayed
them, removed the slide rubbers, cleaned them and tried 3
different hi temp caliper greases (synthetic and non synthetic)
on them, crushed them shut and bled out the excess air and grease
from the sliders, used older thinner pads which give me an
additional mm of clearance, used new OEM pads with new clip and
pin hardware, checked the release freeplay on the master
cylinder, and retracted the pads, filled the master cylinder
halfway, sealed it, and then pumped the pads down, creating a
minor vacuum in the m/c. I've serviced plenty of disk brakes, but
I'm at a loss on this one..... maybe a stupid question - I'm not
used to Brembos. I've been reinstalling my cleaned greased slide
rubber bushing by forcing it into the caliper hole, and then
installing the base plate slide pin, then bleeding the bellows as
I crush the caliper. You aren't supposed to place the slide
rubber on the pin and THEN force the rubber thru the caliper hole
are you? Seems hard to do without lubing the outside of the
rubber to go thru the caliper hole, like you'd tear the pin thru
the rubber. I dunno - no hurry, but clever ideas are welcome.
Otherwise, I just freakin love my bike! HsN
Solution: None.
Brakes work for about 50 applications and then it
grabs the disk.
Problem: I got a 2001 F650GS,
as far as I am concerned it is a lemon. Any way, was riding to
work yesterday, stopped at the light and I can smell this sharp
burning odour. looked at my rear brake and my calliper has smoke
coming out of it. I did notice earlier that the bike is kind of
sluggish, but did not think much of it at the time, riding in
city traffic and all... My rear calliper seized I thought, so I
took the screwdriver out of the bike kit and to my surprise I was
able to spread the shoes with little effort, that goes for the
calliper itself, it was free to move. I do have excessive travel
on my brake pedal, brakes work for about 50 applications and then
it does the same thing (grabs the disk), ABS work. One thing I
noticed that when I apply and release brake I can see the piston
move back and forth about 1/16".There is no way it should
move that much, at the time when brakes will not release the
brake pedal feels solid, like it was from new. Any thoughts? I
think it might be the master cylinder, or some kind of check
valve in ABS system. Pooshkin '01 F650GS, Winnipeg, Canada.
Solution: Just about a month later, I finally got all new
rear braking system:), dealer had no clue what to do, did not
care about what I had to say. I got new disc, caliper, shoes,
master cylinder, they had to take parts off a brand new bike. It
was getting pretty strange what it was doing, the bike was
applying rear brake by itself. Pooshkin '01 F650GS, Winnipeg,
Canada.
Feedback:
- Brake fluid is hygroscopic,
absorbs water from the air. Consider changing your brake
fluid and then bleeding the system if necessary. Flash #412
- Wonder if you have water (steam)
or air in the system (soft pedal) that expands
significantly as the fluid gets hotter due to use. At
some point, the brake starts dragging, creates heat which
expands the fluid, creating more brake pressure, more
drag, more heat, etc... I think I'd try a brake bleed
using fresh brake fluid first (but BMW "claims"
you need their special vacuum brake bleeder to do this
properly). Lots cheaper than ripping into BMW's "black
boxes." Marty #436-Chicago-97 F650F
- It's almost certainly a
problem with your master cylinder, AND it's a warranty
item. There's a white plastic sleeve inside the master
cylinder. I had corrosion between the cast metal body and
the plastic sleeve. This made the diameter of the plastic
cylinder slightly smaller, preventing the piston from
retreating completely when released. Thus, the fluid
can't return to the reservoir, causing the problems
you've described. It was fixed under warranty, and the
mech filled the rubber boot with grease. This has do far
prevented any more corrosion from occurring. Oyvind #1052,
'01 F650GS Dakar, Bergen, Norway.
Brake Calliper Retaining Bolt Warning
IMPORTANT: If you ever remove the
Front Brake Calliper for any work, Steering Head Bearings, Fork
replacement, whatever, make sure the Bolt threads are
clean and there are absolutely NO bits of Aluminium or any other
dirt or swarf jammed in the threads. If there is, use a fine
screwdriver and a wire brush to clean them thoroughly. In
addition check there are no bits of Aluminium in the threads of
the Calliper itself. Test that it can be wound all the way in BY
HAND before tightening. If it jams going in by hand, take it out
and check it and clean it again until you CAN screw it in BY HAND.
The reasons should be apparent, however any small amount of
Aluminium in the thread will start the bolt jamming. If you
tighten it further with a socket or spanner, it can't screw in
any more and starts ripping threads out. Then with more Aluminium
now jammed in the threads, as you back it out it rips even more
Aluminium out. You do not want this to happen. Really Bad
Karma. Do not exceed the specified torque.
Why Does my Brake Pedal Pulse ?
3 Reasons:
- Loose Brake Pedal Axle.
- Worn Roller. See The Chain Roller FAQ
- ABS Activation
Loose Brake Pedal Axle (Most
Common)
- If your chain is too loose,
particularly if your brake pedal bolt is too loose (because
the lower chain roller is on the same bolt) you can feel
the chain bouncing off the roller via the pedal. Take a
look at the bolt and the chain slack. Costs nothing to
correct if it is the problem and wastes virtually no time
to check if it isn't. The Allen Key Screw to do up: (i.e. the Brake Pedal Bolt). Flash#412
Missing lower chain roller.
- My chain is rubbing against
the chain guard attached to the brake pedal which is
resulting in a pulsating feeling in the pedal. The chain
is giving the recommended 20mm and I just lubed and
tightened the screw for the pedal and chain guard. If I
tighten the screw too tight, which appears to be the
answer, the pedal won't return far enough to disengage
the brake light.
ABS Activation
- ABS activation may cause the
brake pedal or lever to pulse, this is normal, but will
only occur under harsh braking on low grip surfaces.
Peoples first ABS stop can be worrying. There have been a
number of incidents with Landrovers in the late 80's when
people felt the ABS pulse and stopped pushing the pedal.
The wheels don't lock if you do this, but its generally
unhealthy. Andy #982
Front
Brake Play
See the Cable FAQ
Sources of Aftermarket Brake Calipers,
Rotors, Brake Lines
Terminology:
Floating rotors are not
"attached" to the rotor carrier. There are "half
holes" in the rotor and the carrier and there are rivets
that keep the rotor positioned in the carrier. They have a slight
amount of wiggle room. The REASON is so that when they get hot,
they can expand without warping because nothing is NAILED down.
They are free axially only. Draw two concentric circles. On the
inner circle, draw a set of six or eight tiny circles, spaced
equidistantly. Now, cut out the tiny circles. Then cut on the
inner circle. The piece from the outer to the inner, with the
tiny circles, is what the actual ROTOR part of a floating rotor
looks like. Now loosely rivet it to the inner circle at the tiny
circles and figure out how to mount the inner circle to your hub
and you have a floating rotor assembly. Get it? Floating calipers
are free to move across the thickness dimension of the rotors, to
adjust their position as the pads wear. The two "floats"
are orthogonal and therefore can be used in concert or
individually, as you like. Flash #412
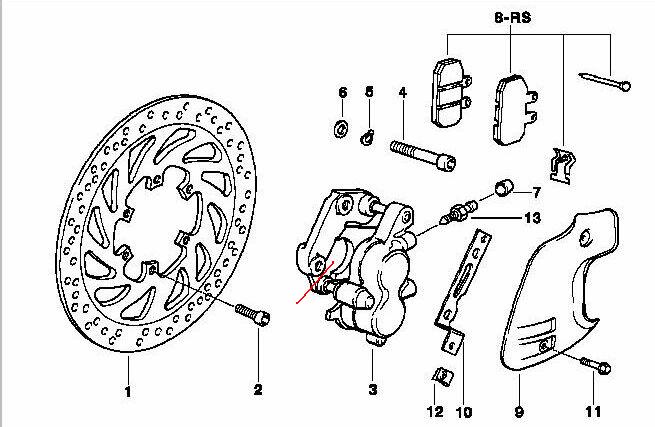
OEM Brakes:
Our front Brakes are 30/32 mm Two
Pot Brembos and the rear is a single pot 34mm Brembo.
The Caliper No's are F 22.5553, R 22.5546.
OEM
F650 Classic Part#:
Front:
Disc Part # 34 21 2 345 323
Brake Caliper # 34 11 2 345 319
Rear:
Disc Part # 34 21 2 345 314
Brake Caliper # 34 21 2 345 312
OEM F650 GS/Dakar Part#
Front
Disc Part # 34 11 2 345 824
Brake Caliper # 34 11 2 345 854
Rear
Disc Part # 34 21 2 345 314
Brake Caliper # 34 11 2 345 856
Frenotec has OEM Brembo Parts, but doesn't
specifically list the BMW F650. It does say "New cast
caliper with 4 individual pads. Provides better braking pressure
and feel than older style calipers. Will upgrade most Ducati,
Aprilia, Moto Guzzi systems". If you find one that fits,
please let us know , ed!
Aftermarket Brake Parts Sources:
Brakes -
Aprilia:
- The Aprilia Pegaso, being
almost the same bike as the F650 Classic, has Rotors that
could be used as replacements.
Brakes -
Braking: www.braking.com
- I have my fingers crossed
that Dennis Kirk will be able to get me a BRAKING rotor
for about $125. (I think that's BRAKING part # front
rotor AP13FL and rear rotor BW05RI). Haven't found a
price from a Brembo dealer yet, if you happen to know any
that are retail friendly. http://www.braking.com/Eng/DISCHI.HTM. Todd#389
Brakes -
Ducati:
- Apparently the Ducati Monster
has the same Brembo Brakes as the F650.
Brakes
- EBC: www.ebcbrakes.com
- When setting up an extra set
of wheels for our 01 GSA, I ordered the EBC rotors and
sent them back after finding that the rear (?) wasn't
compatible with the ABS sensor plate. They also looked
like they belonged on a mini-bike, as far as finish was
concerned. I ended up using Braking rotors, front was a
floater, for the carbed model with no problems. Did you
need to do any adaptation to get the Braking rotor to
work with ABS? Not at all, bolted right on. No problems
and looks better than the OEM's, and still cheaper too. I
bought through Dennis Kirk. Iceman.
- www.accwhse.com has EBC
rotors for the f650 for $200 front, $130, rear. according
to the website, these are floating rotors. the number
below is for the front. the rear can be found by looking
up "profiles" on the accwhse.com website and
looking for the BMW F650. (60506) $199.95 EBC Rotor Left
#MD650LS Mark #403.
- Despite the BMW fiche part
numbers being different, the EBC catalog specifically
lists their rotors as fitting across the F650 line,
meaning the EBC front fits all years Funduro/ST/GS/CS
front, EBC rear rotor fits all years Funduro/ST/GS/CS
rear. Not sure about the calipers. It might mean the
Classic/GS rotors might be different, but
interchangeable? I'm about to break down and order a
Braking rear rotor as a replacement, the cheapest
alternative I've been able to find. Never used the brand
before, but I can't see waiting 8 weeks for a Galfer (which
is competitively $, but backordered). HsN
Brakes
- Galfer: www.galferusa.com
by Todd#389
Q. Can one
use a floating rotor (which Galfer offers as an option ) WITH a
floating caliper (like we have on the F650)? I always thought it
was either/or, but I ain't owned any fancy bikes.
- In my quest for what's
available to replace my slightly warped rear rotor, I
emailed Galfer USA (below) to ask what they have
available for replacement F650 rotors, and got a reply
from their agent, Cyclebrakes, with some part numbers (not available on
their website) that might be useful in the FAQ's. The
stuff isn't cheap, tho the Galfer floating front rotor
sounds interesting, competitively priced the same $176 as
an OEM rear rotor from CalBMW. I have my fingers crossed
that Dennis Kirk will be able to get me a BRAKING rotor
for about $125. (I think that's BRAKING part # Front
rotor AP13FL and Rear Rotor BW05RI). Haven't found a
price from a Brembo dealer yet, if you happen to know any
that are retail friendly. Hey, since the Motorworks and
Motobins websites list rear rotors for 60-80 UKPounds (cast
iron and OEM), considering the weight, I guess shipping
could justify much of the $40 difference compared to a US
price for an OEM rotor? btw, the www.cyclebrakes.com
website lists some interesting items I haven't seen
offered elsewhere, including thumb-brakes and Galfer
brake fluid. I hope some of this is interesting/useful,
helpful comments welcomed.
Reply from Cyclebrakes below:
Hi Todd,
We were forwarded your inquiry from Galfer as we handle
their retail inquiries and orders. We also carry EBC so
between the two manufacturers, we have stuff for your
bike in stock. Ready to ship is a Galfer Front Rotor with
Free Black, carbon-semi-metallic pad (or upgrade), Galfer
or EBC rear pads and EBC Rear Rotor (pad not included).
Galfer carries a front rotor, #DF663, in stock, $175.99
includes Free Black pads, #FD172 on current sale. You may
upgrade to Kevlar or Sintered HH pads for only $20 per
caliper. It is a FLOATING rotor which means better
performance and less chance for warping. #DF703 not in
stock, will have to request from Europe which is 6-8
weeks if they have it ready to ship, $159.99, also
includes Free Black pad, #FD165. Again, you may upgrade
to Kevlar or Sintered HH pads for only $20 per caliper.
EBC front rotor, #MD650, not in stock, $155.99 ETA 1
week, may not be floating (haven't seen a picture) Rear
#MD651, $155.99 in stock. If you want EBC pads then they
are front, #FA209 and rear, #FA208 both available in
sintered HH, $36.99 per caliper. EBC rotors do not
include Free Pads.
We also have Galfer steel-braided brake lines: FK003D166
front and rear, $53 for front and add rear only $40 with
free color choice on plastic outer sheath: red, blue,
yellow, smoke, black or clear.
To complete your order we will need: ORDER INFORMATION:
Bike Info and parts desired. Name & Phone Number,
Credit Card Number (Visa/MC), Ship-to address, Billing
address (where CC statements are sent) if different from
shipping, address, We make every attempt to ship same day
and we're located in southern, California. This quote is
good for two weeks.
Thanks for your request,
Take care,
Melissa
Phone: 805-452-5957
Fax: 805-653-5016, Attn: Cycle Brakes
sales@cyclebrakes.com
www.cyclebrakes.com
Brakes - Harrison: http://www.billet.co.uk/
Direct Links to
Harrison's F650 Specific Pages
"Thanks for
your mail Kristian. Apols for the delayed reply. The caliper that
we make specifically for the F650 (front only) is the #235. It
has 54mm spacing on the mounts. As far as we know the fitment is
the same for the "Classic" f650 and the newer F650GS,
but would like to have a confirmation of any differences if any
of your riders are knowledgeable on the subject. Our caliper is
direct fit, and designed to work with the factory disc.
We will be updating the website shortly, but the fitment is
currently posted on the 'new products' page.
Prices are (GBP£ excluding courier and VAT if applicable):
Billet Original facia design:
6-Piston Polished £239 each
6-Piston Clear or black anodised £259 each
'2k1' or New 'Signature' facia design:
6-Piston polished £271 each
6-Piston Clear or black anodised £289 each
Robert"
- Money spent on braided hoses
and aftermarket pads will give the most improvement for
money spent. If you like spending money Harrison billet
now has a 6 piston caliper (about $450) and there is a
320mm front rotor available. Not sure if these parts fit
the newer GS series but they do fit the original 94-2000
classics. Peter Jensen #233
Brakes - MAP Engineering: www.map-engineeering.com
- MAP Engineering makes an
oversize front rotor for the older 650 that I swear will
fit the Dakar. But MAP remains un-convinced. At least
that was there story when I wanted to buy one last summer.
Jinx

Brakes - Motorworks:
- Motorworks can supply Italian disks or cast iron ones.
If you want performance over looks go to the iron.
Remember you'll need new pads too, its false economy not
to change as a set. Aprillia dealers can probably supply
too. Andy Leeds UK #982
Brakes - Nagesti:
- This link will lead you to a
Japanese company that seems to make replacements for
everything under the (rising) sun. if nothing else, this
link has dimensions for everything as well. http://www.nagesti.com/ng/ingles/index.htm Mtbiero (cugino Pegaso)
Brakes - Spiegler:
www.spiegler.de
- A high-end German
manufacturer of brake parts, 8piston callipers, rotors,
some handlebar/foot-peg items that we all dream about,
with some US dealers. Even for the F650. Downloadable
catalogs w/prices. www.spiegler.de/gb/index.html
Feedback on Aftermarket Brake Parts
AM - Calipers
- Pegaso Cousin Offers Thanks.
What a great forum you have here. thanks for all the help.
This is what I have found recently that may be of
interest. I've been looking into upgraded calipers for my
Pegaso, and the best I can find to date is a commitment
from Harrison Billet in England that they will have a
unit for the F650 next month. I know the Pegaso and F650
share rotors, but before I drop major money on a 4, 6 or
8 piston caliper, I would really like to know if we share
calipers as well. The Brembo part number on my caliper (visible
from the back side, looking thru the spokes) is:
22.5553
This is a two piston single action/floating caliper (both
pistons on one side) style Brembo. It is common on KTM's,
husky's, Husabergs, Cagiva and other Euro Enduros. Is
there a kind soul out in F650 land that is willing to
take a peek at the backside of their front caliper and
tell me the part number (Brembo, not BMW). Thanks.
Prices FWIW:
Harrison 4 piston #173 ~= $260
Harrison 6 piston #214 ~= $321
Beringer 4 piston #240 ~= $460
Spiegler 4 piston $437
Spiegler 8 piston $491
There doesn't seem to be any opposed piston caliper
advertised as a drop in replacement (yet), however, http://www.jacklilley.com/jlcart/ lists supermoto caliper kits from
Beringer for Husky's, KTM etc, that may fit, but they
haven't responded to my e-mails yet. Spiegler has caliper
kits that will fit, but take an intermediate bracket. In
looking at a Brembo specs page at http://www.redracingparts.com/en/english.htm together with some application
info I got from http://www.tawvehicle.com/brembo.htm.
I think the latest Brembo 4 piston series, the "6800"
series with part numbers like 20.6800.x5 could be made to
work in place of the 22.5553 caliper, with a simple-to-fabricate
flat hanger plate. this is yet another option, however
I'll hold out for the Harrison as our calipers are the
same. mtiberio, DOD #1010, Former AMA Pro Twins National
#10, 4 time WERA Super Vintage National Champion.
- Frenotec ( www.frenotec.com ) has OEM Brembo Parts, but
doesn't specifically list the BMW F650. It does say
"New cast caliper with 4 individual pads. Provides
better braking pressure and feel than older style
calipers. Will upgrade most Ducati, Aprilia, Moto Guzzi
systems". If you find one fits, let us know!
- Checking http://www.tawvehicle.com/calcross2.htm#BMW cross-reference list doesn't
give any BMW F650 Caliper Part.
- Redracing do not have them either:
Reply-To: <red@redracingparts.com>
From: "Giovanni Bertone - RED Racing Parts"
<red@redracingparts.com>
To: "'Kristian <snip>
Subject: R: Calipers for Brembo Brakes
Date: Sun, 4 May 2003 14:44:31 +0200
Organization: RED Racing Parts
I'm sorry but we don't sell this calipers.
Best Regards
Giovanni Bertone
RED Racing Parts
red@redracingparts.com
www.redracingparts.com
> -----Messaggio originale-----
> Da: Kristian snip [mailto:snip]
> Inviato: sabato 3 maggio 2003 6.41
> A: red@redracingparts.com
> Oggetto: Calipers for Brembo Brakes
>
> Hi,
>
> I help write the FAQs for faq.f650.com. We're
looking for replacement Brembo Calipers. Our front Brakes
are 30/32 mm Two Pot Brembos and the rear is a single pot
34mm Brembo.
> The Serial No. on the Brake is F 22.5553, R 22.5546
>
> Do you stock this Caliper?
>
> Rgds
>
> Kristian
AM - Rotors
- While the BRAKING rotor is
not actually installed yet, it's fit and finish seem good.
Compared to OEM it has slightly smaller "feet"
meeting the hub, and machined completely flat. Double
sealed tamper resistant factory packaging. But I thought
it was interesting that there are easily TWICE as many
ventilating holes in the BRAKING rotor as compared to the
OEM rotor. That might be interesting. HsN
- Despite the BMW fiche part
numbers being different, the EBC catalog specifically
lists their rotors as fitting across the F650 line,
meaning the EBC front fits all years Funduro/ST/GS/CS
front, EBC rear rotor fits all years Funduro/ST/GS/CS
rear. Not sure about the calipers - takes me forever to
download the .pdf to view the applications.
It might mean the Classic/GS rotors might be different,
but interchangeable? http://www.ebcbrakes.com/.
- Next.
AM
- Rotor Bolt Sizes & Torques
- Q. The Classic Factory
Manual says to use Loctite 270 and 12Nm on the rotor
bolts. I never actually looked at that before,
assuming that the 270 was actually the Loctite 262 (red,
maximum strength, and often requires heat). Not so -
Loctite 270 is a PERMANENT maximum strength green
threadlocker that ALWAYS requires heat for removal. Like
for setting studs. My rotor bolts were certainly not set
with 270 as they came off so easily you could have used a
folding pocket wrench set. So I looked in the GS .pdf
manual (old edition), and there it says to use good old
basic Loctite 243 and 9Nm, as opposed to the 12Nm for the
Classic. What gives? Especially since the rear rotor on
the Classic and the GS are identical part numbers,
certainly fastened by similar size bolts, why new lower
torque's? I think that green Loctite 270 is overkill for
this application, and it certainly wasn't used on mine.
Except that BMW specifies otherwise, Loctite 262 is my
goop of choice, as an upgrade from 243, BUT lowly 243 is
specified in the GS .pdf. Any comments on the change from
12Nm to 9Nm? All obscure trivia, I know, but maybe worth
sharing with other aficionados? So, any enlightened
choices between 12Nm and 9 Nm on the bolts? I'm thinking
of 9Nm and Loctite 262, to lessen warping and yet obtain
better threadlock. HsN.
Thanks very much for the confirmation (Below). I find it
interesting that they changed both the specs (Loctite and
Torque) DOWN. HsN
- A.
- I checked the new GS manual
and it says to use LocTite 243 both front and rear, with
9.0 Nm.
- The bolts for the GS-GS/
Dakar are M6x20 and for the Classic M6x16.
- I checked some torque tables
I have and here is what found regarding M6 bolts
| Bolt Quality (Strength Rating) |
8.8 (Low Tension-Standard
Hardware Store Bolts). |
10.9 (Medium Tensile Strength -
Medium-Stress Applications) |
12.9 (High Tensile Strength -
Special Applications) |
| Molybdenum lubricated: |
8.9 Nm |
12.5Nm |
15.0 Nm |
| Clean and dry: |
10.5 Nm |
15.0 Nm |
17.5 Nm |
- The reason for the lubed/ dry
differences is to compensate for the friction / torsional
stress so that the "clamping" force is equal.
- You said you have socket head
on yours - on my GS there is Allen screws with short head.
Re: my torque table, almost all Allen screws is 12.9
quality. but due to the often-sharp corner under the head
they are best torque as 10.9 screws. All short head Allen
screws MUST be handled as 10.9 or less, despite the fact
that the material usually are heat treated to 12.9
tensile strength. I would think 9Nm is to be used on the
later models, not because of the bolt quality, but rather
because of the "weak" point here: the aluminum
hub. It is all too easy to strip threads in aluminum, if
the latter have inferior or "standard/ inexpensive"
quality. The reason the low head Allen screws must be
less torqued is due to a design compromise. Because of
the low head, the bottom of the "hole" must be
so deep that the material remaining is thinner than on
the normal Allen screws. Haakon #626, Norway.
AM-Brake
Lines (or Are Steel Braided
Brake Hoses Better than the OEM Rubber ones?)
This subject is
like discussing OIL. There are 1001 differing opinions. Like the
OIL discussion, a cross section of these opinions is presented
here. You choose which camp you fall in.

Note: BMW
already (and only) installs steel brake lines on the F650 bikes
that come with ABS and then ONLY the front.
- I asked my BMW shop about
steel lines at my 6000 mile service and he talked me out
of them. Said they look cool, but don't offer any benefit
on our bikes. FYI
- Steel brake lines make a
difference. Anyone who says they don't has never
experienced the difference. In some cases it is dramatic.
When I put steel brake lines on my 2002 the difference
was amazing.
- On the F650 you can see the
stock line expanding as you increase pressure. If you
practice stops from 60 MPH using maximum braking and then
practice again using steel lines (especially the front)
you would have to notice a difference. Just my opinion.
- An SS-line on the rear is a
total waste, IMHO. On the front... like POWER BRAKES when
compared to rubber hoses. YMMV.
- SS lines still not needed!
Either end...Anybody can stop the bike as stock with
maximum efficiency. Only the most performance minded see
any good in these, as I'm one of those guys, but still
don't think they are needed. They do have an effect,
however, I agree. You'd better be good at your braking
skills if you need the extra performance.
- SS Lines greatly reduce the
effort needed to brake with one finger while descending a
hill standing up on the pegs (to lower the centre of
gravity!) This, IMHO, is worth the cost. The fact that
they last 5 times as long is just a bonus.
- Anyone who says SST lines
don't make any difference has never tried them. they make
the brakes have a much more linear feel in terms of
pressure applied to the lever equating to braking applied
to the rotor. The stock lines expand more as you brake
harder.
- SST lines are not needed on
any bike, so that's a moot point. but they do make a huge
difference in how the brakes feel. The SST line made a
bigger difference to him than adding the 320mm MAP rotor.
- Get the SST line, get some
good pads, like Galfer greens, change your fluid and
bleed your lines and you will never have anything to
complain about regarding the f650's braking capabilities.
My ring finger and pinkie haven't touched the brake lever
since I made those changes.
- I agree again, that they make
a difference, but are not required, because feel to one
rider is not the same for another. I've ridden both types
of lines and prefer the rubber hose and they last a long
time. Can't remember ever having changed a brake hose (stock
one). My braking ability is not diminished one bit
because the lack of SS lines. They are very nice and a
plus for some, but not all If you can lock the front
wheel, I say that’s all the feel you better have.
The stock lines will do that fairly easily. Just don't do
it. Some like a lighter feel on the brakes and its
accomplished with SS lines.
- Galfer Brake Lines:
The number on the box was FK003D166- don't know if that's
the part number or not. I got it from http://www.map-engineering.com/index.htm for my '99; it was around $45 plus
shipping last winter.
- For you guys asking about
brake bleeding: For the cost of one garage fluid change/bleed
you can buy an excellent vacuum bleeder or Speedbleeders
(and probably stainless lines as well) and do your own in
10 minutes. On our F's it's totally simple requiring no
wheel removal or anything. An SS-line on the rear
is a total waste, IMHO. On the front... like POWER BRAKES
when compared to rubber hoses. Flash #412
- I've installed both
Speedbleeders front and rear and a steel braided front
brake line on my f650ST 97. The problem is that to
install the brake line you have to empty the system and
then the speed bleeder won't work because there will no
pressure. So you have to fill up the system with the old
bleeder on, using a vacuum pump (speed bleeders don't
work with a vacuum pump), then install the speed bleeder
and process as described in the instructions. That goes
only for the first time because you have no reason to
empty the system afterwards. The rear, where I kept the
OEM brake line was a piece of cake. We did it on Tom #773
bike and mine and doing it yourself depends on your level
of self-confidence (I am in the process of building it...).
I guess the whole thing should not take more than 30
minutes at the shop so we're not talking about a lot of
money and if you don't feel to confident let a mechanic
do it. My 2 cents. Jean #636
- What you could do is install
your new SS-line and do the initial line-fill using the
stock bleed screw. After you've got fluid in the line,
THEN install the Speedbleeder for the final purge. Flash
#412.
- I had the unfortunate
experience of the most severe sphincter-sucking-up-seat-vinyl
stop in the life of my F650. I believe that if it hadn't
been for the new stainless line and the Galfers, I
would've gone up that SUVs tailpipe. And that would've
made my day quite difficult. Stainless ROCKS!! New brake
fluid is good. Galfers are AWESOME! Shank NYC USA
- Money spent on braided hoses
and aftermarket pads will give the most improvement for
money spent. If you like spending money Harrison billet
now has a 6 piston caliper (about $450) and there is a
320mm front rotor available. Not sure if these parts fit
the newer GS series but they do fit the original 94-2000
classics. Peter Jensen #233
- Front - The biggest
improvement was adding a braided steel line. The Dakar,
with it's 210mm fork travel, has a very long hose. Lot's
of flex. With a multi-day bleed job, it was much better.
Rear - I think a lot of the problem comes from wheel
alignment. I have become fanatical about alignment since
it appears to have a big effect on rear brake performance.
Even a little cocking of the rear rotor will cause about
half the efficiency to go away. I have heard good things
about after-market pads, but will wear out the stockers
first. (Cheap that I am). I am sure the stock pads were
supplied by the low bidder. With braided lines up front,
and maybe some EBC pads front and rear, I think the
brakes would be okay. And probably as much as you would
ever want off road. Jinx
- I've put on a braided line
and bled it which has made a difference but nowhere near
the result that I ultimately desire-I have to confess
that I haven't had a look at the wheel alignment issue
that was suggested - so there might be some gains to be
had without spending anything but time. I have only put a
braided line on the front because the Brembo dealer was
scratching his head over the routing of the rear brake
line-it looks pretty complex (or so he said), I will be
looking at it tonight (just as soon as I put the fuel
nanny on - but that's another thread). Ziegfried
- The old brake line on the
Dakar was a little too stressed to me due to the
handlebar risers... just a little too tight for comfort.
I replaced it this evening with a Touratech stainless
steel version. The difference, like others have said, is
night and day. Makes me want to beef up the front springs
now. Gerry #951 (Phoenix AZ).
- So I read about how it's a
good idea to swap out the brakelines for the steel
versions, and then realized that the front brake line on
my bike is already steel braid. Do they normally come
this way stock or did I just get lucky? I bought the bike
brand new from a dealer. '03 black GS, Colorado
- I believe that BMW only
installs steel brake lines on the bikes that come with
ABS. Apparently they believe that BMW riders are not
skilled enough to be able to handle the improved feel of
a firm brake line. In my experience, No. Your hands are
much more sensitive to feel than your foot, with the clod-hopper
attached. In any case, with weight transfer when braking
hard, the rear brake doesn't really need the same feel as
the front. The rubber hoses are OK, but they flex a bit
when used and tend to put a little extra give into the
brake feel. Steel brake lines are noticeable better, but
you won't notice the difference at the rear brake.
Richard #230
- The front is but have you
checked out the rear? My '01 model still has rubber hose
from the rear master cylinder to the rear caliper. I
think Touratech makes a steel line for the rear. That
said, lots of people don't care that much about the feel
of the rear brake. Brad, N. CA., 2001 F650GS - Inmate #1002
- Next.
Contact Area & Front Wheel vs. Rear
Wheel
Q. So, because I'm very
curious (its good I'm not a cat), I did some research on MC
Dynamics and believe I can summarize what I have read so far.
Please correct me if I am wrong.
Given an unlimited coefficient of friction at the front tire
contact patch and given that the COM (center of mass) of the
rider/MC system is higher than the center of the front wheel, the
MC will eventually tilt forward after shifting 100% of the mass
to the front wheel. For optimal braking the COM should be as low
and as far back as possible. I'll give a link for the source of
this info below.
So, assuming that the COM of the bike is a constant (ignoring
brake dive for the moment), then the rider's addition to the
calculation for COM comes at the pegs, handlebars, knees/thighs,
and bottom. Clearly, if we could get 100% of our mass while
braking at 1g on the footpegs (lower than the center of the
wheels) that would be great (its impossible of course). So, the
best we can hope to do with COM is limited by how far back we can
sit on the bike and still operate the brake lever while trying to
keep as much force off the handlebars as possible (get yourselves
a thighmaster). You need to sit as far back as possible to
counteract as much as possible the effect of the force put on the
handlebars (trying to tilt the bike over). The more weight you
can keep on the rear tire the more you can use its coefficient of
friction in addition to the front. Hopefully, I've gotten most of
this right...here's the link I mentioned: http://www.dinamoto.mecc.unipd.it/ Chris in Santa Cruz, CA #782 - 19-Mar-02
A. The basic answer is Yes!
Weight transfer needs to be balanced against what a brake can
absorb in terms of energy which is a combination of down force,
tyre contact area and the brakes ability to generate heat and
then get rid of it. Brake balance changes weight transfer during
the stop.
If things are uneven, you get events such as ABS activation of a
lifted wheel that will change weight transfer again and upset the
whole vehicle calculation.
Instrumentation consists of wheel speed sensors (like ABS),
vehicle speed (via radar) and pressure transducers in the brake
lines. Everything is plotted against time, so you can get vehicle
deceleration, wheel angular deceleration etc. Temperature
transducers are useful to sort vehicles that don't work as the
disk or drum temperature pretty much tells you how much work a
brake is doing. This calculation is pure energy, so must be
basically true, especially if both axles have the same airflow
etc. Kinetic energy becomes heat, first law of thermo dynamics
applies.
Temperature kit is cheap if anyone wants to play. All you need is
a couple of rubbing thermocouples and a voltmeter with two
channels and you can pretty much measure your own brake split for
a given ride or manoeuvre." Andy Leeds UK #982
2-Up
Braking
- My guess is that stopping
distance will be longer...more mass to stop. The good
news is that both tires should have more traction to stop
(more weight on them), and with the rearward bias (of
passenger), the rear brake will become much more
effective. Expect to get cracked in the back of your
helmet with your passenger's helmet (depending on height
& seat configurations). You may even get pushed onto
the gas tank, so be well braced!!! Just be sure your
passenger buys into this "exercise". Marty #436-Chicago-97
F650F
Brake
Links
- http://www.wabco-auto.com/Intl/en/inform/index.htm If you click on Index and then
enter training on the blue bit on the left, it will take
you to a big document about trailer ABS. The first couple
of pages have some of the theory, but obviously it then
descends into product specific stuff about trucks and
trailers. Have a read of this if you like while try a
couple of other sites to see what is about. Andy Leeds UK
#982
- http://www.autosite.com/garage/encyclop/tocdoc14.asp. I'm glad this site is still there.
It cover a fair bit of info on hydraulic brakes. Andy
Leeds UK #982
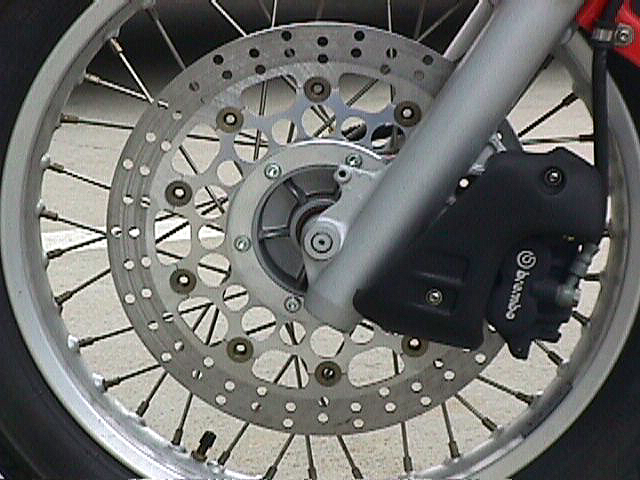
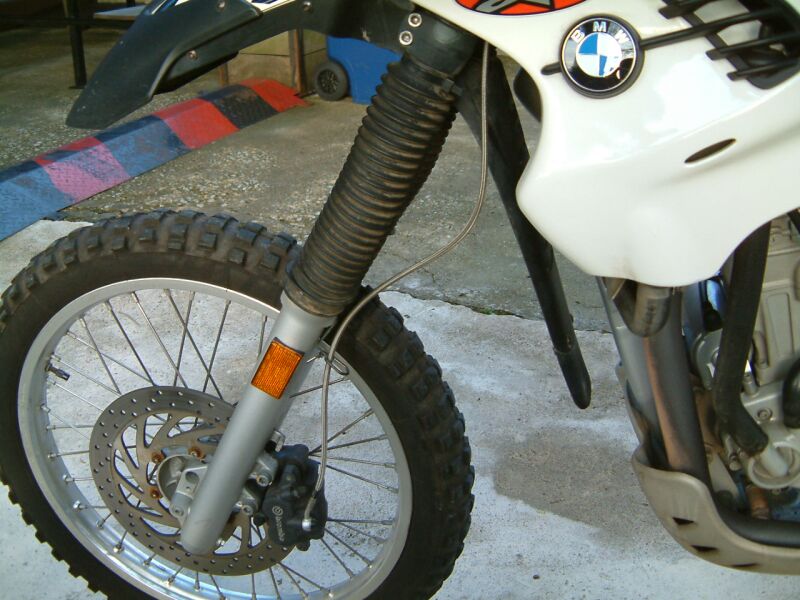