F650 Front Wheel Removal and Replacement FAQ
compiled & edited by Kristian #562
by David#476, Johnny Canada, Kristian #562
Please read the Disclaimer before
attempting any work in this FAQ.
Last Updated: 13 June 2007, by Winter #1935
For other related FAQs:
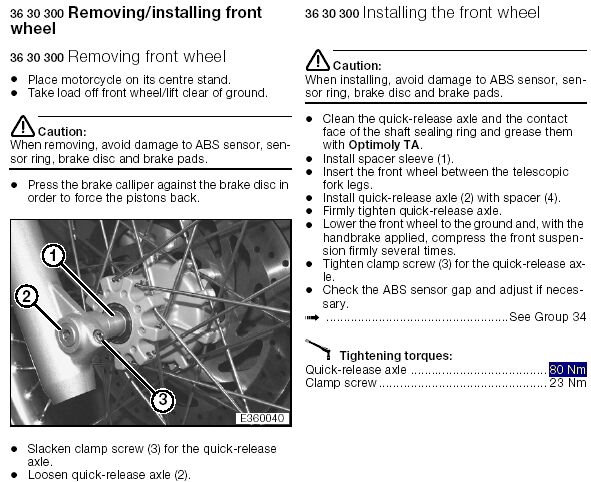
What the Service and Technical booklet says
- Get wheel clear of ground.
- Take off caliper cover.
- Remove brake caliper screws and then caliper.
- Take out retaining screw in fender (front of forks).
- Loosen off retaining screws (behind forks).
- Then remove the 4-bolt bracket, and then axle.
- Then remove speedometer drive. (Classic Only, on the GS it's the RHS Spacer)
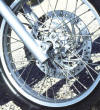
- Mind the brake disk when you take wheel out .
Wheel Removal
Now while it can be easier with the Caliper off,
you do NOT need to remove the caliper.
-
First thing is to lift the bike so the
front wheel comes off the ground.
If you do the job on the Center Stand make sure you PROP firmly with Bricks or
wood, under the skid plate or engine if you remove the skid-plate OR tie down
the back of the bike, while on the stand, so the front wheel is up in the Air.
Make sure it is good and stable.
Alternatively, I bought a motorcycle jack that worked dandy. Available at
Costco for $100, it's something I've wanted for quite some time, and this was
the perfect rationalization to buy it. It took a couple of tries to get just
the right lift, until I found a two by four under the skid plate and the two center stand mounts lifted the bike perfectly straight. I used tie downs to
the rear rack and jack and it was extremely stable, allowing me to move the
bike around to deal with the limited space I had to work on it, which would
have been a problem with the front end removed. That said, I'm sure you could
do the job on the center stand if you wanted.
-
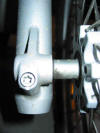
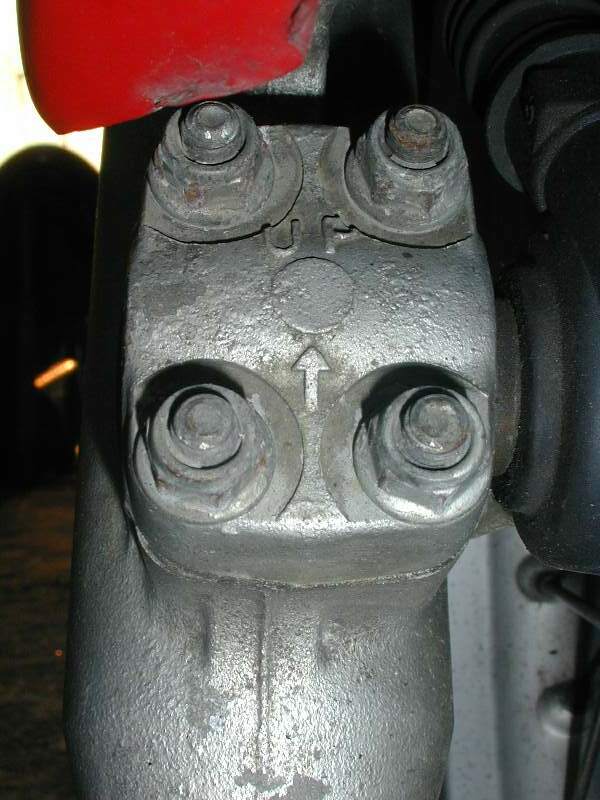
Loosen the
four bolts on the axle
keeper (no need to remove them) and unscrew the axle with the 8 mm Allen
wrench. The four bolts CAN just be accessed for both undoing and retorquing
without removing any extraneous plastic. If you are doing the for the first
time however you may wish to remove the Plastic on the RHS of the Front wheel
(Classic Only),
covering the Fork Leg, so you can see those four bolts. The GS has
ONE Axle Keeper
Bolt.
-
Slide out the Axle, noting the Spacer on the LHS
of the bike inside the fork leg. You will need to ensure you REPLACE this in
the correct location.
-
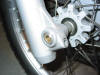
Roll/push the wheel out the front of the bike so
it protrudes just past the fork leg. Then remove the the
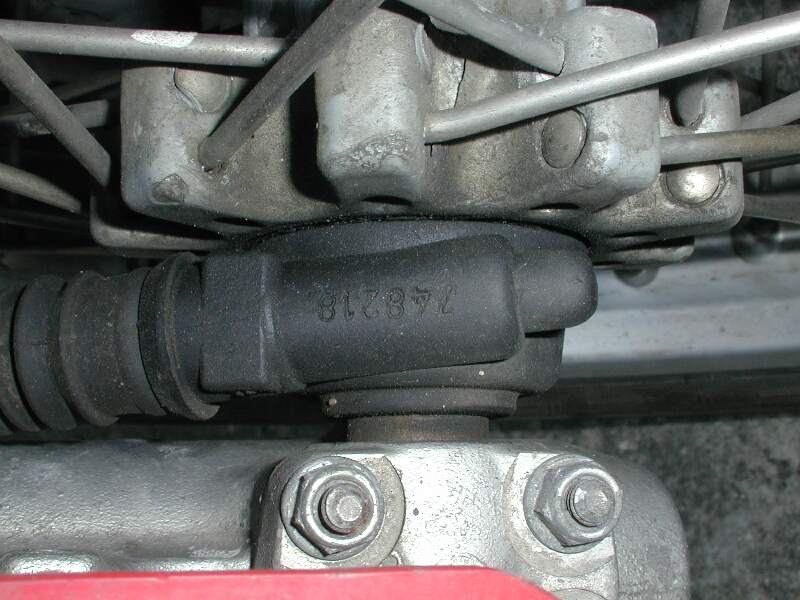
Speedo Drive (or for the GS
the Spacer), by just
pulling it gently out of the hub, to the RHS of the bike, along the axis of
the axle.
-
Roll the Wheel out the rest of the way.
Notes:
- Torqued brake discs are VERY easy to bend, off
the bike. Make sure you set the wheel down on the opposite side.
- If you have the proper torque wrench and hex
socket, the wheel can be easier to put on with the caliper removed. I
make a "C" shaped hanger out of a coat hanger to hang the caliper to the
radiator surround. Note that caliper removal is NOT necessary.
- If you do remove the caliper WATCH THE THREADS
of the two bolts. Make sure they are PRISTINE before you replacement or you
will Jam them in the caliper and wreck the threads when removing them to see
what the problem is. A good reason NOT to remove the Caliper too often.
- Don't forget to pull the odo drive out of the
hub too and give it a bit of grease before you replace it.
- Also do not squeeze the front brake by
accident when the rotors off or the Caliper will squeeze the pads together and
the disc won't go back in. If you do it by accident, just slowly prise them
apart again with a screwdriver. You may want to put something about the
thickness of the disk between the pads to ensure that they stay apart until
you replace your wheel.
Wheel Replacement
- Roll the wheel from the front of the bike back
towards the forks. Line up the brake rotor on the RHS and aim for the slot
between the pads. (If by accident you have squeezed the pads together,
the disc won't go back in, just slowly prise them apart again with a
screwdriver) Stop rolling the wheel JUST before you get to the Speedo/Odo
drive on the RHS and push it into the hub. Give it a shot of grease first. Make
sure the drive is properly seated and the little tabs inside the odo and the
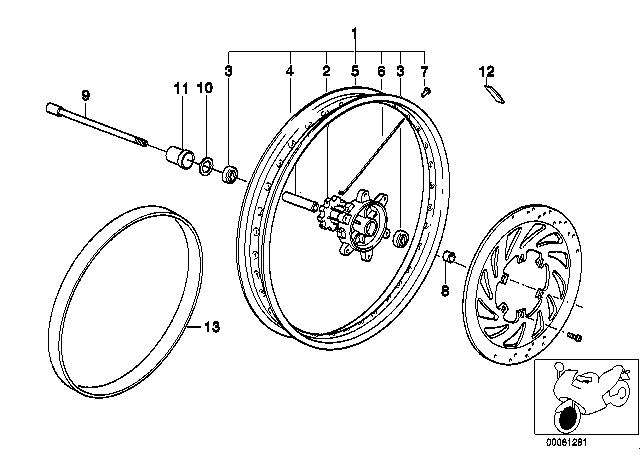
wheel line up properly. For the GS just Grease inside the Seal
and Push the RHS
Spacer
in,
big diameter end of
the Spacer (11) goes into the Seal (10).
- Roll the wheel the rest of the way in so the
center of the hub lines up with the Axle Mount in the forks. You might like to
use a piece of timber under the wheel to get the wheel to the right Height for
insertion of the Axle.
- Insert the axle, making sure you remember the
Spacer on the inside of the fork leg on the LHS of the bike. Torque it to
Spec.
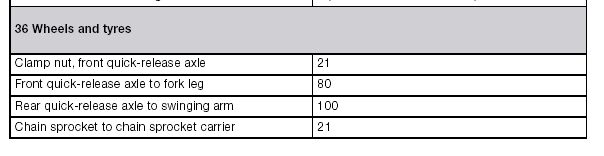
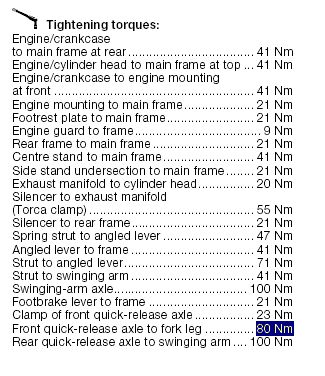
| Torque Spec for front Axle |
|---|
The torque spec for the Classic is 80Nm.
The torque spec for the GS/Dakar/CS is either 45Nm or 80Nm. If in doubt use 45Nm.
For more information on why there are two torque specs for the GS/Dakar/CS models, see the section below on the Cracked Front Wheel Spacer on the GS
|
- Then bounce the bike up and down a few times
with the front brake on to center the wheel/axle/brake before
tightening the (four-on the Classic, 1 on the GS) pinch bolts. This will help center the
rotor and help stop the rotor jamming.
- If you removed the caliper, replace it over
the rotor and Torque the Two Bolts, then replace the Plastic Cover. Don't
forget to replace the little Metal Holder (it goes under the two bolts) BEFORE
you insert the Caliper Bolts. Put it on the RIGHT way or the Plastic Cover
won't go on properly and you will have to undo the whole thing and do it
again.!
- Finally Torque the 4 Pinch Bolts. (There is
just one on the GS). The Torque for the 4# Classic Pinch Bolts is 12Nm
and for the 1# GS Pinch Bolt is 21Nm.
- Squeeze your Brake Lever a few Times until you
have some resistance back in the Brake. Spin your wheel to check no binding to
the Brake rotor.
- Go Ride.
Notes:
- Make sure the speedo drive is located properly
before you ride. If it's off ANY, it will break.
- A thin coating of grease on the axle will help
insure an easy removal next time. (Avoid the threads.)
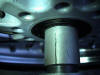
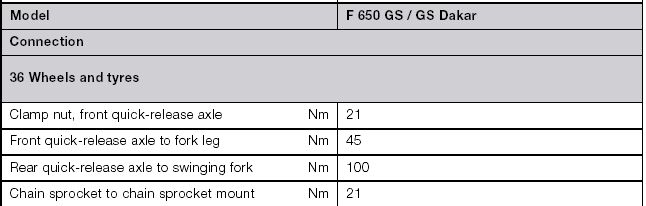
Cracked Front Wheel Spacer on the GS
Why is there a Long Spacer.
BMW were a bit lazy. The took the Classic, took out
the Odometer Drive and added a
Sensor instead. So the Gap where the Odo Drive was had to be filled with....a
Spacer. But lots of bikes have them.
- Earlier Bikes, at least '00 models (US Models '01)
may have
soft cheesy spacers that crack when torqued to
80Nm as per the
GS CD-ROM (10/99 Version).
See
QuickReleaseAxle1099,
QuickReleaseAxleTightTorques1099,
QuickReleaseAxleTightTorques2_1099.
They appear to made of an alloy and are quite light.
- BMW acknowledged this because they
changed the 02/00 Manual to
Spec to 45 Nm. See
QuickReleaseAxle0200 and
QuickReleaseAxleTightTorques0200.jpg
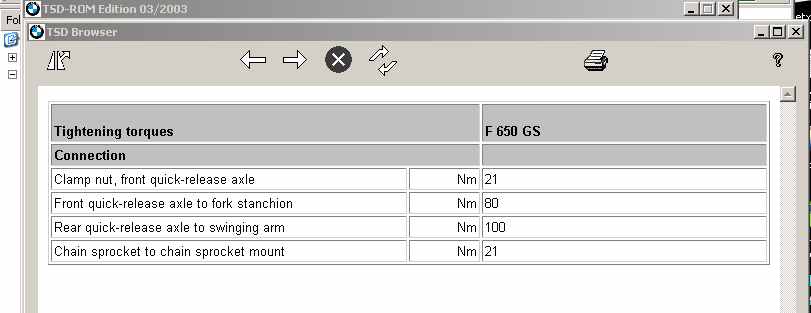
- But they didn't stop there. They changed the
Spec BACK to 80Nm in the '02 Manual. Why? because it is believed (from
feedback) that the NEW spacer is stronger and made of Steel. It feels heavier
than the old spacer. See
TSD0203Torque1,
TSD0203Torque2,
TSD0203Torque3.
- No Recalls, No explanation. If you're in doubt
and out of warranty, suggest you take the bike to the dealer and have them
crank it 80Nm and get them to replace it for free. Or demand a new one,
telling them the above. Ask "How do I tell" so we can write it here.
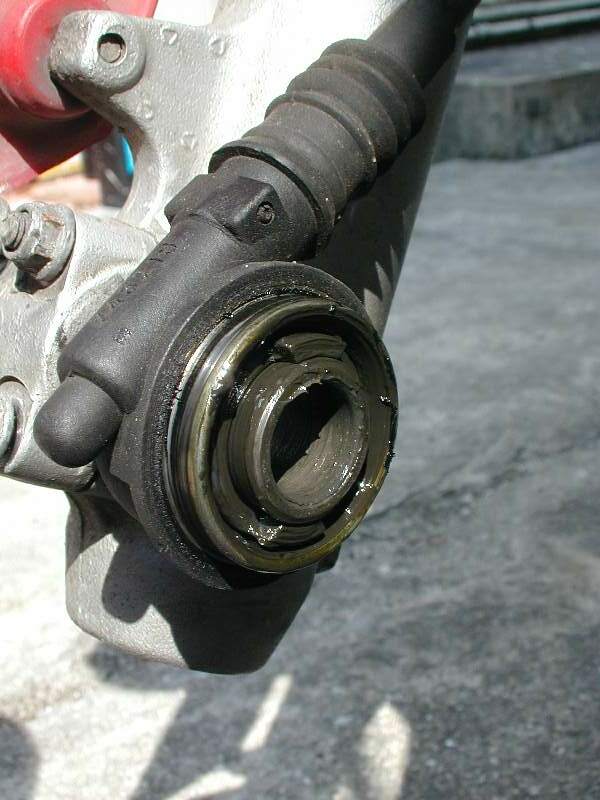
Why does it Crack?
If you Torque your
cheesy spacer to 80Nm you will CRACK
the Spacer
. See this from the
BMW
Training Manual.
Here is a
Temporary
Spacer I had made out of Brass. Later bikes PROBABLY have good (updated)
Steel Spacers.

- I
managed to Split the (Thin & Cheesy) Front Wheel Spacer on the w/e, torquing
up the Axle Bolt (to the WRONG 80Nm OLD MANUAL Spec) after Greasing my Front
Wheel Seal. It struck me that the spacer was installed in place of the Speedo
Cluster on the Classic F and not much thought was put into its design as (a)
it's not very thick, but would be probably be O.K. if (b) the rather small
flange on the Axle bolt didn't bear on the inside half of the Spacer, but
rather over the whole end of it. The Axle Bolt isn't even flat at the flange,
but has a small taper, further squeezing it into the Spacer when torqued up,
which is what caused the split. I was at about 60 Nm when it happened (I
torque in stages). The REAL Spec is 45Nm. Kristian #562, '00 F650GS
- I had
the same problem but hadn't even noticed. The real answer is that BMW have
recognised the spacer wasn't strong enough to support an ants foreskin, and
the replacement part is good old steel, not aluminium as in the original. I
didn't even notice it was cracked in two places, but the whiz mechanic at John
Volk in Vancouver sure did. Jaz #1126, '00 F650GS.