-
Park it on the center stand.
-
Remove
the seat.
-
Remove the left side cover (covering the battery) and remove the
battery. Remove the right side cover, too. Refer
the Battery FAQ for
Battery Removal Tips
-
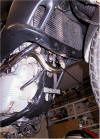
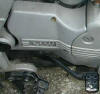
Remove the black engine covers from both sides and the black plastic
radiator piece.
-
Remove the gas tank. Refer
the Gas Tank Removal-Replacement
FAQ.


-
Remove
the windshield and then the fairing.
Refer the Fairing
FAQ. (Tip: when the
windshield is off after removing the tank and the rest of the plastic, you
need only remove the two screws above the headlight facing RIGHT and LEFT,
not the two facing front.) Unplug the turn signal connections by
simply pulling. Unplug the H-4 headlight connector. Pull the parking
light out of the reflector assembly.
-
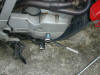
Remove the plastic "bash plate" from below the motor.
-
Drain the oil from the sump and the oil tank (bolt on frame down tube).
Refer the Oil Change FAQ.
-
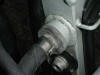
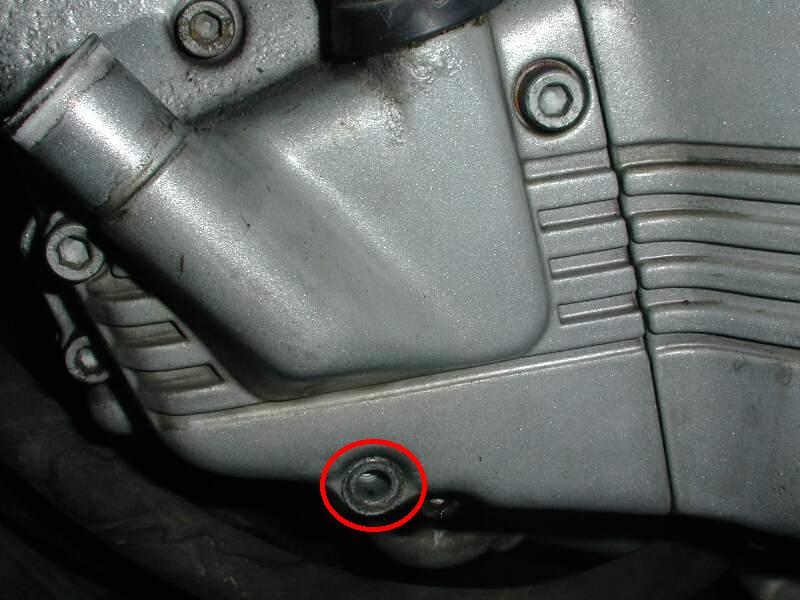
Drain the coolant using the bottom bolt on the water pump.
Refer the Coolant Change FAQ.

-
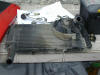
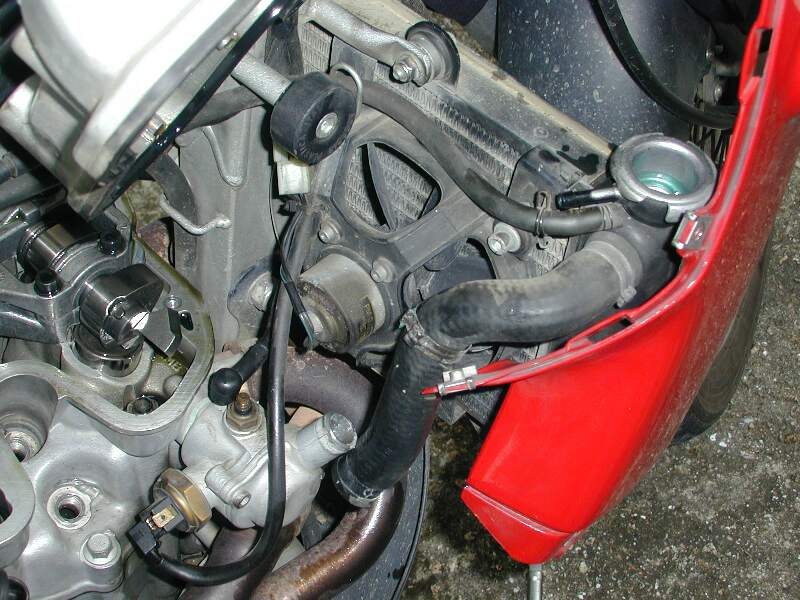
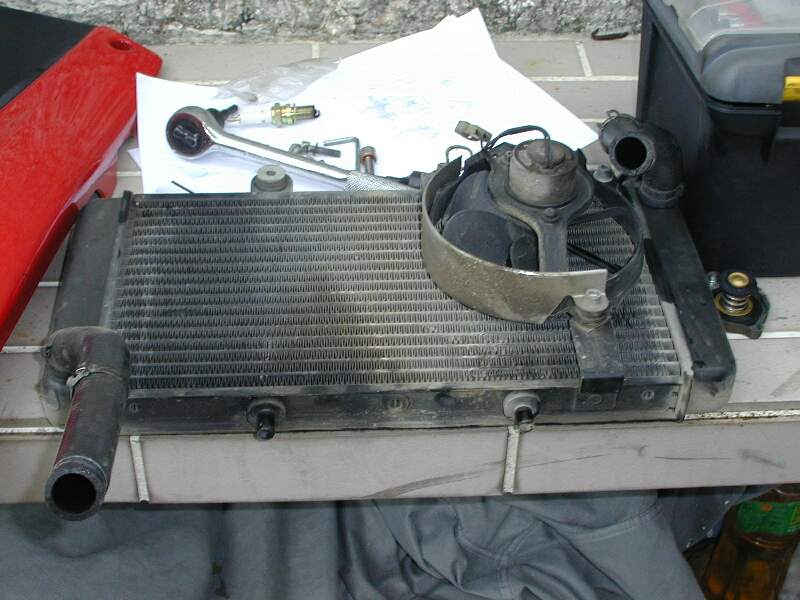
Remove the clamps from the radiator hoses, pull the hoses off and remove
the radiator bolts. Cut the tie wrap at the fan wiring
and unplug the fan connector. Pull the temperature sensor wire from the motor at the same
time. Remove the radiator, with the fan
remaining installed.

-
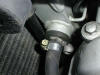
On the right side of the motor, remove the counter shaft cover and the
little two-screw electric cover at the cylinder base. Remove all the the hoses
over there. (If you haven't taken your bike apart before, take all the
cheap, original equipment hose clamps to a cheapo car parts place and buy some REAL hose clamps
with which to replace them.)

-
Knock the countershaft sprocket lock washer back flat(ish) with a hammer
& screwdriver and loosen the
nut that holds the sprocket (30mm socket). You want to do this with
the engine in the frame so you can put the bike in gear and/or step on the
brake as needed. Do NOT remove the sprocket yet. You will need
the brake to hold the input shaft while you loosen the nut from the clutch
basket.
-
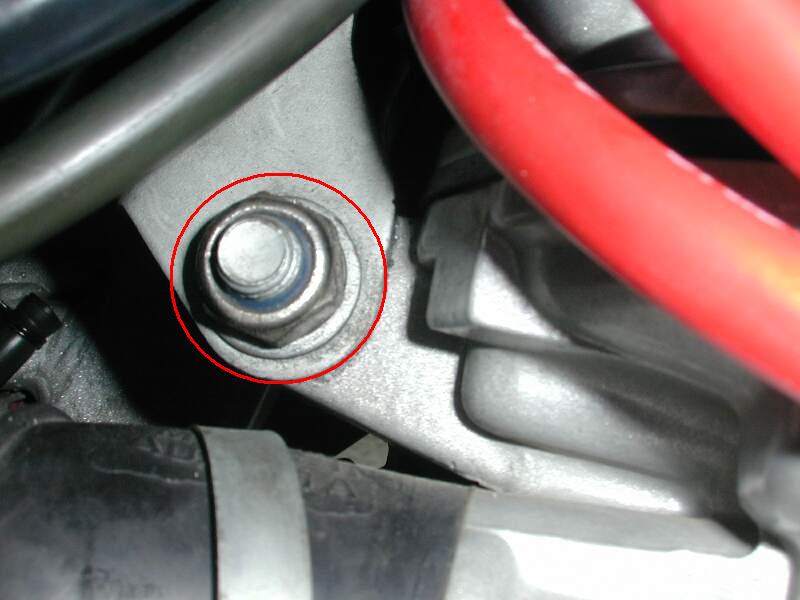
Remove the top motor mount completely from the frame and the motor.

-
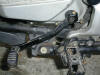
Remove the bolt that holds the shock adjuster. Let the adjuster
dangle. You'll need to move it here and there to get it out of your
way while doing various things. Generally, use a bungee to keep it
held in place.
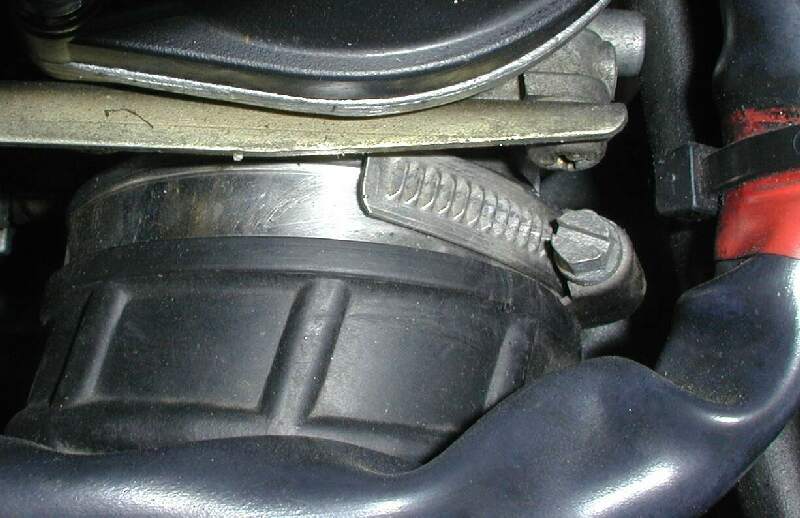
-
Totally loosen the hose clamps on the intake manifold and the
airbox. Wiggle the carb set to break the grip the rubber has on the
carbs. A shot of Son of a Gun or Armor-All or even WD-40 will assist
greatly. Wiggle the carb set loose and pull them out the top. Stop and pull the vacuum hoses off the right side carb. Actually, you
only need to pull ONE hose off (the forward one) if you have done the
Canisterectomy
already. The other (rearward one) should just be a nub with a plugged end.
Refer Carbs Out for more Details on Carb
Removal.

-
Reinstall the top motor mount. (You don't need to torque
anything. But this is the LAST mount to be removed when everything
else is done.)
-
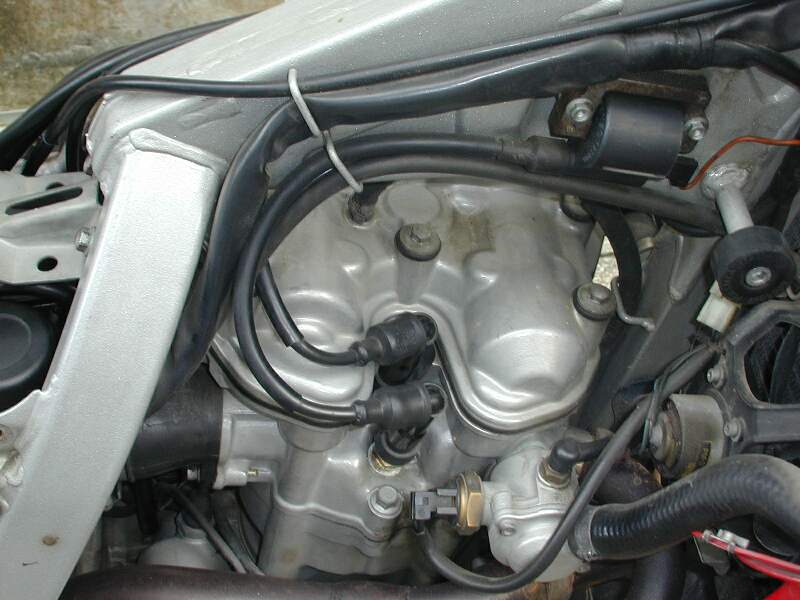
Unhook both spark plug wires and remove ONE spark plug (either one).
-
With an open end wrench, loosen both ends
of the air injector pipe. One end connects to a fitting on the bottom
of the air box and the other to the exhaust header. You'll need
to remove the screw from the area above the right footpeg that holds the
retaining clip that retains this pipe before you can remove this pipe. It takes some wiggling and turning, but it can be removed and reinstalled
with the exhaust system in place.
-
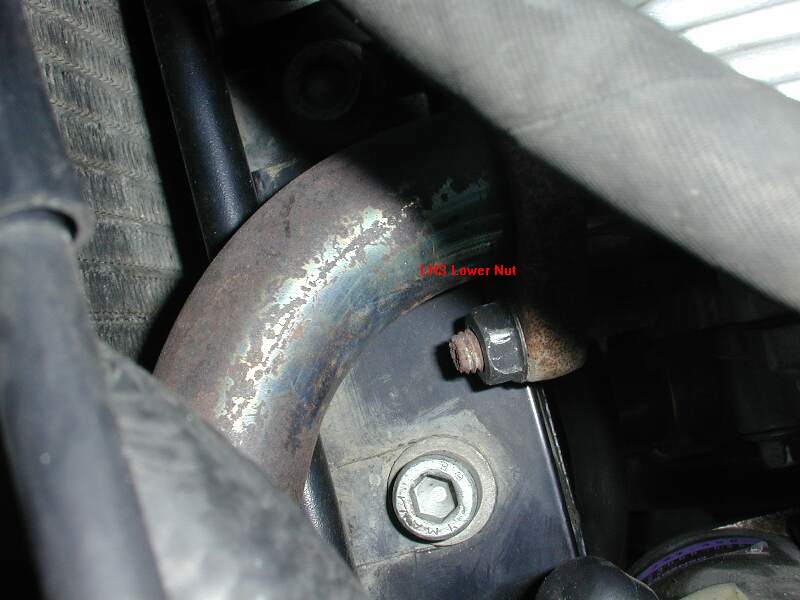
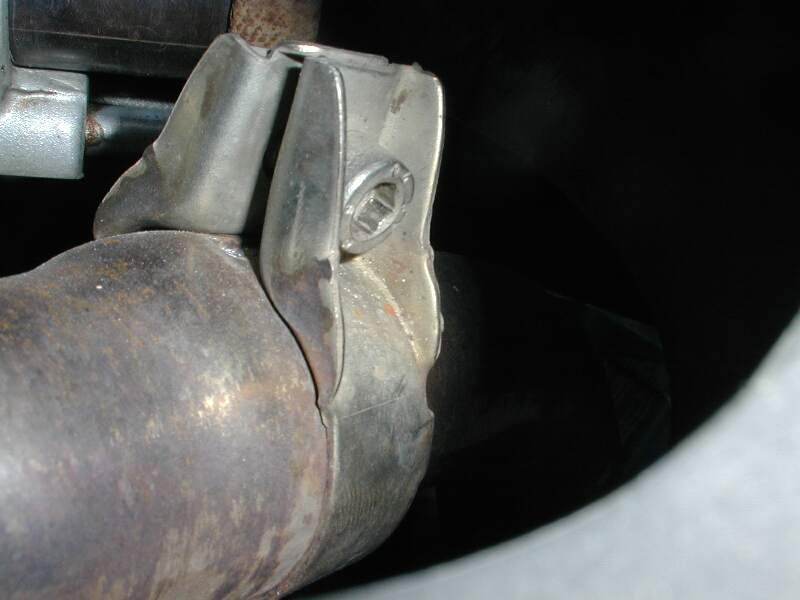
With a 13mm box end wrench, remove the four nuts that hold the clamps
that hold the header pipes in place. Loosen the Allen head bolt on the
clamp where the "u-pipe" header piece goes into the collector
piece. Loosen the Allen bolt on the clamp where the collector goes
into the muffler. Wiggle stuff and remove both headers and the
collector. You can leave the muffler undisturbed.

-
Operate on the footpegs by removing the forward nut & bolt from each
footpeg and just loosening the other to allow you to pivot the footpegs back out of the
way. (Or remove them entirely, your choice.)
-
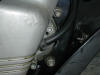
On the left side of the motor, remove the electric cable from the starter
and both starter bolts and remove the starter. It just pulls out with
some wiggling after the bolts are out. Stick the bolts back into their
holes. They'll give something to pull on to remove the cover when you
get to it.
-
Remove whatever hoses you see around there that need removing. By
the way, throw ALL the damned BMW single-use cheap-crap hose clamps away
after you measure them so you can replace them with REAL hose clamps.
-
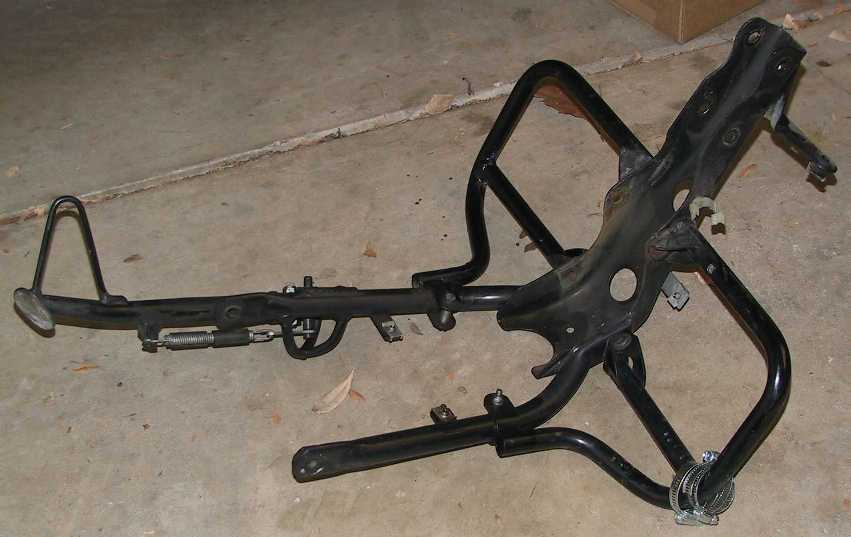
Remove the two bolts that bolt the down-tube frame piece to the motor (and
crash bars if installed) and the two bolts that secure it to
the actual frame. (The rear part of the subframe was held with the
footpeg nuts & bolts.) Remove this frame piece, along with the
side stand (and crash bars if installed). You can leave the metal
"hose piece" up at the front hanging.
-
Pull the clutch lever in at the handlebar with one hand and grab the cable
with the other hand, near the bottom end. When you release the clutch
lever, pull hard on the cable sheath. You can quickly and easily remove it from
the boss this way. Then pull the end of the clutch cable out of the
lower clutch fork.
-
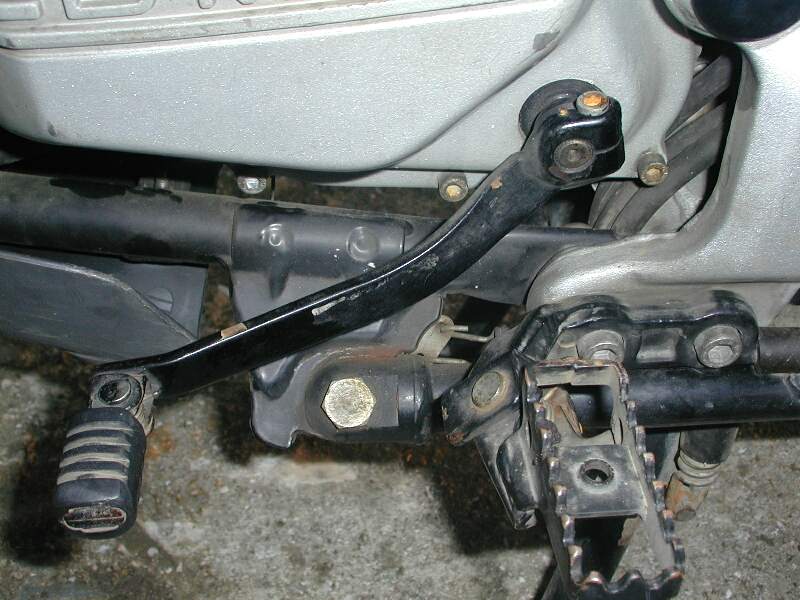
Remove
the bolt from the shift lever and then remove the shift lever.
-
While
you're over there, crack the cam chain tensioner bolt loose, but do not remove
it. It is that bolt halfway between the crankcase and the head on the
back side of the cylinder. You'll need a 22mm wrench.

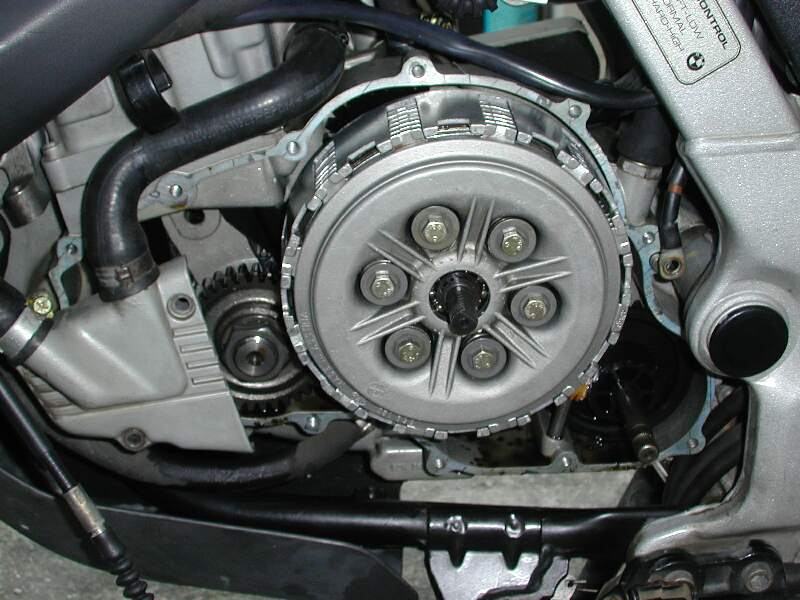
-
Remove all the bolts holding the left side engine (clutch) cover and
remove the cover. The bike is going to pee some more oil and possibly
water when you do this. So you should probably be prepared with a big
drain pan and maybe some newspaper. Hey look! It's the
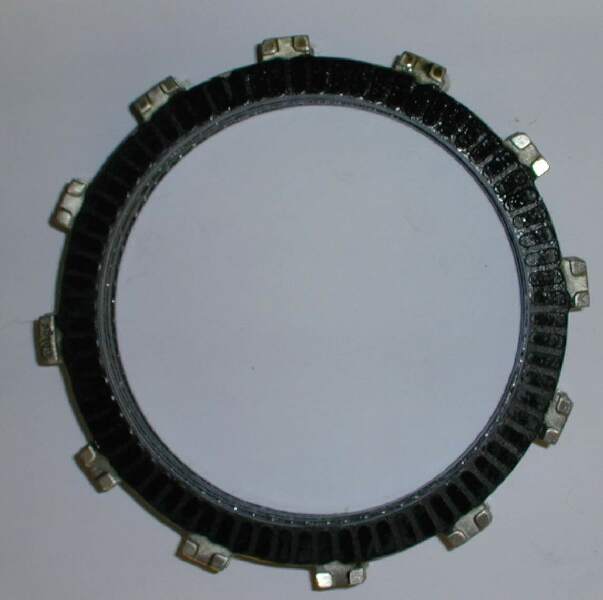
clutch! (Try not to tear the paper gasket.)


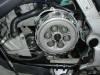
-
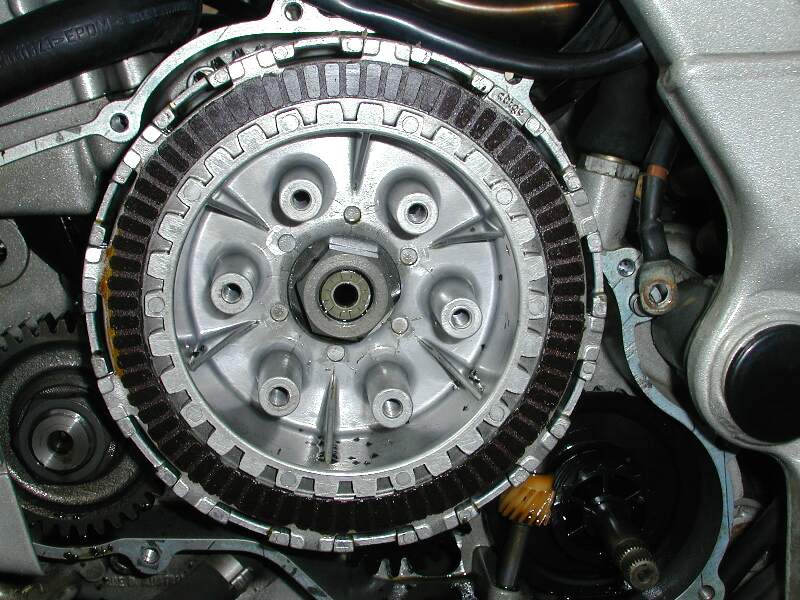
Remove all six bolts. Do this by "cracking" all six of
them a half turn or so and then just removing every other bolt. Take
each of the last three bolts and give them about two turns at a time until
all six bolts are out. Remove the clutch pack. PAY ATTENTION to
how it comes out so you can put it back in the same way (with a metal disk
going in last).


-
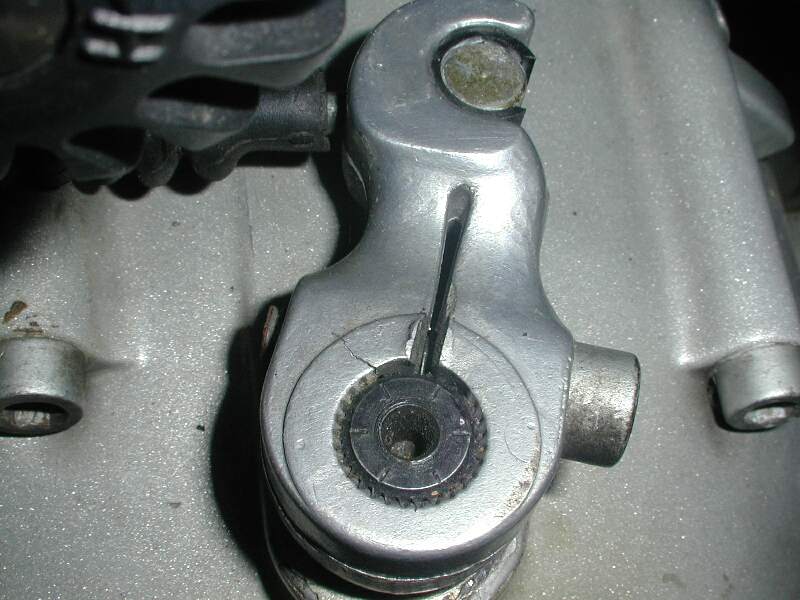
Flatten
the tab washer and then use a 1-1/16" or 26 mm socket (and the rear brake with
the trans in gear) to loosen the nut holding the clutch basket. Then remove
the nut. Behind the nut is a splined washer. This may be difficult to remove
because it may have rotated. Take a dental pick or something similar and
rotate it to line up the splines and then get behind it and pop it off. An
O-ring is supposed to be behind it on the shaft.
You may have problems removing this Nut, so try inserting the TDC Bolt,
use HEAT on the Nut, a long BREAKER BAR and your or someone's foot on the
BRAKE (You will need the the bike in Gear for this to work). If you still have
problems removing this Nut, See
Additional
Notes for Clutch Nut Removal if Required.
-
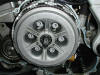
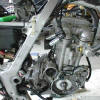
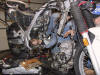
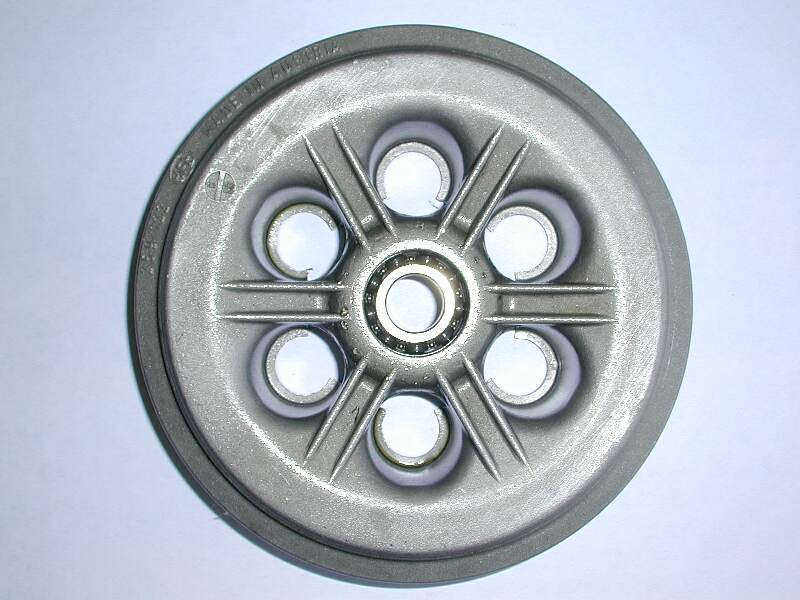
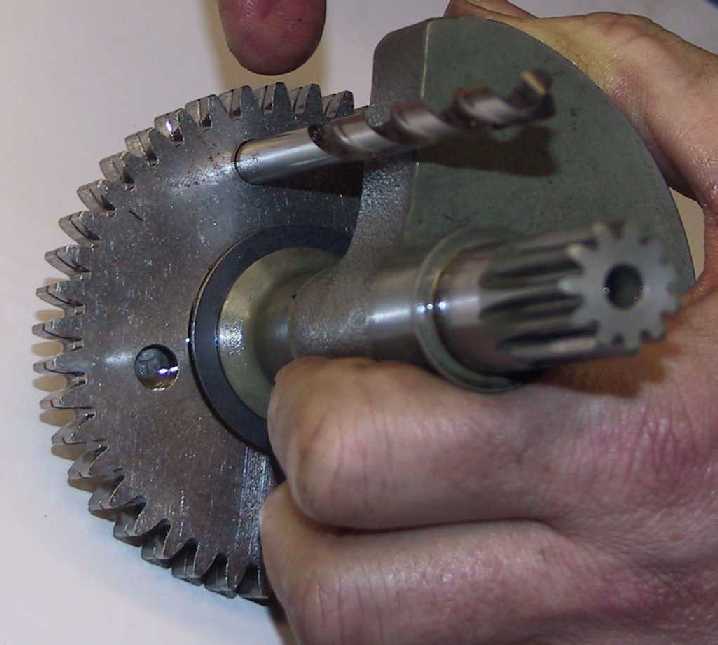
Here is the trick to
removing the basket... put the clutch pressure plate cover back on without
any plates. Stick three screws back in SIX TURNS EACH in every-other hole
with the washers but without the springs. Push the cover in and then
YANK it out. When it hits the bolt heads, the basket pops off. If not, go
again. The included picture was actually taken just before doing this.

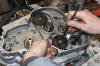
-
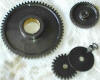
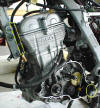
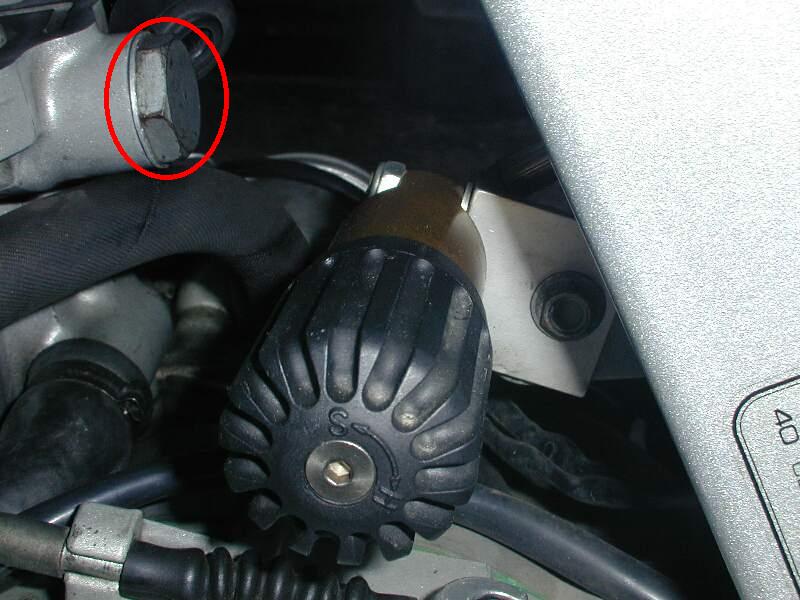
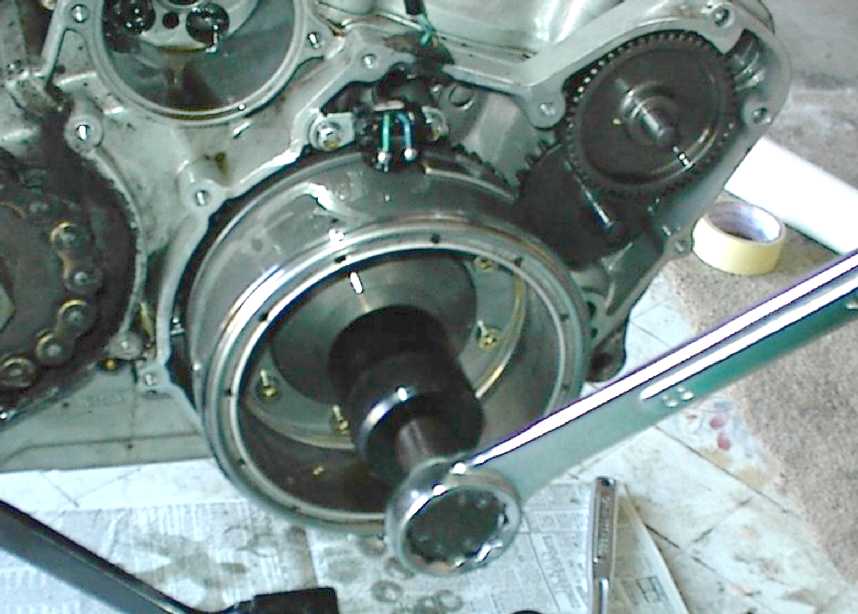
Loosen the nut at the
top of the tachometer drive on the motor near the clutch shaft and pull out
the Tach drive cable. You can then pull off the plastic Tach-drive gears.
-
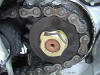
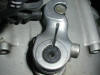
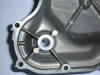
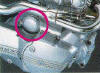
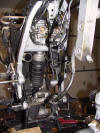
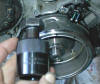
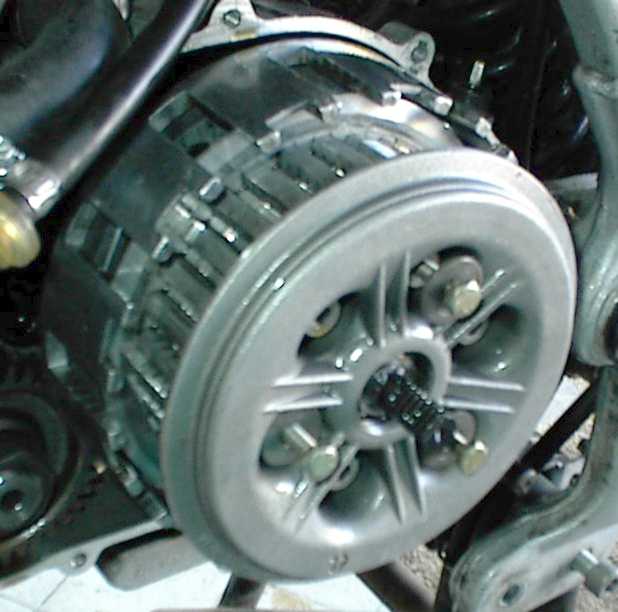
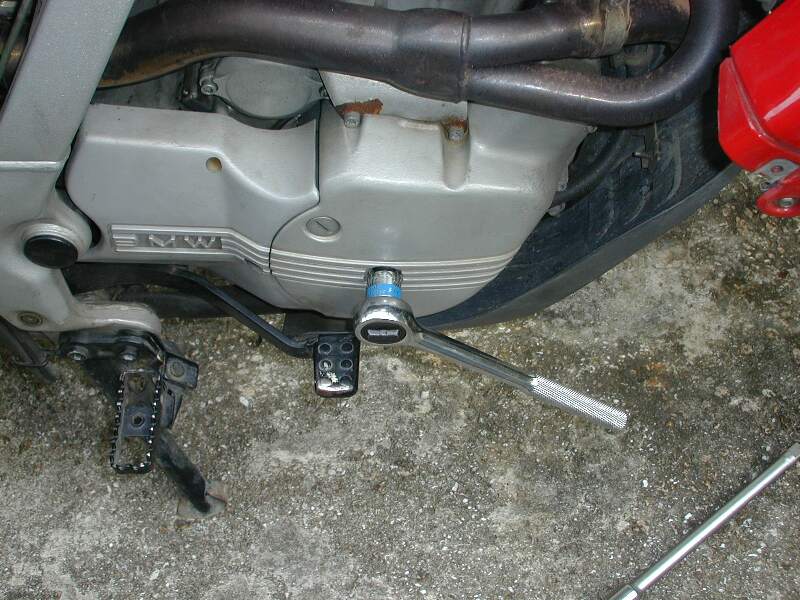
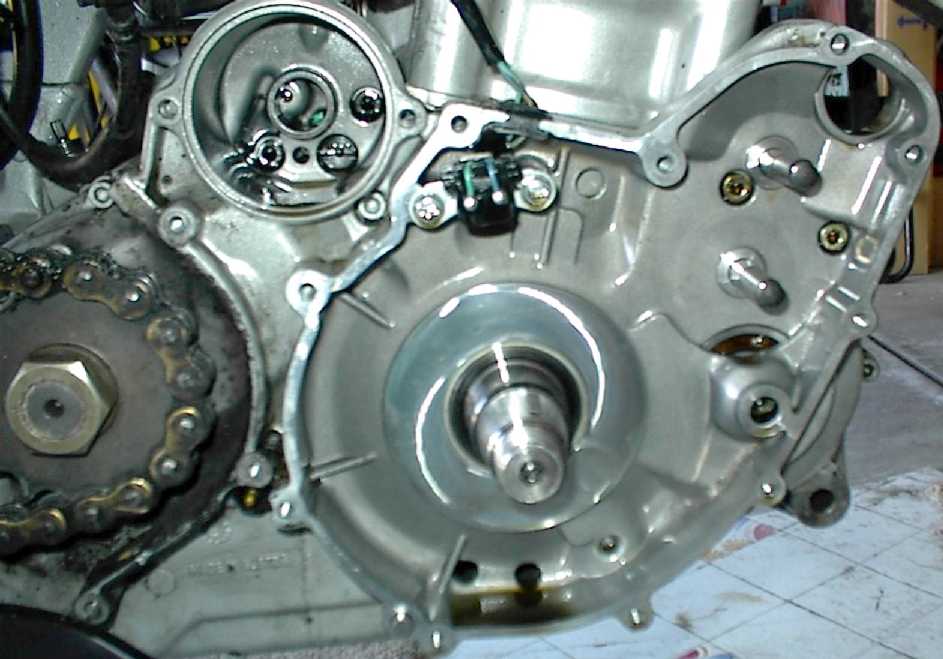
Either stick a big Allen wrench in the end of
the crank sticking through the alternator or put a 30mm wrench on the
nut on the end of the crank on the left side (as pictured) and put your
finger over the empty spark plug hole.
Crank the motor over (turning clockwise viewed from
the right side, counter clockwise viewed from the
left), until you feel it
start coming up on compression. Stick a long, thin screwdriver (or other probe) down the
plug hole and slowly crank the engine over, making sure that the
"probe" is able to rise freely as the motor turns over. When
the probe stops rising and then starts falling, reverse direction until you
find Top
Dead Center (or thereabouts). Remove the bolt on the left side of the
motor where the crank-stop bolt goes. Turn the crank stop bolt (blue
t-handle tool is in it in the picture) in while
rocking the crank back and forth in the vicinity of TDC until you
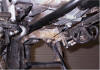
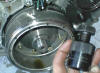
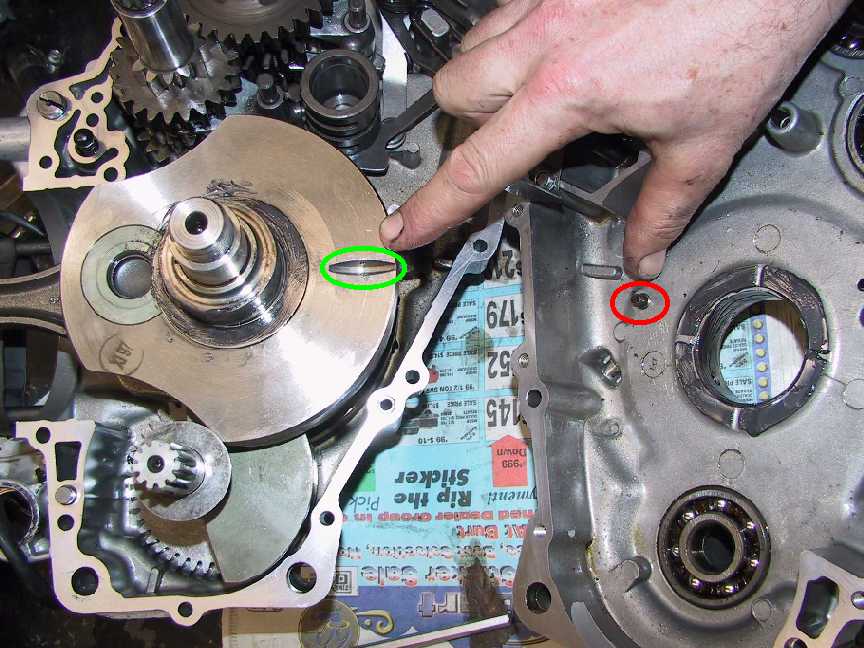
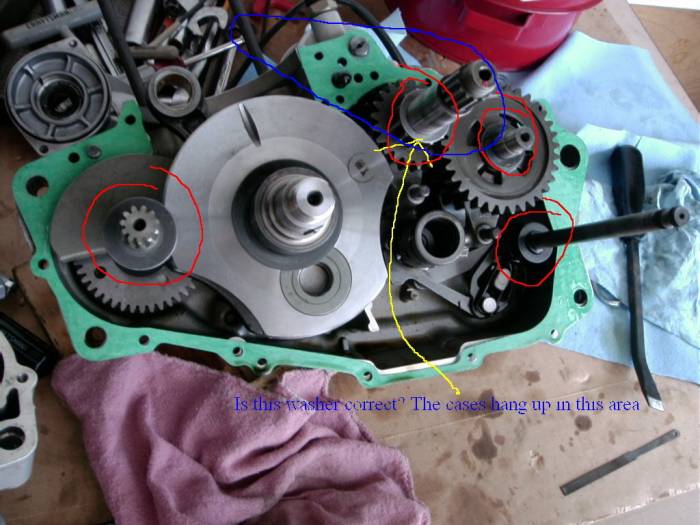
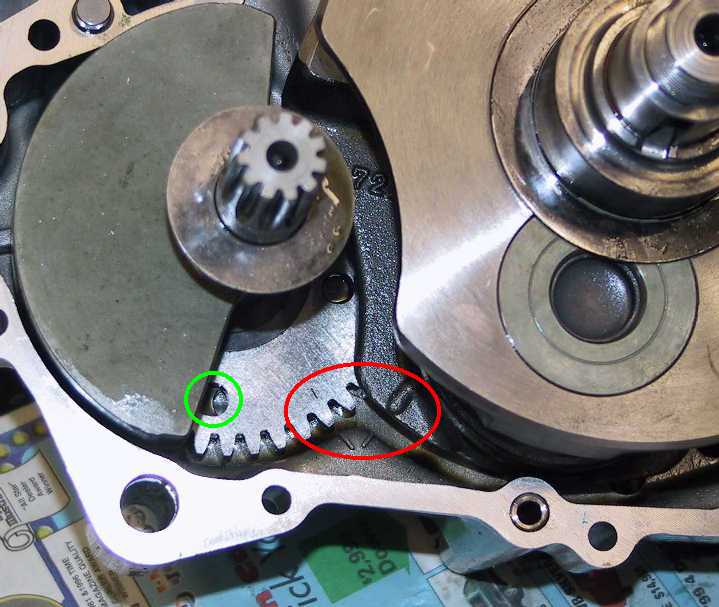
feel the crank stop bolt go into the slot in the crank. Take a look at
the picture of the inside the split
crankcase (below left, taken much later in this process) for
some clarification of how the crank stop bolt works to stop the crank. The thumb points to the bolt in the red circle and
the forefinger points to the slot in the crank in the green oval.

 OR
OR
-
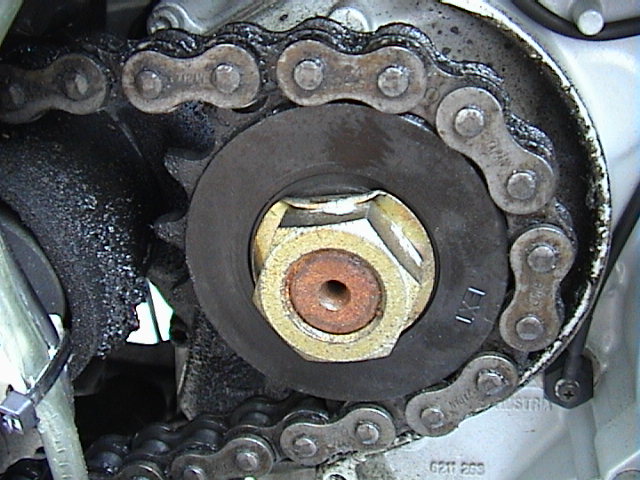
Use a 30mm wrench or socket to remove the nut from the crank timing
sprocket. Pull the lock washer loose. The sprocket will just
pull off once the timing chain is loose. There is no need to remove
the woodruff key from the crankshaft.
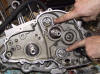
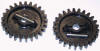
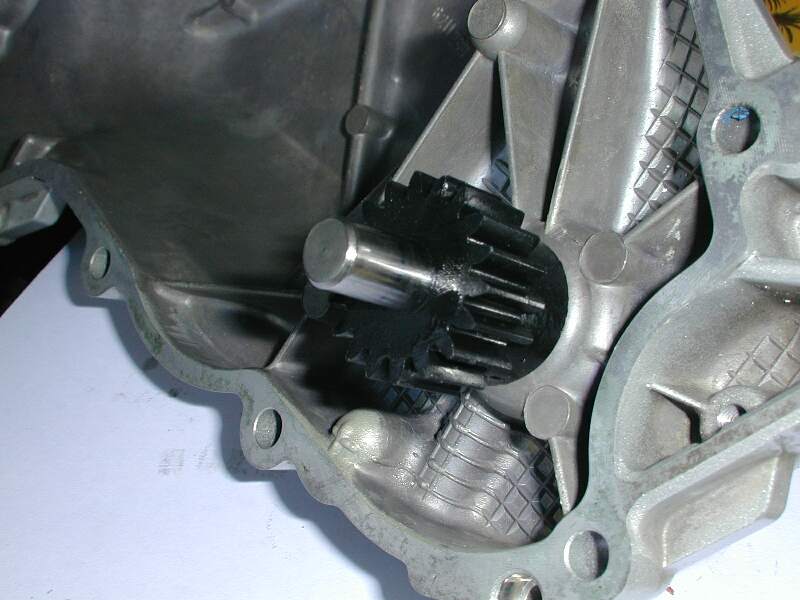
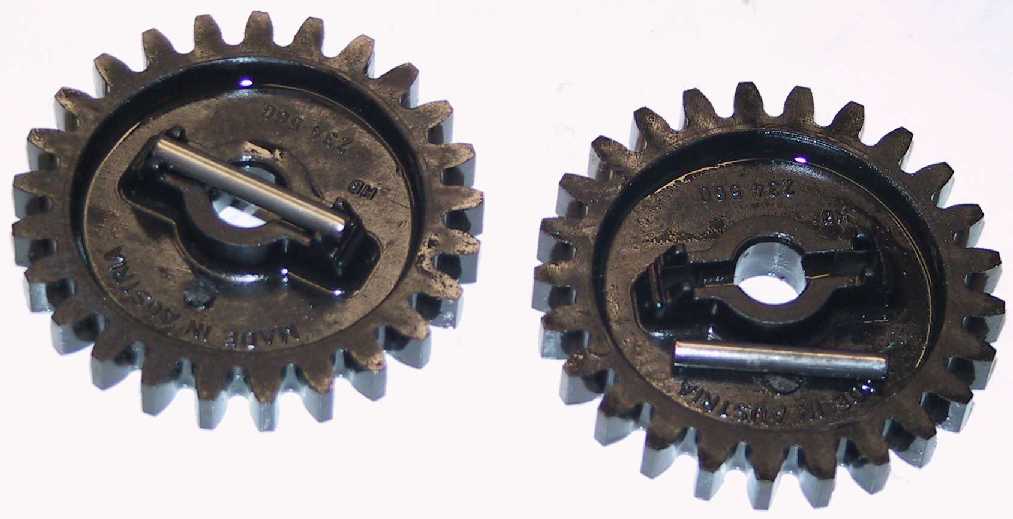
-
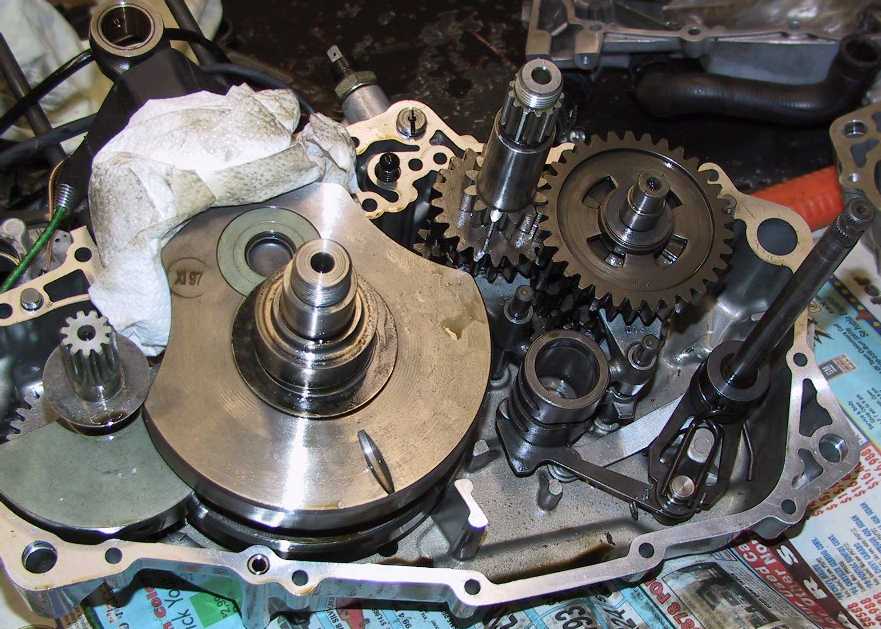
There is no need to remove the two identical black plastic gears from the
oil pumps (unless you have a reason. If you do need to remove them pry
them off. They just POP onto a pin that is across the pump shaft.
-
Back around the right side of the bike... If you have a clip-type master link, pull it and remove the chain. If not, loosen the rear axle and push the rear wheel all the way forward so
you can roll the chain off the rear sprocket. Then remove the chain
from the front sprocket. Remove the nut and lock-washer and pull off
the sprocket. Refer the
Chain Sprockets FAQ.
-
Remove the oil filter cover and filter.
-
Trace the wires from the right side engine (alternator) cover and the oil
pressure sensor up to where they go in the vicinity of where the battery
lives and unplug all of them. You don't need to pay attention to which
wire goes where because they used a different connector for each wire so you
can't mess up when you put it back together.
-
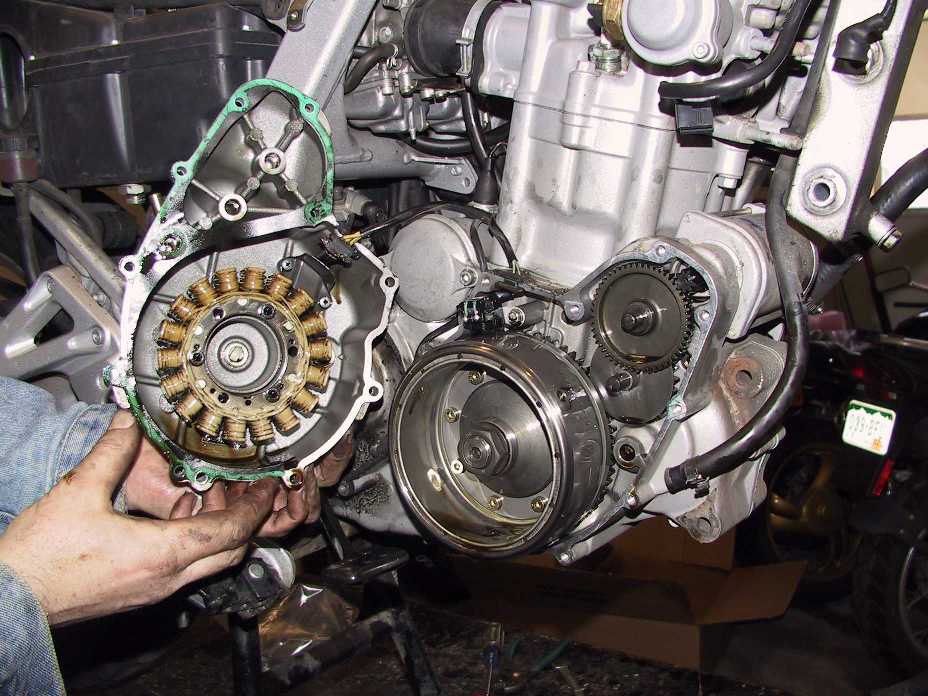
Remove all the bolts that hold the right side engine (alternator)
cover. Pull the cover off. It does not want to come off even
when all the bolts are out because
there is a big honking magnet in there. Might be good to take your (mechanical
wristwatch) off before you do this. The trigger wires should stay
with the trigger. The rest of the wires go with the cover or else get
"removed" or tucked out of the way.

-
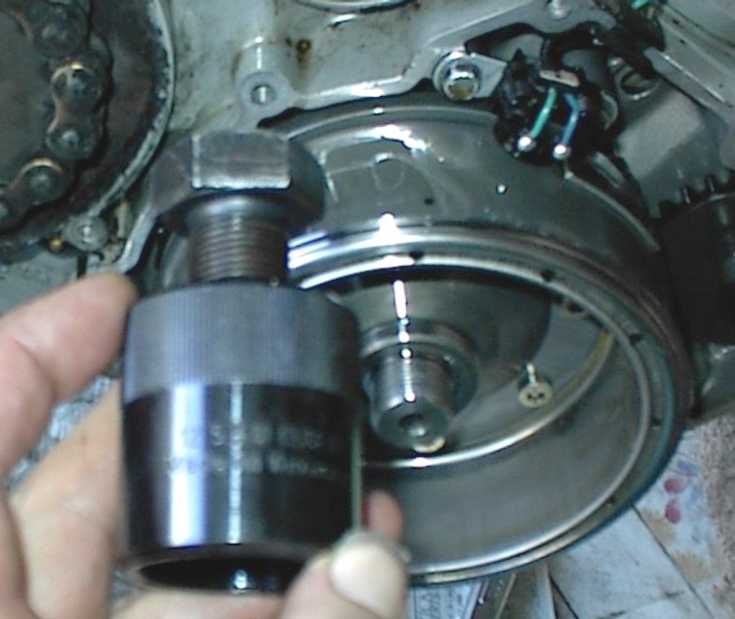
If you don't intend to
split the cases, you don't need to pull the alternator. Otherwise,
remove the nut from the alternator rotor. Then use the BMW
special alternator puller
tool (BMW part number XX-XXX?
Cartool 12-5-510, costs about
US$24 or so). This puller tool that has internal
thread of 37 or 38 mm with a pitch of 1.5 mm also fits a significant percentage of dirt bikes now
on the market.
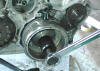
-
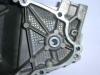
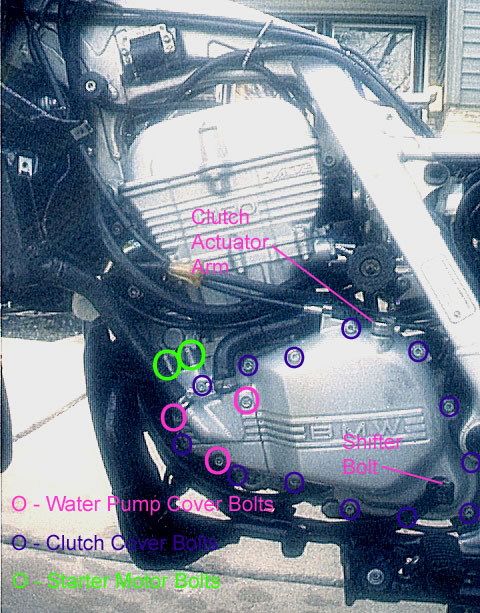
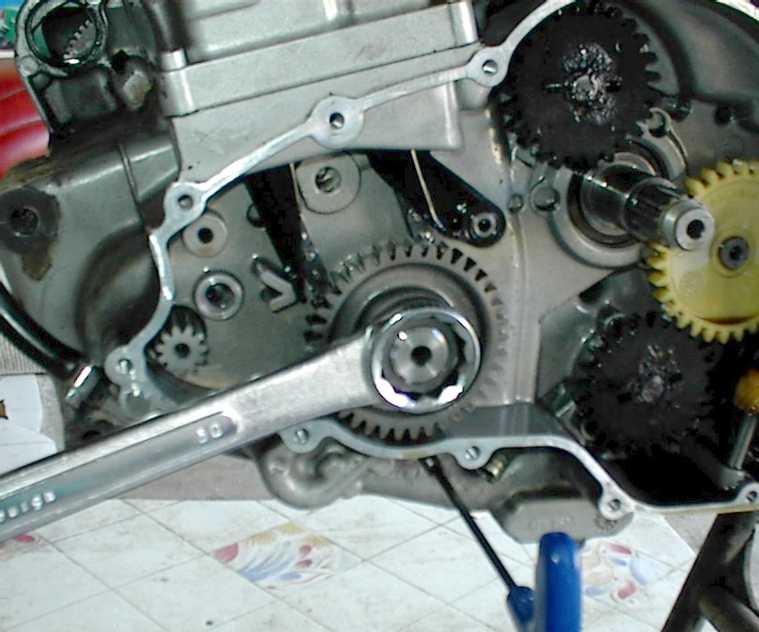
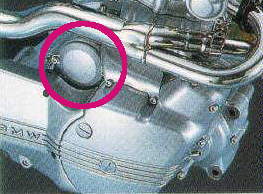
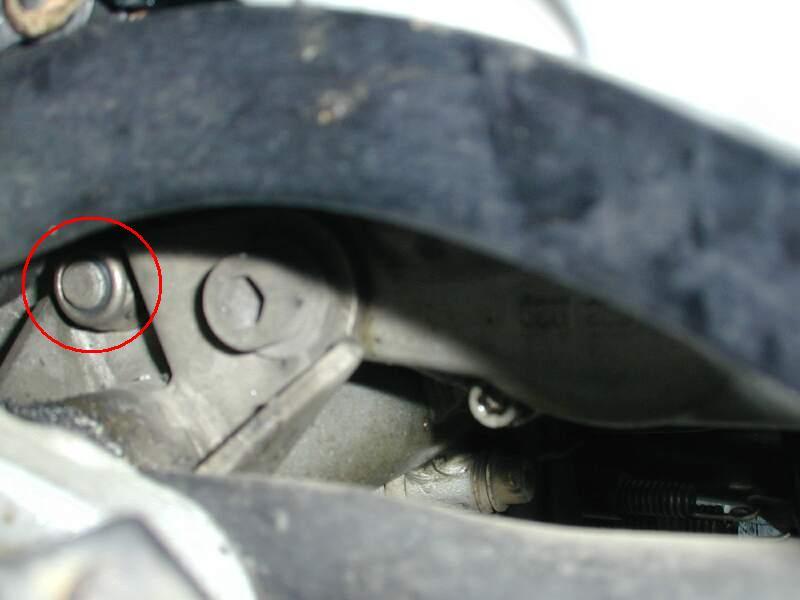
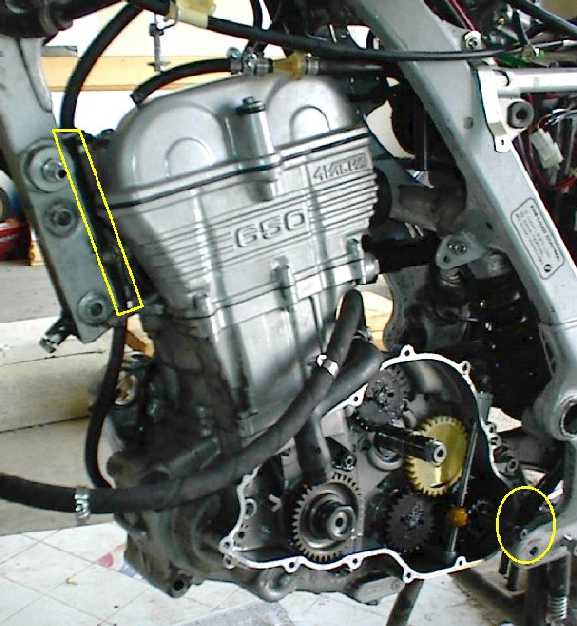
After the
alternator rotor is out, remove the
starter gears and spacers. The reason you are pulling the
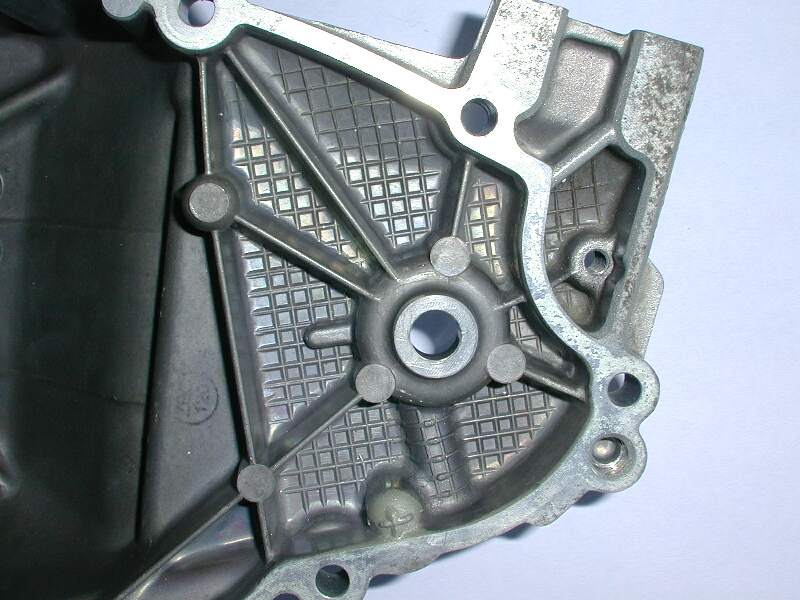
alternator is so that you can get to the case screws behind the starter
gears (circled in yellow in the
case
photo).

-
If there are any other hoses or wires, remove one end or the other until
the only thing between the engine and the frame are the mounting bolts.
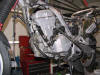
-
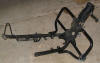
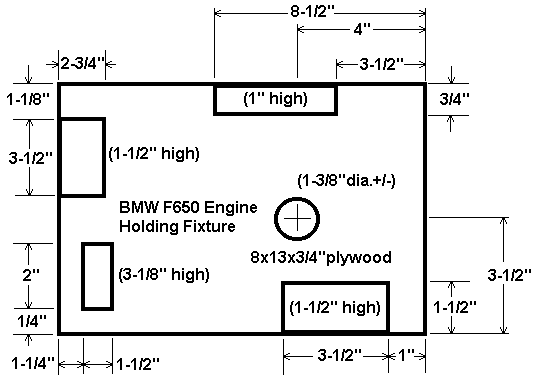
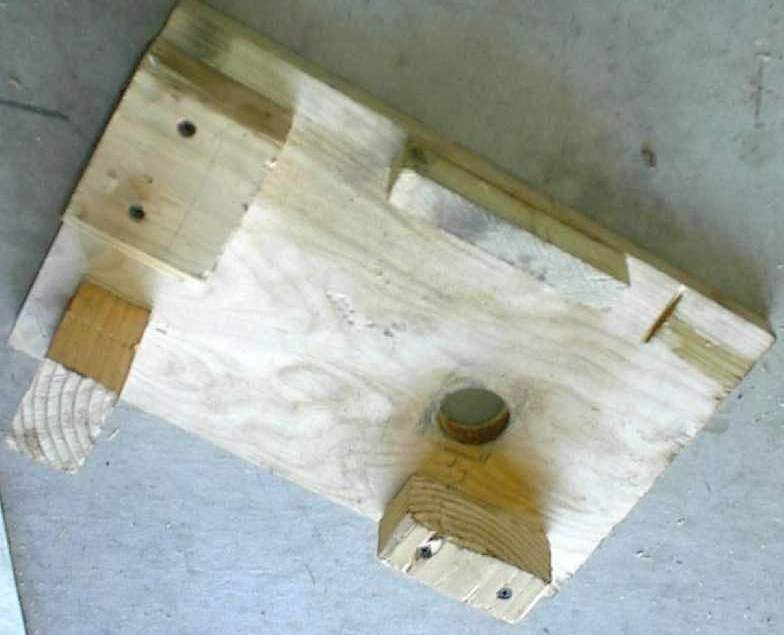
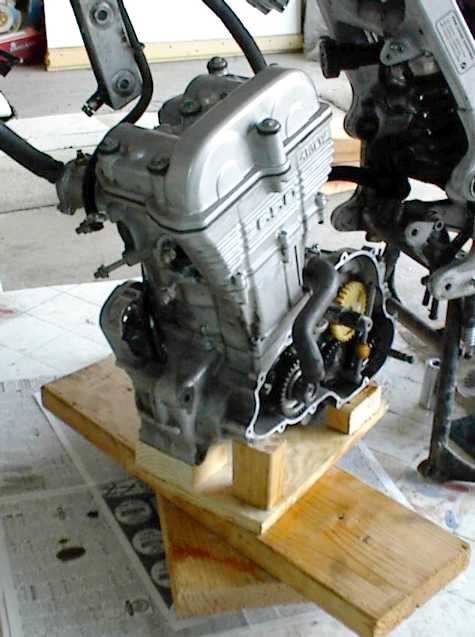
Because the bottom of the motor is not flat, a jig helps with the
un-installation and disassembly. A dimensioned drawing of the jig I
made is linked. This thing is not perfect, but works. An
improvement would be bolting a couple of pieces of metal to the front-most
piece of wood so that the thing could be bolted to the lower front engine
mount. After pulling the motor three times, I figured out the easiest
way for me to do it. Perhaps it will work for you. At this
point, the motor has three mounts in place, the one at the top, the swing
arm bolt and the bolt below the swing arm.
-
The bolt that goes through the motor at the top
motor mount should be LOOSE. But do not remove it at this
stage. This bolt comes out last.
-
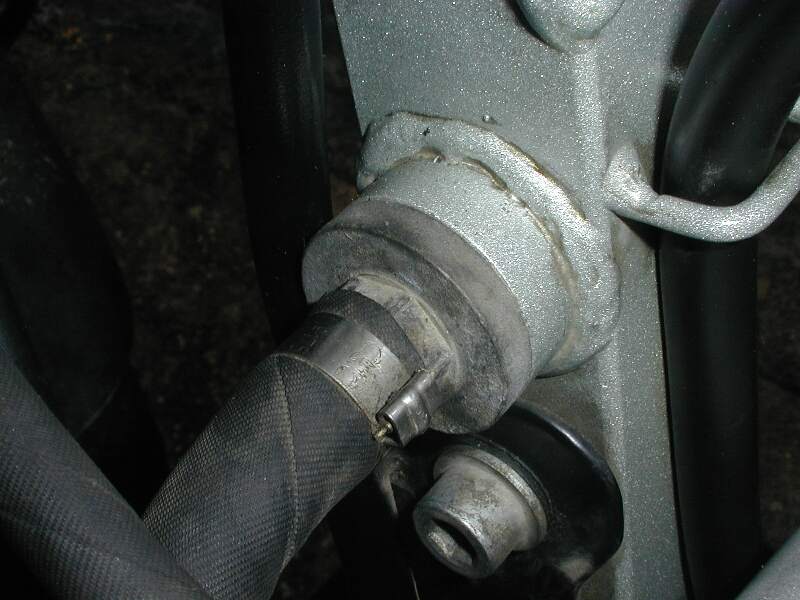
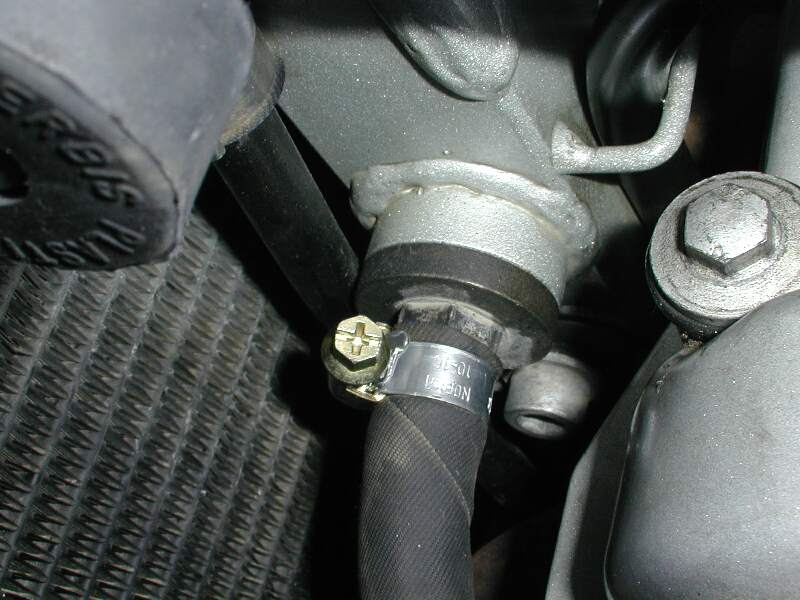
Pry off the black plastic swing arm bolt covers. Use two 22 mm
sockets and loosen the nut from the swing arm bolt. Remove the nut and
washer. [HOMEMADE SPECIAL TOOL: Get a pair of 14mm bolts at
least 100mm long, the less thread, the better. Wrap a Ty-Wrap tightly
around each bolt, up near the head.] Use one of the
"special-tool" 14mm bolts to knock the swing arm bolt out. You do not want to knock this bolt in so far that it goes through the swing
arm and into the motor. You want to knock it through the frame and
about an inch into the swing arm. Pull the swing arm bolt out the
other side and similarly install the other 14mm bolt. (These bolts
significantly simplify reinstallation of the motor. If you don't have
them when you pull it out, stick something in there. But try to
get the bolts before you attempt to put the motor back in. Aligning
the swing arm to the motor and keeping the plastic washers in place is
EXTREMELY difficult without them. The Ty-Wrap near the head is just a
pull tab in case the bolts get shoved in too far.)

-
Remove the engine mount bolt below the swing arm. The motor is now
hanging only from the top motor mount.

-
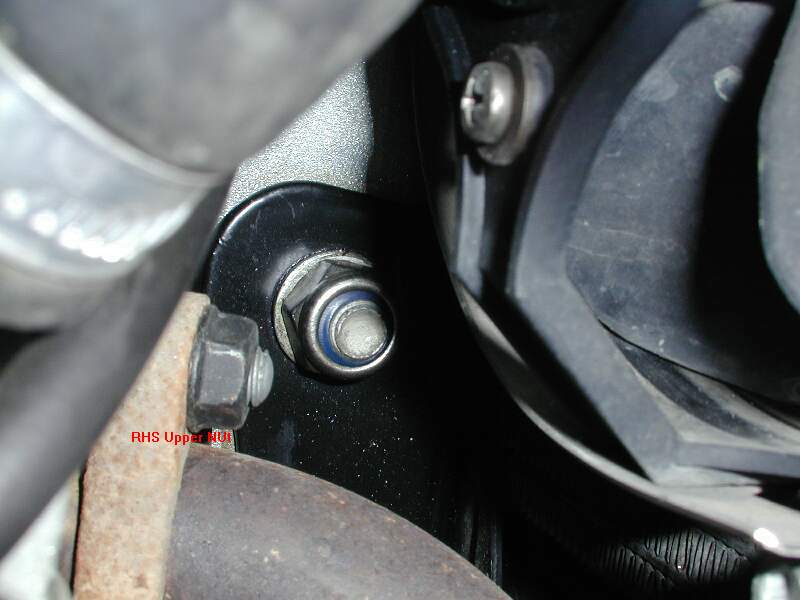
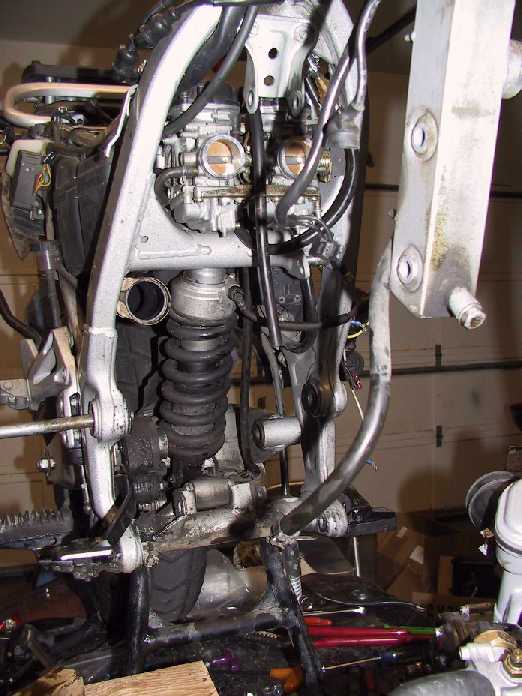
Loosen the two bolts that hold the top motor mount to the frame. Do
this fairly evenly. The motor will lower itself as you loosen these
bolts and then sort of wedge itself in the frame,
against
hoses at the front and rear. When the motor stops, you can remove
the frame-bolts and then pull the bolt that holds the motor mount to the
motor. The motor is now hanging
completely
free, simply wedged in the frame. The photo of the
jig is "upside down" so
it will more closely match the drawing.

-
It can be removed by yourself, but is easier with assistance. Stack
up some scraps of lumber under the motor, to a level a few inches below it. With
your chest on the frame, you can grab both sides of the motor and pick it up,
pulling the head toward the back slightly and turn it to the left, freeing it completely. And move it out toward the left side of the bike. (It is probably best not to drop
it, which is why you want to pile stuff up.) Setting it down on the jig
is a good idea. Once completely free from the frame, drag the motor
out from under it. Note that because of the fact you have to turn and
rotate the motor to get it free from the frame, a transmission jack will NOT
work to remove the motor. If the front down tube was about two or three
inches shorter, life would have been MUCH simpler.


-
Never done this job but to keep the rear wheel from
spinning try to find a wall or curb to back the bike into. The extra friction
on the wheel might keep it from spinning. Good luck.
Brad, N. CA., 2001
F650GS - Inmate #1002
-
What about using a impact wrench? I have a cheap electric
one that is sold for removing tire lug nuts and plugs into a car cigarette
lighter receptacle and supposedly produces about 200 pound feet of torque.
Maybe you could rent a real one at a rent-a-tool shop. In the mean time,
soaking the nut with penetrating oil overnight couldn't hurt. Richard #230:
1997 Funduro
-
Drill a set of small holes in the nut, all in a row. Then
take a cold chisel and a BFH and break the nut off. Flash #412
-
The impact wrench didn't to it either, might try breaking
it off with chisel and BFH. You guys that have done this more that once does
it get easier after the first time off? I made a tool to apply pressure to the
clutch plates so now I need a TDC bolt and maybe a Mapp gas torch. Perhaps the
wrong LocTite was used on your unit during assembly. In any case, it will only
be as difficult to disassemble next time as the effort you apply during
reassembly this time.
-
Condition of the Bike: Right now, I have the
left crank case cover off and the water pump and clutch removed. I also have
the alternator/stator cover off. Procedure:
Install TDC Bolt Have girlfriend sit on bike apply back brake (maybe I
need to put the clutch back on?), and put it in gear. Have friend steady bike.
Heat alternator/stator bolt and only that bolt (what should I NOT do
here?). Apply breaker bar with 30 mm socket.
Increase heat if it doesn't budge. Repeat
procedure with Clutch Nut.
What to buy:
Large 1/2 inch breaker bar (I'll get this at Sears).
Heat gun (I'm more comfortable with that than a blow torch). What should I
look for? Would Sears have one that would work?
Questions:
I assume that both of these bolts are "lefty loosy" (excuse my technical
jargon).
Flash: Mine is also a 98. Was there Loctite on your bolt for the
alternator/stator?
Which bolt should I take off first? Should I put the clutch back on in order
to help with this?
Of course, if I can't get these bolts off, I have to take in into the dealer.
At this point I'd have to reassemble what I've taken off. In fact, I'd need to
replace the washer behind the clutch nut since I've already flattened it. The
dealer is gonna love me (tried the repair myself, and couldn't get it, read
$$$).
-
Some bolts cannot be undone alone - you may need a strong and beefy assistant
to steady the bike and hold the brake, and you'll need a proper
breaker bar (extra long socket wrench). If it's assembled with Loctite
243, use of a heat gun (or careful use of a propane torch ON THE
NUT_NOT_THE ROTOR!) may be necessary. If a previous mechanic mistakenly used
Loctite 648 (per OEM) or Red Loctite, serious heat will be REQUIRED, not
optional. The next level involves use of a large
commercial air impact wrench for : removal, however, use of heat is still
recommended, as if there is Red Loctite in there and it's not softened with
heat, you can break things or rip the threads right off the assembly. (Not
likely in this case with a hardened crank, but you never know.)
If heat AND an air wrench won't get it... eww.
If you have the proper wrench setup, don't be afraid to get the nut up
to 100 degrees centigrade (212F), maybe even 225F. No higher or you start to :
ruin seals, and the magnets in the flywheel don't like excessive heat either.
Best to start off organized, all tools in place, a dry run, quickly apply
massive heat on the nut with precision, remove and cool down with a fan.
-
You have a
gearing DISadvantage on the bolt by whatever gear you have it in when you go
to loosen the countershaft nut. You have a disadvantage of only the primary
drive when you go to loosen the clutch basket nut.
The alternator nut is ON THE CRANK and you are reefing right on the bolt.
But... what're you gonna do? You HAVE to hold the crank somehow. Putting the
clutch back together is one option. An impact wrench on the rotor nut against
the TDC bolt is the only other one I can think of. Oh... I suppose you could
drill the nut and break it off with a chisel if all else fails.
-
Note to self and others doing this: Buy the gaskets, head, case, right side
case and left side case, just in case they tear. My motor is going to sit for
another week while I wait for gaskets. That is okay, I need the rest.
-
If
you do not remove the head from the cylinder, you do not need a new
egregiously expensive head gasket. Only pull the nuts off the studs. Do not
remove the bolts that go up from the cylinder into the head. If you DO pull
the head, do NOT reuse the head gasket.
-
By
the way the F650 book tells you to grind flats on the alternator tool, then
tighten the bolt running through it and pound on it (the bolt) with a hammer.
It says "10. Secure the outer portion of the tool with a crescent wrench
and turn the tool's center bolt with a wrench. Turn the center bolt until it
is very tight against the end of the crankshaft. Tap the end of the center
bolt (not the rotor as is will be damaged) firmly with a hammer. Repeatedly
tighten the center bolt and tap the bolt with the hammer until the rotor
disengages from the crankshaft taper." That didn't do sh**, tried that
although, but ended up using the impact wrench which just spun and popped it
off. Continue till it comes loose. Bull, I realize
you are taking a chance here but I used my air powered impact wrench which I
think is an absolute necessity if tearing down an F650 motor. It popped the
alternator right off. Does it really say "pound on it with a hammer"? When
using nearly any puller, it generally works best to load the puller and then
strike the puller bolt a single hammer blow to shock the assembly free.
-
Another trick when trying to reinstall said alternator. It didn't want to go
back on, because of these little tabs in the hub of the thing. Have someone
spin the gears to the right of it by hand and it drops right in. That had me
and my brother pulling our hairs out trying to figure out how to get it back
on without damaging anything, spinning the gears helped it fall in place.
Refer Timing
Key/Flywheel Removal FAQ for additional details of Flywheel replacement.
-
The F650 book tells you to grind flats on the
alternator (puller) tool. (The
tool Flash got came with flats)
-
Yes but if you follow the book because of lack of a FAQ
you pull the head, since this is my first time I pulled the head. Well for the
cost of a new head gasket I got to clean the carbon build up off the head. By
the way 19,000 miles and very little carbon. I see now that it could have been
done without separating the head from the cylinder.
-
Splitting the cases is pretty easy, although having the wrong side down and
having transmission parts fall out as you split them had me sweating bullets
for a bit. I am mechanically inclined but doing this is a stretch for me, the
next time I do it it will be old hat. I have a 72' CL350 that will be next on
my list I thought I would do the $6000.00 bike
before risking the bike my father gave me for free. I really am just taking
your (Flash's) advice and trying to save money, understand mechanics, and
developing a better zen quotient with the bike. Because we risk our lives on
these mechanical contraptions every time we go for a
ride I think you should be one with the bike. Just like a woman you need to
undress it and check out every nook and trannie....;-) You are correct about
the price of the head gasket, ouch... If my wife's bike needs it motor pulled
then I will for sure write a splitting FAQ, of if I do a crappy job and have
to pull the motor again I will do it. I think this site which I am a paid
member has the best FAQ's period. The only place that even comes close is
IBMWR.com and for 650 info they link here.


