Accessory Socket FAQ For BOTH F & GS
(First Draft)
compiled & edited by Kristian
#562
Please read the Disclaimer before attempting any work in this FAQ.
I have a BMW
accessory plug hardwired with a two prong type male/female jack
from Radio Shack. If the M/F jack from your vest will mate up
correctly, you should be able to do a similar setup. And if you
finaggle it all just right, you will be able to use the same
wiring to hook up your battery tender.
The Eclipse vest
has the common SAE (trailer-type) connector (where plug and
socket are identical parts). Yes, you could get an SAE plug (at
Radio Shack, say) and wire it directly to the battery with an in-line
fuse. However, a better solution is to simply connect your vest
to the accessory sockets on your BMW's. (If you don't have one
for the GS, it's available as an add-on.) To use the bike's
accessory socket, you need to either replace the SAE plug on your
vest with a BMW plug, or attach it to an SAE-to-BMW (male) plug
adapter. I'd recommend the latter. The adapter would also be
useful if you ever get a trickle charger--like a Battery Tender (which
comes with an SAE plug). Also, if one day sell the vest, you
might be glad you hadn't snipped the plug off. You can either
make an SAE-to-BMW adapter, or buy one. Aerostich (www.aerostich.com) sells one for $12 (cat. #116). If you
make one, wire the exposed metal prong to ground, to avoid shorts
in case it contacts metal. Cary
Accessory Socket - Where is it ?
Classic F
On the classic F
the accessory outlet is typically installed on the left engine
cover (I think that's its official name, but it's the black
plastic piece that runs from the bottom of the front fairing to
the back of the gas tank). It's mounted 1"-2" below the
top mounting screw, approx. in line with the petcock. Sorry, no
picture. It is connected directly to the battery with a fused
line and a quick disconnect plug at the outlet to allow easy
removal of the engine cover. James #523.
Anon Supplied
this Template:
and these
instructions: (Retrofit Kit)

 (Accessory Plug Location Circled).
F650 GS
I just installed
one on my 01, so I'll try to explain. (It took me forever as
well, the instructions are very confusing). On the right side of
the bike, at the rear of the "tank', and it front of a fuse
block, are two sets of electrical wires clipped/ fastened
piggyback style together, and bolted to the bike with a metal
screw. The outside wires are disconnected and then,
1) the existing
male side is connected to the female side of the clip connected
to the accessory switch, and
2) the existing
female side is connected to the accessory switch male plug.
In other words,
the accessory switch is now "wired into" the bikes
wiring loom. (on my bike, the color of the wires going into the
existing plugs were similar to those on the clips connected to
the accessory plug). Now there are 3 sets of connectors which
piggyback each other and are connected to the frame via a metal
screw in the same way as before. Greg
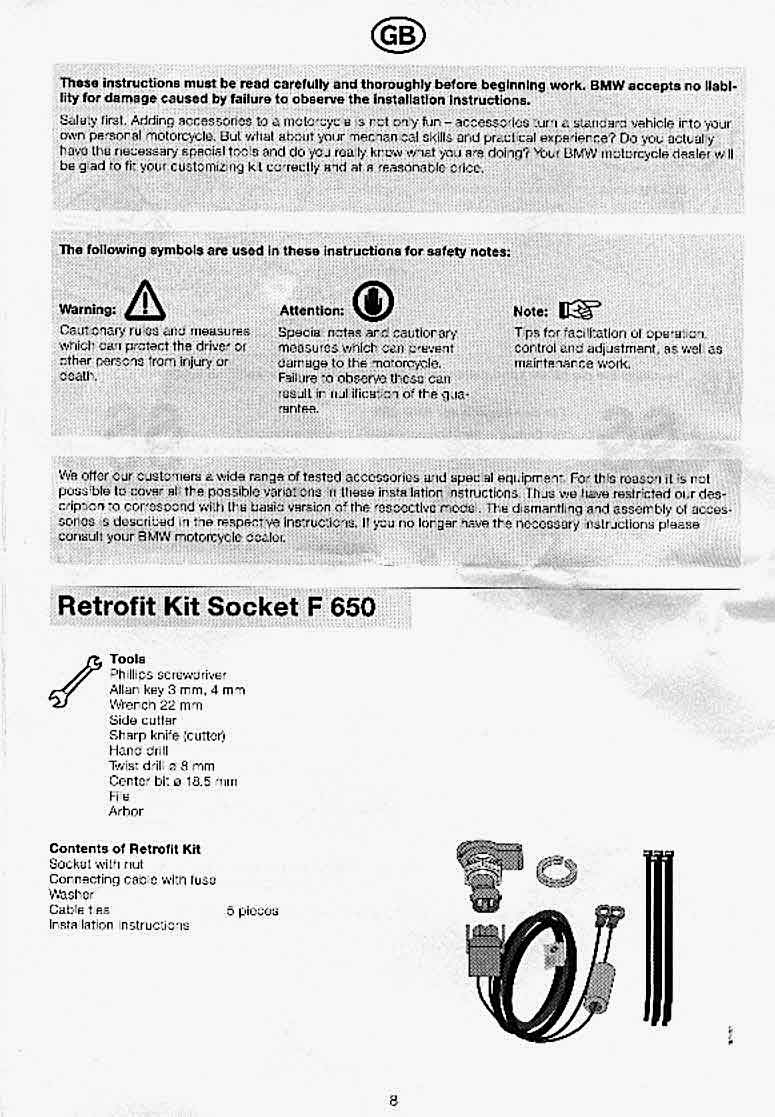
The Accessory Socket Installation FAQ
by Marty Graves
#436
This FAQs is
about installing the F650GS accessory plug (BMW part number 71 60
7 653 870 - US$39 - in 4/2004). Be advised that the BMW
instructions are some of the least helpful BMW installation
instructions I have seen, so I will be supplementing them as we
go (I will assume you received a copy of these with your kit).
Required tools:
- Torx 25 and 30
- Crosshead and standard
screwdriver
- 22mm open end wrench (or
crescent wrench of sufficient size)
- Cutters to trim the ends of
the cable ties
- Extra cable tie or two
- Loctite (light duty) (optional)
- Torque wrench for bolts (optional)
- Flashlight (optional - maybe)
- Remove seat. Remove the
turn signal pods from both sides of bike. Unplug
wiring and remove pods from bike. (4 screws on each pod -
squeeze the tabs on the wiring plug to release).
- Remove the left and right
side faux tank covers. This requires removing three
screws, lifting up at the center, and pulling (GENTLY)
the peg out of the rubber grommet at the front lower area.
For the left side, you will need to remove the oil fill
cap for just long enough to remove the cover, the re-install
it so no "stuff" gets inside the oil tank.
At this point, it would be wise to remove the center
panel and disconnect he battery (remove the negative
cable first - install it last). You may take this
opportunity to remove it and fill the cells with
distilled water to the proper level and clean all the
connections. You may also want to check and fill
the radiator "burp tank", if needed (while it's
accessible).
- Assemble the socket by
putting it through the hole in the bracket (direction is
important), then starting the nut on the threaded
backside. If yours is like mine, the nut won't fit
over the plug's connector tabs - just push it down as far
as it will go - square it up, and start "screwing"
it onto/over the tabs (probably need to use the wrench).
It will eventually self-thread itself and work over the
tabs. Be SURE you have the socket the right way
around in the bracket, as the nut will be difficult or
impossible to remove at this point without damaging
something. Now that the nut is in a usable
location, put a dab of Loctite on the socket threads
where the nut will end up. Rotate the socket in the
bracket - you will find that it is "indexed" to
keep the hinge in the designated location (a little tab
on the socket fits into a little notch on the bracket,
keeping the socket from rotating). Be sure you have
the socket indexed correctly, then tighten the nut snugly.
If you tighten without being indexed, you may damage the
indexing tab, and may find the socket working loose in
the future. At this point, pay particular attention
to where BMW wants the cable to be routed - you should
probably try to wiggle the socket connector on the wiring
through the proper way from the seating area, before
plugging it into the socket (I didn't and had to loosen
some cylindrical gizmo to make room to get the BIG plugs
through from the other direction).
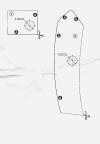
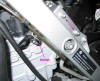
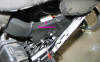
- Remove the two bolts (arrows),
install the bracket/socket (pay attention to wiring
routing), put a dab of Loctite on each bolt and reinstall
them tightly. (Optional - torque to 8 Nm) See
picture of left side of bike, near engine, below.
- The cable needs to be
properly routed along the front facing (inner?) side of
the horseshoe bracket that supports the rear of the faux
tank panels. Next, you need to locate the fuse box
(just to the left of A in the picture), and move it out
of the way. Insert a screwdriver (see picture below),
push the tab far to the left (toward fusebox), and slide
the fusebox away from the bike (toward you). Once
it slides clear of the latch, move it out of the way to
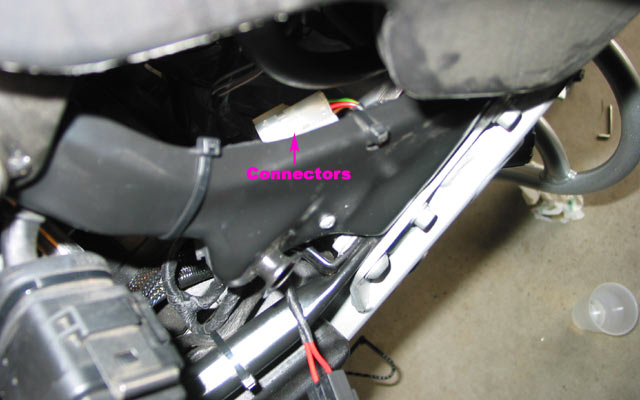
access the connector. Note that the connector is
secured to the frame with a Phillips screw (B) and
indexed into location with a pin in a hole (C).
Here's a
different view of the same area from above… you can just see
the white connector with the colored wires. Also, note the
fuse box is now out of the way.
- Remove the Phillips screw.
There is only one plug that will mate with the one you
just loosened. If you have BMW heated grips, that
socket you just unscrewed is already occupied, and the
grips will have to be unplugged (temporarily) first.
Plug the accessory plug wiring into the unscrewed socket.
If you look closely, you will find that the OTHER
accessory plug is identical to the unscrewed one.
Better yet, you can slide it together (side-to-side) with
the unscrewed one to "mate" and form a BIGGER
plug. And if you have the BMW heated grips, they
plug back into this accessory socket. You'll also
note that the fuse in the accessory wiring will ALSO
piggy-back onto this rapidly growing connector. I
decided NOT to do this, as you MIGHT need to actually
REPLACE that fuse. So recheck your wiring routing,
and assuming that it is OK, go ahead and reinstall the
plug to the frame - indexing it properly, and then
reinstalling the Phillips screw (I DON'T recommend using
Loctite on plastic). If you've followed all this up
to this point, you're probably saying "easier said
than done", and no truer words were spoken.
But we're almost done…
- Note where I have my fuse
lead (red bits at bottom of picture above). Check
your wiring position one more time, then use the three
included cable ties to fasten the wiring to the inside of
the horseshoe shaped bracket - one on the right side (just
above fuse box, as in pictures above), one on the left
side (symmetrical to the right side one), and one in the
center. It should look as pictured above. I
clipped the cable tie from the frame (see picture above)
and secured the fuse to it (see "D" - second
picture above). Slide the fuse box back on to its
mounting bracket.
- Re-connect the battery (negative
lead LAST). Be sure to put a cable tie around the
battery vent tube to secure it to the battery (several
inmates have had battery acid eat bike parts when this
tube came loose). Don't forget the strap that
secures the battery. Test the new accessory outlet.
THEN, reassemble the bike in the reverse of above (be
sure to remove and replace the oil fill cap for the left
side faux tank cover).
Test your turn
signals before riding off. And enjoy that new heated vest…
(or whatever it was that prompted you to install the outlet).
Classic Q. Can
anyone help me locate the heated grips socket shown on the pre-01
wiring diagram I see plenty of black/green wiring, but can't seem
to find the socket.
- Mine is a t shaped plug with
1 each BROWN and green wires. It's on the right side of
the headlight fairing, tucked way up under and behind all
the wiring junction/plugs. If you look for the plug for
the right turn signal wiring, and follow it up, you'll
probably find it nearby. I'm not sure you can actually
see it very easily without removing some fairing, but you
can probably feel it up there somewhere. Todd #389
- Todd's message may be just
the answer that you are looking for, but when I installed
my heated grips on my '01F650GS/Dakar, I had a hard time
locating a plug that was located on the right side, up
and behind the rear shock adjuster knob. Jim B/SoCA
GS/Dakar Q. I
am installing a set of Kimpex heater elements on my bike for
heated grips. I am still unclear where the connector for the
heated grips is located. I have located a 3 pin molex style
connector on the right side frame piece next to/under the Airbox.
It is attached to a blue connector which is in turn attached to
the frame via a screw. This connector contains a brown (grd), a
red (hot), and a grn/yel (acc power) wires. Can some one confirm
if this is the connector intended for heated grips on the factory
kits? Did not see any free connectors in the junction box
directly behind the steering head. I suspected this is the
correct one, but I questioned it due to the absurd location it
was found. Makes no sense to me why a handlebar function would
have a connector back in the middle of the vehicle.
- Yes, that's the one I plugged
my BMW grips into. Handy location, eh? Just in case you
didn't see it yet, there is a screw on the outside of the
frame that holds the plug assembly in place; I needed to
remove the screw to get the grips plugged in. Scott, ID.
- The red wire is connected
straight to the battery plus, the green/yellow via
ignition and fuse #4, just FYI. Mine didn't have a fuse
in that location. xls, San Jose, CA
For more on
Heated Grips see the Heated Grips FAQ.
Alternative Sources for Accessory
Plug & Jack
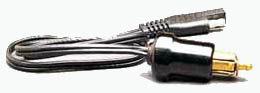
Jastek
- http://www.jastek7.com/products/plugs.html: Here's a company that sells BMW
type accessory plugs for $6.95. They also have a good
variety of sockets, cables and adapters. Richard 424,
Oregon.
- Jastek Powerlet Socket. It is
identical to the BMW socket, but Jastek supplies the
wire, in-line fuse and every type of adapter. Their link
is http://www.jastek7.com . They are small, rugged, and
have a spring-loaded cover. On my '98, I noticed that
there is room to put the socket in the middle of the
instrument cluster. It's also a convenient place to plug
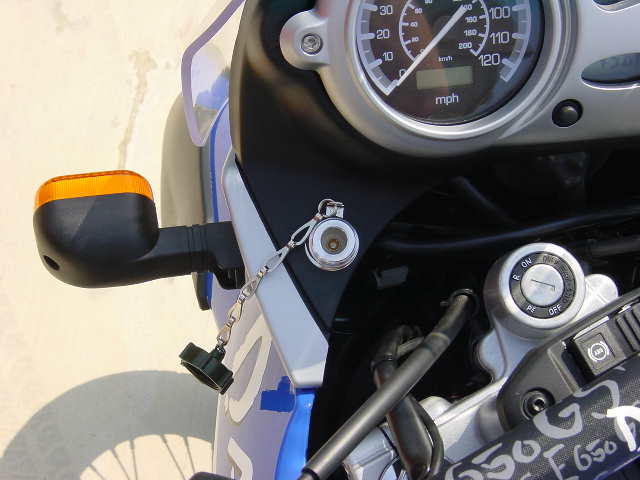
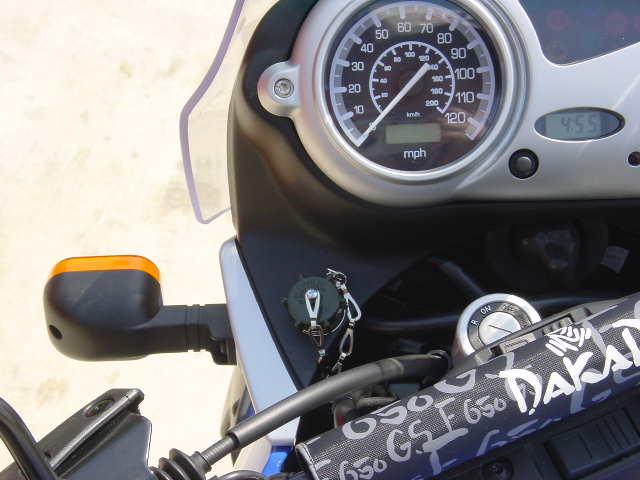
in a radar detector, mp3 player or whatever. You can plug
a battery tender into it and keep the battery fresh, too.
Larry
- Check this site out for
installation (of a Jastek on a VFR). It is highly
recommended. http://www.sport-touring.net/mods/powerlet/index.shtml. Gar 673 East Ky.
- Jastek 12V Power-Socket. The
F650 doesn't come with the necessary socket to power my
next-on-the-list GPS so I decided to install an easy
access power socket. The kit was purchased from Jastek
Engineering but I swapped the standard socket for this
military style one. The kit was relatively easy to
install. The most difficult part was making sure that the
socket had enough clearance underneath to attach the
cabling. Flying Scotsman.


John Deere
- Bosch male and female BMW
accessory plugs are available from BMW dealers. I don’t
have the BMW part number nor the exact prices. A simpler
and much cheaper Bosch accessory socket is available from
John Deere dealers for about $9. In fact John Deere
apparently has two female sockets available, with the AL25073
part being mostly plastic and cheaper , while the MG82002966
part is made with more metal and appears to be more
durable. I've used the AL25073, and it's Ok, but just Ok.
The Hella female socket (in my experience) grips the male
part much more securely than the John Deere / Bosch AL25073
does. John Deere part numbers: Female socket: MG82002966,
Female socket: AL25073, Male plug: RE11344. From http://www.morrowmarsh.ca/concours/techpages/bmwaccessplug.htm.
Warmsafe
Widder
- www.widder.com (the heated clothing people) show
these parts on their web site:
- Z4F Hella Receptacle (accepts
BMW plug or Hella plug) $6.00
- Z4M Hella Plug (plugs into
BMW receptacle or Hella receptacle) $6.00
Does the F650GS BMW accessory socket kit
fit a Classic?
by Harl #380
The GS/Dakar kit is different from the Classic kit.
The Classic kit connects to the battery directly while the GS kit
connects to a plug on the wiring harness. The socket mounting is
different as well.
Notes:
Installing a Cigarette Lighter Plug
Q. I have a 12v power plug
installed on my Dakar. As you know it is different than the
common "cigarette lighter" plug cars have. I am looking
for a proper name to call the (Dakar) plug so I can send it (the
name) to some guys that build some kind of universal charger and
only have the cigarette lighter plug and not even know of the
other. Any links and photos about it, should help too.
- Don't know its "real"
name?. Call it the "John Deere accessory plug,"
since the two are almost identical. I added a cig outlet
to my Dakar for this reason. That way I can charge the
cell phone, power the GPS, or whatever and accept normal
plugs. There is a nice spot for one on the dash, and this
is very close to the battery so direct wiring is easy.
About switching it: I have it wired direct so that I can
recharge a cell phone (or whatever) overnight while in
camp, with the bike totally shut down and key out. I also
like that location because it is easy to power/charge
something that is in the tankbag while underway.
DakotaDakar.1198

- "BMW accessories outlet"
I believe Hella also uses this style connector. I like
DakDak's cigarette lighter mount, but in a pinch there
also is a connector that fits into the BMW accessories
outlet that has a cigarette lighter style adapter at the
other end. Runaway #1259 (CO)
- DakDak's plug location makes
a whole lot more sense for an accessory plug than the
spot designated on the GS for BMW's accessory plug kit.
It takes a lot of fumbling around to find it in order to
plug in my electric vest if I have forgotten to plug the
vest in before I actually get on the bike. 2001 F650GS
Dakar, RogerN_#827
- Am I paranoid when I'd be
worried about people messing with the cig lighter when
the bike is parked? It is a cool location, I totally
agree. But I'd wire it to the heated grips power (switched
by ignition), to be safe. In that case the wiring is a
little more work and it's probably not a wise idea to use
the same connection for charging the battery then, though.
2001 F650 GSA. its_xls.
- BMW sells an auxiliary outlet
that uses a relatively special plug (thus the adapter to
go into a standard cig. lighter plug). On the Classic,
stock location was in the lower engine cover - drill a
hole for it (near the petcock area), and should be wired
directly to the battery for always on. If you want a
standard cigarette lighter outlet, I think handlebar
clamp versions are available (non-BMW, try a Harley shop
if you want a chrome one :-)), and wire it yourself.
Marty #436-Chicago-97 F650F.
- I called BMW and with the two
parts I would need, it would cost approx. $75 + shipping,
that's just crazy. Has anyone found a home-made way of
doing this? They have a cigarette lighter kit that ends
up being European, so that our accessory plugs can't work
in it, and then I have to buy a $25 adapter to convert it
to American. Does anybody know of a setup to just skip
the whole conversion and just wire a NORMAL accessory
plug directly to the battery w/o going through this
expensive BMW stuff?
- I have the BMW accessory plug
and a normal cig adapter plug. For the BMW acc. plug, I
have a BMW -to-cig adapter with a 2 foot cord, just long
enough to reach into a tank bag or my pocket. the other
cig plug is primarily for my Touratech GPS mount, but
could be used for anything. it is wired directly to the
battery (both pos/neg.), runs under the tank, and ends at
the steering head. Mark #403.
- Universal Lighter: http://www.denniskirk.com/powervendor/details/detail.asp?serverid=nlStreet&PartNo=40305. Marty #436-Chicago-97 F650F.
- I want one BMW plug (which I
have) and one "normal" cig. lighter outlet on
the bike. So I stopped by Radio Shack earlier today and
picked up:
Part (Radio Shack part #)
---------------------------------
DC Extension cord with on/off switch (270-1557)
Inline mini-blade fuse holder (270-1237)
10Amp Fast-Acting fuses (270-1093)
They've got all kinds of different socket configurations,
but I went with this one because it had a longer cord,
the housing for female end is entirely sealed, and it was
only 50cents more than the other one I was looking at (total
for the above parts, after tax, was $10.50).
I'm going to cut the male end off the extension cord,
figure out which wire is positive & which is
negative, splice in the fuse, then wire the whole shebang
directly to the battery. For now, I think I'll just zip-tie
the female end to the handlebars, as this outlet will
primarily be used for the GPS. Josh #581 (IL, USA)
- Q. Why don't you just
hard wire the GPS to the battery instead of messing with
another plug/adapter. Much cleaner this way. Cycoactive
recommends cutting off the cigarette adapter but Garmin
sells special cables for all of their products which
don't have the adapter receptacle AND which have an
inline fuse (which CycoActive says is not necessary as
the units have sufficient internal protection). If you
wanted to try to make a "universal" kit when
chopping off the cigarette adapter you could attach male-female
leads to some cable left to it and leave this in the car.
That way the data cable end could go with bike or car and
the power side could be hardwired to the bike and using
the cigarette adapter in the car. Personally, I would
just get the Garmin cable for the power and put it on the
bike. Cheap and easy. I've found West Marine to have
these in stock best vs. CompUSA and other "local"
Garmin retailers (unless you find a specialist).
Cycoactive does have cheap cigarette adapter kits for
bikes on their web site, I just don't like having the
extra bulky cable stuff and prefer a neat installation
with the cable and mount ready to go (less to worry about
and carry). If it costs you ~$20 it's worth the sanity
and ease-of-use. davidhpark, #711.
- I have my "BMW"
accessory socket in the same position as in the pic (above),
It is handy there :-) I also bought a plug and a
cigarette lighter on a wire from the local auto shop. At
the end of the long lead I attached the BMW plug. Hey-presto,
the best of both worlds. I have enough cable to run a
light, radio, cell phone in to my tent or pump my tires
up. And I can use dedicated BMW plugs too :) .James#848.
'97 F650 & '85 XT400
- I'm surprised nobody
mentioned the "Jastek Powerlet" socket. Jastek,
http://www.jastek7.com, sells these sockets (which have a
spring-loaded lid) along with brackets, and every kind of
adapter - SAE plug, regular cigarette/cigar adapter, tank
bag wire and everything else. Their kits include the
heavy gauge wire and fuse, as well as the zip ties. I've
got several kit on my other bikes and love them. Larry
- Next.
Do
it yourself Accessory Plugs
( Apart from this site: Making an Accessory Plug http://www.morrowmarsh.ca/concours/techpages/bmwaccessplug.htm )
Q. I want to add an accessory plug on my Dakar. One of them (Dealer)
told me that ok I can order the accessory plug for €40. Then
he told me "yes but then you need the extra adaptor to turn
the 220v (remember I am in Europe) to 12v" (!!!!!!!!!!)...
and this for extra €54. I always thought that the accessory
plug did DIRECTLY output 12v DC and didn't mess with 220v AC! And
then that I only needed a simple adaptor to change the plug to a
more "common" (at least in Greece) "cigarette
lighter" plug. But no 220AC-to-12DC! Was I THAT wrong? Or
was the reseller full of sh*t? After all it is a complex
circuitry to make 220v AC from battery power (and more complex
than turning 220v AC to 12v DC like most power adapters at home
do). So even the two prices look a bit weird (40 for the complex
thing, 54 for the simple thing).?
- If you want to run stuff on
12V, ALL you need is the outlet installed (and a
corresponding plug on whatever it is you want to run). If
you want to run stuff on 220V, you will need an inverter
that turns 12VDC into 220VAC. 56€ is probably high
for that. If you want to plug a charger into the wall (220VAC)
that plugs into your bike, to charge your battery, that
is probably also 56€ from the dealer. That, too
sounds high since they cost about US$56 here. Anyway, it
all depends on what you think you want to do and what HE
thought you wanted to do. Flash #412 (CO)
- Screw the dealer; Full of sh*t
is right. Just find the cigarette lighter female plug and
wire the sucker to your battery. Don't forget to put an
inline fuse in the positive side. Mike410(Iowa)
- My GS has on board 12v/240V
AC Inverter @ 300w continuous, 450w surge, fits in
topbox, can run my laptop, 5" colour TV, camp lights
etc. Jack F650GS Australia
- The dealer is talking about
either an inverter (DC battery in, AC for household stuff
out) or a battery charger (AC in, 12v DC out). If you
already have the thing you want to plug in and it works
at 12 volts from a cigarette lighter, you only need a BMW
male plug and a cigarette lighter female socket. Connect
the two with the right pins together (use 3.5mm2 or
bigger cable) and you're sorted. Andy Leeds UK #982.
Accessory Socket Fuses
- I believe the original fuse
is standard European 8 amp (white) inline, I've replaced
mine with 15A to handle additional intermittent horn
current use (added dual horn with relay). Eyeball says
wires look to be 14 GA (maybe 12 or 16 or metric
equivalent) Also enclosed in heat shrink tubing (protect
from high engine temps). I connected the + and - direct
to battery terminals (per instructions). Suspect that
Flash would prefer it go direct to a good chassis ground
instead.
Accessory
Socket Polarity?
by Flash #412
Q. Is the middle, pointy
bit on the plug for the BMW accessory socket pos. or neg.? i.e.
Where do I wire the (+) positive and (-) negative on the socket.
Is the "inside" point the (+) or is the "outside"
ring on the female socket (+)??
A. The center contact is the positive contact. i.e. "inside"
point the (+).


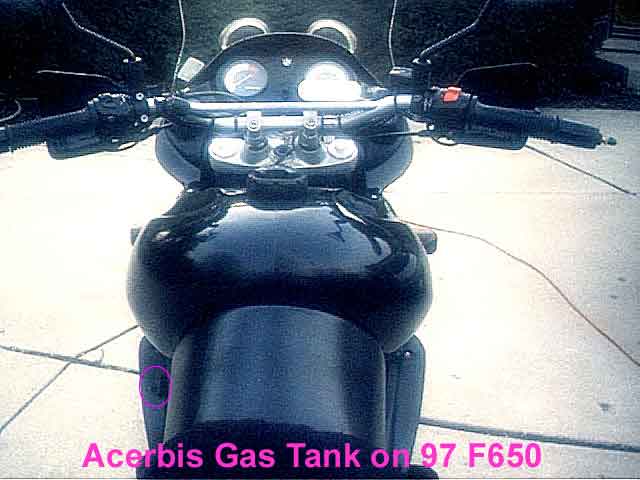 (Accessory Plug Location Circled).