Heated
Grips
Installation FAQ
compiled &
edited by Kristian #562; updated by Scott ID, #1244
Please read the Disclaimer before attempting any work in this FAQ.
Non-Heated Grip
Installation
by Nothing Clever, '02 P/D, Louisiana.
My old OEM grips (NOT heated) wore out so I was hunting for
new ones. Shop recommended Pro-Grip (Rally model) made in Italy & retailing for
US $7.95. I thought, "Too good to be true." But I gave in to my American impulse
to spend for the ephemeral rush and bought them anyway.
Removing the Old Ones
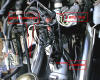
Once home, I unscrewed the bar end weights and loosened the
screws on the handguard clamp adjacent to the electric switch housings (lights
on the left and kill switch on the right) so the handguards could rotate out of
the way (probably don't need to do this as once the end screw is off, the
plastic handguard is rather soft and can be moved out of the way easily). I used
a flat-bladed screwdriver to gently pry the old, tight grip away from the
throttle housing on the right and did the same on the left. I used a little of
Mommy's hairspray to help coax them off.
Now for the installation of the new grips.
The ends of the grips are solid and presented the problem of
'how to make a nice, neat round hole' without butchering the grips. I took a 6
inch socket extension and two snug-fitting sockets from my tool set (two
different sizes to accommodate the smaller-diameter left grip and larger
diameter right grip), slid the grips down until the socket was firmly seated in
the end of the grip. Holding the socket extension upright and resting on a piece
of wood I squarely pounded away with a rubber mallet on the solid end of the
grip. It took about 6 healthy blows for each grip and, presto, I had a nice,
perfectly sized and perfectly round hole at the outside end of the grip for the
bar-end weights to mate up to the bar. I remove the socket quickly from the grip
before the hairspray set. I tossed the little plugs left over into the trash.
Next I sprayed hairspray onto the bar and the inside of the grip again to help
ease the grip onto the handlebars and, when dried, to help keep it in place
despite rain or heat.
Now for the important part.
The grips made an incredible difference and the bike feels
refreshingly new, no exaggeration. Almost no road-buzz, steering feels more
responsive, I feel much more control of the bike, the throttle responsive even
seems smoother, grips are very comfortable and it's a cheap but immediately
recognizable modification/maintenance.
Hot Grips
by Flash #412
01/11/11
A while back, Doug #317 said, "The part number for the Kimpex heated grips is
994398. I didn't find it on the web site but called and they confirmed it,
Accessory Warehouse
www.accwhse.com 800/241-2222. I ordered some at a total of around $35. A
couple of the local "missing links" around here are quite satisfied with
theirs. These work even better than the $300 kind and have a three way switch,
hi-off-low."
I've done this twice. The first time, I wired them from the battery via a
fuse. The second time, I was back in the USA and dug around in my piles of crap
and found a mating connector for the factory installed, factory-hot-grip
connector up in the fairing. I ran off there, via a fuse.
I drilled a hole in the dash, after checking from the back that it would fit
where I wanted it to go. I picked up a rubber cover for standard toggle switches
at an electronic parts place for about $1, making it completely waterproof. I
have a black, rubber-covered, toggle switch on the dash, just below the roundel.
Hi-Off-Lo. No indication of what it is.
The grips that I got both times were too long for the F. The first time, I cut
off JUST the closed ends. When I went to install them, I had to use some washers
for bar-end spacers. To be on the safe side, I got some longer bar-end bolts,
too.
The second time, I cut the grips to fit, which unfortunately cut the heater wire
(in each grip), too. I soldered in a small patch wire which I "sealed" into
place with some epoxy and then covered (just the end of the grip) with tape.
They work GREAT.
Just before I bought the first set in France, I was all prepared to make my own.
Take a look on my website for how I was going to make them, posted by an
Australian. Note: I did NOT follow this plan. And so I can't say from personal
experience that it'll work. That info is posted
here.
Hot Grips
Ò
Installation
By Andy
#618, Slightly modified by Flash
#412, (14/12/01)
14/11/11
Parts
Required:
-
I ordered Part #475-875,
which was the kit for 7/8” diameter bars.
-
I requested the ends be bored out for
bar end weights.
If you ever want to get
the things off Do NOT use EPOXY. Use Hair Spray. The Extra-Hold Stuff
like Loni Anderson from WKRP in Cincinnati must
have used. If you have a
Wife or Girlfriend you will know it
is as Sticky as Hell.
Sticky enough for Hot Grips.
Alternatively, Honda
makes a special hand grip cement. I used it on another bike after the hairspray
solution went away in the rain (fortunately on the LEFT grip). Stuff smells
really foul.
Get a new throttle tube
from your dealer. The part is cheap and it allows you to simply remove your old
one, with the grip intact.
3 amp inline fuse holder & fuse.
10 x ¼” thick washers
of ½” diameter.
1 x 70 mm long machine
bolt to replace bolt used for bar end weight. Take old bolt along to verify
pitch – I believe it was 1.
Either a solder gun &
solder, or Posi-Lock Connectors (www.4unique.com),
and Posi-Lock Water-Tite boots. I soldered my connections so I can’t tell you
how many connectors you will need.
Silicone
sealant.
Quick connector for
BMW Hot Grip connector. I found a T-shaped Hitachi connector at an auto parts
store. It wasn’t an exact fit until I used a Dremel tool to grind down the
inside edges and allow it to slide on.
Black zip-ties.
General
Comments:
The Hot GripsÒ
only come in lengths of 4.75” or longer. OEM grips are 4.25”, which means you
have to account for the extra half inch. Two possible solutions include:
- I
installed my grips by pulling the old ones off and putting the new ones on
exactly where the old ones had been. On the throttle side this is not a
problem. However, on the clutch side I needed an extra long bolt to reattach
the bar-end weights. On both sides I used washers to keep the weights spaced
properly from the grips.
- Jean #636
reported that instead of buying longer bolts, he moved the mirrors inboard a
little to make space for the longer grips. His instructions
are provided
below.
I installed
the grips with the standard hi/lo/off switch and resistor, and will include
directions on how to do this. Jean #636 used the heat regulator, which he
mounted on the bars (pick a convenient spot).
Getting to
work:
-
Remove your bar end weights, old
grips and any adhesive residue. I sliced mine off with a razor. If you are
more patient, you may be able to heat the grips with a hair drier and pull
them off. Use a citrus cleaner to remove any glue residue.
-
If you plan to fit the grips by
using longer bolts skip to step 3, otherwise:
-
Remove the two Allen nuts on
each casing.
-
Locate a little pin sticking
out of the casing bottom part. That pin fits into a hole bored into the
underside of the handlebars and prevent the whole thing from rotating.
There are two of these holes located on each side ½” apart.
-
Move the mirrors and then the
casings a little bit to the inside and you will get enough room to fit the
hot grips.
-
You should still be able to
use the outer hole on the left side provided you don’t slide the hot grip
all the way through.
-
Make sure you don’t cover the
hole when you glue the grip on.
"Gluing" the grips on:
-
Spray the inside of each grip liberally with
"White
Rain"
(or
equivalent)
hair spray.
The one
with the smaller hole goes on the left side. The one with the larger on the
right.
You will
want to eyeball where on the throttle tube the grip goes, rotationally so as
to end up with the wire lead at the 7 o'clock position in relation to the
bars as seen from the end, with the throttle at rest. This keeps the wire
away from the ignition switch and allows it to travel unobstructed as
you
roll on throttle.
It is
easiest to use a vise to squeeze the grip onto the throttle tube. If one is
not
available, a pair of pieces of
scrap wood and a hammer will do the job. Once the grip and throttle tube are
mated, there will be no removing it without cutting.
Slide your left grip on and allow both to cure
overnight. Do NOT ride the bike for at least six hours.
Disconnect your battery.
Take the wires leading from the
grips and route them along the bars down toward the front forks. I clipped the
black zip-ties on the bars and re-zipped them with the new wires underneath.
Ensure you leave enough wire to allow the throttle to twist properly. The
directions suggest a 3” radius loop.
After the
Hairspray
dries you will need to reinstall the bar end weights. I used two washers on
the throttle side grip and eight on the clutch grip to provide proper spacing.
I also needed the longer bolt on the clutch side to hold the weight on.
Now you need to remove your
front fairing and windscreen. I also removed the front fender to avoid
dropping hot solder, or other stuff on it. I used a piece of plastic to
protect the tire.
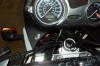
Next the fun part. Find a
suitable location on your dash for a ½” (13mm) hole for your hi/lo/off
switch. I chose a location between the trip meter reset switch and the BMW
roundel. I used a sharp pick to place a small indentation in the dash so my
drill bit would not wander as I started the hole. Check the backside of the
dash to ensure you are not drilling into anything vital!
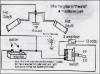
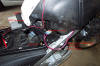
The next step is the wiring.
Following the wiring diagram, I did the following:
-
I soldered the two wires
coming from each grip to their counterpart on the opposite grip. Ensure you
leave enough slack to allow the handlebars to turn through their complete
range of motion.
-
Next, I soldered a wire for
the ground between one of the wires for the grips to the brown wire going to
the hot grip quick connector for the ground. I then wrapped all soldered
connections in electrical tape.
-
Now, prior to installing the
switch and the resistor, I soldered all wires to each connector. It was
easier to do this while they were on the workbench than on the bike. On the
wire leading from the “Lo” switch terminal to the resistor, I stripped a
small section about two inches from the resistor terminal to connect to the
second set of wires coming from the grips.
-
Once all of the connections
were soldered between the switch and resistor, I installed the switch and
rubber boot to cover it on the dash.
-
I then mounted the resistor on
the black bar leading from the triple-clamp to the dash. I did this by
applying silicon to the backside and using zip-ties to hold it in place.
This has worked perfectly, and is rock solid after 3-4 weeks of use.
-
Finally, I soldered the
remaining connections in place – the wire between the grips and the
low/resistor wire; and the wire from the “Hi” position with the 3 amp fuse
to the green wire on the quick connector.
-
Wrap all soldered connections
with plastic electrical tape and secure any loose wires with zip ties.
-
Reconnect the battery and test
the grips and make sure they work.
Reassemble the bike…you are
done.
Additional comments by Jean #636:
Jim Hollander from Hotgrips sent me
an email a few day and stressed the fact that he sent me the 475-875 model with
ends bored out. Apparently they are a little shorter so that may explain why I
had little problems fitting them. The heat regulator adds a lot of wiring to the
handlebar area. It's really a question of personal comfort but the switch
solution is definitively more aesthetic than the regulator one. But the latter
gives you a wider range of choice when it comes to output.
I had to move the right side casing all the way to the second pin hole because a
dealer had done, after the initial installation, an awful job changing the
handlebars he had bent when dropping the bike (dealers, you know...) and had put
the grip just right smack over the outer hole without fixing the pin, so the
casing was rotating. I had to move it to the inner hole to attach it and now I
have a 1/2 inch gap between the grip and the casing/mirror ensemble.
Other Problems & Solutions during
Installation:
Q. Installing heated grips on my
2001GS and all is going well for a novice. Well... I'm putting the left hand
grip on (of course after doing the more tricky right side) and as I'm attaching
the grip, somehow I hadn't pulled all the slack of the cable heating cable all
the way tight and I pulled the grip right off of the cable. So the left hand
grip is hanging in my hand with the wire coming out of the handle bar. I'm so
pissed at myself. Anyone think this sort of thing can be fixed?
A. Cut the grip 'til you get to the wire. Solder it back. Use plenty of
electrical tape. OR, buy a set of aftermarket grips and use one of them. OR, buy
a BMW replacement GRIP. Flash#412.
Heated
Handgrips on the Cheap
Cheapo Hot Grips #1 -
Hot Grips Australia
Date: Sat, 31 Oct 1998 13:09:05 GMT
From: beka@ozemail.com.au (Eric Graudins)
Subject: BMW: DIY Heated Handgrips. (Longish)
Copyright
LO presidents.
This is similar to what I posted on an Oz motorcycle newsgroup a while
ago. It may be relevant to those who are heading towards winter,
unlike us down here in Oz who are getting ready for the barbecue
season. It is submitted in the spirit of Pirsig, who also can't see
the sense is spending a couple of hundred dollars when a couple will
do.
A significant development from the Oz Deep South LoTech Motorcycle
Research Labs.
Its starting to get cold here in Tassie.
In a cuppla weeks its going to be bloody cold.
And my hands are going to get icy cold, because some mongrel decided
that he needed my Spidi winter gauntlets more than I did. This
morally bankrupt cretin knocked them off out of my helmet which I had
left dangling on the rear indicator of the mighty Chicken Wing.
Probably had a spot of gardening to do.
(This wouldn't happen now - I can whack them into one of the
wonderful glove boxes on the RT ! )
I rode home that night with my mind filled with many thoughts:
The hearty discussion that would take place if I ever found the
aforesaid mongrel
How I had looked at other people riding without gloves, and thought
what dickheads they were, and pondered the fact that I was doing
exactly the same thing
Thought about getting some of those wonderful heated handgrips, so
that I could use my lighter gloves all year round. - Nah - they are
more expensive that another pair of gloves. Then, EUREKA!!!
The light globes went off in my head - (or was it a speed camera - It
wasn't- its been 3 weeks now, and no ticket.)
I realised that heated handgrips are just a bit of resistance wire
connected to the battery, and wound round the handgrips and coated
with rubber. For this they charge over nearly $200.00
Upon checking the trusty Dick Smith catalog, (and no, I wasn't still
riding at this stage) I found that item W-3200 is 4 metres of
Cuprothal resistance wire with a resistance of 6 ohms per metre.
For this they charge $1.20.
2 metres of this wound round each handgrip would give about 12 watts
of heat. After application of the she'll be right rule, and a couple
of stubbies (13oz bottles of beer) , I was confident that this was
exactly the right amount of heating required. Total current drain
should be about 2 amps.
To cut a long story short - it worked beautifully with the resistances
connected in parallel across the battery. However, It's a bit too
warm. I've got to turn it off after about 5 minutes. (see! you can't
always rely on the she'll be right rule)
I then added a 5 ohm 10watt resistor in series with the
aforementioned resistance wires. The temperature was now beautiful.
I then added a switch to bypass the resistor for those times that it
is really cold, and you need the extra heat in the grips.
I drilled a hole into the handlebars near the headstem so that I could
run the wiring through the handlebars, and out the ends. This was to
solve the problem of connection to the heating element on the
twistgrip. (Yeah, I know I've weakened the bars, and I know that someone an
engineering degree will come back at me with detailed
discussions of stress risers, and calculations proving that the
handlebars now have less strength than a wet tissue. I've applied
the partly discredited "she'll be right" rule again, and decided that
the risk is acceptable. Anyway, it's been working on the CX for nearly
2 years now)
My handgrips are the black foamy touring ones, with a chrome knob on
the end. The soft foam allows the resistance wire to be wound tightly
around the grips. It digs into the foam, and does not slide laterally
across the grip.
I used twin core wire running through the handlebars. I removed the
chrome cap on each handgrip. The power wires were fed through a hole
drilled near the headstem, and out each end of the bars. I ran twin
core wire with +ve and -ve, rather than trying to find an earth for
the heating element on the handgrip.
I ran the +ve wire under the foam, so that it came out on the inner
side of the handgrip. One end of the resistance wire was tied in a
rolling hitch and wound in a spiral around the handgrip, at a spacing
of about 6mm. 2 metres of wire will reach the entire width of the
handgrip, where it was again hitched I soldered the first couple of
turns together so it would not unroll, and also soldered the power
leads to each end of the resistance wire. I glued the chrome end tips
back on with silastic.
P.S. don't forget to put on some kind of switch, and a 5 amp fuse.
DISCLAIMER: This information pure fantasy of course. I would never
suggest that anyone ever actually put it into practice, and deprive
motorcycle accessory manufacturers of much needed revenue. Things like
this are far too complex for the average person to undertake without
professional assistance. Your bike could explode, catch fire, go
rusty, or all three. I only thought of it because my brain has been
burned out by the harsh rays of the sun caused by the huge hole in the
ozone layer directly above us. Have pity on me.
Cheers,
Eric Graudins
Tasmania, Australia.
K100RT CX500 Ulysses #12359 (Oz Old Farts Bike Club)
AND on the 8th day, the lord said "OK Murphy, you can take over now"
Cheapo Hot Grips #2 - Kimpex
by Derek Janssen
Recently, I installed some heated handgrips on my 97 BMW F650.
I wanted to share the installation procedure with you.
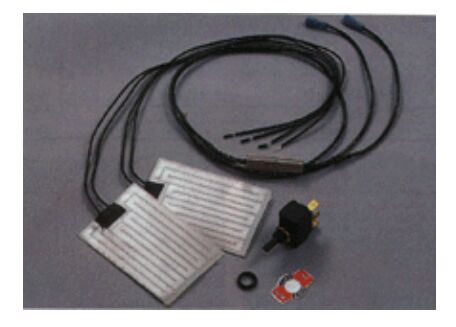
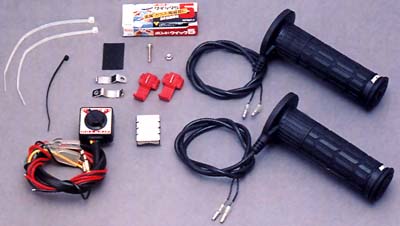
First I ordered the kit. The manufacturer is Kimpex and I
ordered the kit from the Accessory Warehouse (http://www.accwhse.com/ or
1-800-241-2222; They do accept orders on-line). Kimpex heated handgrip kit is
P/N- 994398, when ordered from Accessory Warehouse. (The kit was about $23 by
the time shipping is included.)
Here’s a picture of the kit from the catalog:

Here’s the steps I followed:
-
Remove bar end
weights from handlebars.
-
Remove grips without
destroying. What I did was sprayed some hair spray (Vidal Sassoon) under the
grip. I moved the grip around until the hair spray had spread around enough to
loosen and remove the grip. Clean the bar and the plastic throttle after
removing the grips to remove any excess hair spray.
-
I installed heat
shrink tubing on the grip heater wires. I left about 3-4 inches of bare wire
to allow for soldering the connections. I installed the heat shrink tubing to
allow for better abrasion resistance. I would recommend size ¼” which can be
purchased at most electronics stores.
-
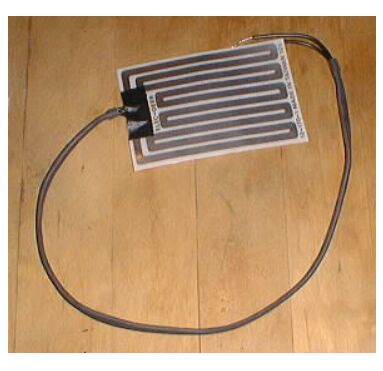
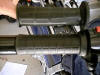
Next, I installed
the heaters. Remove the adhesive backing and stick the left heater on the left
bar where the grip would go and stick the right heater on the plastic throttle
thing. Be sure to leave enough room for the heater wires to come out of the
throttle. I installed the heaters with the wires coming out vertically, but
you may want to play around with that.
-

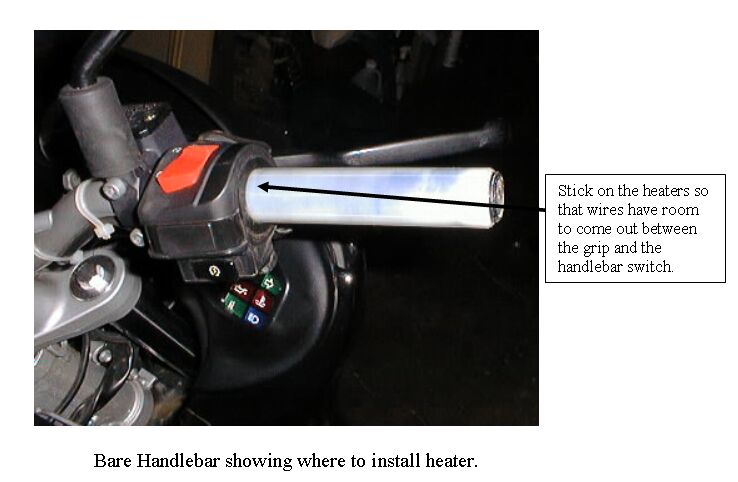
-
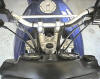
Bare Handlebar
showing where to install heater.
-

-
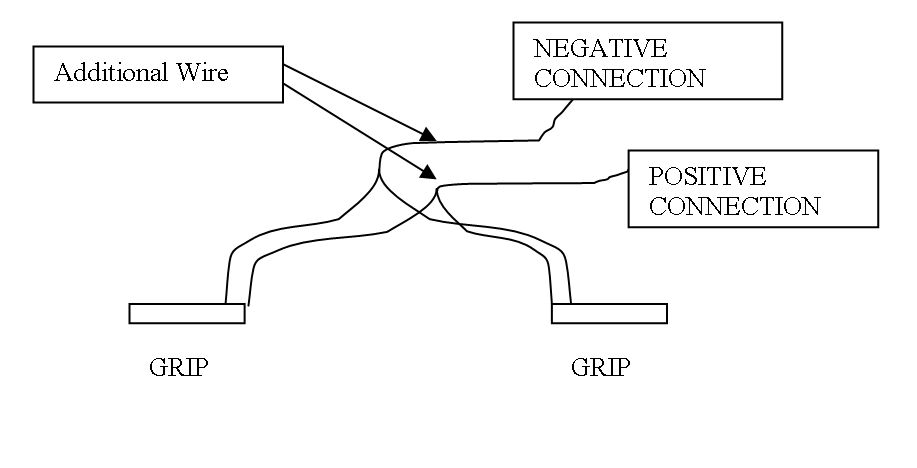
The length of the
wires on the heaters will not reach the switch. I soldered on ~15” of
additional wire so the connections could be made. (Note: these extensions did
not come with the kit.) As seen in the manufacturer’s wiring diagram the two
wires from each heater are joined together to have one positive connection and
one negative connection. This is further illustrated in the instructions from
the manufacturer. Note 1: If you solder the connection, be sure to use shrink
tubing over the solder connection. Note2: As an alternative to soldering, the
crimp style connections should be adequate.
-
Electrical
connections: Once the additional extension wires are attached to the heater
wires, install the crimp lugs on the ends of the extensions. The positive
connection and negative connection cannot be differentiated right now, so pick
one to be positive and one to be negative (it doesn’t matter which). Install a
crimp style female spade plug (medium size [blue]) onto the positive
connection. (Note: this plug did not come with the kit.) Install a crimp style
MALE spade plug (medium size [blue]) onto the negative connection. (Note: this
plug did not come with the kit.)
-
-
Install a crimp
style MALE spade plug (medium size [blue]) onto the connection coming from the
switch (the two wires going into one.) (Note: this plug did not come with the
kit.)
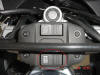
-
Now you’re ready to
drill the hole in the dash for the switch. I opted to install the switch
between the BMW insignia and the odometer reset dial. Space is tight on the
backside, so measure exactly equidistant from each (in the middle) or the
switch may not fit. I suggest marking the spot and drilling smaller pilot
holes before drilling the big ½” hole required for the switch. Before
installing the switch, connect the positive connection from the heaters to the
switch. Be sure to install the switch with High and Low in the appropriate
spots. (See manufacturer’s installation instructions)
-
Panel with Switch
Mounted

-
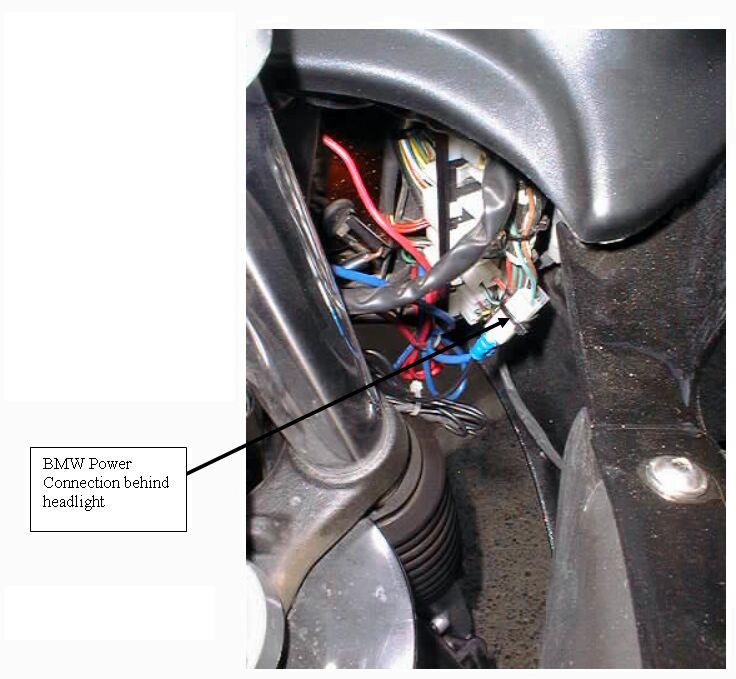
The two final
connections are to the BMW power and ground. The wiring harness behind the
headlight has a socket available for their heated handgrips. One wire is
Green/Grey and one wire is Brown. Connect the wire from the switch to the
Green/Grey wire in the harness. This is your Power connection. Connect the
negative connection from the heaters to the Brown wire in the harness. This is
your ground connection.
-
-
Tie up any excess
wiring.
Kit contents:
Additional parts:
- BMW Wiring Diagram $25 (optional since I described the
connection)
- 2 Male Spade crimp style plugs (Medium size [blue])
- 1 Female Spade crimp style plugs (Medium size [blue])
- Heatshrink tubing or crimp style wire connectors (tubular)
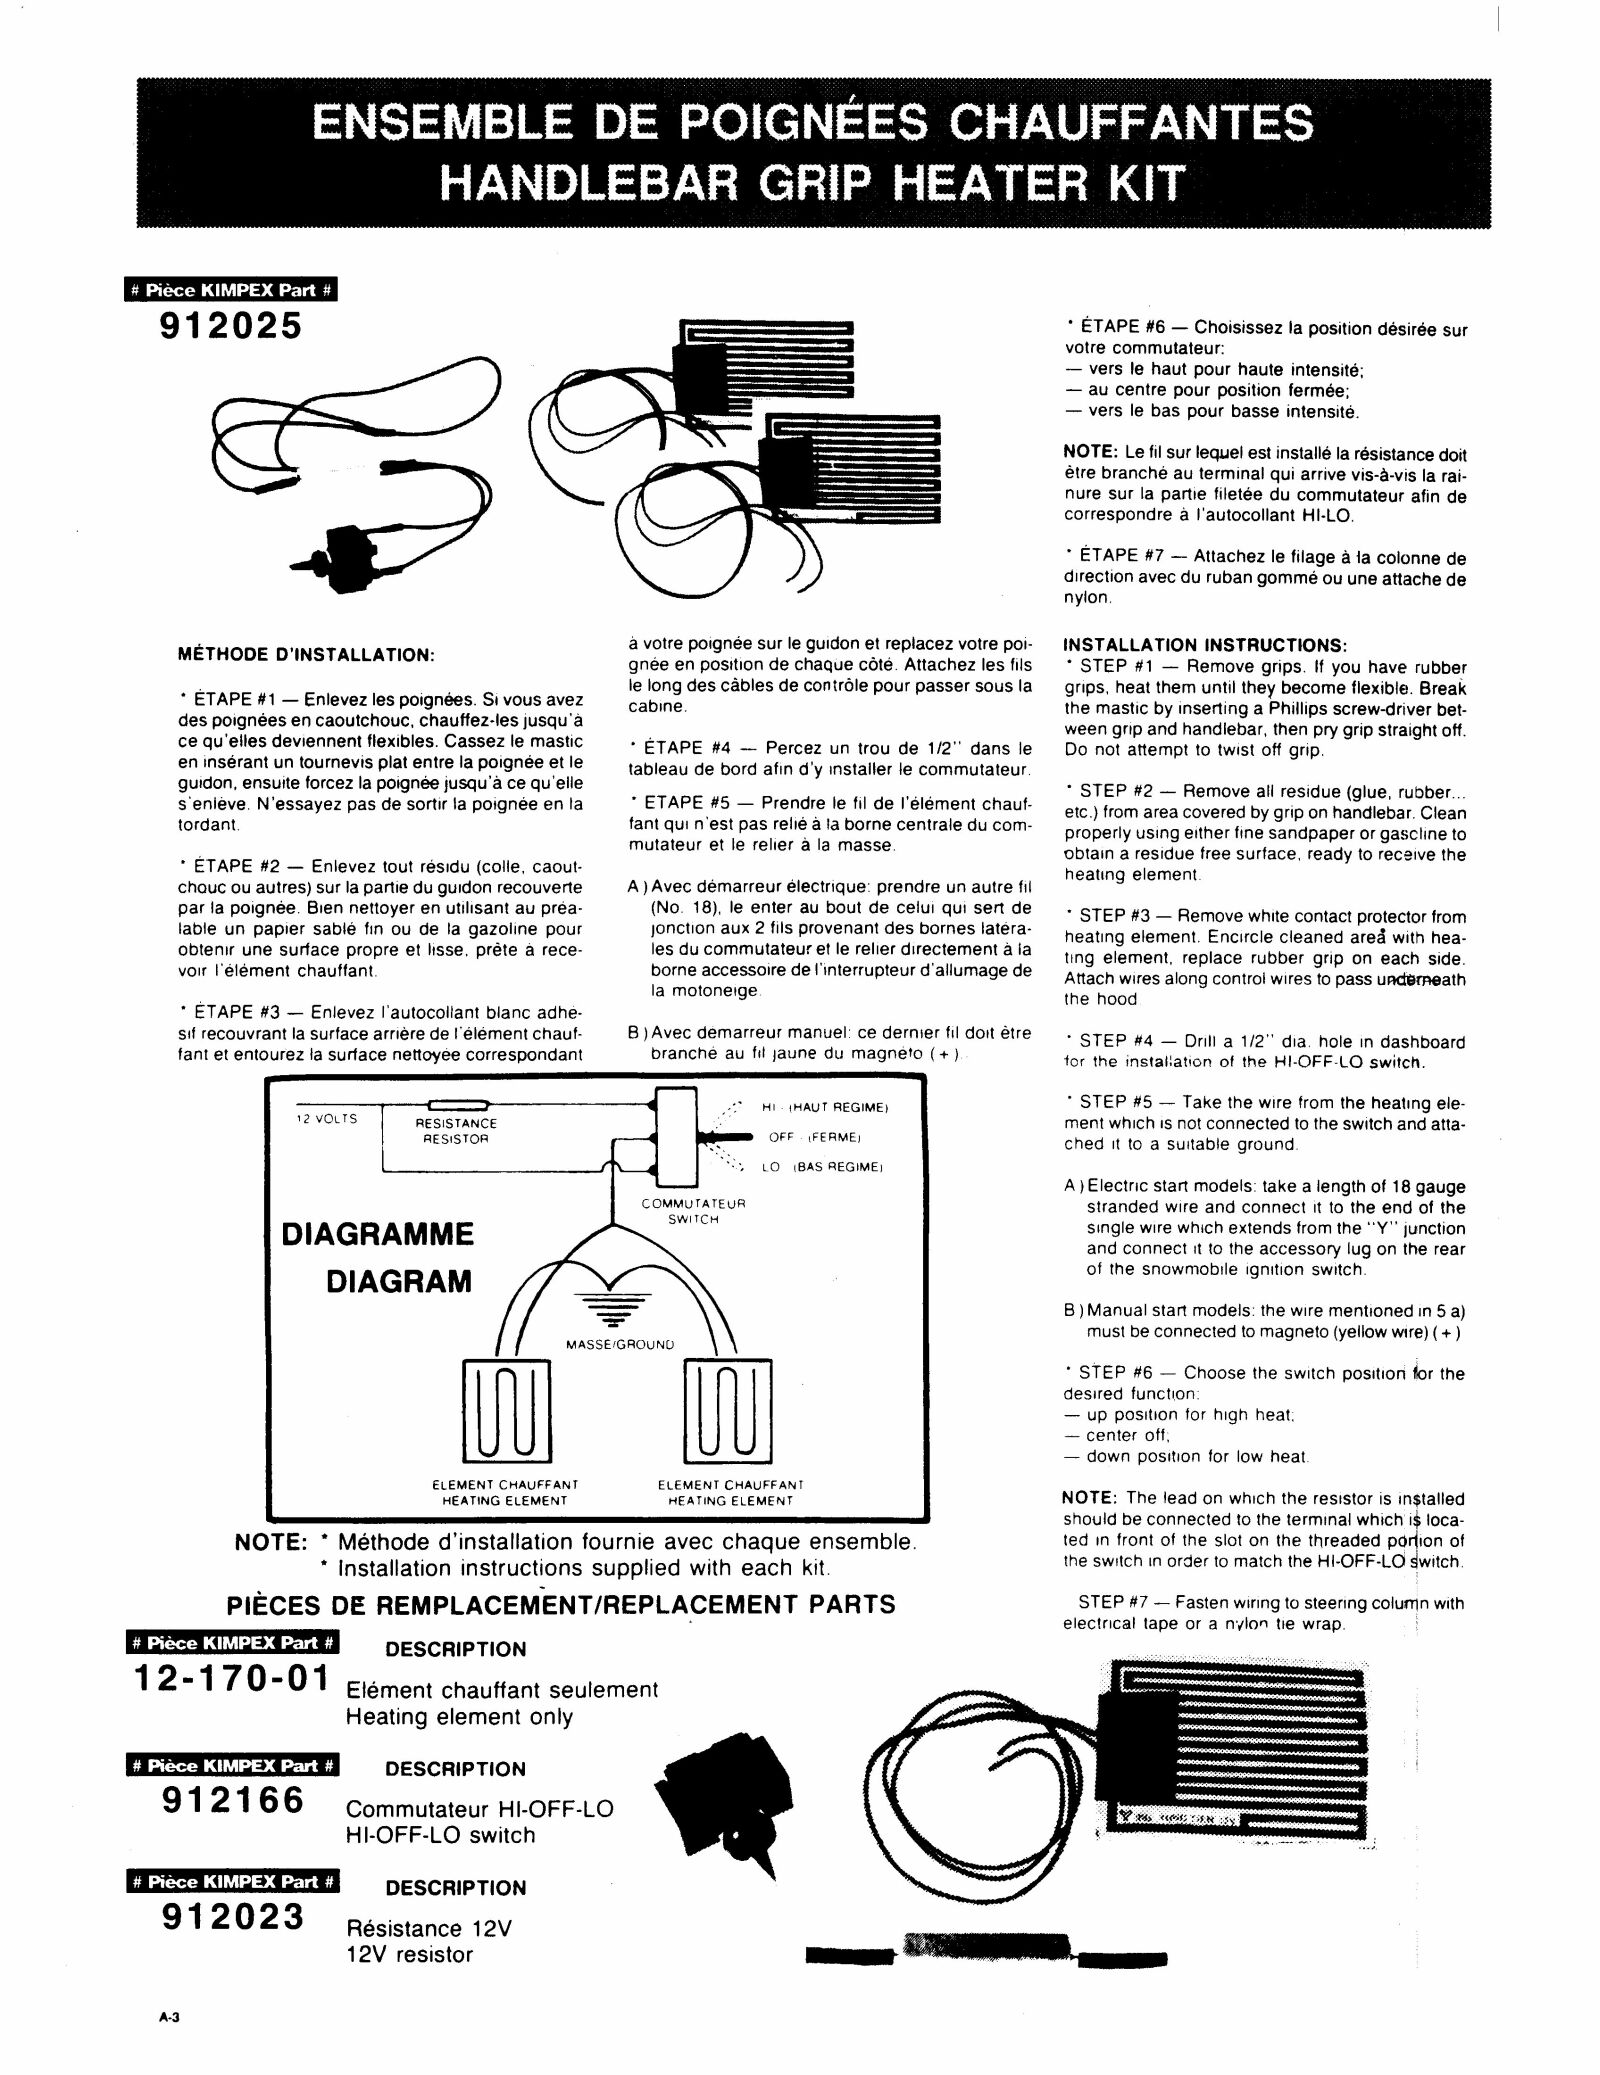
Here’s the instructions that came with the Grips:

Cheapo Hot Grips #3 -
Homemade with Wire Windings
Pat#1210 '94 Classic F
After seeing the thread about hand warmers and in particular the link to the DIY
Handgrips I decided to have a go. I have ordered the wire from
www.wires.co.uk Copper/Nickel 0.315mm which
is 6.29 ohms per metre. I have a heater fan switch from a car which has 3 on
"settings" and an off. I was thinking of using that to give 3 heat settings ( 5
ohm resistor, 10 ohm resistor and straight through). Is this a runner? If so
what are the best type of resistors to use in this situation.
I have been looking at Farnell and they seem to have a
comprehensive list of stock. Will I need to get the foamy grips that Eric
mentioned in the link above or can I just wind the resistance wire around the
standard grip. Put the heated grips together yesterday. Simple enough to do
especially with the advice from Flash.
I wrapped the resistance wire around the grips 21 or 22 times
which is roughly 2 metres (@6.9 ohms per metre= 13.8 ohms) and connected them to
a single pole on-off-on toggle switch which I mounted on the dash directly above
the trip re-set knob (using a splash proof cover). It looks very neat indeed.
I put a 5 ohm resistor on one of the on tabs of the switch by
simply crimping a male and female spade connector on either side of the
component. The fuse holder is also of the panel mounting type which is located
below the idiot lights. Power has come from the un-used spade connectors which
were just behind the dash on the right hand side which I guessed was the heated
grips outlet that Flash referred to above.
The weather has been fantastic for the last few days so it is
probably not a great time for trials but this morning it worked fine though on
the hot side. I had ordered a 10 ohm resistor also which I might use to have a
'Summer' and 'Winter' setting. Cost approx €20-€25 with enough resistance wire
left over to do at least 3 or 4 more pairs of grips. I am going to wrap
"self-amalgamating" tape (fancy insulating tape) around the grips to protect
them as I figure wet wire=short circuit.
Cheapo Hot Grips #4 Hein
Gericke Heated Grips
by its_xls
I
bought heated grips from Germany for ~70 Euro (~$70), from Hein Gericke. Daytona model. They
have three settings, off-hi-lo.
Installation was easy once I found out that my bike already has the BMW wiring
for heated grips (which didn't help me that much, but confused me a lot). They
look great, are thicker than the OEM non-heated grips and work terrific.
My
aftermarket grips are about the same heat left and right. Those were
advertised as the "luxury" heated grips, not the "value" ones, the price
difference was 2x ($39 for value grips, $79 for the luxury). But my guess is
too that they probably suffer from hammering them onto the bar. The ones I got
fit very well, and were easy to put on (with hairspray on the left side). 2001
F650 GSA
Cheapo Hot Grips #5 Saito Heated
Grips
by Spakur #1117
I also
ordered some cheap SAITO grips, from Germany (
www.louis.de ). They cost about €35 and have HI, Low, Start and off.
Hopefully I get them tomorrow :-). If I remember correctly the Start consumes
60W, HI 20W, Low 12W, so Start is I guess to get them hot quickly (You're not
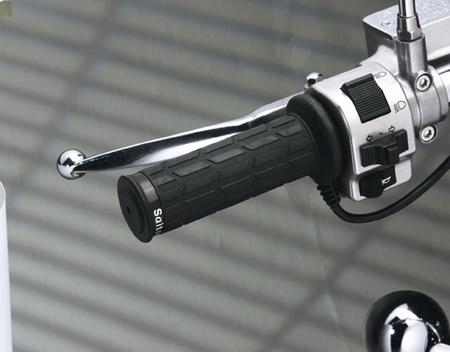
supposed to use the START more than a few minutes). Here is photo off the
SAITO grips from www.louis.de. Spakur #1117. 1995 Classic Red F650 with
60.000+ KM.

 These are the ones. Made in Japan.
Manchons
by
busker
Shown on a CS, but
basically a nice warm place to put your hands. Here is my solution: "Manchons".
A solution shared by a lot of "year round" Parisian riders with or without
heated grips. You don't need winter gloves with these if you have heated grips.
It takes no time to get use to them and, as ugly as they are, you don't see them
when you're riding. It's a choice between looking cool and being cool or
enjoying the ride... I bought these in Paris, yes in France, after seeing a BMW
R1150R rider with them... This model is design for the f650gs but since the
handle bars, controls and mirrors are similar, they fit nicely on the CS (nicely
being a relative term here). These are made by Bryant and cost me 80€ but that
is because I bough them at a BMW dealer... Givi makes them as well but I don’t
know if they fit the CS. There are many makes and they can be found at all
motorcycle accessories stores in Paris. In North America, I hear that you can
also find them as after market items for snowmobiles.
Specific Feedback
on Cheapo Grips
Q. What are the best type of resistors to use in this
situation.
Q. Will I need to
get the foamy grips or can I just wind the resistance wire around the standard
grip.
Q. I want to connect an LED to the circuit to let me know
when it is on. Can I just connect it to the positive and negative (on the grip
side of the switch) through a suitably large resistor. If so, are all LED's the
some or is there a specific type and what size resistor? Can it be connected to
the power coming through the ignition switch or do I need to use a relay (with
power coming straight from the battery), if I want it to switch off with the
ignition?
-
In my experience, you only need three positions: low, off and
hi.
-
Typically you want to run an LED at about 1.0 to 2.0 mA.
Though this does vary with some LEDs. LEDs diodes with a fixed forward bias
voltage of about 1.2 V. If you use a common, ordinary LED, you'll want your
current-limiting resistor to be equal to running voltage (~14.0) minus the LED
on-voltage divided by the desired current. (14.0 - 1.25)V / 1.5 mA = 8.5k But
since that is not a common value, get the next smaller one for a slightly
brighter light or the next larger one for slightly dimmer light. Any value
between 6.4k and 12.7k will do just fine.
-
It makes no difference which side of the LED the resistor is
on. Put the flat side (cathode) of the LED package toward ground. I'd suggest at
least holding the parts in your hands between the battery terminals to check
brightness before you execute the installation. Your charging system puts out up
to 14.5V while running. Your battery will be at somewhere between about 11.5 -
12.5V at rest. As long as one side of the LED/resistor string is at 12V
(nominal) and the other side is at ground, and you have the polarity right, it
will glow.
-
Think of an LED/resistor string as being just like an
incandescent idiot-light in that it can go just about anywhere (except that you
MUST observe proper polarity for the LED). You wouldn't use a relay to drive an
idiot light. You wouldn't put a light bulb across the ignition switch if you
wanted it to indicate when the grips are on. You would attach it between the
switched side of the hot grip switch and ground. Put the LED/resistor string in
the same place.
-
If it is too complicated, why bother with the LED at all? You
can SEE the position of your switch, so you already have a visual indicator. And
you can FEEL the hot grips. If you hook the hot grips to the wiring point that
BMW provided, then they will never be on when the key is off. Just why do you
think you need an indicator? (I've been running hot grips for twenty years
without any problems on three different bikes without any indicator lights.)
Flash 412 (CO)
Q.
I'm about to rebuild my heated grips later this week and
was wondering about resistors?
I'm about to install a resistor somewhere
between 10-100 Ohms parallel to my right grip, so that the heat is better
divided between the two grips. The Current will be less than 1A. The question
is if I can just use any resistor? Are resistors rated for current? I have
done the calculations on the grips and I'll need a resistor rated 0.9 - 9W +
20% = 1.1-11W depending on if I use a Resistance of 100-10 Ohms - which I'll
need to experiment with. I have tried measuring the impedance of the two grips
to see what the difference is there. They are 3.5 ohms for the left grip and
3.9 for the right grip. I think that I have to reduce the right grip to
somewhere below 3.5 ohms, since the left grip is in contact with metal, which
the right isn't. They are connected in serial in the Hi (20W) and Low (12W)
mode and in parallel in the start mode (60W). It is in the start mode the
highest current will pass thru the resistor. I've narrowed down my
calculations and to get 3.5 Ohms over the right grip I need a resistor of ~35
Ohms. to get down to 3.0 ohms (which I think is probably to low) I need a 13
Ohms resistor.
-
You have to make sure
the resistor can handle the current you're going to put through it. Most of
those cheapie resistors are rated at either 1/2 watt or 1/4 watt. Using one of
the fundamental rules of electricity (I forget which one, but Flash would
remember for sure), you get: W = V*A, or watts = volts * amps. So if you're
drawing 1 amp maximum at 13-14 volts (what the alternator is probably going to
be putting out). So you're probably going to need a much more healthy resistor
that what you'd get in a grab-bag. If you know the exact draw of the heated
grips, you can get an exact number. 5-watt resistors aren't uncommon, 10 watt
resistors are quite a bit more expensive though. Seacuke #1214
-
Some hot grips come
with resistors for use in making the LOW setting. They're normally 10W
resistors. They're ceramic rectangular things. Think about it... you have a 15
watt device (grips) you want to turn into a 10W device. Do you really think
attempting to dissipate five watts in a half watt element (resistor) in that
system is a Good Idea? There is no "voltage draw." There is a voltage DROP and
CURRENT draw. Do the math. Here is all the equations you'll need.
Volts * Amps = Watts
Volts / Resistance = Amps
You can reorganize the four values V, A, R, W until you have it all figgered
out.
For instance... V² / R = W, and I² * R = W
Use 12V for nominal voltage. But buy a resistor rated for at LEAST 20% MORE
than the calculated value for the watts you figger it will be dissipating. If
you calculate that you need a 4W resistor, a 5W will do. But if you calculate
that you need a 5W resistor... buy a 10W. Try to find a NUMBER of watts that
is PRINTED on your grips if you can. Flash #412
General Feedback on Cheapo Grips
-
When I made my first set of electrical heated
equipment: heated visor, handgrips, boot soles and knee pads I just bought some
thin stainless steel wire, used to "lock" the "pliers" on lobsters. You can get
that type of wire in a lot of gauges? And not expensive at all. I could have
made the calculations to get it all "almost" right from the start, but decided
to do it "safe". Just wrapped a looong length of the wire around the back of a
wooden chair and connected a newly charged 12V battery to both ends (with 3
headlight bulbs in parallel to make sure). No heat at all. I then moved one of
the battery connections a bit closer to the other and so on until I it started
to warm up a bit- just lukewarm after a couple of minutes. Then I had the length
of wire to use. A safe and easy procedure to use. Only one thing to remember,
the visor is cooled down all the time and kneepads is insulated, from the cold
by layers of clothing. I once had a partial short circuit in one of my kneepads.
I still have some small sharp brown lines in one kneecap. When I felt the heath
it was too late already to pull the plug. haakon#626
(Norway, F650GS)
BMW Heated Grips
Installation on the GS/Dakar
by beem_dubya
The new set comes as a kit. All parts, new bars,
weights, connectors, etc. Everything is designed to snap into existing
connectors on the bike. Pretty easy stuff. The install manual is very good.
Great pics, easy to read, several languages. One good place to start is to make
copies of the English section and the German section. All the install pics are
in the German section only. I took both to a copy center and had them enlarged,
taped them to my garage wall in sequence so I didn't have to fumble with a book
and dirty hands. Looking back now after doing it, it should take less than two
hours with a helper. Be careful with the wiring attached to the grips. Small
gauge, easy to kink or crimp during the
"snake-the-wires-thru-the-bars-and-find-the-hole-by-the-switch" game. The only
help you need is someone to hold the bars during several steps so as not to
damage anything or get air in the front master cylinder. I just bungee'd the
bars to my garage door opener on the ceiling, works great.
For more on the "New Bars" & Hot Grips
bit see the Aftermarket
Handlebars FAQ.
Feedback:
-
The ABS bikes already have the
harness installed that plugs in at the fuse block. Dig deep into to relay box in
front of the battery and you will find the end to this harness. Look hard it can
be confusing. Supertech
-
The heated grips were quite the task. Gotta remove all sorts of stuff. The
bodywork, battery, etc. Even the airbox. Then there's the new handlebars,
controls, fishing wires here and there, you get the picture. Figure about three
hours, depending on how long your best bud stays to chat, trips to the 'fridge,
etc. Arch
-
I recently installed the 650 GS heated grips. I have an 02 Dakar. Install took 3
hours with no distractions. Simple and logical, just lots of bits to undo and
redo. The Dugger
-
A recent Forum thread asked if the BMW grips could be replaced when they wear out (rubber grips only, not the heating elements). A link was provided to gsclubuk.org which showed removal and replacement of BMW grips from an 1150GS; these grips look the same as those for the F650GS. Below is a summary:
The grips can be peeled off, but the adhesive may require careful use of a knife (do NOT cut the heating element wires!)
Some steps taken from the gsclubuk.org website:
"I bought the grips, made by Ariete, from Motorworks, where Kevin told me that, to fit these (pattern) grips, I’d need to buy 2 pairs and use the throttle sized grip on each side, to allow for the extra diameter of the heating element. "
"I carefully peeled back the rubber from the switchgear (inboard) end. The grips seem to be glued at both ends, so you have to slowly and carefully let the tension you are putting the rubber under to break the seal of the adhesive… I decided to give myself a bit of assistance by cutting the rubber as I rolled it off. I was very careful to only cut the rubber that was folded double – I didn’t want to damage the wires in the heater… "(Mike O., gsclubuk.org)
Dual Star Heated Grip
Install on GS/Dakar
by Eric #1112
Last weekend, my buddy Marc and I got
together to install Dual-Star heated grips on our two Fs (my ’01 Dakar and his
’02 GS).
Dual-Star vs. Kimpex
On three previous bikes, I’ve installed
the Kimpex snowmobile heated grips ($30 from Aerostich.com). This time, I
decided to try something new and went with the Dual Star grips (also $30, from
dual-star.com). Here’s how they stack up:
The Dual-Star grips feature:
-
Much nicer switch (better feeling,
smooth edges, chromed)
-
No hi/lo resistor to heat up
-
Asymmetric grip pattern (put the side
with more wires on the clutch side… since the bar acts as a heat sink, this
side would otherwise be cooler than the throttle side)
-
Better instructions provided
-
Kit comes complete with zip ties,
wiring connectors, etc.
-
Includes a nifty little stamped metal
plate for the hi/lo marking (Kimpex provides a cheesy chromed sticker)
-
Not quite as warm as the Kimpex grips.
I have to use the hi setting more.
-
And the Kimpex set is pretty much the
opposite of these points.
Installation:
Start
Stop at Krispee-Kreme and buy some hot,
fresh, donuts. Two per person is adequate without being gluttonous. You also
need about 3 feet of wire. We used dual strand 18g wire from Radio Shack. Be
sure NOT to get solid core stuff. Now, you’re ready to start wrenching.
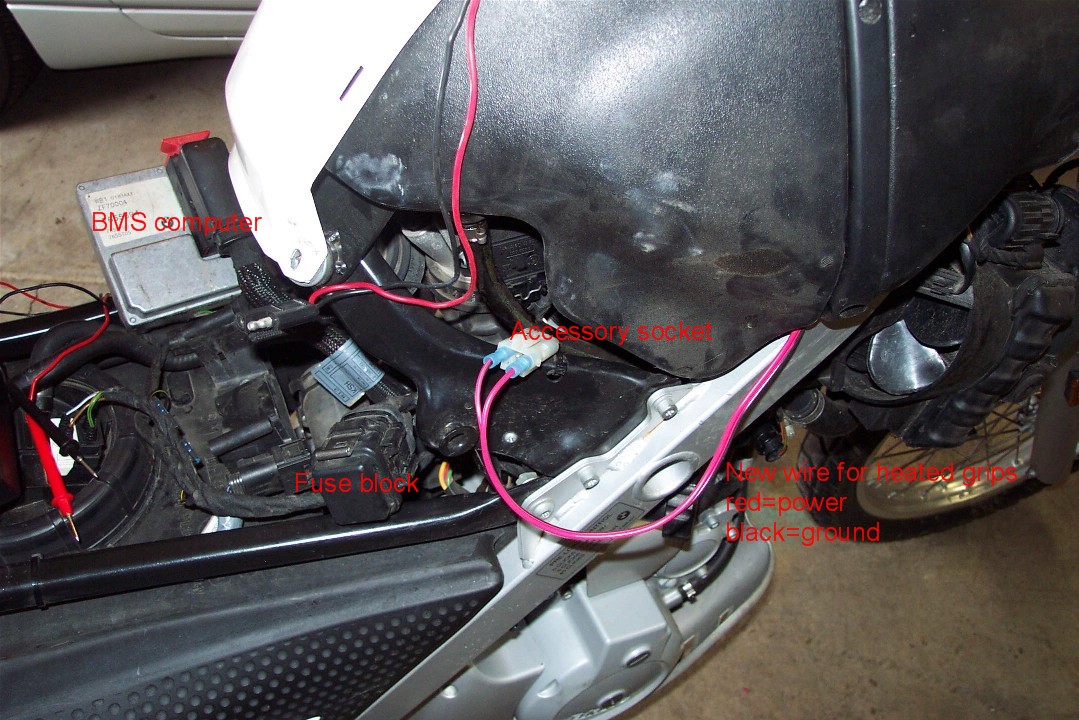
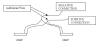
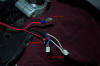
Power Supply
The FAQ says this about the provided
open socket for the BMW heated grips: “The connectors that the grips and switch
attach to were buried in the wiring junction box that’s between the battery and
the front of the frame…” Neither Marc nor I could find this mythical connector,
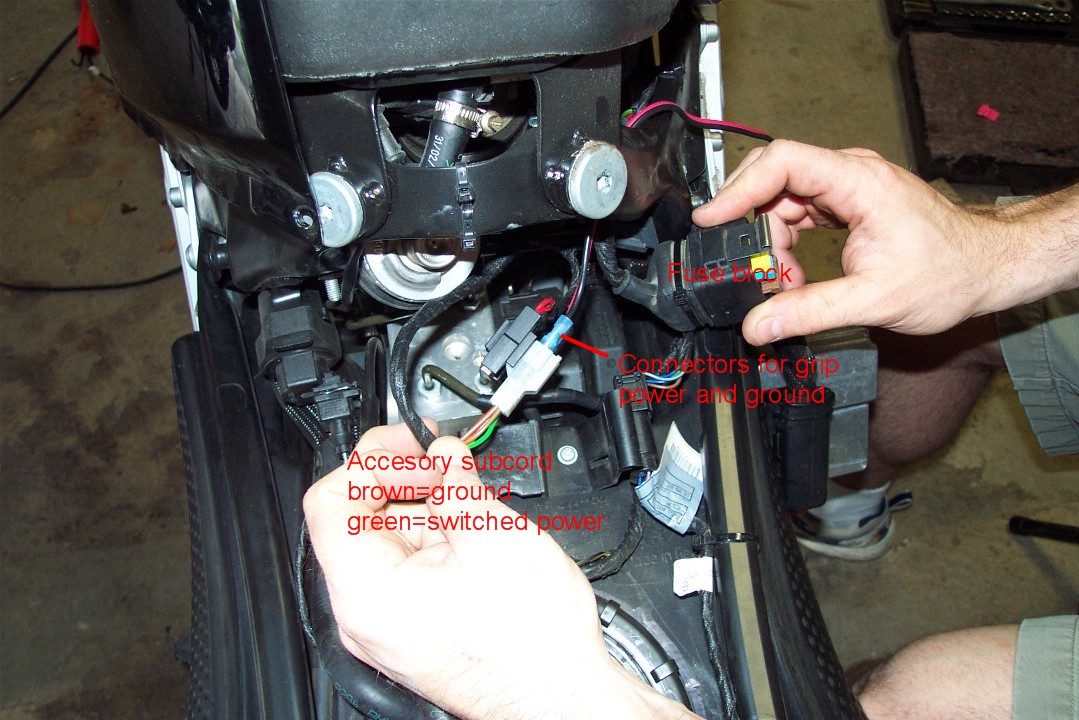
so we opted instead for the accessory plug socket. If you buy the accessory
socket subcord, it plugs into this. It’s located in front of the seat, under
the rear end of the faux gas tank here:
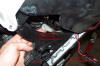
To make access easier, we unclipped the
fuse box and moved the little BMS (?) computer to the side (simply remove the
rubber band and it pops out).
My bike doesn’t have the accessory
socket subcord, so I was able to plug directly into the accessory socket. Marc
had installed the accessory socket subcord, but it seemed to have come with a
spare socket of it’s own. We plugged the power wires into that. The accessory
connector has three circuits:
Brown: ground
Red: always on
Green: switched on (i.e.,
only on when bike is on)
(The accessory subcord has two wires of
each color going into the connector, the plain socket has just one wire of each
color)
Using the female couplers provided with
the Dual-Star kit, we connected some red/black 18g wire to the accessory
socket. We had to mash the blue coupler a bit to make sure it stuck well into
the accessory socket.
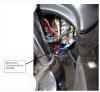
Here’s
 (with accessory subcord), and
 (no subcord). In each case, we hooked our red wire to the green wire in the
connector (power), and our black wire to the brown wire in the connector
(ground).
(no subcord). In each case, we hooked our red wire to the green wire in the
connector (power), and our black wire to the brown wire in the connector
(ground).
I ran my wires up the upper side of my
right side frame, around the front of the head tube, to the left side of the
instrument panel. Zip ties were freely applied.
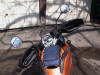
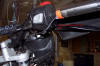
Grips
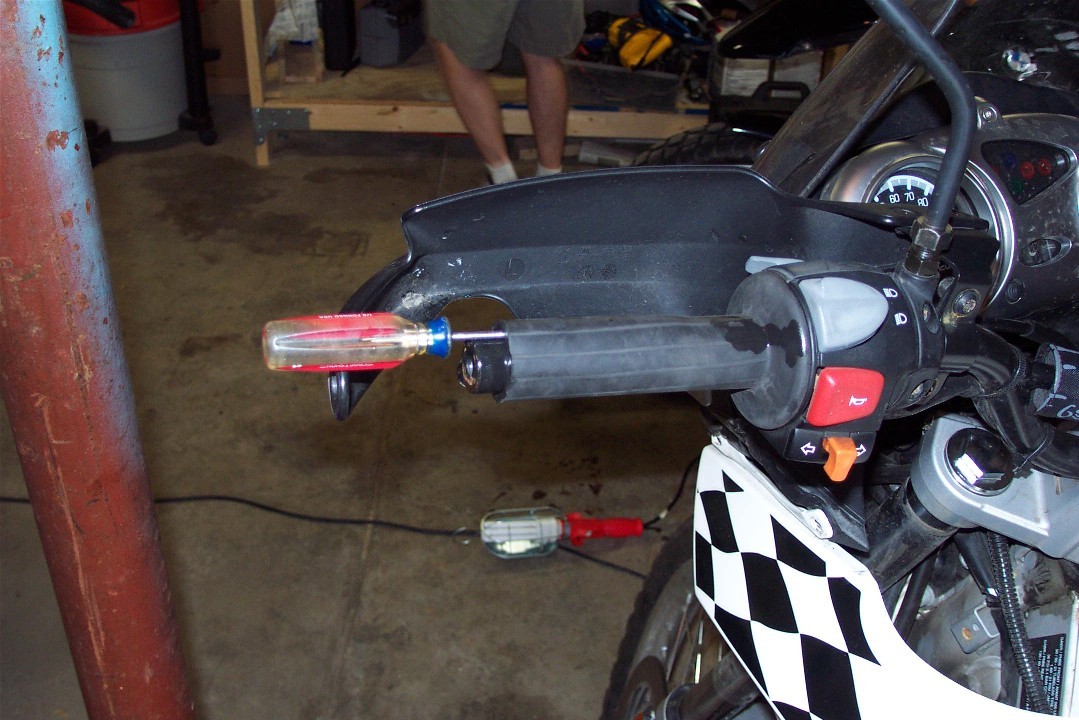
Next we moved to the front of the bike.
There’s lots of ways to take grips off (compressed air, cut with a knife, etc.),
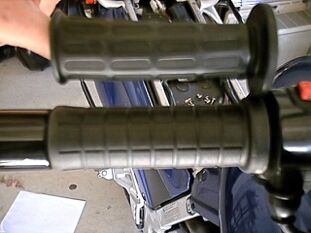
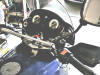
but I like to use rubbing alcohol. Take off the bar end weights, and insert a
small flat blade screwdriver under the grip, like
 .
Pour half a capful of rubbing alcohol under the grip, work the screwdriver
around, and slide the grip off. The throttle side is exactly the same.
.
Pour half a capful of rubbing alcohol under the grip, work the screwdriver
around, and slide the grip off. The throttle side is exactly the same.
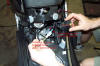
Now comes the first nervous part,
installing the grip heater elements. I put mine towards the outside edge of the
handlebars (where my hands usually rest), with the wires coming out the bottom.
Here’s my
 ,
and my
,
and my
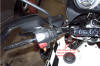 .
.
To reinstall the grips, rub an alcohol
soaked finger around the inside of the grip, give a light coating of rubbing
alcohol to the heater elements, and slide the grips on. When the alcohol
evaporates, the grip should be securely fixed. BE VERY CAREFUL TO LET THE
ALCOHOL EVAPORATE BEFORE RIDING—OTHERWISE, THE GRIP CAN SLIDE FREELY. I’ve used
this technique for years on mountain bikes and motorcycles, and I’ve never had a
problem.
You can reinstall the bar end weights
now, as well.
Wiring
Run the element wires along the existing
wires down the handlebar, replacing the existing zip ties.
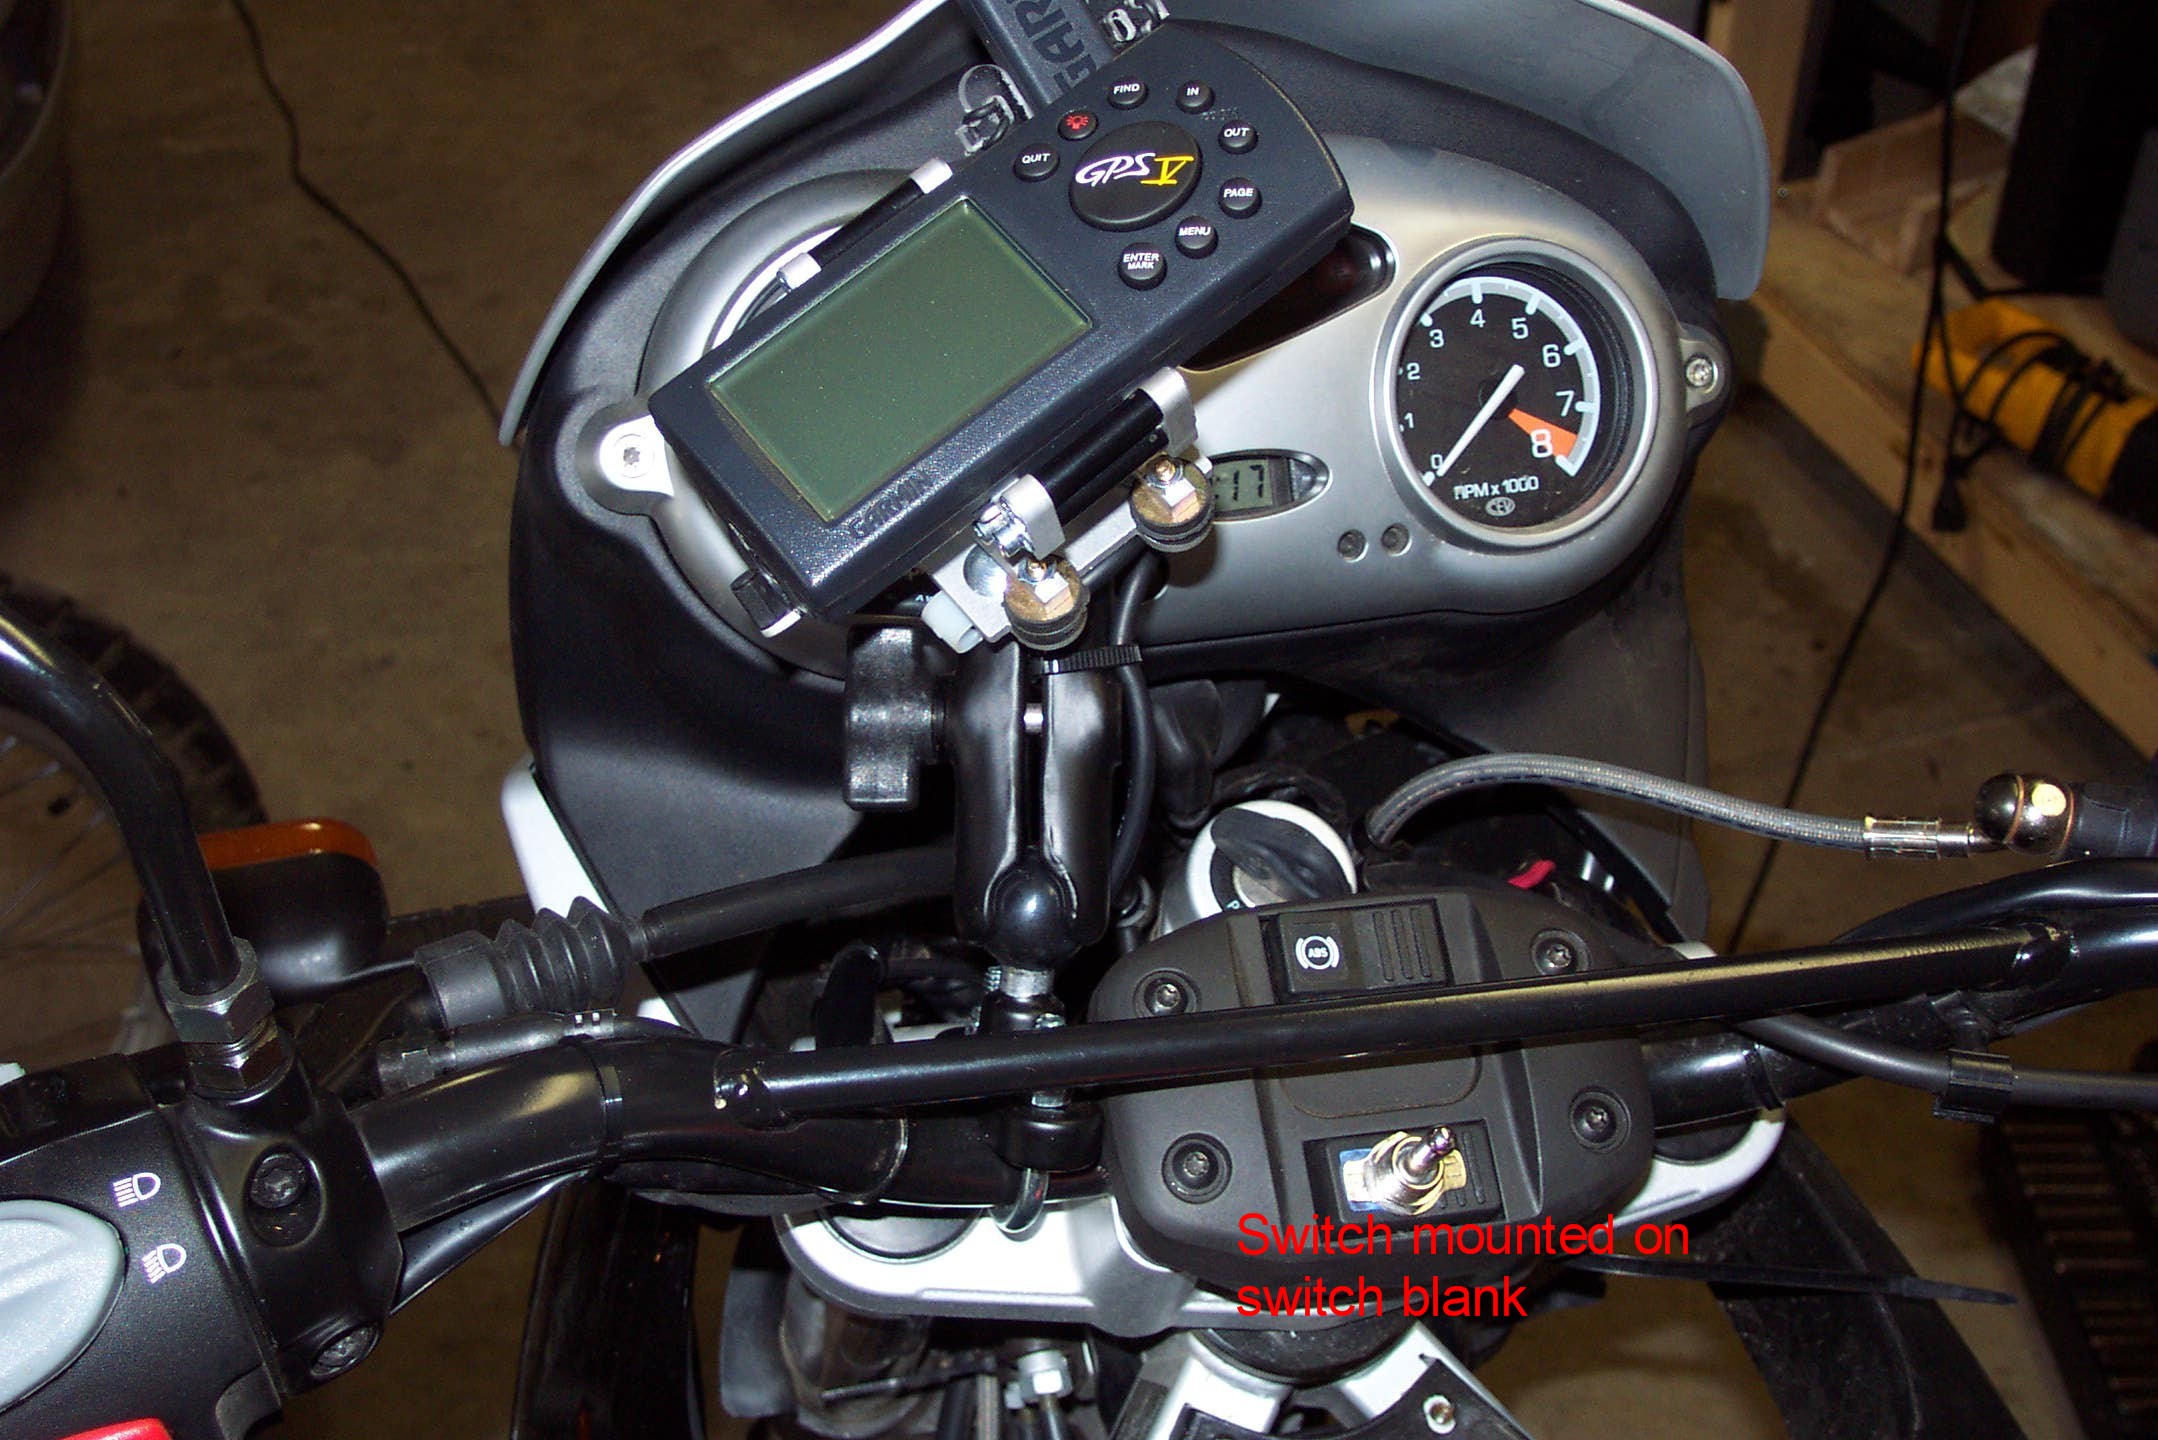
I drilled an ugly
 in my instrument panel for the switch (it gets covered up later); Marc has ABS
which gives him a
in my instrument panel for the switch (it gets covered up later); Marc has ABS
which gives him a
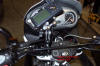 to use (above the handlebar mounting area).
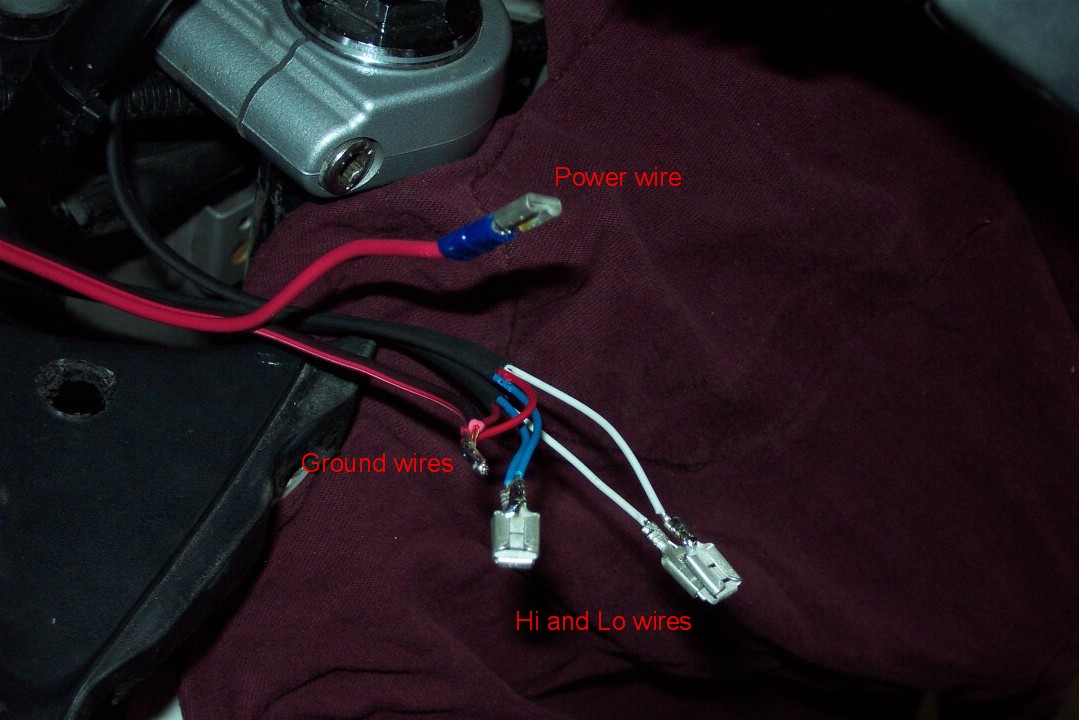
The next nervous part is cutting all the
wires to length. Twist the bars side to side to check for free play, measure
twice, cut once. Each grip element has three wires, plus the power wire and the
ground wire, so you have 8 wires to deal with.
The Dual-Star directions are pretty good
here, even if they seem counter-intuitive (i.e., hooking the low wires to the
high side of the switch), but it all works out. You’ll get
 :
:
-
The single power wire runs to the center prong on the
switch,
-
The ground wire from the accessory plug gets connected to
the two ground wires from the grips,
-
The high and low wires from the grip elements are each
connected by a piggy back clip
We soldered all of these wiring
connections to hold them together (use a rag to protect the bike).
That’s all of the hard stuff. Plug the
wires into the switch, and install the switch in your chosen spot. The switch
is keyed to the switch plate, so you can’t mix up the high and low wires.
Here’s the
 .
.
One odd thing came up: my grips were
protected by the appropriate fuse in the fuse block, but Marc’s weren’t… quite.
When he removed the fuse, he was still showing 8 volts on the voltmeter.
Neither of us had any explanation for this. Maybe a winter project?
Jamming Hot Grips
Problem
- When
heated grips are switched on the throttle stiffens and eventually locks solid.
Turn grips off and it loosens again! (Dangerous!)
-
Solution -
The sticking is caused by lack of
clearance between the handles and the bar-end when the handle expands. Simply
loosen the screws on the throttle/switch assembly and slide it a few millimeters
away from the bar-end.
-
The remedy is simple .. Just loosen the two Torx bolts in the
clamp at the bottom of the mirror stalk and slide the clamp about 1 - 2 mm to
the left, then re-tighten. If you plan to go off-road
it's wise to leave the whole unit on both sides loose enough to rotate if you
hit the dirt., so it can be whacked back into place with your fist. It saves
breaking off levers etc if you drop it.
Trevor #999, Bristol, UK, 01GS.
One Hot
Grip stops Working?
by y kiwi #1303
Q. My left hand heated grip has stopped working, the right continues to
work fine. Has anyone else experienced this or can anyone give a shortcut to the
problem: bike is just about still in warranty but don't have time to take it to
the dealers.
A. The wires go from the switch, to the connector block for power and
then to the grips.
-
Unscrew the four screws and lift off the switch holder. You can then pop out the
switch to make it easier to access the wires underneath.
-
Roll back the left grip from the outside to access the bit where the wires enter
the grip (well that's how the right one works)
-
Test the connection between the switch and the outer edge of the grip with a
multimeter. About $3 if you do not have one.
-
If there is no connection then you have a faulty cable. If it does work and the
grip does not then you have a faulty grip. Make sure the switch is on when you
do the test. (full)
Faulty Grip
-
Take of the bar weights, roll back the rubber grip and look at the grip - is a
wire broken? solder it up. well. Test...
Faulty Cable
-
Access the connecter which is under the left faux tank facade/seat.
-
Test the connections between the connector and the switch and between the
connector and the grip. This will tell you what cable to check. Also the
connector itself could be at fault (i.e. a loose wire). There are 4 pins - two
left, two right. one low one high.
Mine failed between the switch and the grip. This seems like an easy thing to
happen as there are a couple of places where friction is high or where the wire
is compressed.
If there is a a fault between the connector and the grip:
-
Unplug the faulty wire from the connector and pull it back through up the the
handlebar. The wire goes through a hole in the center of the handlebar and
splits off to the left grip.
-
Do not pull the end through that hole because I am sure it would be a nightmare
to put back.
-
Look at the cable - pull it out a bit from the handle end as well (you would
have taken the bar weight off by now...). Is there a bit that looks suspiciously
work/broken/cut?
-
Test between that bit and the other ends of the cable. Use a razor blade (boxcutter)
to connect to the wire through the cable when testing - but you will need to
remove the outer plastic first. When you have found the break then simply solder
it up, use up some electrical tape and put everything back where you found it.
you probably need to do both wires. oh - and check the right hand grip cable
because chances are it is about to fail as well. Warranty would replace it all
free of charge probably, but why miss out on a couple of hours fun.F650GS 2001.
Feedback:
-
-
Have you popped out the switch to see if any wires are loose? Have a got a
multi-meter that you can put on the ends of the wires that go to the left grip,
to see if the circuit is open? (Indicating burnt out wires) or whether there is
still some resistance left in the circuits? (Indication that there's a
connection fault). Trevor 999 UK 01 GS
Uneven Heat
in my Heated Grips
Problem: With my new aftermarket CHEAP heated
grips. I installed my new CHEAP heated grips (Saito) ordered from Germany last
Friday. The problem I am having is that the left grip does not get as hot as the
right one. It does not matter if I use the Start, Hi or Low setting, the left
will always be colder than the right one. Before I take a look at it later this
week (I hope) I thought that perhaps someone has some idea what to look for. My
guess is that there is some problem either in the left grip or in the switch.
Solutions:
-
I suggest swapping the
grips at their connectors. If it is a switch problem, the right grip will
start acting goofy. If it is a grip problem, it'll stay in the grip. While you
have them unplugged, you might want to take an ohmmeter and check the
resistance of each grip just since you're there. Also, Tape the handlebar with
one sparse wrap of tightly stretched electrical tape. Flash 412 (CO).
-
If after you switch leads
and check resistance per Flash's timely suggestion and the left grip is still
cooler, it may just be that the handlebar is acting as a heat sink. The right
grip has the throttle sleeve and a bit of an air gap that insulates the grip
heater from the bar. I've used snowmobile heated grips on a couple of bikes
and unless I insulate the bar with something the left grip is always
noticeably cooler. Harl #380
-
I think you will find the
right grip gets hotter due to the plastic sleeve. I have not found a good way
to insulate the left grip. Keith in Alaska. #714
-
To get the Left grip on I had to use a
hammer and a wooden board, so If I decide to take it off it will be a pain in
the a$ (but probably possible). The right grip was worse than the left - I had
to file the plastic inner throttle, before I could use the hammer/wooden board
technique. The right grip will - I think - never come off without cutting it
to pieces. Spakur #1117
-
I've had the problem with more heat on
the right side every time when mounting different aftermarket grips on five
different bikes. The right grip is thinner but is insulated from the handlebar
so it really is no surprise. On my previous bike (SV650S) the difference was
too much so I mounted a power resistor on the right grip circuit to
compensate. That worked very well. BMW grips are not perfect but close enough
not to bother me. Pelle, Sweden, '02 GSDA
-
I have the factory heated grips on a
GSD and the right seems warmer due to usually hanging on tighter with right
hand being the throttle hand. If you grip the left just as tight then heat
levels out. Bill #697, Atlanta, GA.
-
I'm pretty sure that they are connected
in series, (otherwise your left 3.5ohm grip would be designed for a max of 59W
and 53W for the right 3.9ohm one, which would burn your hands and melt the
plastic). Serial would give you a full power of 13.2W on the left and 14.7W on
the right side. [14.4V assumed above]. As the above isn't a big difference the
heat sink theory sounds likely, maybe combined with the simple fact that we
all usually have a firmer grip of the right, (throttle), grip. I have the BMW
heated grips, but found the below in a Transalp FAQ: "Most popular models are
Daytona grips available through Polo and Gericke shops (60 €, watch out for
special offers) and Saito grips from Louis shops (30 €) which are quite thick
and made of plastic rather than rubber, but have a three level electronic
adjustment. They are sometimes defective when new, but dealers know about this
and exchange is no problem." They also wrote this, which makes sense I think:
"They are usually connected to the cooler fan fuse (10 A) since the fan and
the grips are hardly ever in use simultaneously. This also switches them off
with the ignition." RakaD
-
Possible Solution: If I
connected say a ~10-30 ohm resistor parallel with the right grip and to that a
~1-2 ohm resistor in series. Then this would compensate so that more current
would run through the left grip in START and High mode. In the LOW mode a
little less current would flow in the Left grip and much less (more than the
left grip) in the Right. The resistors would need to be changed probably a few
times to get it right, but I think the numbers given should about accurate
(according to my calculations). So using this compensation would even
out the difference in all modes, the only downside is that in the LOW mode it
would also lower the total effect. In the other modes, what is lost in the
right grip would be mostly (depending on the 10-30 Ohm resistor) transferred
to the left grip. Perhaps this is a good solution. Spakur. What you all think?
A. What you're describing could be a good solution, if the electronics
parallel and then series connect the grips. However if I were to design pair
of heated grips as cheap as possible, I would have the grips connected the
same way at all time, and use PWM, (pulse width modulation, on-off-on-off..
you know the drill..), to control the power. The reason for me to ramble on
like this is that it might just be enough with one resistor in series with the
right grip if they are parallel, (this serial resistor wouldn't get as hot as
an parallel one either). The PWM is usually very slow to avoid radio
interference, perhaps you can even measure this with your multimeter, but this
isn't that important. Just measure across the two grips in start, low and high
mode. If the voltage across them are equal, then they should be in parallel
connection. If the left 3.5Ohm shows a lower voltage than the right 3.9 Ohm
grip, then they are most likely serial connected. RakaD
Removal of Heated Grips
Handlebar
Heaters
-
I don't use heated grips but handlebar
heaters from a company called "Warmfit" (UK). They are inserted into the bars
,have two heat settings, are totally reliable and cost around £30. The company
is in Portishead Rd Bristol, the main man is called Mike. If you can't get hold
of him give him time because I believe he goes to New Zealand often, where the
heaters are made. This product is fantastic and well worth pursuing. I say this
as a satisfied customer on at least 6 or 7 occasions. My F650 FI came with grips
but the Warmfit units are superior.
General
Feedback on Heated Grips
-
The greatest thing
about heated grips besides the fact they keep you warm is that they allow the
use of a much lighter glove. I wear my Joe Rocket Speedmaster gloves most all
winter except in heavy rain. This allows a feel to the bike and you fingers to
remain very nimble to operate the controls, do zippers and alike. The carbon
fiber knuckle guards keep the knuckles warm and the heated gloves do the rest
down to the mid 30's.. If you don't have a Dakar you will also want to
purchase the hand protectors to keep the wind off. The heated grips don't work
well without wind protection. StuporXtech #1130 01 Dakar Or
-
Dakar
heated grips. Stock BMW grips cost me $211 recently, including new handle
bars. The new bars have a few holes drilled in them, and a small cut-out at
the bar ends to allow the wires to fit under the grips. You also get new bar
weights as the old ones will not fit anymore due to the cut-out (male-female
kind of problem). And of course the two-position switch and switch holder
(which you will throw away if you have ABS since you already have one).
Spendy, but if you need the clean, OEM look I guess that's the price. Scott,
ID.
-
Heated
gloves vs. Grips. I've tried on those Widder gloves, and I'm sure they are
warm, most likely warmer than grips. However, in terms of thickness and
overall bulk, my mountaineering gloves are very similar, and I've ridden with
them, and I didn't like it: seemed like too much effort to work the
clutch/brake levers. And MY gloves have pre-curved palms and fingers, whereas
I don't recall that the Widder's did(?). So, I bought a set of BMW heated
grips a few weeks ago, and so far I like them a lot. The temp was about 37
degrees this morning, and I used my mid-weight fleece "windstopper" gloves
(about the same thickness as thick leather riding gloves) with the heat set on
high. This worked fine, and I get cold hands VERY easily. I think the BEST
setup for me this winter will be my lightly insulated cross-country ski gloves
(1/8" Thinsulate) with a leather palm/fingers, and then put the gauntlet nylon
shell from my heavy mountain gloves over the ski gloves (to block the
wind/rain). This combo seems to stop the wind, etc. yet is thin enough to feel
the heated grips, and retain a sense of feel on the levers. Scott, ID
-
Heated
gloves:
Pro: Much warmer than heated grips, heats the whole hand.
Con: You have to remember to take them with you and there's that annoying
wiring and plugging it into the bike thing.
Heated grips:
Pro: Always on the bike, always ready.
Con: Gotta use the death grip to feel the heat and if you put a previously
heated hand on the cold cold lever, you'll feel it just like you previously
felt the heated grip. Shank NYC USA
-
I have
both the Gerbing and Widder gloves which I use with the vest (or jacket
liner), arm and leg chaps as conditions dictate. I prefer the Widder system
because of the many options it offers. You might start out on a cold morning
wearing everything..... have it all stashed in your top box by mid afternoon
and just need the vest and gloves to get you home. Excellent!! The grips are
great and will consistently heat your palms with a bit of the warmth
generating into your hands. Under 45 degrees F however, the topside of your
hands and wrists will be cold. The gloves heat your whole hand and wrists and
your hands will be warm in any temperature. Bulky? Yes......, but easy to get
used to and certainly worth the trouble. I have stated here a few times that
the grips are great.......but the gloves are heaven. You must buy a thermostat
to control the heat or the gloves will ALWAYS be TOO hot. Art884.
-
My
F650GS Dakar is the first of the 5 BMW bikes I've owned that doesn't have
heated grips. I've never felt that they were that effective, so I've
considered the Gerbing or Widder gloves. In the meantime, my cheap, and I mean
$5.00 cheap ski gloves are doing the trick. RogerN #827
-
Aftermarket grips are LOT$ cheaper than gloves and less liable to break. Cycle
World said, "Heated grips are opium." I have used heated grips for over a
decade. I never felt a need to try heated gloves. Flash #412 (CO)
-
I use
us army surplus mittens with three fingers. There have wool liners with
leather and canvas outers with gauntlets that go up to your elbows. They cost
$6 and my hands have never been cold even at 20 degrees F. Not sure they would
be so good in the rain, but its completely unnecessary to spend $250 to get
heated handgrips with these gloves. Paul.
-
Heated
gloves work on any bike (except /5 conversion w/180W alternator). Only need
one set. Would need THREE sets of grips to cover the whole stable...(the
trials and tribulations of owning multiple bikes). And I don't lose them if I
sell the bike. Marty #436-Chicago-97 F650F.
-
I have some OLD,
CHEAP heated grips. I have never managed to stop the left grip from slipping.
The result is that the wires are now mush. Covered in a LOT of electrical
tape, the iron filings manage to connect most of the time but not al the time.
Result the LHS grip either works or doesn't. This can be a pain, but it
normally doesn't work then I don't really need it. James #848, '97 F650.
-
You can get heat
elements and switch much cheaper than buying BMW grips. These elements can
also be fitted under standard grips. However, the elements that go under the
normal grips:
1) Don't get nearly as hot as the BMW grips 2) Have a much shorter life span
3) The wires get broken very easily. On the plus side they are cheep to
replace. PQBON
-
I had my left grip
replaced under warranty. Use a multi-meter to read the read the resistance in
the grips. it should read around 4ohm if memory serves me right. My LH grip
was reading 220+ ohm. Remove the middle faux tank piece, lift off the relay or
whatever it is in front of the battery and unscrew (1 screw) and remove the
black lid under it to access the connector for the grips. It's a grey or
milky-white connector which gathers 4 wires into one connector and is just
lying loose in there with plenty of wire to spare. Come to think of it, it may
be possible, though not necessarily easy, to rewind a busted grip.. The tough
part would probably be to dismantle the grip and get the core and resistor
wire out. It should then be easy to get some appropriate resistor wire,
rewind, reassemble and glue. Unfortunately, I think I threw my old grip away,
since I was getting a new one under warranty anyways. Oyvind #1052
-
I
recently installed the 650 GS heated grips. I have an 02 Dakar. What a
difference, like holding warm mugs of coffee while blasting through the Sam
Houston National Forest. In combination with my heated vest from Aerostich, I
am warm and happy. The Dugger
Links - Electrical Diagrams, Sources of Heated Grips