
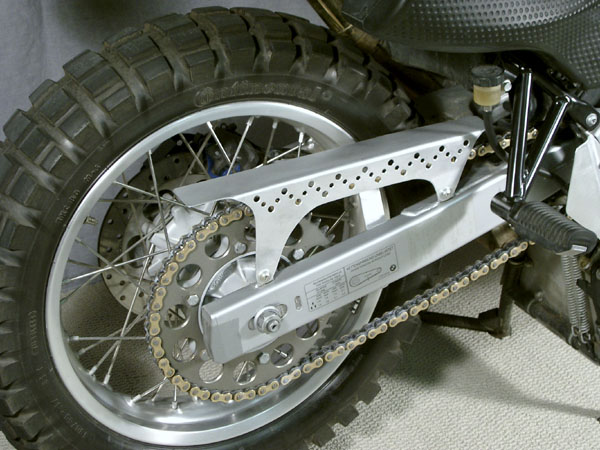
Other Protective Guards (Chain Guard, Disc Guard, Brake Cylinder Guard etc.)
For Low Front Fender refer Front Fender Mods GS
For Lowering Information, refer the Lowering Kit FAQ GS.
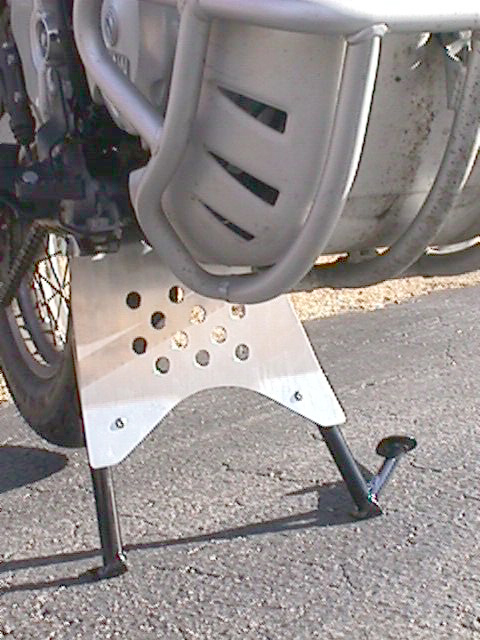
For Stand Information, refer the Dakar Centre Stand FAQ
For Handguards refer Aftermarket Handlebars FAQ
For Classic Accessories and Opinions on Frame Accessories including for the GS/Dakar, see the Classic Aftermarket Engine Protection FAQ
Touratech Footpeg Installation Guidelines for F650GS
by
PQBON
edited by Norm#874,
Kristian#562
Step 1: Place the bike on its center stand on a flat, hard
surface.
Step 2: Remove the three, Torx 40 bolts that secure the left and right foot peg brackets to the bike.
Step 3: On the left side, remove the shift lever by removing the 5mm pinch bolt, then slide the lever off.
Step 4: On the right side, to remove the brake lever, first
· disconnect the clip with a small screwdriver that connects the actuator rod to the brake pedal ;
· unscrew the Torx 40 bolt that the lever pivots on, saving the bolt, washer and bushing.
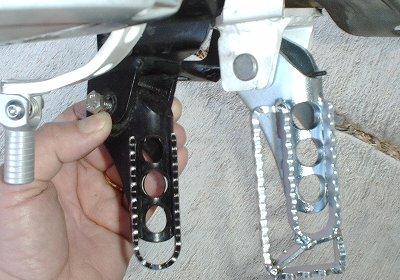
Step 5: Once the foot peg brackets are off the bike, disassemble the stock pegs from the brackets by sliding the cotter pins out and removing the spring, spacer, and washer.
Note: The tricky part is putting the new foot pegs in the new
brackets. To do this you reuse the pin, spring, washer, and spacer from the old
brackets. I installed and removed the pin several times to get the action
smooth. Put the spring around the spacer and put the unit in the new peg. While
holding the peg/spacer/spring assembly, slide the entire assembly into the new
bracket. Put the bent end of the spring into the little dimple in the bracket.
Now slide the pin through the front bracket flange, peg, spacer, peg, and
finally the back bracket flange. Put the washer on and put the new cotter pin
that came with the kit through the hole in the pin and bend.
Step 6: Repeat Step 5 on the second foot peg assembly...
Step 7: Mount new brake lever. First adjust the actuator rod from
the brake to make it longer so the brake will still work. To assemble the brake
pedal you need the solid spacer from the old brake lever. You will
· Insert the spacer in the pedal then slide the original bolt with washer through the spacer.
· Install the spring around the spacer, then slide the whole unit into place and start the Torx 40 bolt.
· Adjust and line up the spring so that it is hooked on both ends (see picture on the Touratech docs).
· Tighten the bolt solidly (about 15 ft/lbs).
Note: Adjusting the brake actuator rod is a pain. You have to break the glue put on to keep the adjustment in place. I had to lengthen the rod by about 1 cm or so (give or take) to make the brake activate just after the brake light switch was activated. Some people reported problems with the brake light... I didn't have any.
· Re-attach the clip from the rear of the lever to the actuator rod.
Step 8: Install the pegs.
· Install the top screw first on each side but don't tighten it.
· Install the lower screws on each side but don't tighten them.
Note: If you aren't using the rally or other after market side stand, on the left side there is a rubber/metal flange to catch the side stand. Don't forget to install that on the rear bolt.
· Adjust bracket alignment then tighten all the screws on each foot peg bracket.
Step 9: Install the shift lever by removing the 5mm pinch bolt (if
the bolt is in it won’t go on, I promise!) Stand on the bike to find the
location of the shift lever that suits you. Install the pinch bolt and tighten.
Now you are ready to ride.
BTW=> I've only ridden around the block with
them but they seem to be GREAT! I've ridden DHP's world tourer with them and
they make standing on the pegs a piece of CAKE!
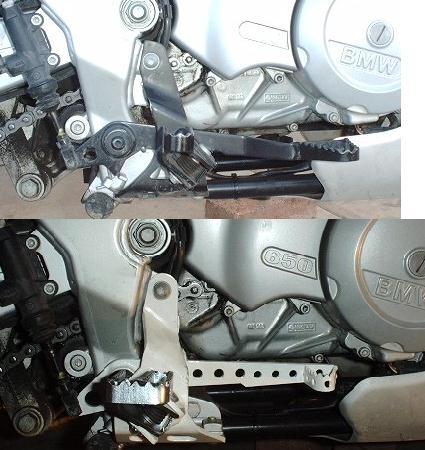
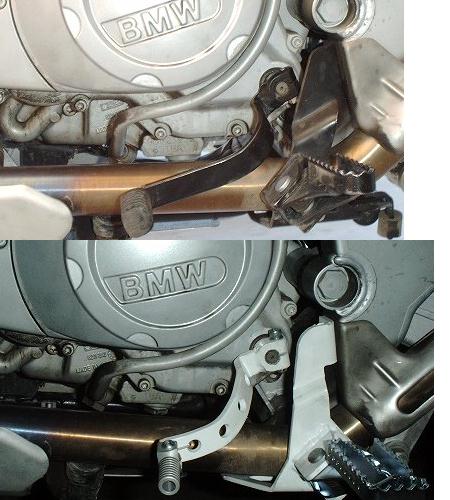
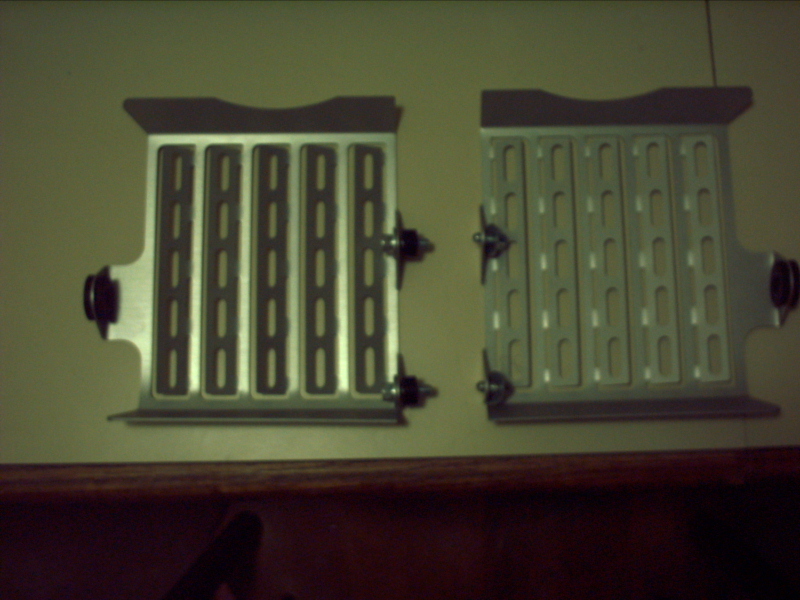
Here's some pics of the RHS Foot peg/Brake and LHS Foot peg/Clutch Shifter, before
(Top) and after, supplied by Gerry #951
The new right side footpeg sticks out further than the original. The left side is about the same. They are located down and back from the original. Using the common points in the photographs, it's easy to see. It's not a great deal of distance but it does feel slightly better. The footpegs are much wider and more comfortable also.
Opinions
I thought the Touratech pegs were poorly constructed, considering their price. They'll hold up, I'm sure. But they look like they were slapped together by an amateur welder. For $100 just for the pegs, I expect more. They do NOT work on the Classic. mark #403
Man I love them! I bought the whole system and they (like all the other Touratech stuff on the Dakar) ROCK!! They give you a better standing position while off road, better grip for your boots and are excellently constructed! Yep I like em!!!! Scotty FT. W, Tx. #1078
Putting the Touratech peg kit on a standard GS decreases ground clearance. If you are scraping the stock pegs in turns this will only get worse with lower pegs. Brad #1002
I love my pegs. Quality seems ok. (a little bent after dropping the bike on them a couple times, but ok). They just feel so much more positive when I go to stand up, especially in the wet (or at speed). I am not sure whether the kit (with lowering stuff, shifter and brake pedal) uses different pegs than the "pegs only" option though. No problems with cornering, but maybe I am just not aggressive enough... Ted
When I enquired about purchasing a Dakar seat at the dealer he peeled the seat of one in the showroom and gave it to me to try for a short while. Well worth it. Also, as a cheap way to make more room on the bike I would recommend the Touratech footpegs, they drop slightly from the stock pegs. That, with the seat, makes for about 5-6cm of more leg room, doesn't sound like much but it feels like a million bucks. Andre.
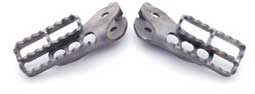
Looking at pictures of Touratech's pegs for the GS, they really don't seem to me to be anything but a set of original pegs with an additional "loop" welded to them to make them wider and longer. At the price they're asking, I'm considering shaping a piece of flat steel bar and grinding notches in it to make those "loops", and having a qualified welder help me with fixing them on. Are there any other significant changes to the Touratech pegs that I'm not aware of? Oyvind #1052
The location of the TT pegs is lower and rearward a bit. It makes the transition from sitting to standing much easier and it changes the weight distribution some. I went with them because of the relocation aspect and not the size. bwfox#1131
I'm pretty sure all the do is buy OEM foot rests, strip the paint and weld on the extra metal. The pegs are only $100 US and if your time is worth anything to you they are not a bad deal. Still I'm sure you could make the modification as you suggest. As for the lowering kit it makes more sense on a Dakar. The extra ground clearance should make the lower pegs a non issue. If you have never touched a peg on a standard GS you probably won't care there either. The main reason for wider pegs is to make standing up more comfortable and safer. If you sit all the time save your money. Brad, N. CA., 2001 F650GS - Inmate #1002
I bought a set of these pegs to see if they'd work on the classic (they don't) and was surprised by the cheesy quality/appearance. they don't look to me like they're stock pegs that have been modified. however, they are AVAILABLE. so you either buy them, find another solution, live with what you've got, or come up with your own solution. Mark #403
I love my pegs. Quality seems ok. (a little bent after dropping the bike on them a couple times, but ok) They just feel so much more positive when I go to stand up, especially in the wet (or at speed) I am not sure whether the kit (with lowering stuff, shifter and brake pedal) uses different pegs than the "pegs only" option though. No problems with cornering, but maybe I am just not aggressive enough. Ted in TO, 01 GS
I also like the Touratech pegs -- they provide more comfort and significantly more control when standing. Levity.
The Touratech pegs are modified stock pegs. If you're a "bg", they're probably easy to make. I'm not, so I got them with the relocation kit. Being 6'2" and 225, they help me feel more comfortable on the bike. :-) Cheers, Gerry, #951 '01 Dakar PHX AZ USA.
Foot-peg Relocation - Touratech 300-0040. SCX.
Foot peg adjustment. Well I'll butt in and summarize in case you don't get a lot of response (I don't have them). A number of people here have installed the Touratech kit to lower the pegs and gain larger foot rests which are better for riding when standing. They seem to be easy to install if you can turn a wrench. Much better for off road use if the usual response. The only downside is that the lowered pegs are going to drag in turns if you are inclined to such riding (hey, is that a pun?). I drag a peg on occasion and just can't imagine how often that would happen with lower pegs. (Dakar owners not included here. The extra 1.5" of ground clearance probably reduces peg dragging a lot.) I'm just a bit taller than you and feel your pain. I hope you have already swapped seats for the Dakar model or have an aftermarket seat. That makes a big difference in cockpit comfort. I also ride with my toes on the pegs a lot. Sliding your foot back gets your knees back enough to probably clear the lip in the tank. I also spend a lot of my freeway/highway time with my feet on the rear pegs. They are easy to flip down with your boots when riding and the change in position, at least for me, is good for the low back and shifts pressure points around for a while. It also gets my upper body down and leaned into the wind which I find better at 65+. Now hopefully you'll get some opinions from people who actually have them. BradG #1002
Same height as you. Installed the footpeg and handlebar risers and it makes the fit better for me. Gerry #951
I'm only 5'9", so I was just inside the comfort zone when seated. I was quite uncomfortable standing though - I really felt hunched over the bike. I installed the footpeg relocation kit and the handlebar risers - quite a difference! I am much more confident standing on the bike now. The seated position feels a little more upright now ... and there's definitely more knee clearance now! Installation was a snap! Only problem I had was with the new brake pedal - I didn't pay real close attention when putting it on. I quickly found in testing the rear brake that I had mis-aligned the pedal stops -- keeping the brake pedal from engaging the brake piston. Was a quick re-place and off I went...Chuckles #912 (Austin, TX).
I am 6'2-1/2 with a 2001 GS, standard suspension. Same complaint as Jon, so I bought the Touratech kit. Easy to install - instructions are in German, but the FAQ provides enough of a translation that there's no problem. Between a Russell seat, the lowered foot pegs (1" lower, 1/4" back), and the handle bar risers, the bike is much more comfortable for me. Originally I also installed the shortened shift lever and brake pedal that come in the kit. I missed enough shifts and brakes that I re-installed the OEM stuff, leaving the foot pegs. (Most of my riding mileage-wise is on my 80-mile daily commute on freeways. I don't need to be iffy about shifting or braking during those rides.) I don't have a problem scraping the pegs - my size 13's scrape the pavement first anyway. I heard - after I bought the Touratech units - that Bob's BMW has a set of footpeg re-locators that move them 1" down and 1" forward. I've never seen a pair, nor have I heard how they work w/respect to cornering, etc. Dan#823.
I bought a pair of Touratech Rally pegs from Happy Trails the other night, and I took some before-after pictures for comparison (left side of bike):

Wunderlich Aftermarket Footpegs
On my Dakar, the amount of lean when on the stand is excessive. When the bike is loaded it takes a huge effort to stand it up straight. I decided to utilize the Jesse extender after exploring other options. I originally thought $50 was too much for a simple device. When no other easily-deployed options surfaced, I went ahead and ordered one from Al Jesse. It is a very well-made and thought-out accessory. It is the right length and very sturdy. It uses an expansion plug/throughbolt on both ends. The instructions are bogus and confusing. They show a picture of a sidestand being cut off at the bottom right above the "foot" with a hacksaw. What's worse, the directions tell you do the same thing. Then after you have cut the foot off, you realize that in the case of the F650GS, the stand should have been cut off further up, right next to the tang you use to deploy the stand with. I have made it work, but it could have been cleaner and better if the instructions had been for this bike. I called Jesse and they confirmed that the instructions were for a different older Airhead model, but they include the same generic one with all the models of extensions, even though the procedures are indeed different! Such a quality piece of machine work and such poorly executed instructions and picture... Bert #1131
 Photo courtesy of Gerry#951
compiled by Brad #1002
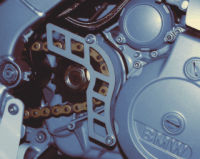
bg's Stuff
from bg's Stuff
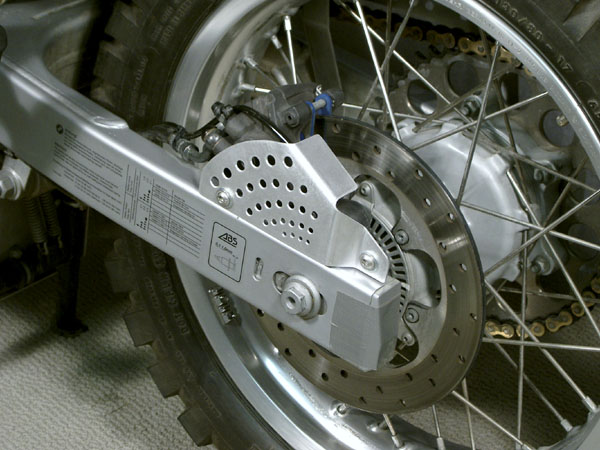

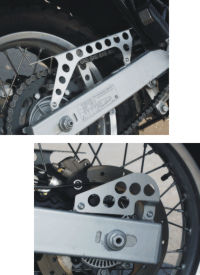
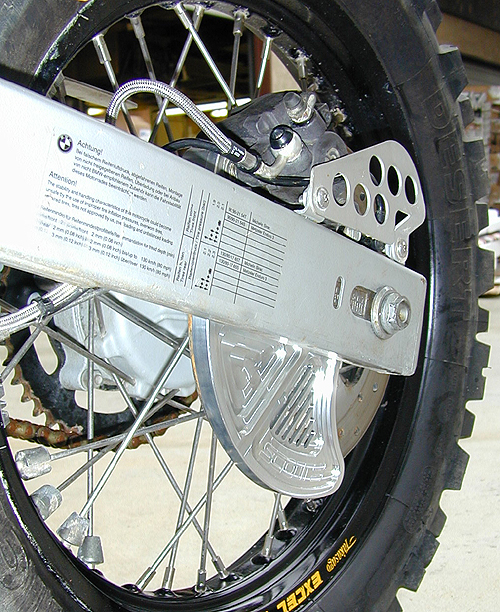
Scott's Disc Guard
Touratech
from Touratech USA or Touratech Germany
Rear Master Cylinder
from Touratech USA or Touratech Germany

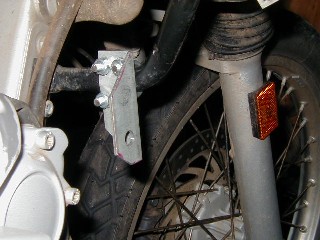
Front ABS Sensor
from bg's Stuff

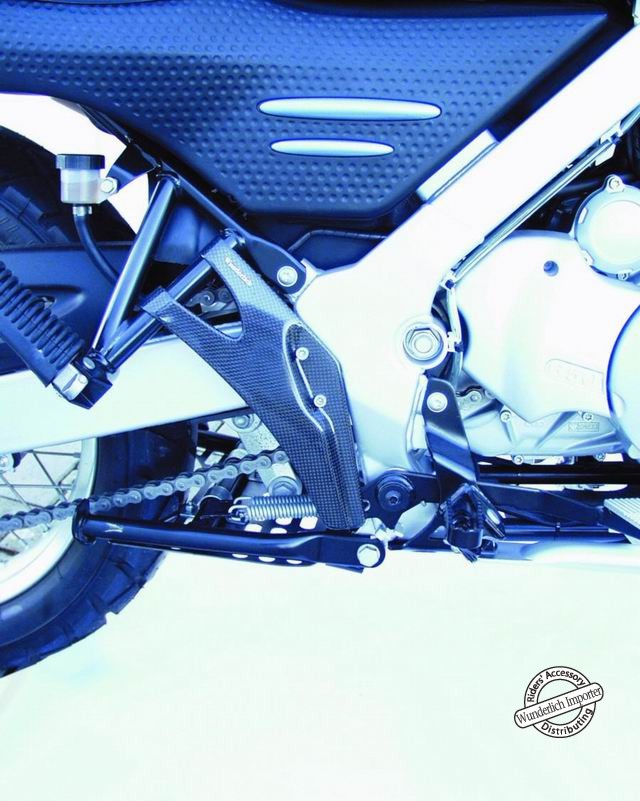
Wunderlich Rear Master Cylinder Guard
from BMW Santa Cruz
Scott's Rear Disc Guard (Shark Fin)
from Scott's Performance
 Courtesy of DHP#711.
Here.
Courtesy of DHP#711.
Here.
Feedback on Various Guards
Master Cylinder Protection.
Anyone know where to get an aluminum master cylinder protector/cover for the F650GS? I just got the drilled aluminum chain guard and brake sensor protector from Touratech, it looks great (way better than all that plastic) but all they have for the Master is carbon fiber and I was trying to match the rest. BTW, I kind of expected better build from Touratech. The main part of the chain guard is good but one part of it (where it mounts to the bottom bolt of the swingarm) is plastic and will probably fail in the future. '03 F650GSA - Titan Blue Colbster, CA
Take a look at the brake protector from the R11S. That is what we use. Don www.mredsmoto.com
Holtam Metal Fabrication has one coming to market very soon. I saw the latest prototype last night. They are listed in the classifieds under retailers and manufacturers. SScratch
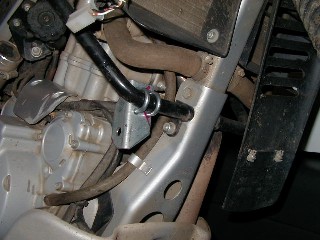
(In addition to SScratch's reply...) In response to requests from several riders, brother Merrill has developed a guard to protect the rear master cylinder on the F650GS and Dakar. Riders commented that the rubber boot was easy to scrub off with right foot. Also the brake line attaches to the cylinder with a plastic fitting, easy to break if unprotected. I should have pictures and more info soon. If interested, please email me. rjholtam@worldnet.att.net. Raleigh619 ST in TN
I made mine out of a scrap of .060" sheet aluminum and attached it using longer bolts from the hardware store. Less than $5 and 30 minutes invested. I cut the shape using a reciprocating saw and made the 3 bends using a bench vise. It seems to work fine and it looks O.K.. I wanted it because my boot was constantly popping the rubber boot off of the cylinder shaft. Kevin 1092 Atl, GA USA 02GSA
Mine is from 1150GS, $12.00 and change, fits right on with same screw holes - the piston rod is still un protected though-just like the big bike's. tomn
I know you ask for aluminium but the latest BMW Motorcycle Accessories catalog has a Carbon fiber Brake cylinder cover in it . Part # 71 60 7 661 280. $ 24.00. A bit spendy but it looks very neat. I run a stock aluminium one myself. These parts are designed to fit the "S" but will work nicely on the F650. I had to use some spacers. Steve 1130 Or
Next.
See the After Market Handle Bar FAQ
Engine Protection Bars, Sump Guards & Bash Plates
compiled & edited by Kristian #562
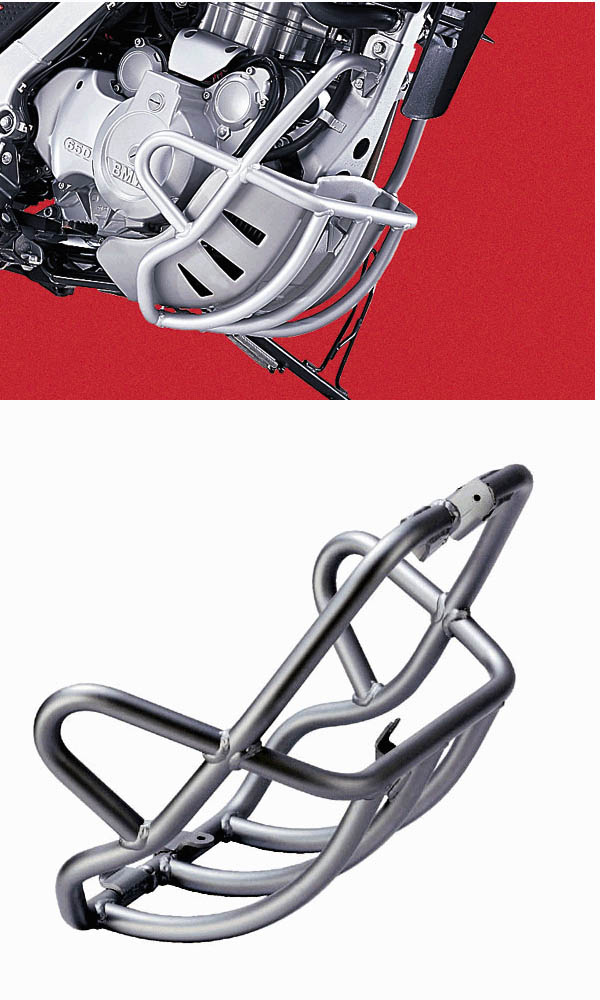
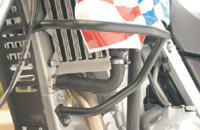
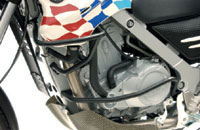
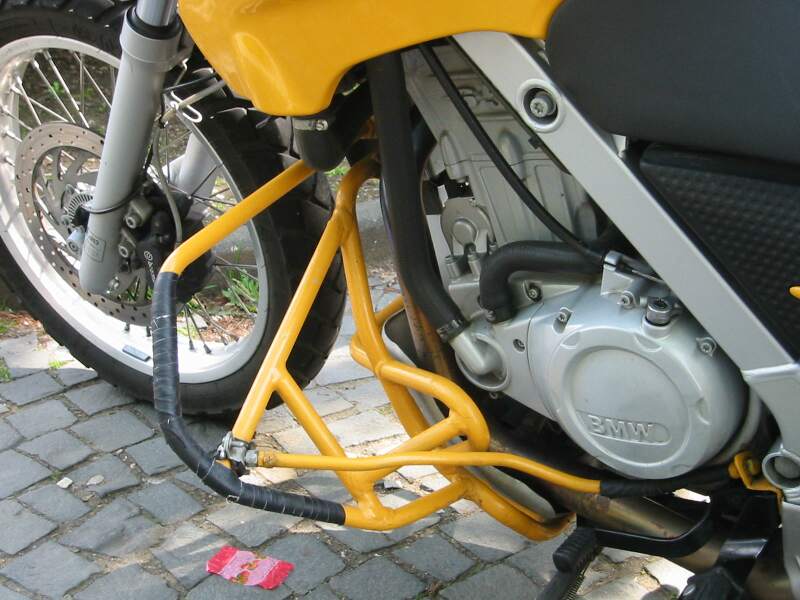
Hepco-Becker Engine Protection Bars
This section shows Photos and gives some Installation Tips.
For Opinions on ALL Protection Bars, with Feedback on Both Classic & GS/Dakar, refer the Classic Frame Fairing FAQ.
from Raleigh
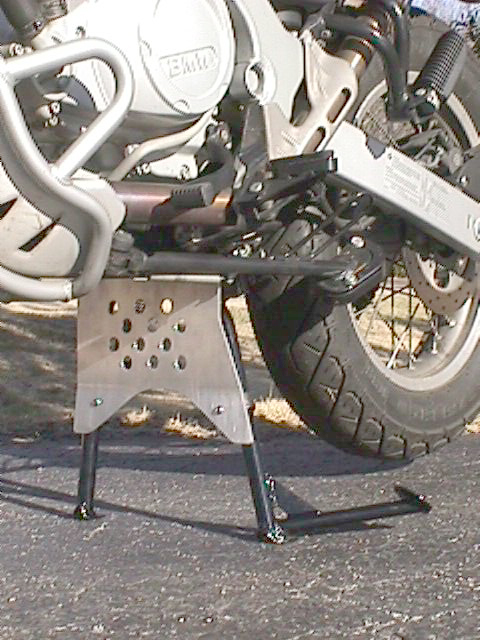
The Engine Protection Bars are from BMW. The Bash Plate is from R.J. Holtham.
Refer the Dakar Centre Stand FAQ for
further Details


What is the BMW Engine guard mounting-torque?
PaulRJ #1218 Boston
The one a mounted on my '98 Classic asked for 50nm for each of the 4 bolts.
Actually it doesn't explicitly say each bolt. It says (after telling you to
".... tighten with new self-locking nut from retrofit kit"): ATTENTION. The
tightening Torque is 50 Nm.
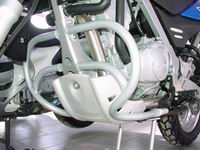
BMW Bars photo from www.bmwscruz.com
from Joe at Joe Equip F650GS.

Hepco-Becker from Wuedo. German) or Wudo (USA)
from
Touratech USA or
Touratech
Germany
Upper Bars Lower Bars
These notes from Mike #819 about the Bars - "Just put on both sets of guards today. The radiator set does not mount in the rear. The ends of the guards are free floating, stopping about an inch away from the engine. I don't know if having a solid mount to the head would be a good idea if the guards took a bad hit."
Installation notes from TOMN
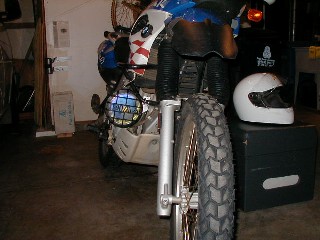
 Note Tomn has mounted a PIAA light on the Bars.
Unsnap the fairings at radiator.
Unscrew the top screws of plastic radiator cover @down tube.
Loosen the bottom screws (instruction says to unscrew but just loosen, and very hard to get to so save your wrist)
Unscrew lower front M8 engine mount to down tube -you will see the photo on instruction and i think you can tell from their web site pic.
2- M6 Stainless screws 2- M6 washers, 2- M12 washers, they all replace the top most screws of radiator plastic cover screws: crash bars attach between the plastic and the frame. Insert the washer (used as spacer and you will know why once you take the original screws out. Sneak the bar over, then put back the plastic over the bar, fasten with the new M6 +M6 washer.
1 M8 long 1 M8 locking nut and washer
replace the engine mount screw on the down tube-the bottom end of the bar goes
there.
All will take 15 minutes if you do have a clean bike, no bent pieces and screws
are not frozen. My fairing has bent up snub (phallic looking plastic poker which
inserts into the radiator cover) and was a dog to get it back into the place.
Says to tighten all to 21 NM but only the M8 can be done with my tool set. A
good deal of patience or those "dry set lock tight" will be needed to even apply
thread lock as screw holes are hard to hit -you will see what I mean -just keep
an eye on those radiator cover screws.
The radiator cover screws are very pain to tighten once the crash bars are in
-could use flex jointed ratchet extension and Torx bit but who's got such at
home. could buy 3- 6 packs instead.
After this was done, I futzed with a yellow PIAA driving light I always need to
keep "left turners" away -was hit before and since the light, not once such in 3
years. This took almost 3 hours to figure out and arrange already made brackets
to work with the new bar. My son was starving by then 9:30pm -Bad dad, bad dad.
Note: the lower corner of the radiator is situated between the bar top and
bottom. Though farther recessed in from the plane defined by the foot peg, the
bar and the handle bar at any angles, if a big rock happens there, you still
might get the radiator dinged. They could add another vertical piece in that
area, or you could. Hope I will never know.
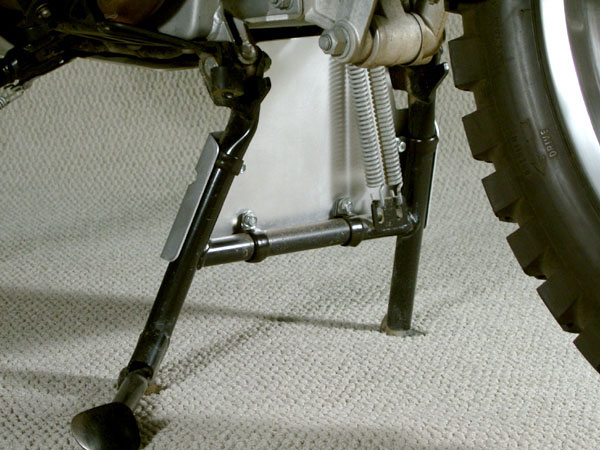
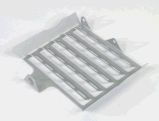
from Touratech USA or Touratech Germany
The Right Hand Photo is one of their
RF650RR Rallye Bike Sumpguards and has a reservoir for water or Tools. For
the version with the storage box that you will need
to purchase additional mounting rails and change the oem sidestand for the
Touratech version (stronger and different mounting point). Need to specify this
with Touratech at order time as it's not a standard conversion for the GS/Dakar
(i.e. not frequently ordered except for Rallye kits). The benefits of carbon
fiber = lighter weight, stronger. The OEM BMW crash bar is REALLY HEAVY. DHP#711

from Touratech USA or Touratech Germany
from bg's Stuff

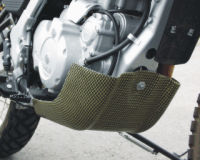
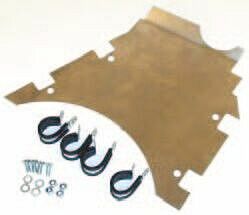
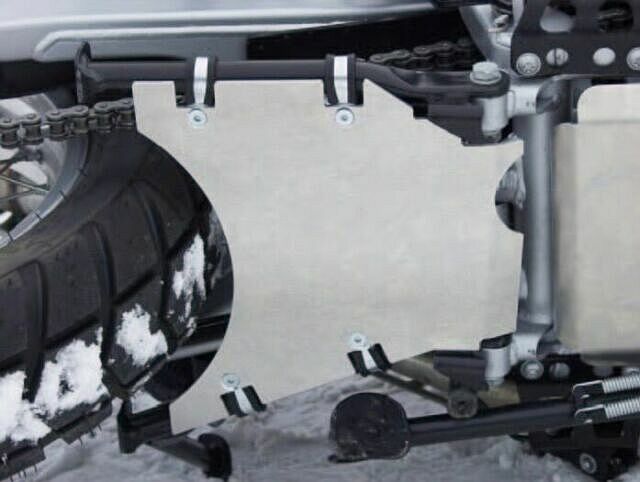
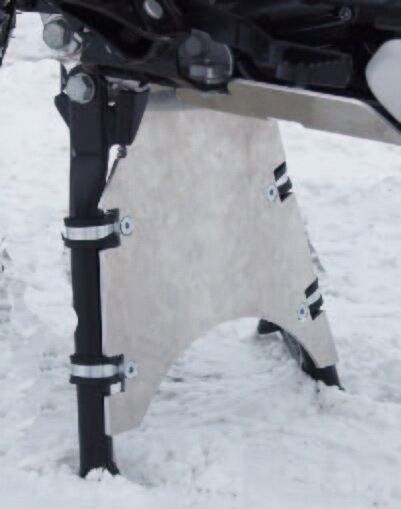
Touratech Underbelly Pan Extension
from Touratech USA or Touratech Germany

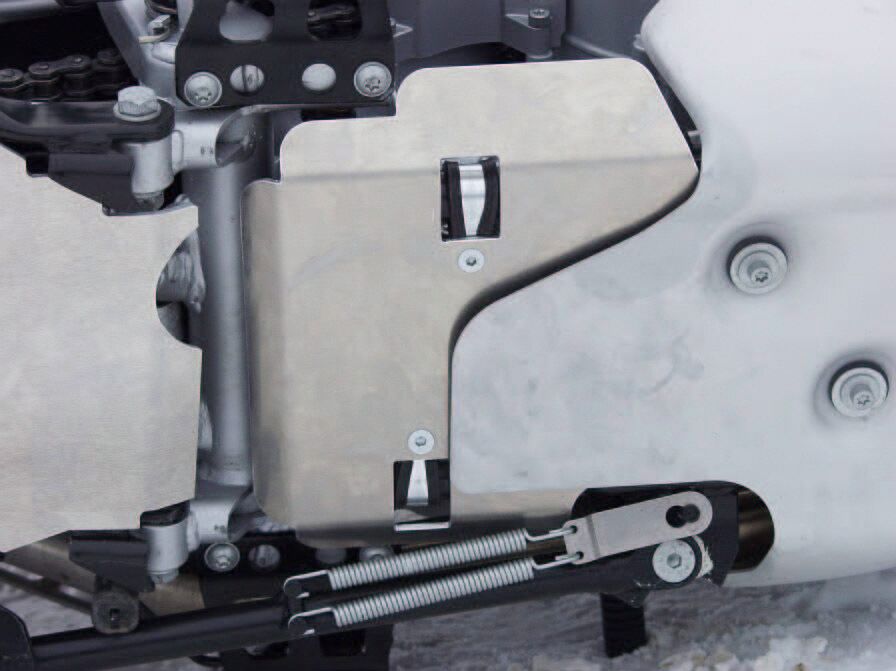
from Robert #1071
These look dangerous on a sharp corner. Too much lean and BAM. So be careful making your own.

Wunderlich
from Guz.
For Opinions on Protection Bars in General, (Both Classic & GS/Dakar) refer the Classic Frame Fairing FAQ.
Wunderlich Photo from www.bmwscruz.com
Touratech Photo from www.touratech-usa.com
Touratech Photo from Adam 906.
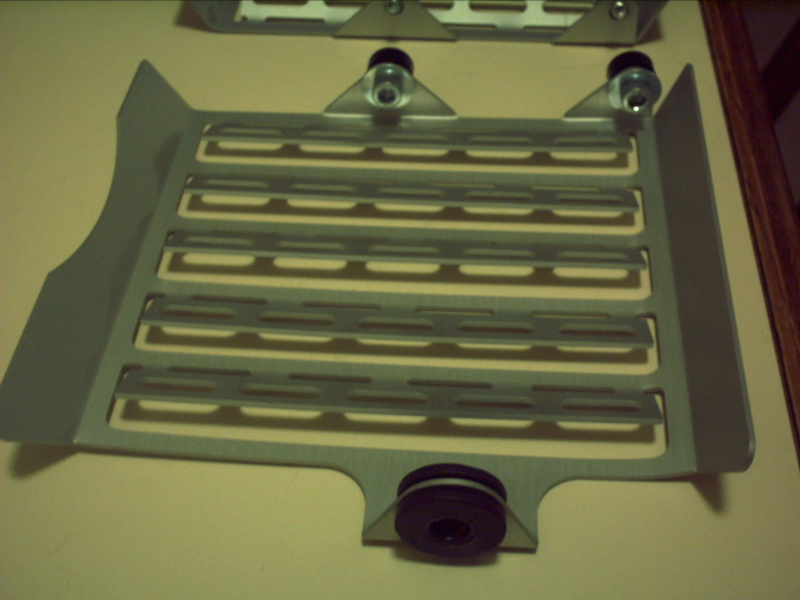
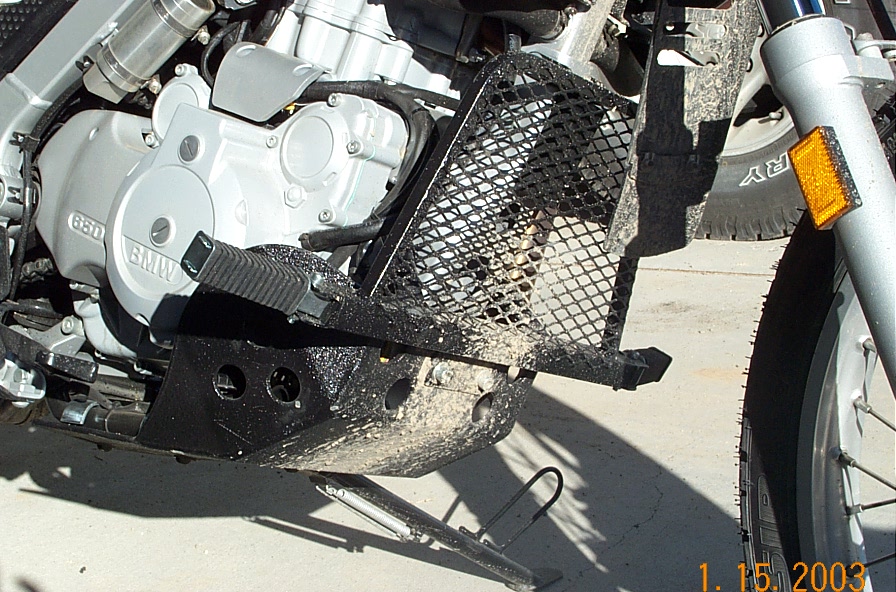
Homemade Radiator Guards#1
by Jack in Oz
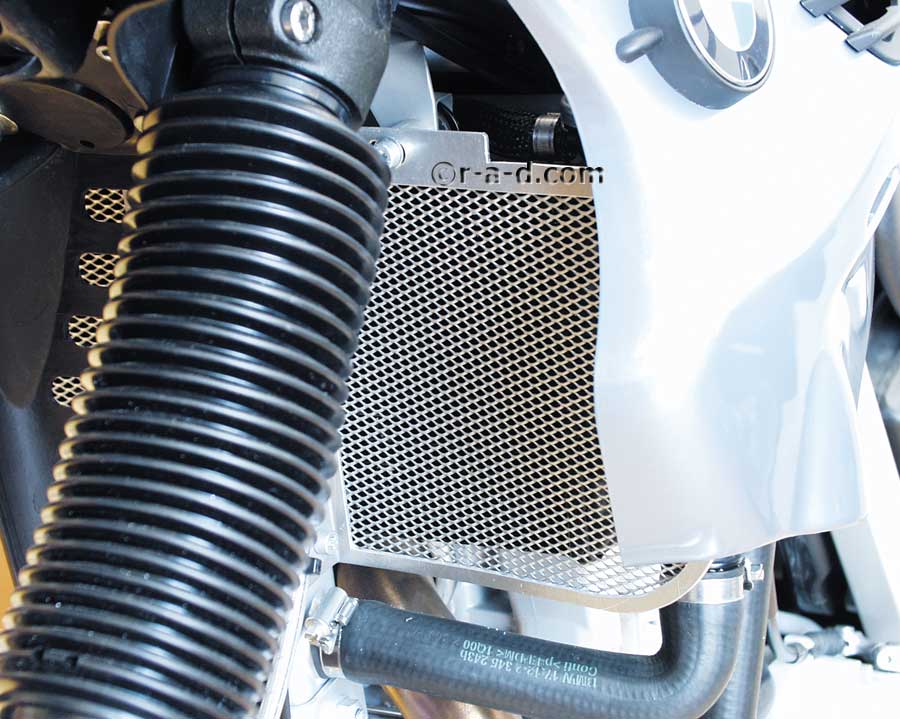
Homemade Radiator Guards for the BMW F650GS


I decided to have a go at making them for a few reasons, one was the cost of the Wunderlich Guards at A$250 or so. Next was the fact that they were fitted by removing the original plastic shroud around the front of the radiator.
Last was...I had a spare few hours one afternoon!
About removing the OEM shroud, I don't believe this is a very good idea at all, past experience in hot climates has shown that shroud removal from ANY water cooled car/truck/motorcycle will compromise the capacity of the cooling system to do its job. Similarly, the fitting of any grill/mesh etc in front of the radiator will do the same thing!
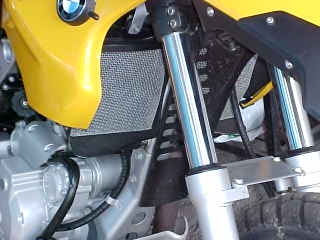
So.......by fitting the Wunderlich Guards I would be breaking 2 rules! Doing it my way...I was only breaking one, AND providing protection to the radiator core from rocks/debris thrown up off the road, as well as large bugs/insects etc.
In addition to this, the Wunderlich Guards are actually mounted quite close to the core (in pics I have seen) which means a large rock could dent the mesh enough to hit the radiator core itself. My guards have at least 30mm spacing out from the core surface. None of the above is to criticise the Wunderlich Guards, but for Australian conditions I felt that there had to be a more rugged solution than what they offered.
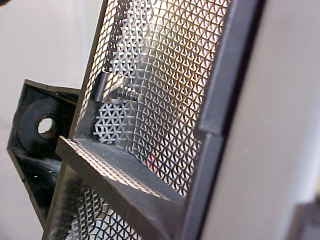
The material I used was a close woven galvanised mesh that was in my junk pile, a low budget start!
First thing to do was remove the radiator and clean the core fins of bugs/junk, I then repainted the radiator with radiator paint (a semi-gloss black)
To make the guards, I simply cut and folded them to fit within the inside perimeter of the existing shrouds and secured them with existing shroud mount bolts on the frame and the outside ends with PK screws and captive nuts, through the 2 existing holes on the plastic shroud itself. No extra holes were drilled for this project. Tin snips did the cutting job fine. On the top and bottom edges of the mesh, I carefully folded the cut ends of the wire over the mesh and crimped them with pliers, this eliminated sharp wire simply poking out and means the mesh strands at the extremities won't fall apart.
After fitting the guards, I reinstalled the radiator and fresh BMW coolant mixed 50/50.
At the very top of each guard, I fitted some upside down "U" shaped black upholstery edging to make it look a little more pro.
The same edging was used an the bottom inside edge of each plastic "tank" cover, so the wire grill would not contact the cover during rough riding conditions.
The only "down" side to the guards is that the radiator needs to be removed to take them off.......I would consider that very little debris will find its way behind the guards anyway, so they may get removed once each 6 months to clean the core, if it needs it.
Preliminary testing over a week in 30 deg C weather, both on highway and city riding has shown that the fan may run a little more often, but only in city riding. The 'real" test will come on our midsummer 38-40 deg C days :-)
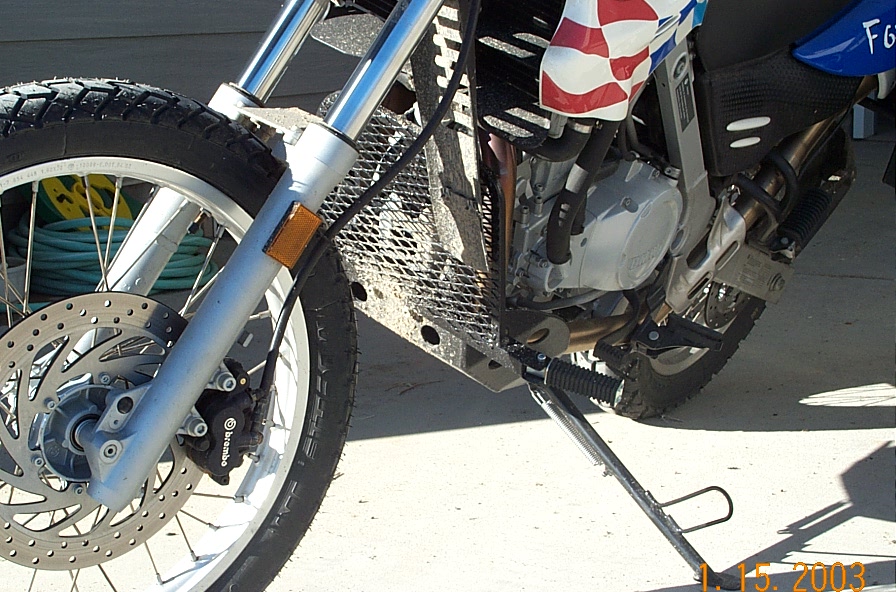
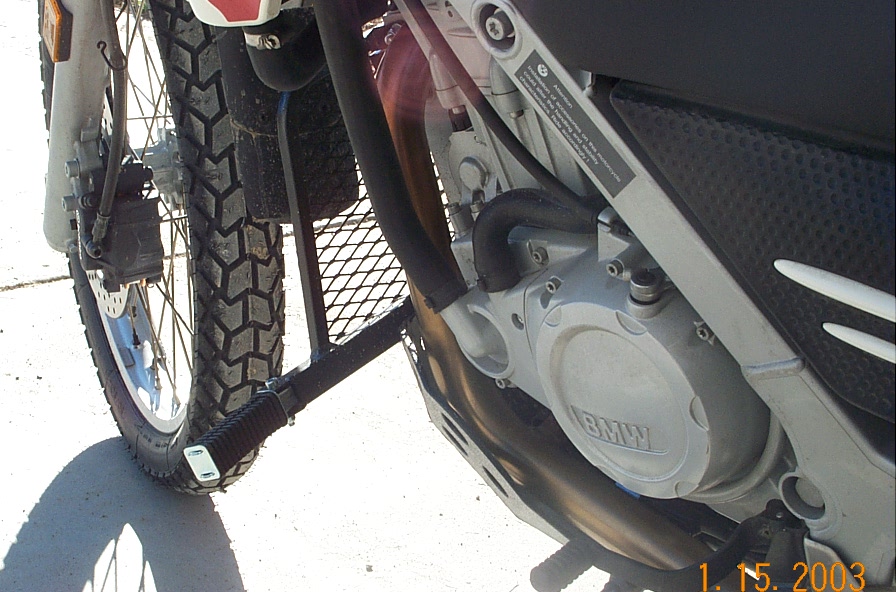
More Homemade Radiator Guards
by Tink
I made similar radiator guards but used black powder coated stainless steel mesh. I got it for free from a security screen manufacturer's waste bin. The mesh is called Crimsafe. I split rubber vacuum hose down the middle and used silastic to fix it around the edge of the mesh. Attached the guards with two cable ties to the centre of each radiator shroud. Although I had to drill two small holes, the guards could be fitted with the shrouds in place. If I need to remove, I need to snip the cable ties and use new ties to re-affix. Had them on for 6 months now (since new). Have done 10,000kms both commuting, highway and dirt. No problems with overheating whatsoever. Fan rarely comes on and then only when stuck at traffic lights. Will post some photos when I bring the digital camera home. Cheers Tink F650 Dakar Brisbane. Australia.
I've been running with my home-made steel mesh radiator guards for over a year and 10,000 miles. No problems in hot weather ever. By the way, I fastened mine to the black plastic shroud with stainless steel screws, washers and nuts (the holes are already there on both sides). Rod CO '02GSA
Feedback:
I love you guys. Your innovation with materials at hand runs after my own heart. US$65 for a radiator guard, indeed! Flash #412.
For Opinions on Radiator Grills in General, (Both Classic & GS/Dakar) refer the Classic Frame Fairing FAQ.