compiled & edited by Kristian #562
Please read the Disclaimer
before attempting any work in this FAQ.
Last Updatedd: 2 June 2007, Winter #1935
For other related FAQs:
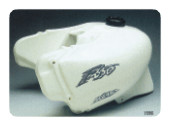
Acerbis and Touratech both make an aftermarket Tank. Acerbis' Tank holds 27L and weighs 3kg. Refer classified for details. It slots right into where the old one was.
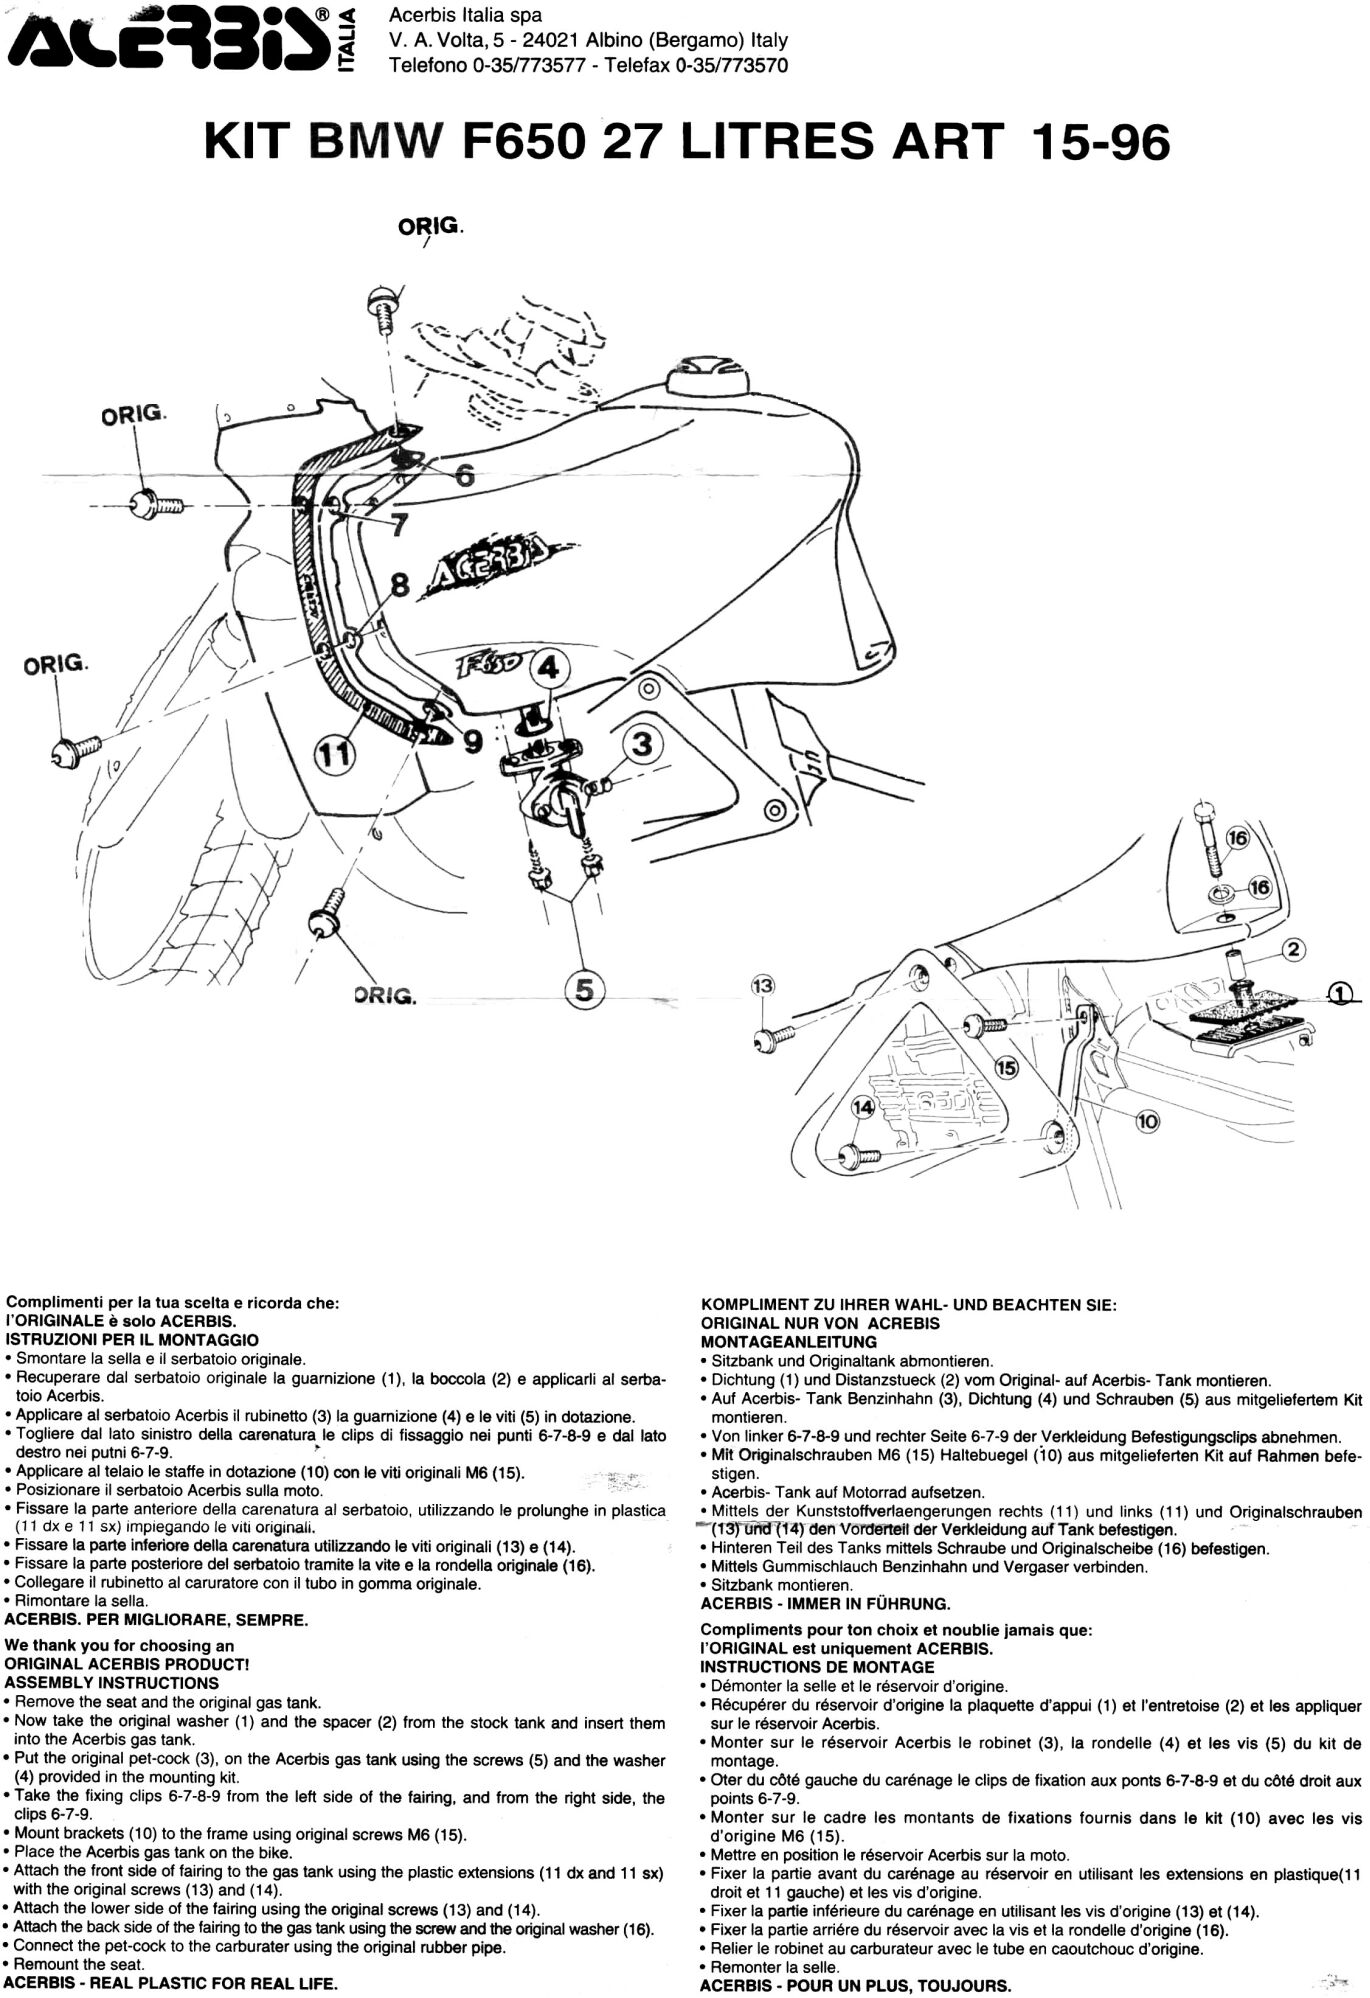
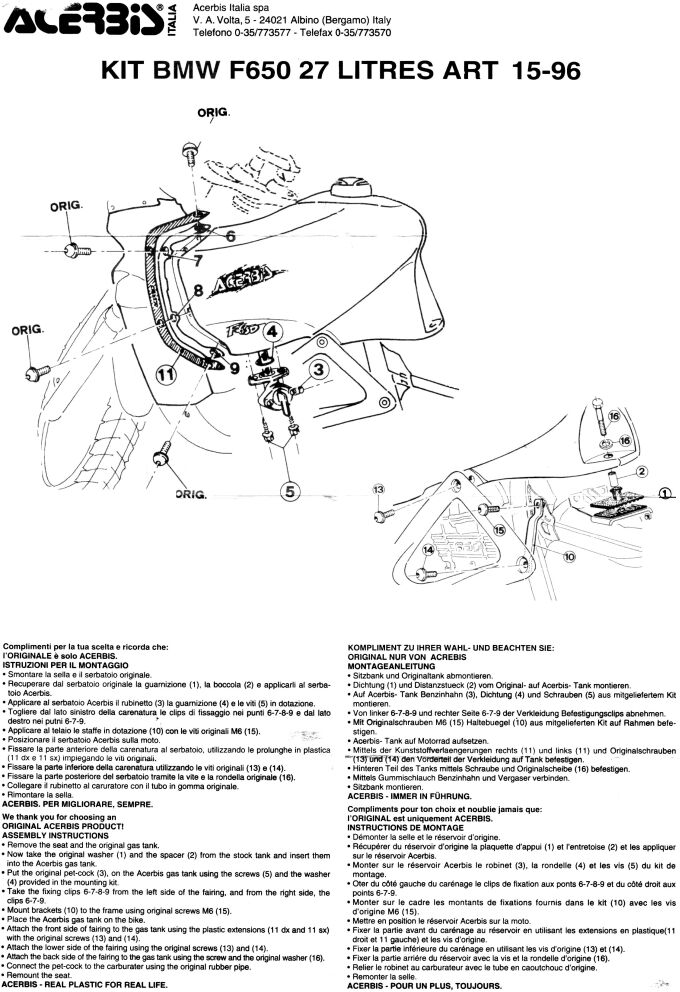
Photo from Touratech, Original installation instructions from Flash#412
Photo from Marty #436 Prints over 4 Sheets Prints over 1 Sheet.
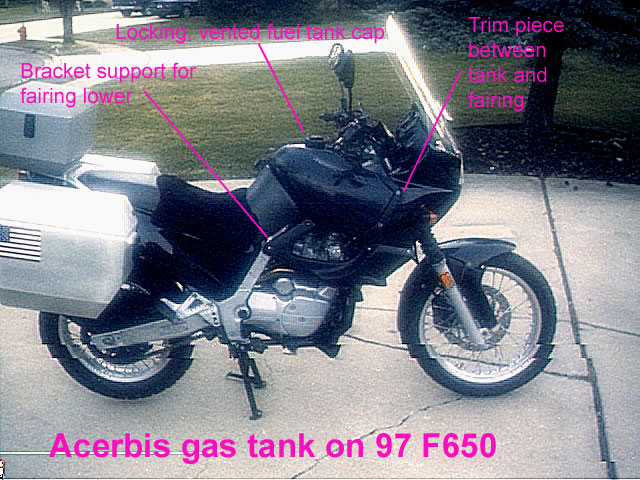
Note: Acerbis no longer appears to sell the Classic aftermarket tank. You may still be able to pick used/second hand Acerbis tanks from time to time. (thanks to Marty #436)
OK, so this time I was doing the part of the 24k service where I remove the petcock and clean the screen. I went on reserve 10 miles from home. When I got home, I leaned the bike REAL far over to the right and tried to slosh gas over there before draining the Acerbis tank on my '98 classic via the reserve position before removing the petcock. Screen didn't need cleaning, of course, thank you Mr. Murphy. Put it back together and sloshed about a pint of fuel in the tank to ride 0.8 miles to the gas station where I put 7.276 gallons in it. I am NOT (any) CRAZIER than I was the last time I said it holds 7.3 gallons). Flash #412
I have an Acerbis tank on my 97F650. Reserve worked fine the first few times I used it. After that, every time it switches to reserve it will not switch over. If I try and try, once it dies, and I use the choke, I can then get it to draw fuel and it generally works OK after that, but sometimes it does not and I have to tilt the bike to get more fuel from the right lobe and just use the regular petcock setting. When I fill up I can switch to the reserve setting and it runs fine so I know the reserve opening in the tank works fine and so does the petcock. I have drained the tank in case there was any water in it and that did nothing. I have opened the fuel cap in case the vent was not working, that sometimes seems to help. Kent
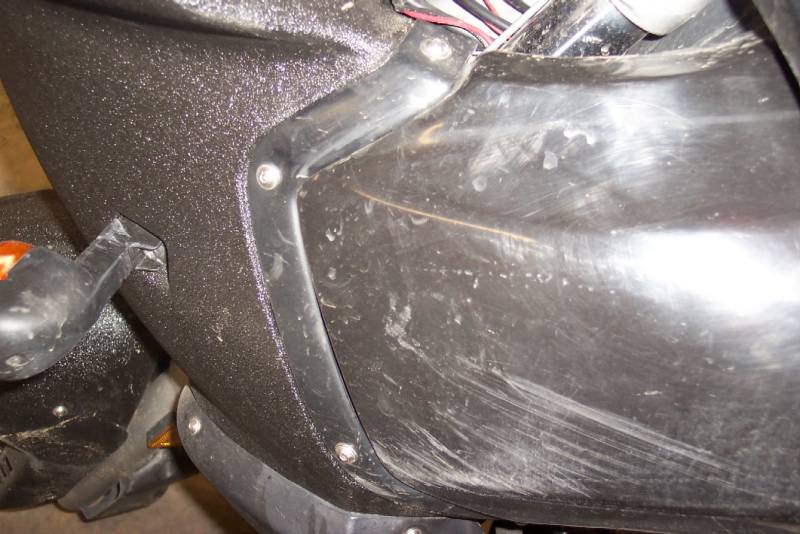
The thing bolts right on, more or less like the stock tank, with some very slight differences. For some reason they did a crappy job where the tank meets the fairing. Instead of making it fit right, they made these trim panels that ALMOST cover up the fact it doesn't fit. Frankly it is about a bodgy a job as you'll see in an aftermarket accessory. HOWEVER, by God it holds a LOT of fuel! And BMW sure could have learned something about petcocks from Acerbis, too. The tank fits '94-'00 carbed F650s. It doesn't reduce the number of screws at all. It is slightly harder to mount to the fairing that the stock tank due to the addition of a trim strip to cover up the poor fit. It is WORTH IT! lash #412 (CO) - 01-Jun-02
Alright for those of you who don't have a decoder ring. Here's some plans. The scan may have changed dimensions a little. I'm not sure how they will transfer to web with resolution and all, but I can email them if you need them. Also, maybe I can get some more precise mesurements somehow. But its best to use the template.
It's worked for me. The quality looks better than the photo, and you almost can't tell its not original, or so Pecos says. The plastic isn flexible and handling weather well. No UV problems, and I tested a piece of plastic in the sun 24/7 for past 4 weeks.
Images:
The story I got from Acerbis is that the volatile components of the fuel "breathe" (out) through the plastic tank. They DON'T breathe through any additional paint covering it (the tank color is molded into the plastic). As a result, they get trapped under your paint, forming bubbles in the paint (soon to peel). I tried to use double-sided tape to fasten the mounting hardware for an RKA tankbag setup. It unstuck itself within 24 hours. Roughed up the surface and used epoxy to fasten the Velcro, seems to be working so far. So words of warning are: live with black or white (a red one was once available, but it faded to pink over time and has been discontinued). If you have any tankbag type accessories, check that they will adjust to fit, as the Acerbis doesn't have a Faux cover and is slightly bigger than stock. Marty #436
I have an Acerbis tank that I haven't got around to installing yet, and it has a sticker that says (in 4 languages) that the plastic material is not to be painted. Whether it can or should be painted is another story, but the manufacturer seems fairly clear that they don't recommend it. James #523
One more thing about paint...These apparently are difficult to paint, from statements here previously. Finding a good primer coat that will adhere will be your biggest challenge and "if so found", paint will be no-brainer and easily done. I know of none right now (primers), but have never tried either. Maybe a good epoxy primer will work. Proceed at your risk, as the paint on plastic tanks is a challenge, at best. BMW did paint their plastic tanks on early GS1100's with some bad results and tank replacements with metal ones. This GS model BTW was the only BMW produced with outer shell plastic tank! My GS1100 plastic tank never had to be replaced with metal one, as it never failed, so the painting of plastic tanks IS possible with the right stuff! Randy748
The painting process apparently ruins the MTBE plastic type that Acerbis used. It's not safe to prime and apply the paint to the tank, just use as is. DavidHPark, #711
I did notice that it seemed to be related to the time I trimmed the gasket for the locking fuel cap. It leaked like crazy on a trip I was on every time I filled the tank. I remembered reading you have to trim the gasket some, so I did, and it worked great. It must have been a month later when I next went on reserve and that was the first time I noticed this coughing -hesitation, dying stuff. Could that have screwed up the venting? Kent #114
Flash #412, December '01
So the other day I was warming up my bike while checking the tire pressure and noticed coolant trickling down to the ground from the belly pan. Having changed my impeller only 6k ago, I figured that was NOT it, it wasn't. I could see dried coolant residue around the fan. Since I have a temp gauge, was in a hurry, hadn't ridden it in weeks, I rode the bike to work anyway. No problems on the trip, no leak at work. No problems on the trip home. No leak there, either.
Pulled tank off. Found the problem. I installed an Acerbis tank about two and a half tankfulls of gas ago. The Acerbis tank had apparently sat on the hose from the puke tank to the fitting on the radiator cap and "distressed" the hose to the point of failure. My puke tank puked in my driveway.
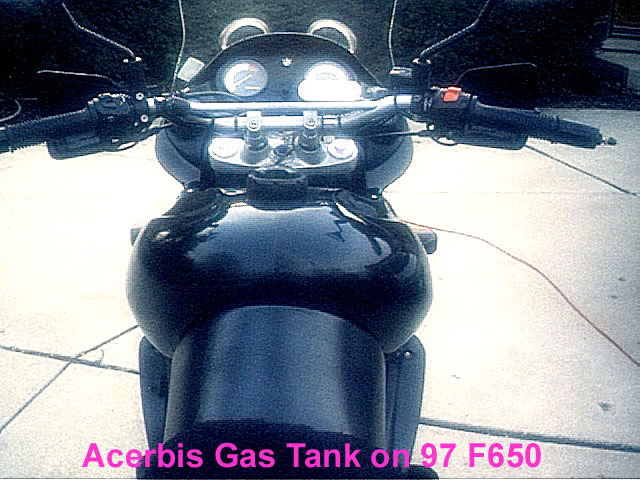
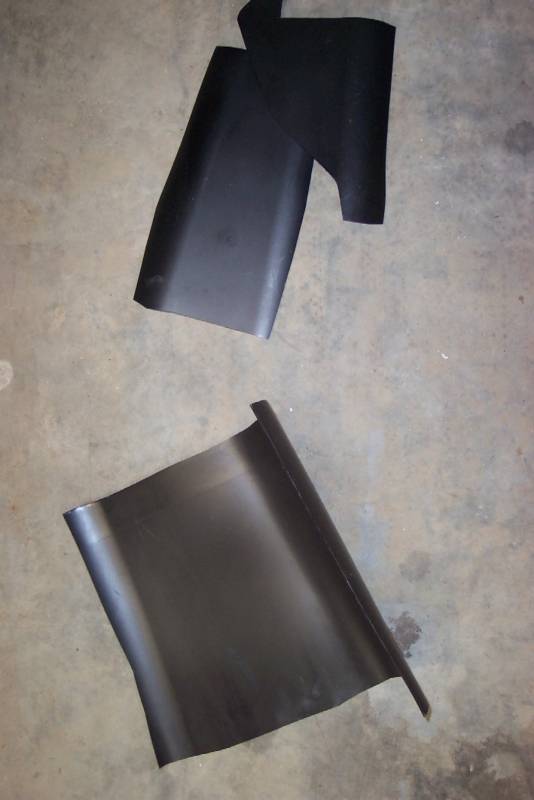
The stock tank is black plastic, no matter WHAT color your bike is. It lives under a plastic cover piece. The stock gas cap is DOWN in the tank, destroying capacity. The Acerbis has ALMOST identical external dimensions. But NO waste. The gas cap is on top. It all makes sense when you see one. The Acerbis sticks BACK about a half inch more than the stock. The Acerbis uses these black plastic strips between the tank and the fairing to cover the joint.
Marty #436-Chicago-97 F650F
Several months ago, I cross-threaded one of the tank-fairing bolts going into my Acerbis tank, stupidly overtightening it enough to "spin" the brass socket in the tank. Had to drill the head off the bolt so I could remove it and temporarily re-install the stock tank.
At the time I wrote this: "Well, some klutzy mechanic (myself) cross threaded one of the fairing/tank bolts into one of the the brass inserts of my Acerbis gas tank after my last 6K servicing. Tried to back it out, but the brass insert started spinning in the tank. Had to drill out/off the bolt head, and lift the fairing over the remaining stub in order to remove the tank (replaced with original tiny stock one). Tried roughing up the surface of the tank/insert and putting a layer of JB Weld over them to hold it in place...no luck. Looks like there MIGHT be enough space around the brass to maybe sneak a syringeful of 5-minute epoxy in between, but it might fill up the brass threads or glue the remaining piece of bolt in there permanently (assuming I could pump that high viscosity glue through a skinny syringe needle to start with). Looking for other alternatives...possibly filing off the protruding stud to a rounded tip and drilling a small hole crosswise for a cotter clip? Anybody else been there done that successfully? "
I finally managed to talk with the technical guy at Acerbis, to find out if (1) they could fix it [no] (2) if I could obtain a non-stripped brass socket [no], or (3) if there was an approved method they could recommend to fix it [no, for liability reasons, it IS a fuel tank]. Not a whole lot of support there [at least he DID tell me that the brass socket fits into a depression in the tank, so it won't be spewing gas out the stripped socket every time I stop suddenly].
I managed to drill two very tiny holes (<1/16" diameter) into the brass socket, one on each side of the remaining bolt piece, with the intention of using a "hog ring plier" or rig a tiny "pin wrench" to hold the insert while I unscrewed the bolt piece (so it wouldn't just spin the socket). Fortunately, one of the two holes drifted slightly outside of the brass socket, and wedged the brass socket enough to remove the bolt piece. Best I can tell, the brass insert is a cup (closed bottom). My thoughts are to pump some slow cure (90-minute) 2-part epoxy down each hole using a syringe/needle, the 90-minutes allowing enough time for it to flow into the tiny gap between tank and brass insert (I hope). I'm hoping it's not so thick that it won't flow (syringe needle or gap). Also, considering fabricating a small pin (brass) to slide down each hole.
Next step is to fabricate a pair of bolts to go in the topmost gas tank sockets (closest to oil filler). I'm envisioning cutting off the heads, drilling a hole through the bolt, rounding/smoothing off the visible part and screwing it the proper depth into the tank. Drop the fairing over the stubs, drop a washer over, then put a spring clip through the hole to keep it together (picture the old hood retainers that people used to put on "street rods" in the 70s).
Moral of the story...be SURE that those screws are not cross-threaded, and DON'T force it if the screw seems "tight". FWIW, the BMW tank has the same sort of brass inserts.
Blockage in the tank? How is that possible?
Now to my buddy's problem with the F650... The '99 mid-miler has a few growing pains and I think I can help with most of the issues. This one is almost embarrassing to state but here goes. I cannot get the fuel tank cap off.... It just clicks and spins, we have the key, he sprayed some graphite into the key cylinder, nothing... Any thoughts here...? Were there any inherent problems with the caps over the years..? radguzzi
Anybody know the M size and length of the fastners that secure the gas tank on a classic? There the same size as the ones that hold on the front fender. The same ones that vibrated out on both sides four times now. The same ones that vibrated out, so that my fender is now a melted piece o' crap? Imokurok