F650 Aftermarket Pelican Luggage FAQ
Please read the Disclaimer
before attempting any work in this FAQ.
Last Updatedd: 11 June 2007, Winter #1935
For other related FAQs:
Introduction
One of the more popular aftermarket modifications to the F650 model bikes is the addition of Pelicans - Pelican cases that is. There are many aftermarket commercial options for luggage, however the "Do It Yourself" luggage is becoming popular. Most often this includes the use of a commercial mounting bracket, and Pelican cases. In fact one of the commercial options (Caribou) uses Pelican cases. These sorts of cases are designed to be tough - and given the number of times we all seem to drop our bikes, the luggage needs to be tough.
This FAQ contains the "Do It Yourself" luggage for the F650. It contains examples of what others have done installing their own custom cases. However it is up to you how you install your own cases. the process is quite simple:
- Work out which mounting brackets to use (or build them)
- Work out which cases you will use
- Mount them however you please
This FAQ also contains other custom luggage installation suggestions and ideas. Most of all have fun building your own luggage!
Materials
Pelican Case Choice
Why use a Pelican case?
- They are very tough cases - you have seen the pictures of the car driving over the cases right?
- They are for the most part waterproof (until we put holes in them)
- You can get new cases from most camera stores (or online if you want to pay less)
- They are lighter than most commercial panniers
- The satisfaction of making something yourself?
Can I use some other form of case?
- Yes you can - the same process applies. Other examples include ammunition boxes used by the military (remove ammunition before installation) or various other manufacturers of camera cases.
What are the downsides of these cases?
- Most cases are side opening
- They do not come with a funky locking mechanism - you have to use either a padlock or build your own locking mechanism
What size case should I use?
- Take a look through the pictures in this FAQ - different people have different preferences.
- Remember - the more space you add, the more excess cr*p you can and will take. This adds more weight.
- Most people opt for a Pelican 1400 or 1500 as a top box.
- Most people opt for a Pelican 1520 or larger for panniers.
- Visit any good camera store and they should have some on display. As a general guide, see the table below for volumes.
- Note: The top loader cases may be difficult to mount
| Pelican Case
| Volume (L)
| Weight (kg)
|
|---|
| 1400 | 9.3 | 2.5
|
| 1430 (top loader) | 14.9 | ?
|
| 1440 (top loader) | 33.5 | ?
|
| 1450 | 15.4 | 3.4
|
| 1500 | 19.5 | 3.65
|
| 1520 | 25.4 | 3.95
|
| 1550 | 34.5 | 5.9
|
Where can I find more information / purchase online?
Mounting Brackets
What mounting brackets can I use?
Can I use different mounting brackets for the topbox and panniers?
Will I need to modify my mounting brackets?
Can I build my own mounting brackets?
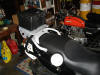
Pelican Top Boxes
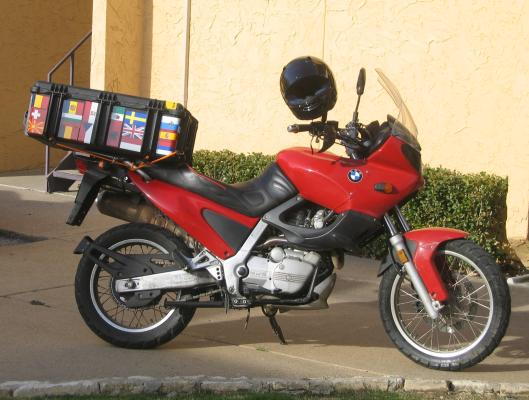
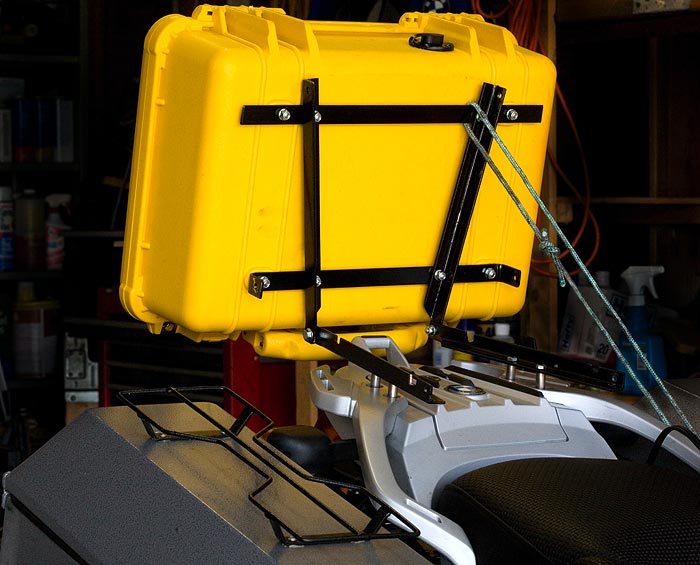
Classic: WillK's Topbox
GS: OldDave's 1500 Topbox
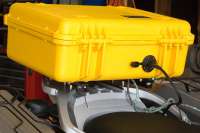
Materials
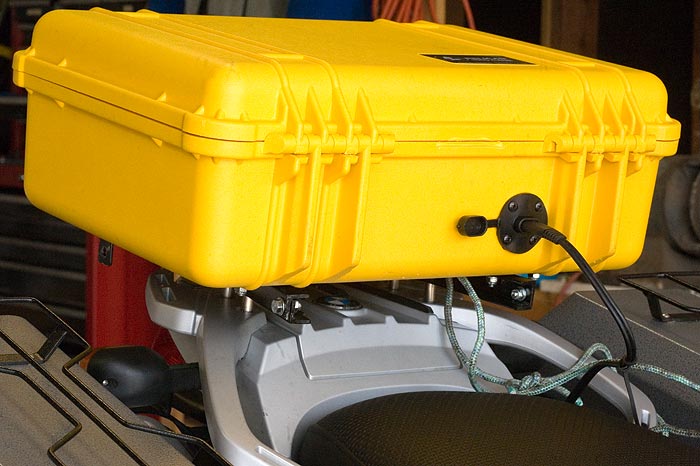
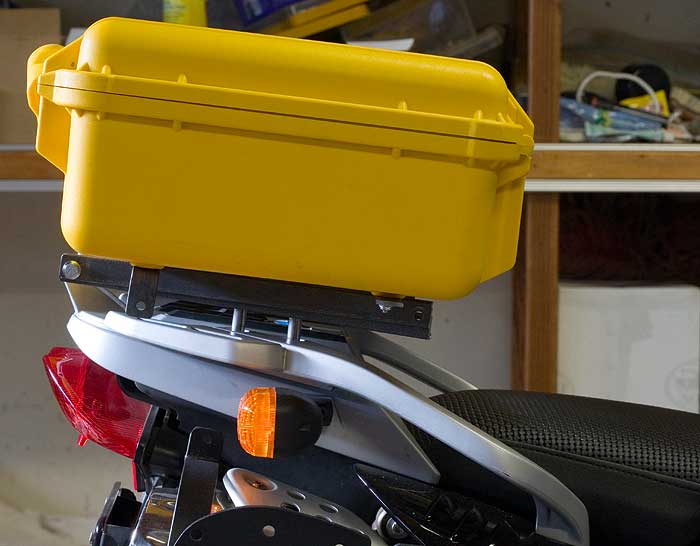
- Pelican case model 1500 - Yellow should be cooler than black for electronics and the extra visibility is a feature
- 48 inch 1/2 steel angle iron
- 48 inch 1/2 flat stock
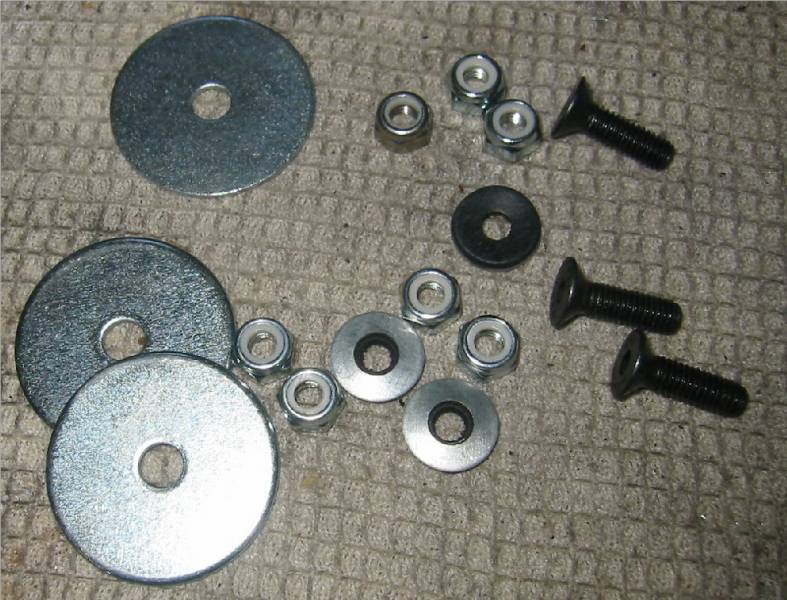
- Many 6mm bolts, washers and elastic stop nuts
Installation
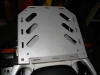
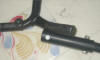
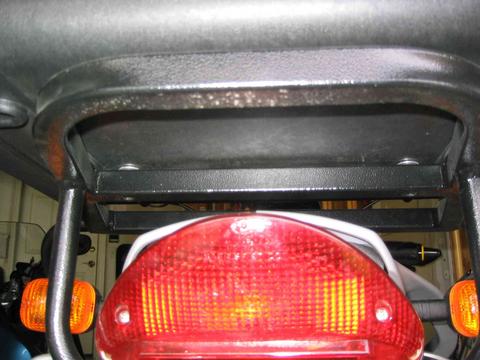
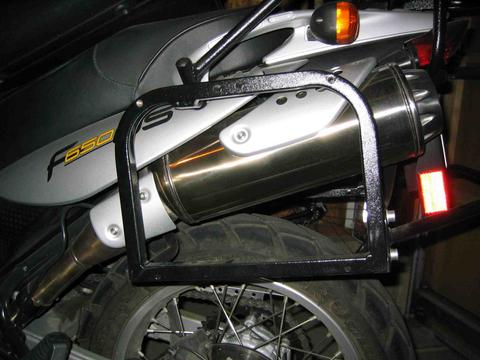
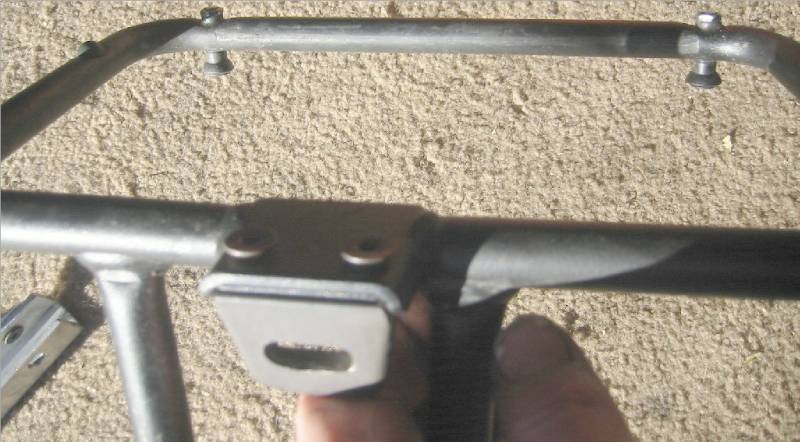
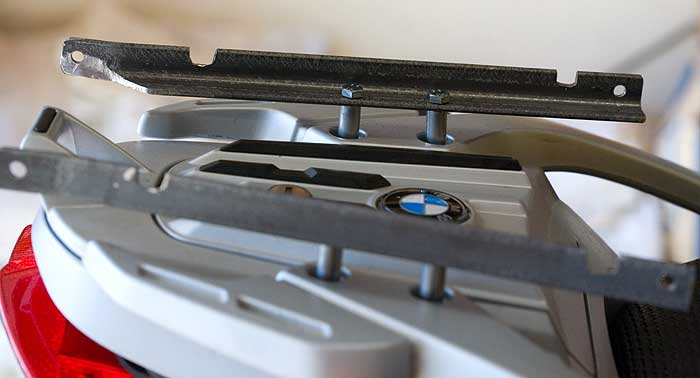
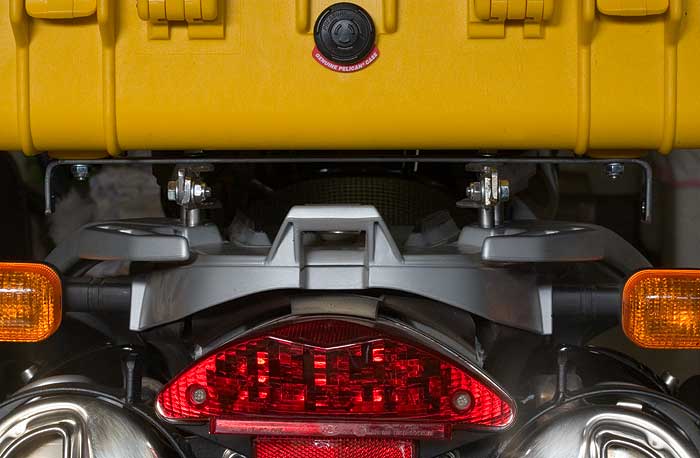
- Mount two brackets on the bike like this
- Measue and mount the brackets on the pelican case
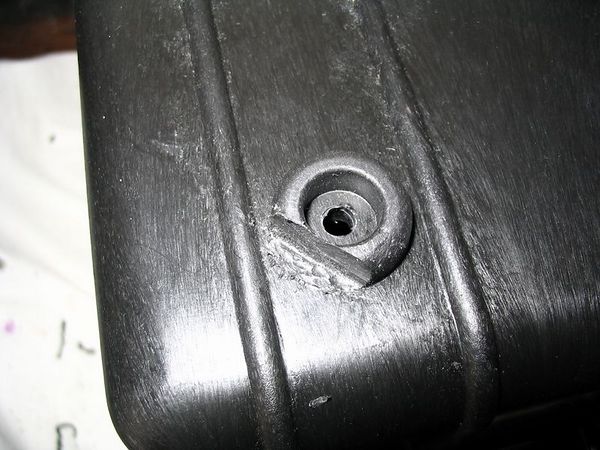
- Make sure you do not stuff it up like this extra hole
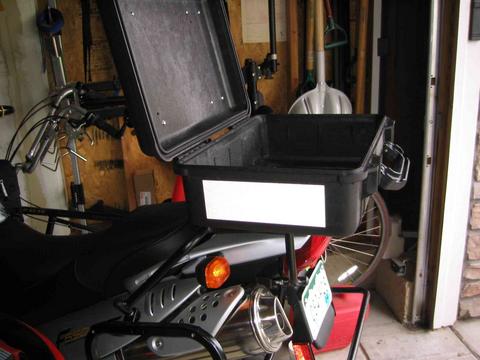
- Install the two bolts allowing the top box to be flipped up
- Side view of the box
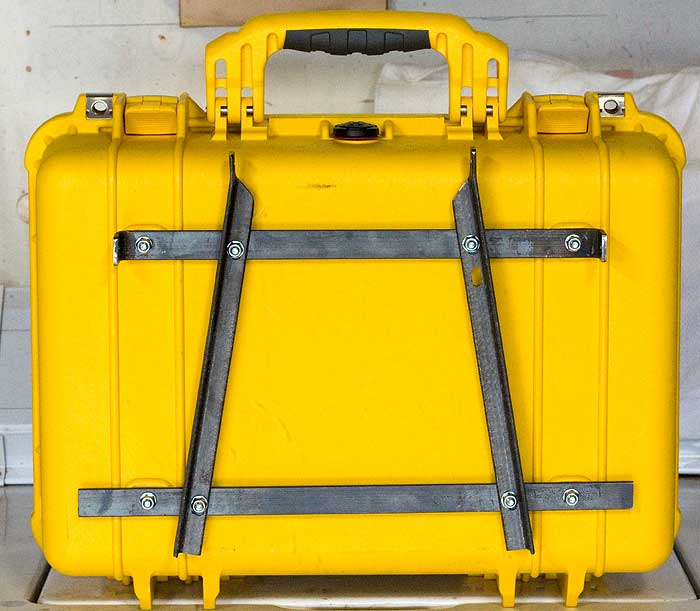
- Install some extra supports as shown here and install the bolts at the front.
- Your done!
Features
- You can wire the box... Also wired the box. The wires are not the most out of the way, but I needed a flat accessible surface for the Powerlet bulkhead connector. When the laptop it charging there will usually be a dry bag in front of the box that will cover the wires.
- Remove a few bolts and you can get access to the tail compartment. Inconvenient, but it takes just a couple of minutes and should not have to be done too often.
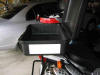
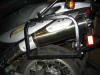
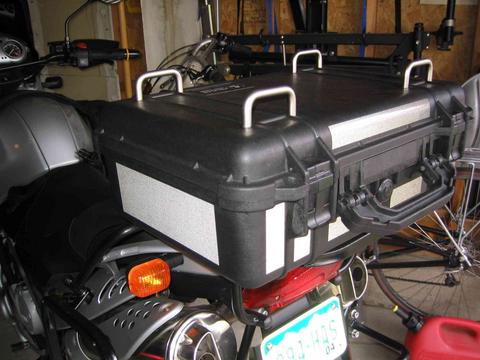
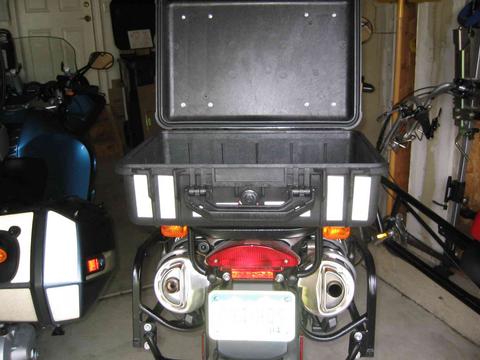
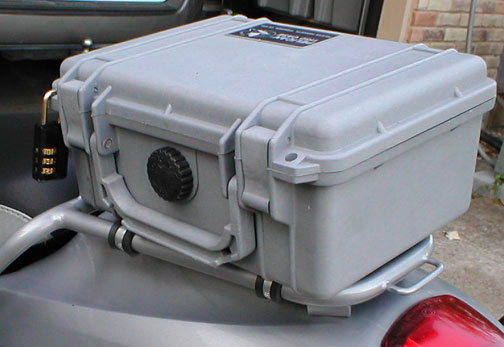
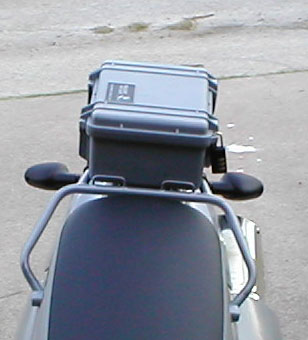
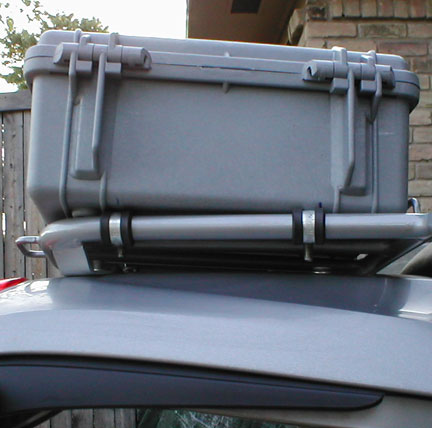
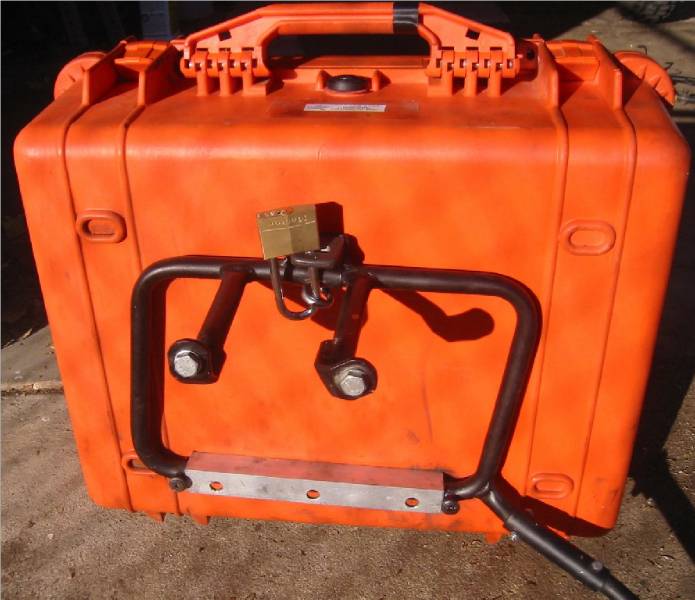
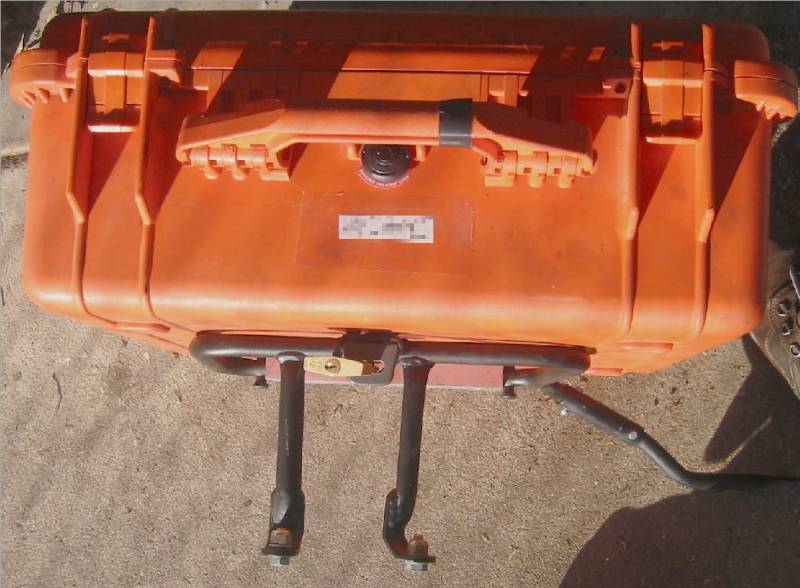
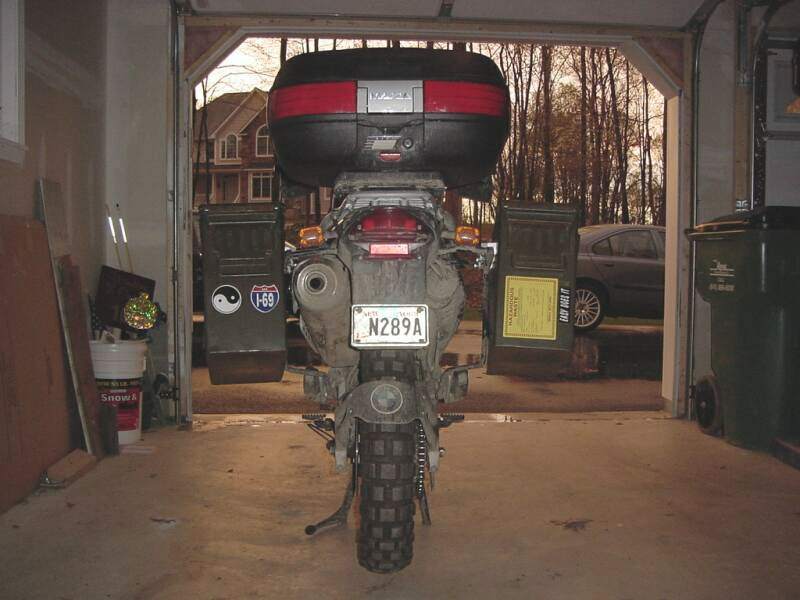
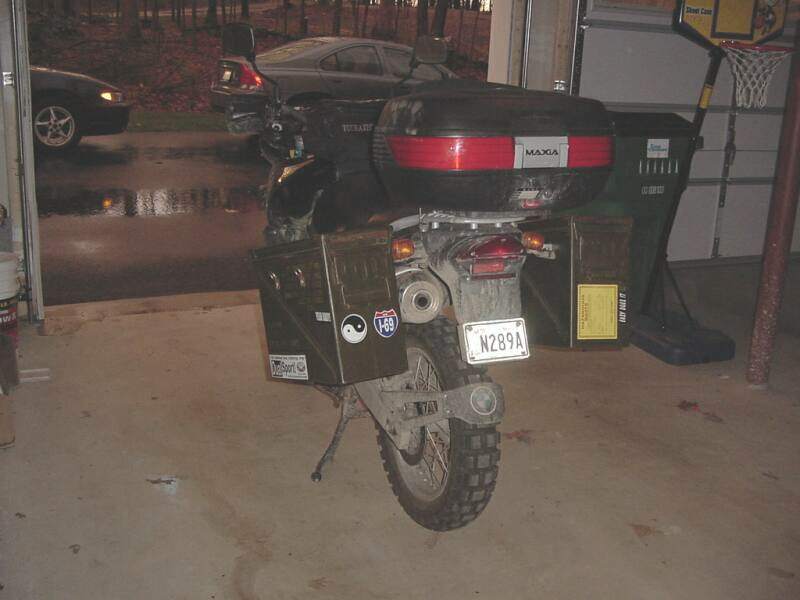
GS: CessPool's 1500 Topbox
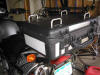 The case was mounted on a Happy Trails tail rack. In case you aren't familiar with the HT rack, it is build like a brick sh#t house... err, I mean it's really solid. I got the Pelican case from http://www.all-pelican-cases-4-less.com/ The case looks a lot larger in the pictures than it does in person.
- As you can see from the photos, I've got some reflective adhesive strips on the box back and sides. I just had some spare stuff laying around and decided to use the pieces available to make the case more visible at night. Turns out it worked fine.
 The mounting hardware consists of a couple of metric bolts with press fit knobs from the local hardware store that match the embedded threaded inserts on the HT tail rack. There is also a wide washer underneath the knobs between the knob and case. I really crank these knobs down when the top case is mounted and so far it hasn't come loose while riding. I like the option of being able to remove the case when I need to... but come to think of it, I haven't had the need to yet.
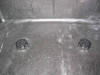
 This picture shows a couple of rubber-backed washers that take up the space between the rack and the case. The rubber backing on the washers has a two-fold purpose. It holds the bolts captive in place on the case after removing it and takes up the small space between the case bottom and the rack. The case has some small extrusions on the bottom that hold the case up off the rack by about 1/16".
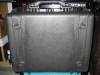
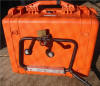
Right side view of case with lid open.
| 
Left side view of case with lid open.
|
Rear view of case with lid open.
| 
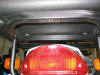
View from front with case lid closed.
|
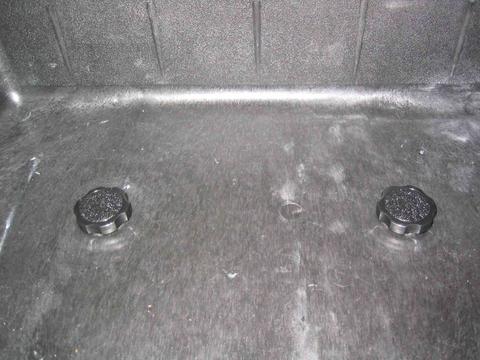
- Notice the tie-down loops on the top of the case. I went to the local hardware store and got the most heavy-duty drawer pulls I could find, and mounted them with a washer on both the outside and inside of the case. I also used blue Loctite to hold the screws in place, so they wouldn't loosen while riding.
From Ike #647: I have used similar cases, and Pelicans, for many years and have two suggestions:
- Put some of that reflective tape inside of the lid in case you are stopped at night with the lid open/up.
- Stick a piece of wide masking tape inside of the lid so that oil changes, etc. can be easily recorded on it. I also record on the tape certain telephone numbers inside of my bags and usually keep a spare key there also.
|
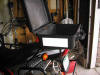
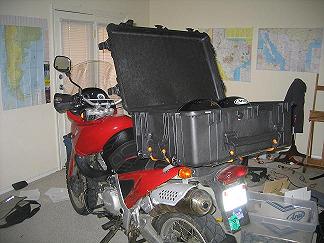
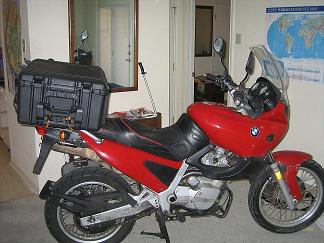
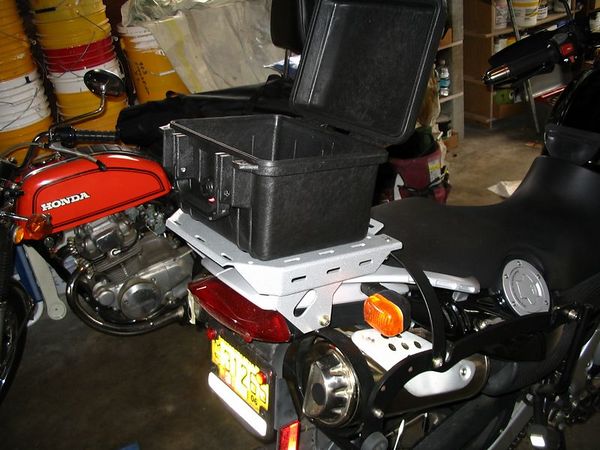
GS: Motoplanner's 1300 Topbox
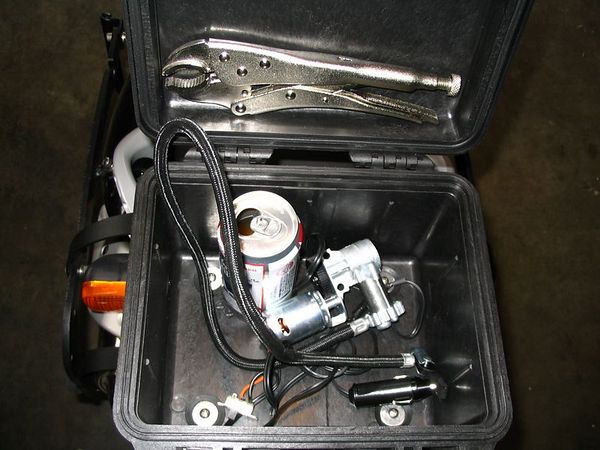
- I wanted something to just carry some essentials (mainly tools, air compressor) for off-road where hard side cases would be likely scraped off/destroyed. Ordered a Pelican 1300 for $35. Didn't want anything too big, and there was a substantial price jump beyond this size. For long distance/camping I'll mount the 20" top plate and side bags to the Jesse mounts. Went to Ace and got some stainless hardware, bolts, Nylocks, fender washers and neoprene washers for vibration damping and waterproofing (I'm going to take it on and off) -$5.00 (got a bunch of extras too).
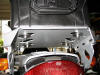
 Saw that the "feet" of the Pelican about perfectly mated/recessed into the Jesse rear rack slots (one could just grind these off and mount it any old ways).
 The modified feet set right into those slots and it doesn't move 1/64" any which way but up (before bolting down). I plan on removing the handle soon, as it's just additional weight/shrapnel. And what do people do to a handle? Yerk on it as hard as they can, is what.
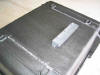
Four feet/posts angle-cut to mate with angled slots.
| 
Mounted view from below.
|
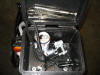
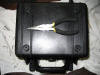
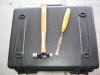
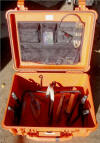
The bare essentials: air compressor, beer and big Vise-Grip (for scale).
|
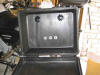
View 1
| 
View 2
|
- I'll probably add some reflectors and such. Anyway, that’s how I spent $40. That's a Jesse rear rack. Jesse offers top boxes that are quite heavy and expensive. I bought the big plate (bolts on to the top of the rear rack) to strap my kitchen sink to. To have a Jesse rear rack you have to have Jesse side bag mounts too. $. If a guy had a Happy Trails or some such rear rack (a more stand-alone system), it'd be a simple deal (with the right size Pelican) to bolt one on.
GS: Misc Topbox Images
Anon - Pelican cases on a KTM
Sideways mounted topbox on a single spark GS
Pelican Cases as Panniers and Removable Top Box from Greg (CessPool)
Pelican Panniers
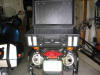
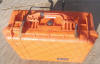
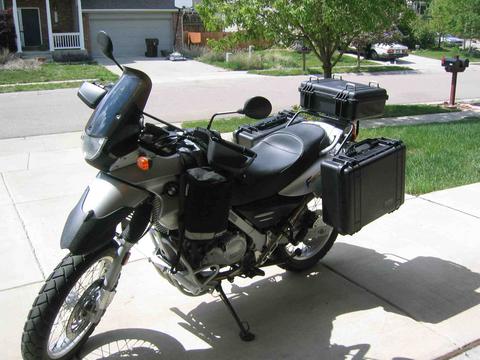
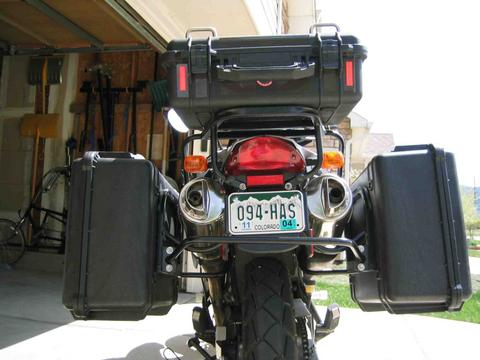
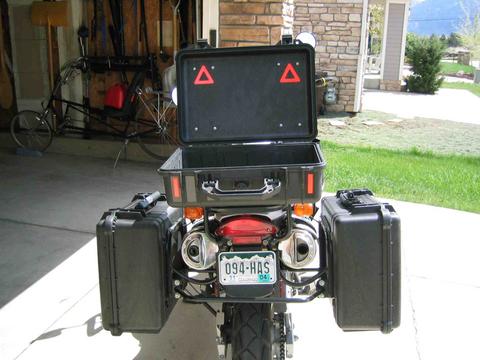
GS: CessPool's 1550 Panniers
- I mounted a set of Pelican 1550 cases on my F60GS as a lower-cost alternative to aluminum panniers. As with the case for the Top Box above, I acquired them from the online dealer, All-Pelican-Cases-4-Less.com. The cost for the pair of cases was about $200 and that includes the shipping charges.
 The cases are mounted on a Happy Trails side rack, which is one solid piece of equipment. I also used the Happy Trails pannier mounting kit, which consists of a set of "L" brackets fashioned from some sort of synthetic material, as well as all the hardware necessary to mount the brackets and a pair of large knurled knobs which allow the cases to be easily removed from the rack. The width of the mounted cases is 38" from edge to edge. I tried weighing the cases on my bathroom scale, but it's one of those digital ones and it failed to trigger. According to the web site where I ordered the cases, they're about 13-1/2 lbs each.
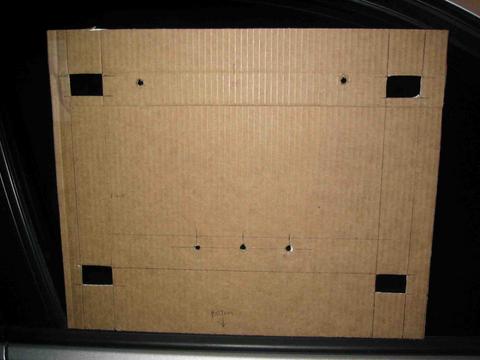
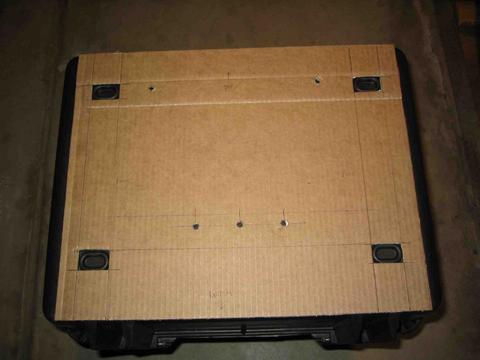
- I constructed a cardboard template to fit the back side of the Pelican case and used it to locate all of the mounting holes to be drilled on the case.
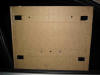
Cardboard template.
| 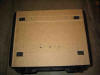
Case with cardboard template.
|
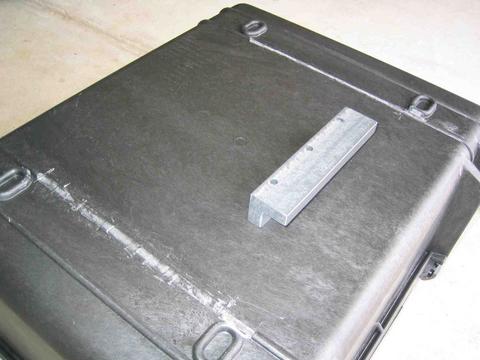
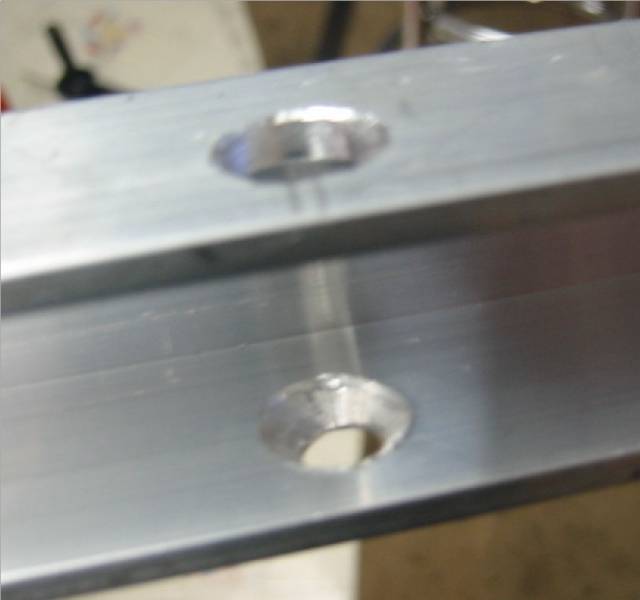
- Note the extrusions which run vertically up & down the case. When the case is mounted on the rack, these extrusions hold the case away from the rack and prevent it from sitting flush. Rather than put spacers between the "L" brackets and the case, I elected to remove the extrusions.
Back side of the Pelican case before modifications.
| 
Back side of the case with the extrusions partially removed.
|
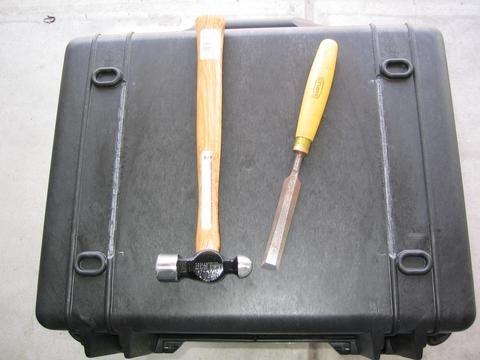
- Yeah, I know, I shouldn't use a wood chisel with a ball peen hammer and I should be ashamed of having such rusty chisels...
Case back with the bottom "L" bracket mounted and the extrusion removal completed.
|
- I used blue Loctite on the bracket mounting screws so they wouldn't vibrate loose under use.
Pelican case interior detail when mounted on the bike.
|

Rear view from below with cases mounted.
| 
Rear view from above with cases mounted.
|
- The rear views of the completed installation show how the cases are mounted flush with the side rack and how wide the setup is while on the bike.
- I've got a few more things to do before I'll consider the installation complete. I'd like to mount some footman loops on the tops of the cases so I can lash luggage on the top of the racks. I need to put some black reflective tape on the front, side and rear portions of the cases. This reflective tape is almost invisible during the day but makes you really stand out at night. Thanks for the idea from inmate member Ike in Georgia. I'll also be putting an 8x11 sheet of this reflective stuff on the inside lid of the top case, so that when I'm stopped by the side of the road with the top case open, I'll even be able to be seen by the blind... I also need to install a piece of wire or rope connecting the lid to the case so when the case is opened the lid doesn't immediately fall to the ground and spill the contents of the case.
- So far I like the whole setup of using Pelican cases as panniers. They're inexpensive, virtually indestructible when you drop the bike, and very dust and waterproof. On the downside, they're a little heavier (I think) than aluminum panniers and open from the side rather than the top. I'll be using the h*ll out of them this summer...
- I got the Pelican locks as well and they work great. I was going to get some locks at our local hardware store but the Pelican locks were cheaper than the equivalent locks I found locally.
- I also considered the 1520 cases but wanted the extra room of the larger cases for a trip to Alaska. The 1520's would work and look great and provide more clearance too.
- I took out the bike and rode it hard in the Colorado mountains and didn't touch the bags down once! I did reduce the size of the sidestand though. I also had the bike up to 100mph on the interstate and didn't notice the bags at all.
Pelican Cases on Moto-Sport Pannier Brackets for F650GS
- I have installed the Moto-Sport pannier mounting brackets and pucks and Pelican 1550's and I must say, I am pleased with the finished appearance. (Pics in The GS Aftermarket Luggage FAQ.) By the way, the whole set-up was $373, not bad for ~4000 sq. in.
- I noticed that the brackets are wider than the flat area of the bottom of the case, and originally I was going to stand-off the pucks and bottom bracket by ~1/4 in. I saw where CessPool removed the extrusions, and I did not want to modify the cases in that manner. But then I decided that it was only necessary to shave off 1" of the extrusion in four places on each case to accommodate the brackets. This was preferable to cutting billet aluminum to stand off the hardware, which wouldn't have worked due to the length of the bosses on the pucks anyway. It also proved to be more difficult than I thought to position the pucks due to my own competence level and in part to the position of the boss; it is offset at a 45 degree angle with respect to the tab, rather than at 90 or 180 degrees. I am concerned that the pucks lay on or near the muffler heat shield. (I know, that's what they're for.) I don't know if the cases will drag. The lowest point is about 19 or 20 in. off the deck.
- One thing that concerns me is that the Moto-Sport brackets sound like they have some residual material from cutting and welding the supports (rattle, rattle, rattle) inside the tubes.
- Greg #1245 commented: On the Yukon's and other M-S panniers, the pucks are rotated 45° so that they fit exactly in the corners of the bracket (visualize having the pucks as far apart as possible and rotating them 45° clockwise and counter clockwise). This prevents the panniers from moving forward/backward without relying on really tightening down on the pucks.
- cb_abq replied: That makes sense now that I read it. I put them all the way to the edges, I just didn't turn them into the corners, but I should have. I left some slop to the inside so I could a) add some rubber strips to the bottom brackets and b) if I erred the other way they wouldn't go on.
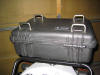
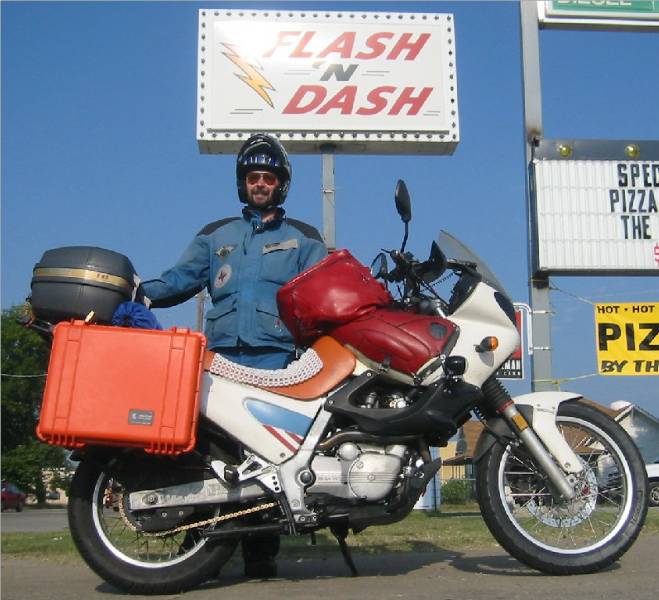
Classic: Flash's 1550 panniers
Introduction
Givi makes some great products. I have a set of E360 saddlebags and an E45 top box. I’m VERY happy with them. They have one drawback… because of the way the single lock works, you cannot take them on an airplane. If you lock them, the TSA will destroy the latch to open them. If you don’t lock them, there is nothing to hold them closed.
I wanted a set of saddlebags that I could take on an airplane. These bags needed to latch securely without locks. Yet I needed to be able to lock them to the bike and lock them closed when they were on the bike. From the variety of plastic cases out there, I selected Pelican Cases.
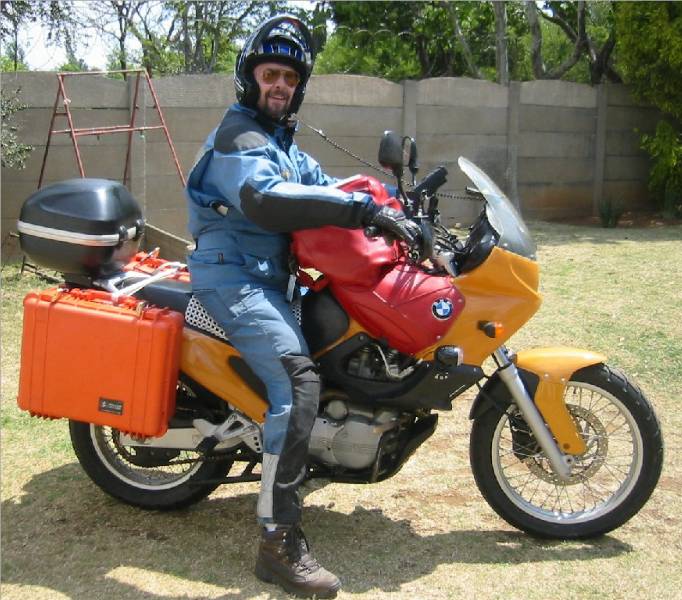
Pelican Cases cost significantly less than bags from motorcycle companies and are significantly sturdier. Pelican Cases come with an unconditional lifetime warranty, with the exception of sharks, bears and children under five. That’s what they write. What Pelican will tell you on the phone if you ask, is that drilling holes in them voids the warranty. I figure that since they cost less than $100 each, I can buy three before I have bought one bag from BMW. BMW bags are made of crap plastic and will explode like a firecracker if you drop the bike on one of them. Pelican Cases are STRONG.
Installation
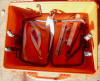
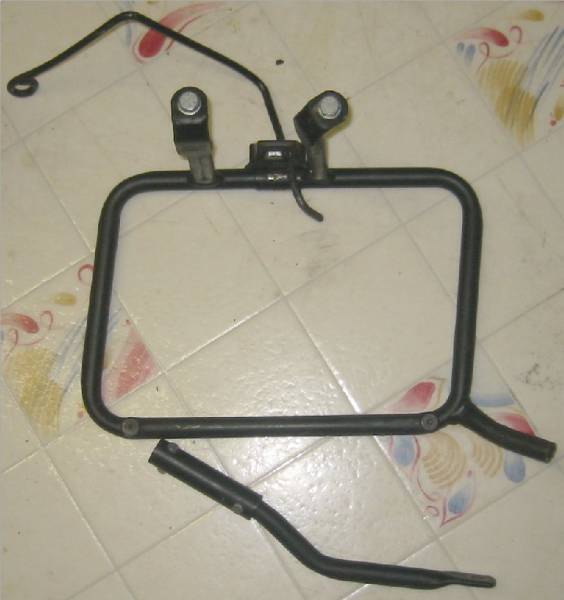
- For a variety of reasons, I picked the 1550. (Click on thumbnails to open large pictures in new windows.) When mounted as saddlebags, they open from the side. Since have a tank bag and a top case, I don’t open my bags very often when they are attached to the bike. So I prefer these. The 1650 has more volume with very little addition to the dimensions. I think if I was going to do it again, I’d get the 1650’s. I picked the International Orange color for several reasons. First, they are EXTREMELY visible. This might keep someone in a car from broadsiding me. (Probably not.) Second, they are EXTREMELY visible; this makes them unattractive to thieves. “Did you see a guy go by here with a black suitcase?” just doesn’t cut it. Finally, I ride a BMW F650, the only BMW motorcycle with a chain drive. The international club for the F650 is called The Chain Gang. Members are called “inmates.” And the club’s color is jailhouse orange. I bought a pair of Pelican 1550 cases and a set of Givi bag loops. I think the whole mess cost me right at $300 new.
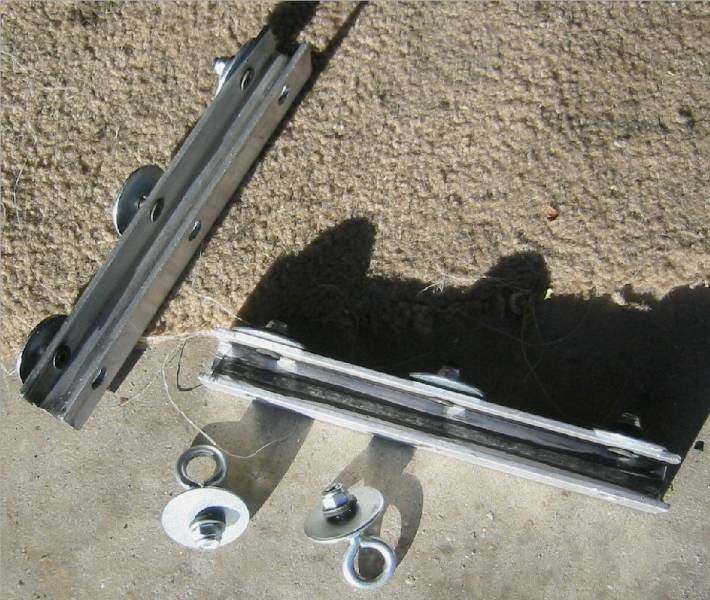
- Then I bought a few eyebolts and some washers. I also got a length of appropriately-sized C-channel aluminum. I cut the C-channel so that the pieces would fit in the space between the “tits” that the regular Givi bags use to attach to the loops. Then I drilled three holes in each piece, straight through the opposite sides of the “C”. I drilled one set of holes over-size so that I could get a bit through it to countersink the inside of the opposite holes. My plan was to use 6 mm flat head cap screws to attach the rails to the bags. On the inside of the bags, for each bolt, I used a large fender washer followed by a quarter inch rubber-backed washer, followed by a NyLoc (nylon-insert locking) nut. This would not only attach the rail to the bag, but prevent any leaking. Plus, the outer surface of NyLoc nuts is rounded, which theory says will be less “offensive” to whatever rubs up against it inside the bag as we rattle down the highway.
- I also bought some short eyebolts. My original idea was to attach two eyebolts to each bag so that one would be above the top rail of the loop and the other below the top rail. I figured that a long-shackle padlock would catch both bolts and secure the bag to the bike.
 After some eyeballing and allowing as how, I realized that I needed to remove some hardware from the bag loops. Since I didn’t want to lose the hardware, I just turned it around backwards. When moving the “tits” on the bottom rail to the other side, I used screws that were longer than the originals. After tapping the through holes, I re-installed the tits on the other side using longer bolts with jam nuts.
 Similarly, the latch piece required some different bolts. I used flat head cap screws for their lower profile. But I realized that by milling a slot in each stock Givi latch piece, I could mount a bag to the bike and lock it with just one padlock. This involved bending some special rods. My fallback plan, if that didn’t work out, was to have three locks per bag, one for each latch and one to secure it to the bike.
 After getting the loops worked out, it was time to decide how the bags should be positioned. I held them parallel to the loops and they seemed canted too far forward. I held them parallel to the ground and they seemed too flat against the lines of the bike. So in the end, I split the difference. This meant that the two bags would not be strictly interchangeable. So I put a piece of red electrical tape on one handle and a piece of black on the other. It’s just as well. When you are in a hotel and open one bag, if they’re not marked, Murphy says you’re going to open the wrong one first. I also stuck a return mailing label on each bag and covered it with clear packing tape, just in case I lost it.
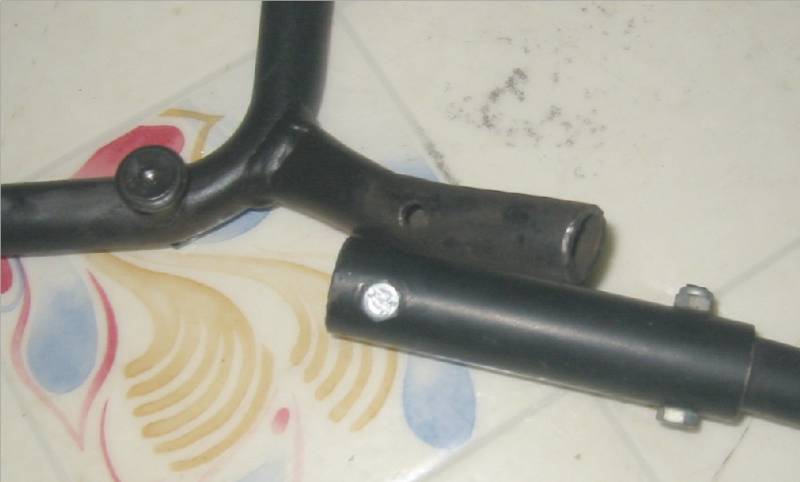
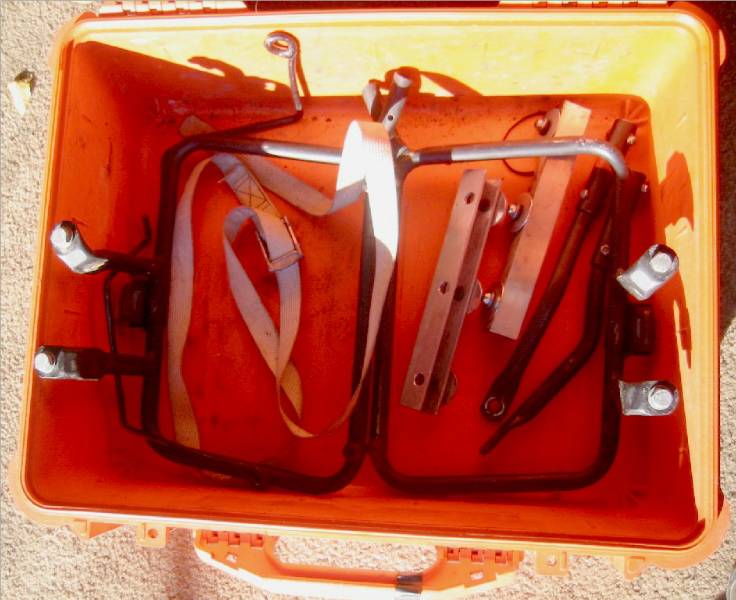
 Another part of putting the bags on the airplane is carrying the mounting loops. I accomplished this by cutting off the lower leg that shares the buddy peg bolt. Then, both loops and all of the mounting hardware would easily fit inside one bag. A piece of pipe, cross-drilled for 4 mm bolts, made reattaching the amputated legs trivial. While the reattached legs were a bit wobbly before mounting the loops to the bike, once mounted, they were solid as a rock. One other item worth mentioning is the tie down inside the bag in the photo.
 I picked up some of the tie downs that BMW uses to secure new bikes inside shipping crates for free from my local dealer. Rather than make some sort of cross-brace at the bottom rear of the bag loops, I simply loop the tie down across the seat and through the handles of the cases. They’re held very securely to the bike and the strap takes some of the “bending weight” off the bag loops. All of the attachment hardware easily fits in one bag with plenty of room left over for other goodies.
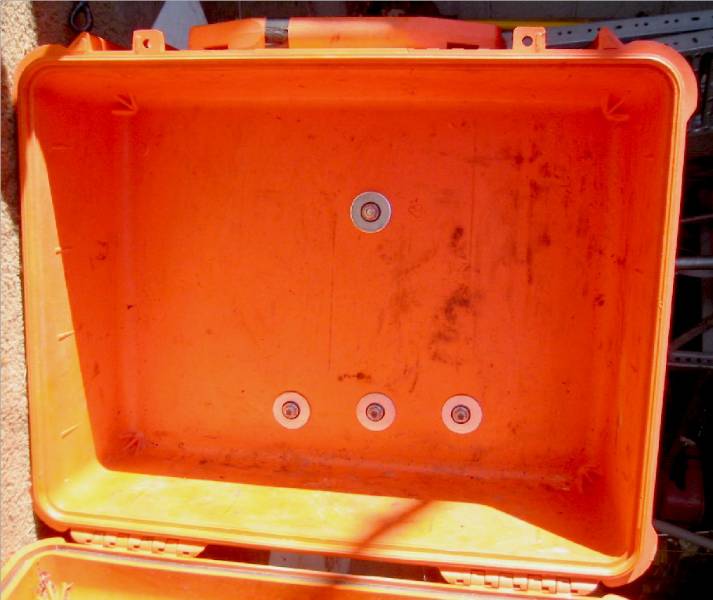
 Pelican sells accessories for their cases. They don’t sell anything to go inside the lid of the 1550, so I bought a pair of inserts for the 1400 series. They attach with sticky-back Velcro, so they work just fine. The one pictured is the “photo” insert. I also got a “document” insert for the other bag. These are not very expensive and certainly add utility. (What’s pictured is not what I had there while I was actually using the bag.)

Here is a photo from the back, of the bag attached
to the loop using a “special rod” that I made.
| 
Here is a photo from the outside, of the bag attached
to the loop using a “special rod” that I made.
|
Here is a photo from the back, of the bag attached
to the loop using a long-shackle padlock. I bought six
keyed alike padlocks at Home Depot for about US$20.
| 
Here is a photo from the top, of the bag attached
to the loop using a long-shackle padlock.
|

The first trip I took with the bags was a weekend shakedown
cruise of about 2000 miles round trip from Colorado to Arkansas
and back. They performed flawlessly.
|
- The next trip I took with the bags was 20,000 miles round trip on Lufthansa (Denver to Frankfurt to Johannesburg and back) plus about 4500 miles on the ground in Southern Africa. Again, the system performed flawlessly.

Here’s a shot of the bags mounted on the loaner
bike I borrowed in Johannesburg as I’m getting
ready to head out for some adventure.
| 
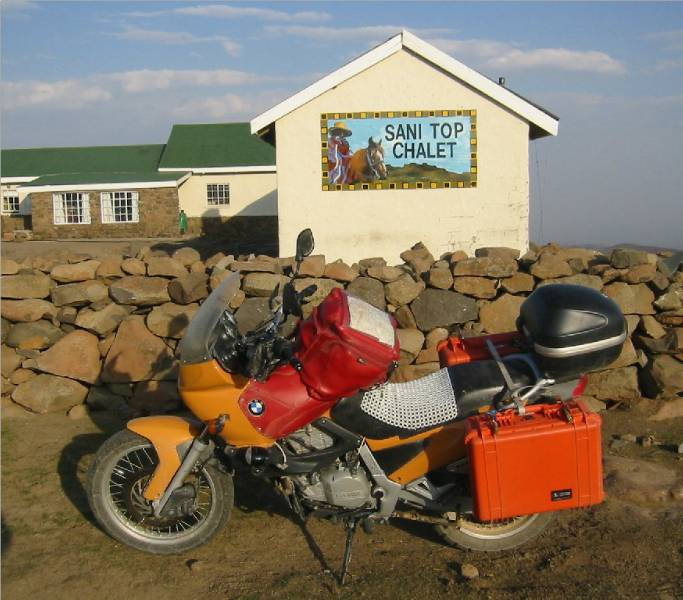
Here’s a shot of the bags, still on the bike almost 4000 miles into
my African Adventure, outside of the highest pub on the continent,
in Sani Top, Lesotho. (Sani Pass between South Africa
and Lesotho is without a doubt the worst excuse for a
road I have ever encountered. Woo HOO!)
|
Other Panniers
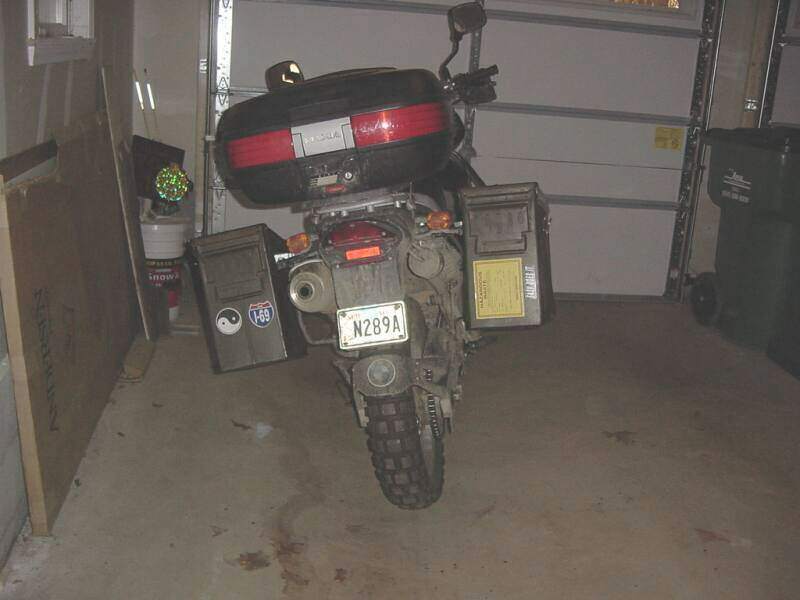
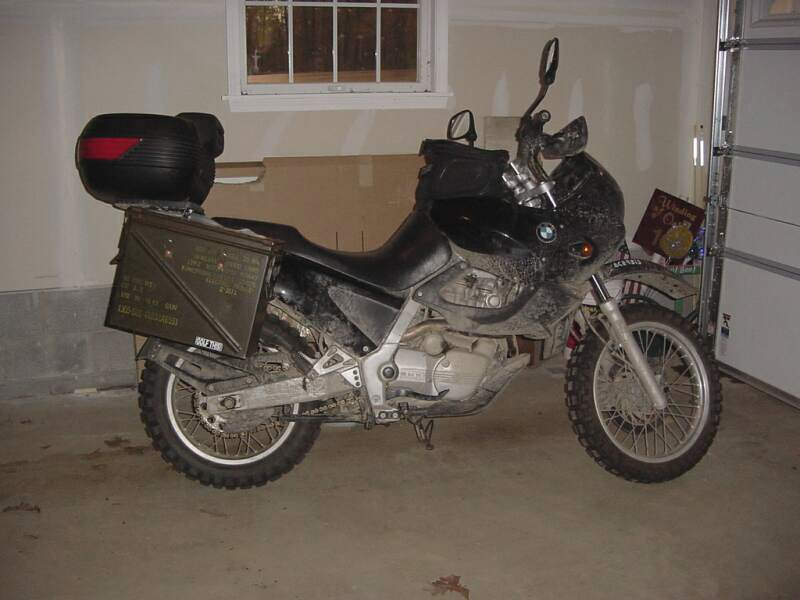
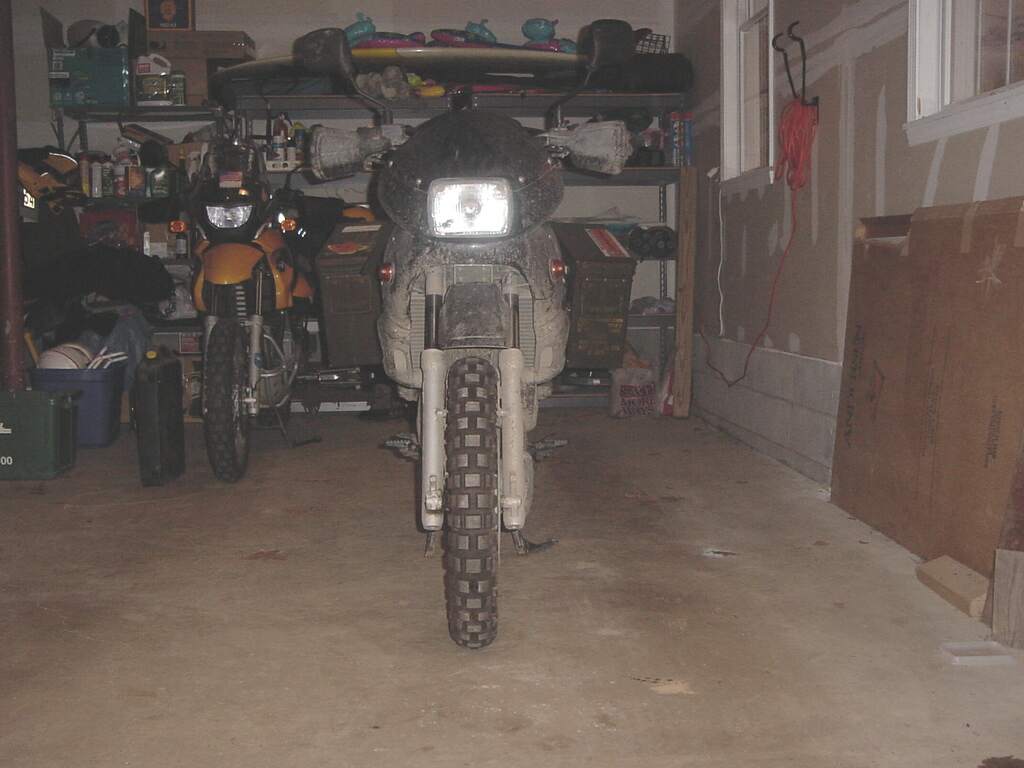
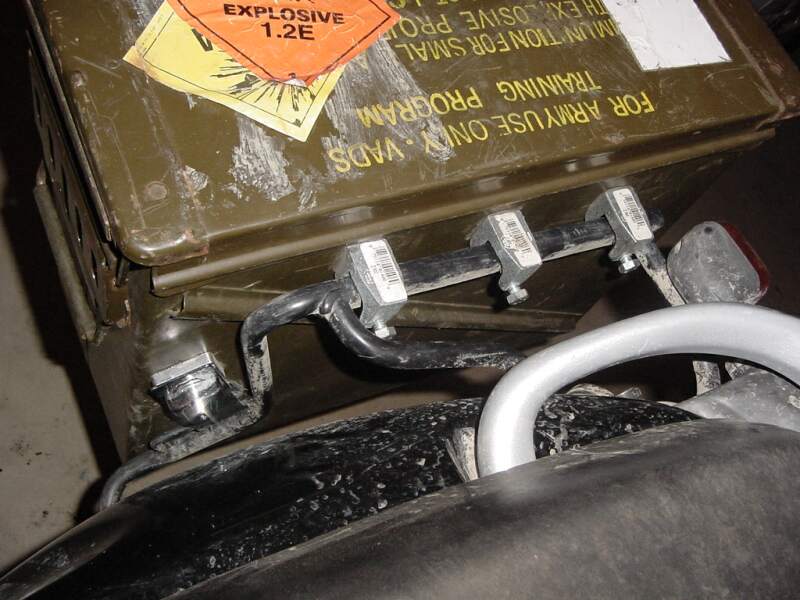
Ammo Can Panniers
- For those who have asked if this is possible, I used the BMW pannier rails and some hardware at home depot. the whole thing cost me about 50 - 60 bucks. I want to put a cross member in the rear, since the cans bounce a little when loaded up. They are heavy though, about 20lbs each, but waterproof and extremely strong. The cross member should reduce the bounce when I install it. I would not recommend them for off road use because of the weight, but I have done 5-6 hour trips at highway speeds, twisties and around town no problem.
Ammo Can Sources
Locking Mechanisms
Reviews and Opinions
 The case was mounted on a Happy Trails tail rack. In case you aren't familiar with the HT rack, it is build like a brick sh#t house... err, I mean it's really solid. I got the Pelican case from http://www.all-pelican-cases-4-less.com/ The case looks a lot larger in the pictures than it does in person.
 The mounting hardware consists of a couple of metric bolts with press fit knobs from the local hardware store that match the embedded threaded inserts on the HT tail rack. There is also a wide washer underneath the knobs between the knob and case. I really crank these knobs down when the top case is mounted and so far it hasn't come loose while riding. I like the option of being able to remove the case when I need to... but come to think of it, I haven't had the need to yet.
 This picture shows a couple of rubber-backed washers that take up the space between the rack and the case. The rubber backing on the washers has a two-fold purpose. It holds the bolts captive in place on the case after removing it and takes up the small space between the case bottom and the rack. The case has some small extrusions on the bottom that hold the case up off the rack by about 1/16".

 Saw that the "feet" of the Pelican about perfectly mated/recessed into the Jesse rear rack slots (one could just grind these off and mount it any old ways).
 The modified feet set right into those slots and it doesn't move 1/64" any which way but up (before bolting down). I plan on removing the handle soon, as it's just additional weight/shrapnel. And what do people do to a handle? Yerk on it as hard as they can, is what.
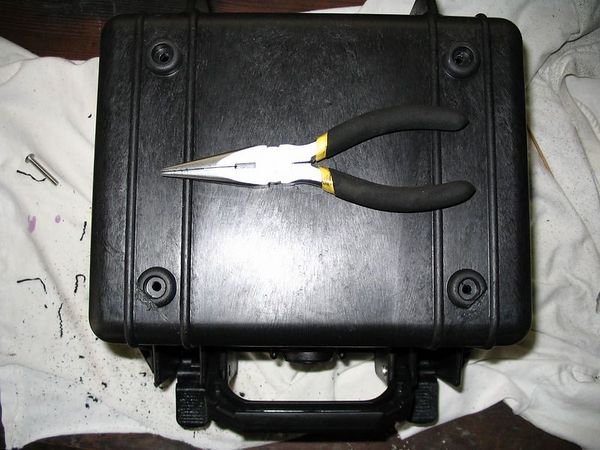


 The cases are mounted on a Happy Trails side rack, which is one solid piece of equipment. I also used the Happy Trails pannier mounting kit, which consists of a set of "L" brackets fashioned from some sort of synthetic material, as well as all the hardware necessary to mount the brackets and a pair of large knurled knobs which allow the cases to be easily removed from the rack. The width of the mounted cases is 38" from edge to edge. I tried weighing the cases on my bathroom scale, but it's one of those digital ones and it failed to trigger. According to the web site where I ordered the cases, they're about 13-1/2 lbs each.


 After some eyeballing and allowing as how, I realized that I needed to remove some hardware from the bag loops. Since I didn’t want to lose the hardware, I just turned it around backwards. When moving the “tits” on the bottom rail to the other side, I used screws that were longer than the originals. After tapping the through holes, I re-installed the tits on the other side using longer bolts with jam nuts.
 Similarly, the latch piece required some different bolts. I used flat head cap screws for their lower profile. But I realized that by milling a slot in each stock Givi latch piece, I could mount a bag to the bike and lock it with just one padlock. This involved bending some special rods. My fallback plan, if that didn’t work out, was to have three locks per bag, one for each latch and one to secure it to the bike.
 After getting the loops worked out, it was time to decide how the bags should be positioned. I held them parallel to the loops and they seemed canted too far forward. I held them parallel to the ground and they seemed too flat against the lines of the bike. So in the end, I split the difference. This meant that the two bags would not be strictly interchangeable. So I put a piece of red electrical tape on one handle and a piece of black on the other. It’s just as well. When you are in a hotel and open one bag, if they’re not marked, Murphy says you’re going to open the wrong one first. I also stuck a return mailing label on each bag and covered it with clear packing tape, just in case I lost it.
 Another part of putting the bags on the airplane is carrying the mounting loops. I accomplished this by cutting off the lower leg that shares the buddy peg bolt. Then, both loops and all of the mounting hardware would easily fit inside one bag. A piece of pipe, cross-drilled for 4 mm bolts, made reattaching the amputated legs trivial. While the reattached legs were a bit wobbly before mounting the loops to the bike, once mounted, they were solid as a rock. One other item worth mentioning is the tie down inside the bag in the photo.
 I picked up some of the tie downs that BMW uses to secure new bikes inside shipping crates for free from my local dealer. Rather than make some sort of cross-brace at the bottom rear of the bag loops, I simply loop the tie down across the seat and through the handles of the cases. They’re held very securely to the bike and the strap takes some of the “bending weight” off the bag loops. All of the attachment hardware easily fits in one bag with plenty of room left over for other goodies.
 Pelican sells accessories for their cases. They don’t sell anything to go inside the lid of the 1550, so I bought a pair of inserts for the 1400 series. They attach with sticky-back Velcro, so they work just fine. The one pictured is the “photo” insert. I also got a “document” insert for the other bag. These are not very expensive and certainly add utility. (What’s pictured is not what I had there while I was actually using the bag.)
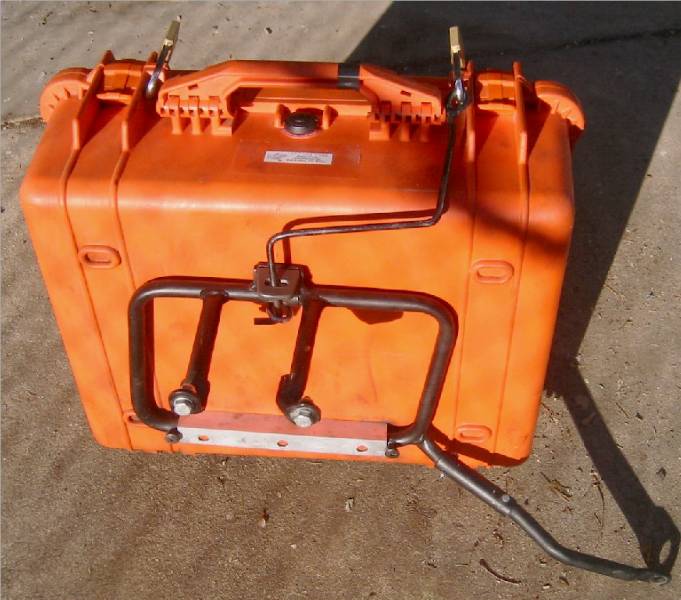
