 Fred
had a pelt of sheepskin cut to form the stock seat by Don Weber of Mr. Ed's
Upholstery. As you can tell from the picture on the left, Fred has a very cushy
ride. Got a pelt of sheepskin, give Mr. Ed's a call. He's listed in the
classifieds.
Fred
had a pelt of sheepskin cut to form the stock seat by Don Weber of Mr. Ed's
Upholstery. As you can tell from the picture on the left, Fred has a very cushy
ride. Got a pelt of sheepskin, give Mr. Ed's a call. He's listed in the
classifieds.The Aftermarket Seats FAQ
compiled & edited by Kristian #562.
Updates by Nick #1085,
mspeed#1023
Please read the Disclaimer before attempting any work in this FAQ.
Woolly Bully
Fred #172
8/27/99
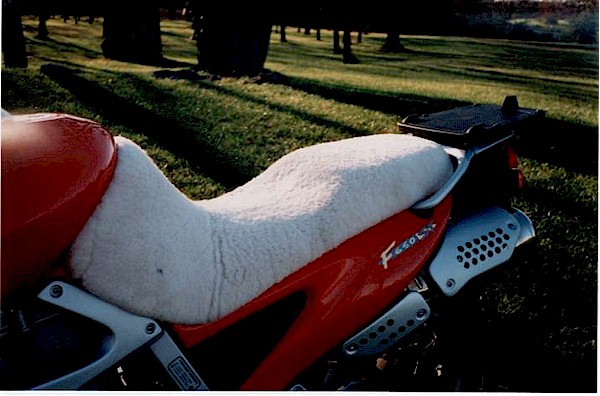
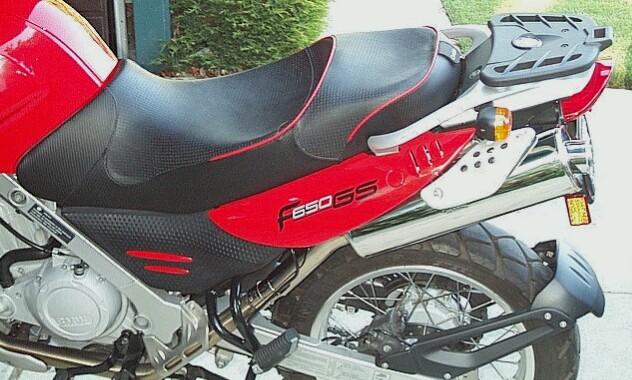
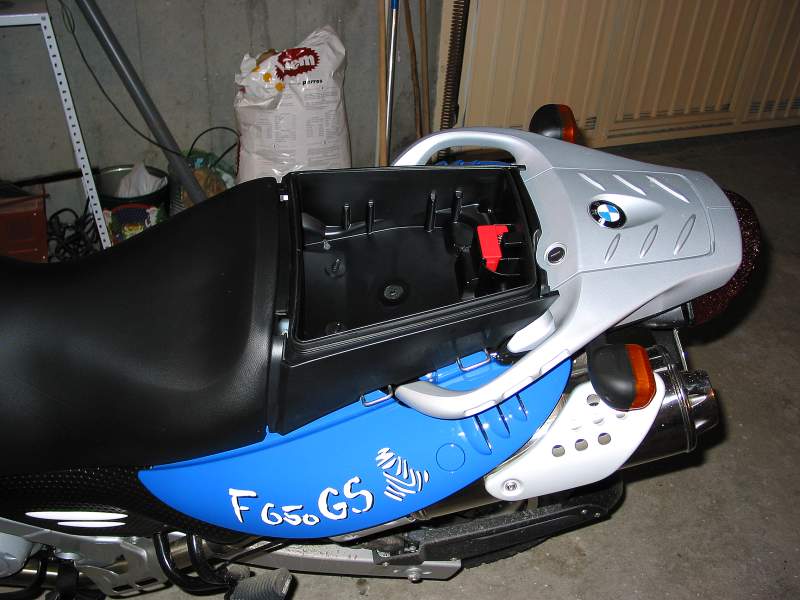
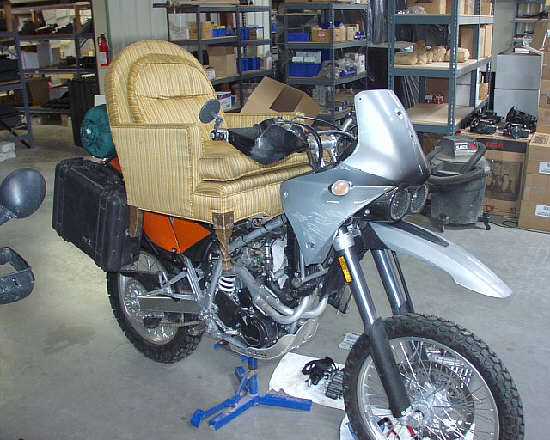
Well Fred may win the best seat cover award with this.
We all know how warm the seat can get after setting in the sun and from the engine heat transferred under the seat to your bottom-side.
Fred
had a pelt of sheepskin cut to form the stock seat by Don Weber of Mr. Ed's
Upholstery. As you can tell from the picture on the left, Fred has a very cushy
ride. Got a pelt of sheepskin, give Mr. Ed's a call. He's listed in the
classifieds.
OEM Seat Fix #1
by Marty #436
11/27/01
The BMW F650 comes with a typical BMW seat…worthless. The usual fix is to pitch the stock seat and purchase a suitable aftermarket seat. Unfortunately, the cost of this fix can be steep.
A lower budget solution to the stock 100-mile seat is outlined below (I've done over 10K on my F650 with it). Two caveats (besides the usual do it at your own risk bit):
It will raise your seat height by 1-2 and also a bit wider, so not for vertically challenged riders
Depending upon the amount of air in the self-inflating pillow, the bike can feel a little less stable, as the air cushion separates the seat-seat interface.
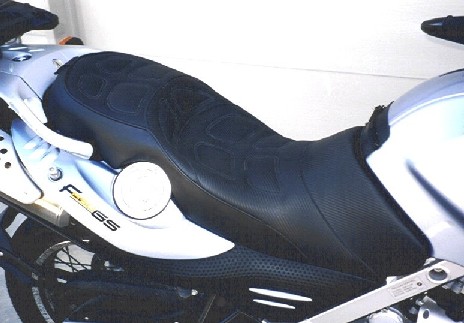
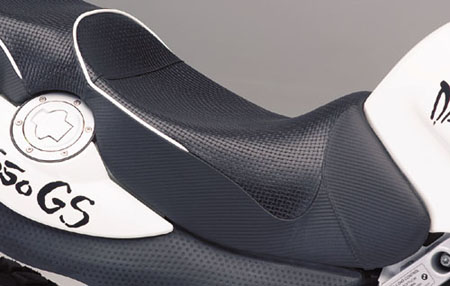
![]() Side view of seat as assembled
Side view of seat as assembled
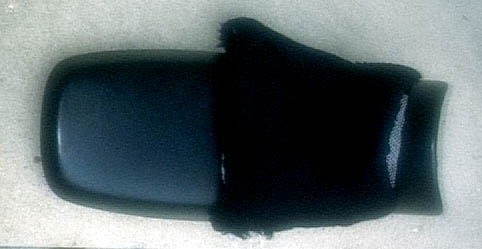 Top view of seat as assembled
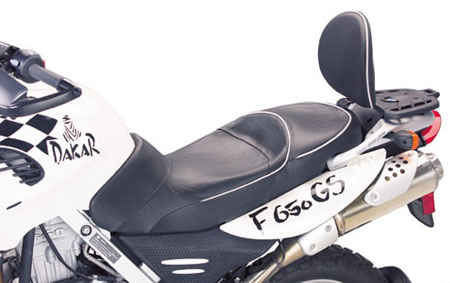
![]() Side view of seat with sheepskin removed
Side view of seat with sheepskin removed
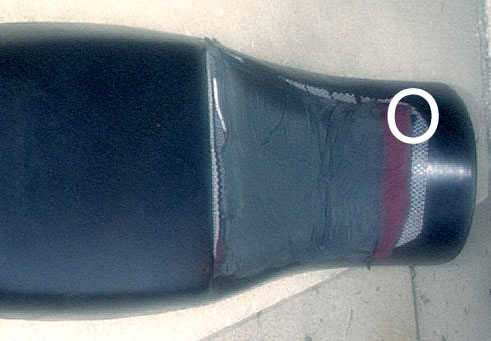 Top view of seat with sheepskin removed (valve shown in circle)
The main component is a self-inflating air pillow (this one is made by Stearns). It is the forest green (on one side) and maroon object in the pictures. For those unfamiliar with these, they are similar to Thermarest mattresses. They are covered in a vinyl-coated nylon (just my guess), and contain a slab of open-cell foam, which expands and sucks air into the pillow when the valve is opened. Compressing the foam with the valve open, then closing the valve while the foam is compressed expels air. Approximate size is 9 x 14 x 1.5. This particular pillow has been molded into place over many months and miles, which is why the size looks irregular. The air valve is circled in the bottom picture. These are available at most camping supply or marine supply stores (as inflatable seat cushions).
Keeping the pillow from sliding around on the seat are two pieces of shelf lining material, cut to the appropriate size (one on top and one underneath). This is a tacky, expanded foam material about 3/16 thick. Check your local department store or office supply store.
Tying it all together is a sheepskin. Alone, the sheepskin can almost double the range of the stock seat (for the vertically challenged). This particular sheepskin was US$25. It was put together from a leftover piece of sheepskin pelt ($15), with two pairs of Velcro straps ($5 /pair) to wrap around and secure the seat underneath, holding the pillow and shelf liner pieces securely to the seat. I purchased my sheepskin at the Pure Stodge BMW Rally (Iowa City, IA 2nd weekend or so of June) from the Wool 'N' Wear vendor. http://www.woolnwear.com/index.html
Initially, try using the air pillow with a minimum of air. This will allow the flat pillow to conform to its new curved configuration faster. As needed (hopefully at a stop), air can be added or expelled to shift the pressure points to new areas, allowing the old pressure points to relax. Obviously, this solution is not as good as an aftermarket seat, but for those who take rare long rides, might be an acceptable and cheaper alternative.
OEM Seat Fix #2
by
Rob (UK)
I did my Dakar seat a few thousand miles ago. It cost not a penny, took about
1.5hrs and made an absolute world of difference. Half hour before and I was
getting dead arse, I have just done a tour of Ireland doing at least 8hrs a day
without a hint of discomfort.
You will need:
a bread knife (electric is handy)
a bit of soft foam about a foot square (i used 1.5inch very soft)
a staple gun using heavy duty staples 6mm long max. (I used one designed for fixing telephone cable to skirting boards as I had it handy)
Before starting suggest you try chosen gun on base to check will pierce plastic)
The job is a little fiddly but not at all hard and makes a HUGE difference.
The cover is actually bonded to the foam so it all goes back exactly as it came off. The mods I made were to the under side.
I basically removed the staples with a flat screwdriver to almost the rear.
Then set about cutting slices from underneath until the the seat felt flat and the contact patch of my behind greater.
This required trimming quite far back as the step is part of the cause of the feeling of been pushed or sliding forward.
The step is still there un-touched but by removing foam from the underside in this area the slope feeling is removed.
It is easier than it sounds as long as you slice and try at regular intervals, taking your time to settle and feel what's wrong via your rear.
Once I had this feeling correct I decided the seat still felt firm so I cut a bit of very soft foam in a triangle shape leaving a flat at the top of 2inch and at each back/side.
I then placed this in the seat position, between seat foam and plastic base and sat on it.
Straight away it felt great and had the added advantage of giving support to the upper thighs too.
I expected I would not be able to get the cover back over the base rim but I could without much pulling so I stapled it back.
The front section is now stapled slightly closer to the edge but not a lot. The whole effect is a transformation, loads more comfort.
Just be careful that your staples are 1) strong enough to get thru plastic and 2) not so long that they come thru other side.
If you wish to make things easier you could do the cutting and add foam then ask a local place to staple it back for you.
It really is worth doing, can't figure why they made the seat so wrong in the first place, it is still just as easy to move around on it when riding hard.
by Scott Urban, ID
#1244
The problem: Forward tilt of the '02 Dakar seat had me riding the "tank." This
was especially bad when riding downhill, while two-up, or while wearing a
"fanny" (American sl.) pack full of stuff, or after 1 hour of steady riding
(apparent settling of the foam).
The fix:
Before going at it, I pulled one staple to check the size: The original staples were about 1/4 inch, so I went and bought a pack. I then tested my staple gun to be sure it would work with the hard plastic seat. I have a manual gun, and it worked OK. An electric might be easier and better if you don't have the grip of a rock climber . . .
Prior to removing the staples, I took a white coloured pencil and traced the edge of the upholstery; this would be my guide as to where the edge needs to be stretched back to. I also drew several lines perpendicular to this edge line. These lines ("index lines" in Photo 1) also helped in the re-install process. (Note: if you add or subtract a lot of material, the fabric may or may not return to the same exact position. In my case it did).
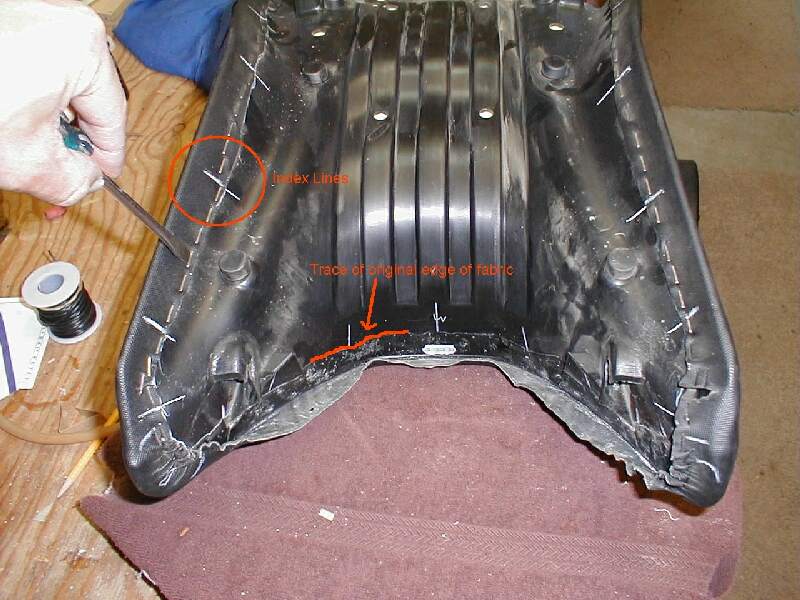 Photo 1
I removed all the upholstery staples from the front half of the seat. The back half I left alone. I used a straight screwdriver to pry them out.
It turns out the seat fabric is attached to the foam, so adding/removing material directly under the fabric isn't a viable option. I'm guessing they lay the fabric in a mold, then inject the foam onto the fabric. Anyhow, once the staples are removed you can lift the foam away from the seat bed.
I obtained a wide selection of foam from a friend who fits knee braces and shoe orthotics for a sports medicine clinic. This is all closed cell foam (Photo 2). I also had some 1/4 inch neoprene scraps from a dive shop, though I didn't use it, yet. I cut a 5x8 inch piece of 1/4-inch Ensolite foam (the blue stuff in the pictures). I wanted something stiff and resilient. The Ensolite is the same stuff backpacking sleeping pads are made of. Whatever you use, be sure it is a kind of foam that will not permanently deform after a few sittings; pinch it real hard and see if it rebounds back to normal. By trial and error, I added and removed different layers/sizes, then lowered the original foam seat into position, and sat on it. Even went for a couple of drives around the block before deciding on a fix: Two layers of the blue stuff, with a final layer of 1/8 inch neoprene. I added a small strip of 1/4 inch around the very front end too (see Photos 3 and 4). I did this because the original foam is very thin here, and I wanted a little more protection. (Note: final green neoprene layer not shown in photos.)
 Photo 2
 Photo 3
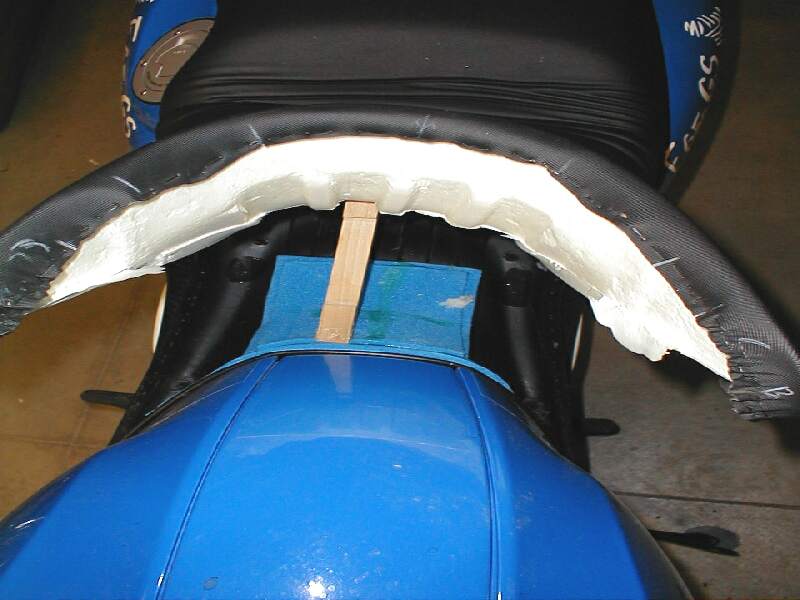 Photo4
Using contact cement (just a few patches as you might want to undo the job some day!), I glued each layer in. The stick shown in the photos is to allow the glue to cure prior to pressing the pieces together.
Re-installing the fabric: Starting from the back, I stretched the fabric so the closest "index line" was lined up, and put two staples at that line. I then stapled the area surrounding the line, then stretched the next index line into position, etc., etc. working towards the front.
The whole project took about 2 hours, including test rides. Getting the fabric stretched and installed to a nice, original appearance was fairly easy, especially with the help of the index lines and edge lines made in step 2, and would be even easier with an electric stapler. I will say that a few tiny wrinkles can be seen near the centre of the seat. This is because I essentially lifted the front of the seat, so a few wrinkles will form where the seat has flexed. Since the fabric is fixed to the foam, you can't just stretch it smooth. However, after 3 days of riding, the wrinkles are nearly gone, and are not noticeable.
Three days later I can say the seat feels much better, and it only cost me a few dollars in materials (glue, staples, etc.). Normally I would be pushed right up to the "tank" while riding two-up; today there is 1.5 inches of seat remaining between me and the tank.
Have fun, and good luck!
Addendum:
When I go all day, I strap on a piece of RidgeRest foam. This provides better
support for long rides; a most elegant and attractive fix. ;>) Anyhow, works
great for me. And being removable, it makes a good sit pad when stopping along
the trail for a snack.
OEM Seat
Fix #4
by RPozak
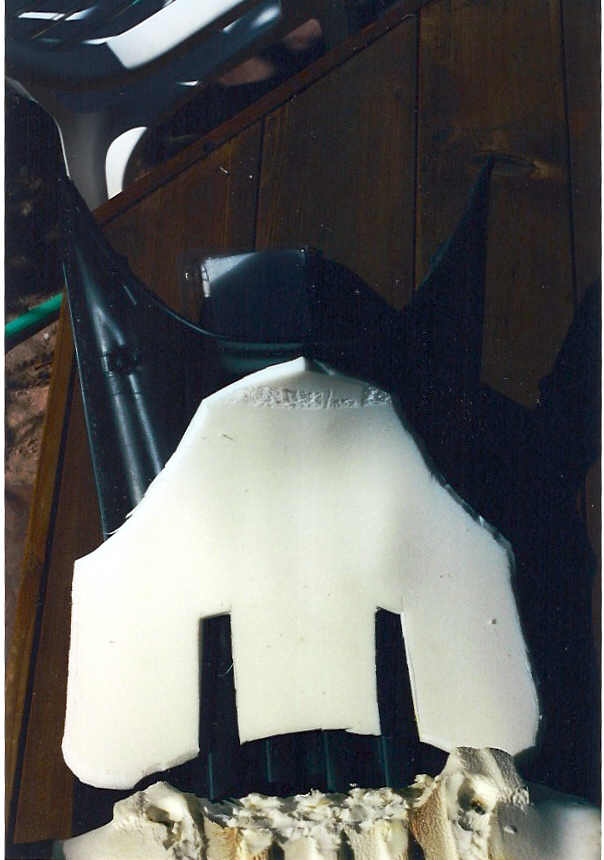 I've done several modifications to my OEM '02 F650GS seat. I think I've found
the most comfortable version for someone 5'8"-5'9" with 30-31" inseam. I removed
about 1/2" of foam from under the seat in the rear of the driver's seat area to
lower the back of the seat. I added high density foam as shown in the attached
file to raise the front of the seat. The two rectangular cut-outs eliminate high
spots that I found painful.
I've done several modifications to my OEM '02 F650GS seat. I think I've found
the most comfortable version for someone 5'8"-5'9" with 30-31" inseam. I removed
about 1/2" of foam from under the seat in the rear of the driver's seat area to
lower the back of the seat. I added high density foam as shown in the attached
file to raise the front of the seat. The two rectangular cut-outs eliminate high
spots that I found painful.
 Charlie's Corbin Seat. (Classic)
 Eric's Corbin Seat. (GS)
 Rebecca's Corbin Seat. (GS).
 Corbin's Seat Pics. (GS).
Here's some .mov files mov1, mov2, mov3, (Approx 4MB each) and a lightened .avi file (Single 9MB File) of how to install the Rear Compartment Lid with a Corbin (or any other High Back Seat). (Thanks to Seacuke #1214).
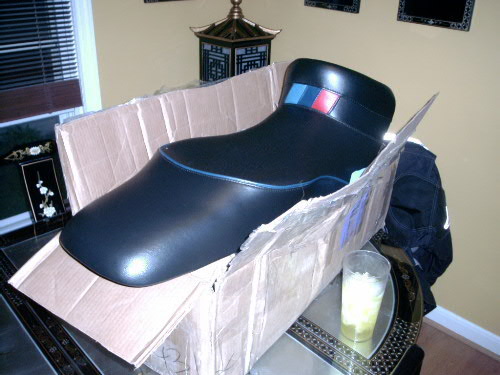
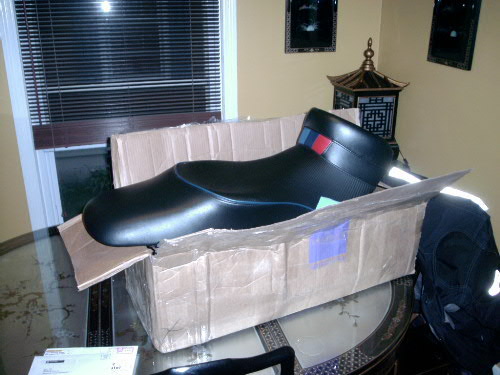
Dakar Single Seat
Courtesy of DHP#711
here:

 Lock Unit NOT Included.
(Seat ONLY is Part # 9 048 198).
Lock Unit NOT Included.
(Seat ONLY is Part # 9 048 198).
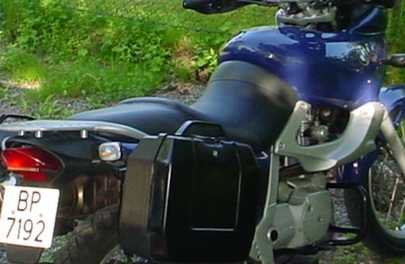
High and Low Stock Seats for GS/Dakar
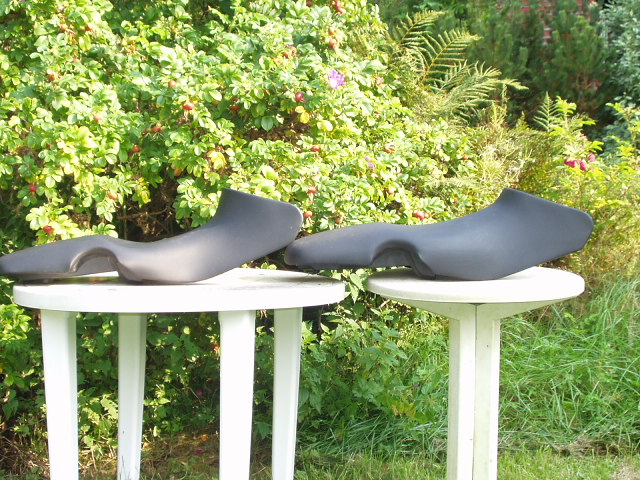 Here is a picture of both a low stock seat (left)
and a replacement high seat (right). Courtesy of my friend Haakon. The 1.5 inch
(40 mm) difference is very obvious and they seem to have fairly the same forward
inclination. The BMW part number for the high seat is 52 53 2 345 735. About
$200 at any BMW dealership. Fernando.
Here is a picture of both a low stock seat (left)
and a replacement high seat (right). Courtesy of my friend Haakon. The 1.5 inch
(40 mm) difference is very obvious and they seem to have fairly the same forward
inclination. The BMW part number for the high seat is 52 53 2 345 735. About
$200 at any BMW dealership. Fernando.
![]() Low seat from Mike (aka Ziggy)
Low seat from Mike (aka Ziggy)
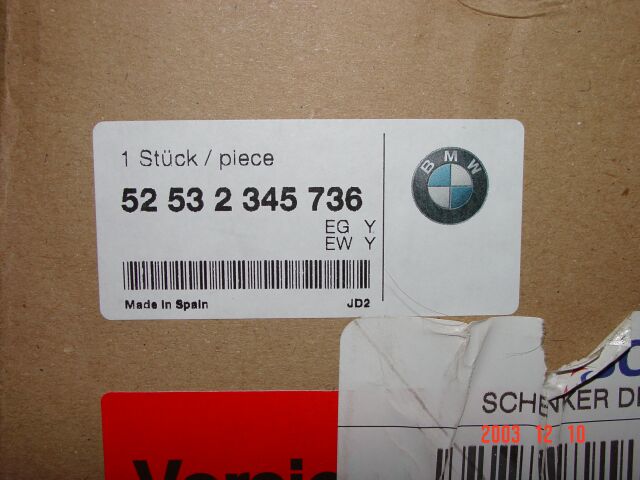 Part Number on box
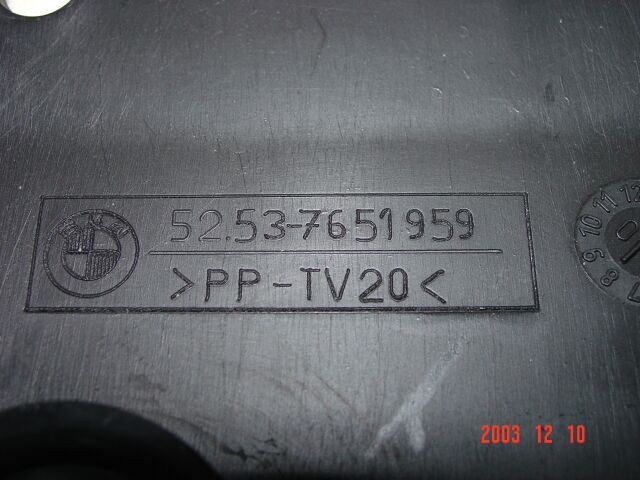 Stamped under seat
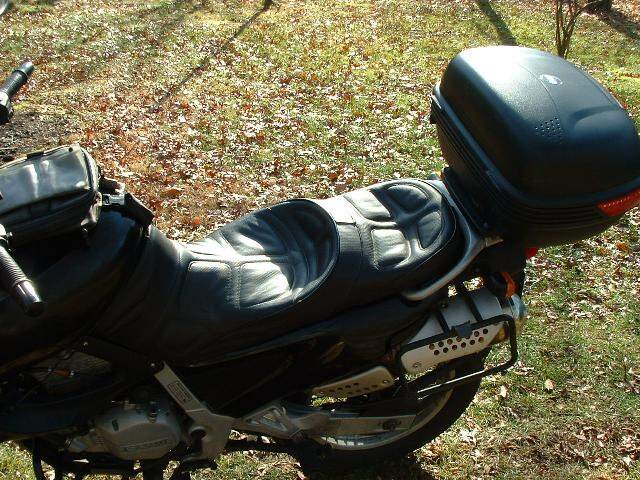
 Aridriel's reupholstered seat
 Brad's reworked Dakar seat
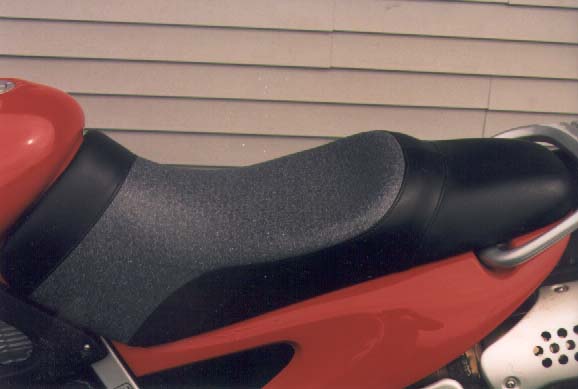 Photo of Mr Ed's Seat. (Classic).
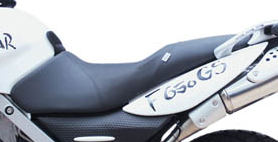
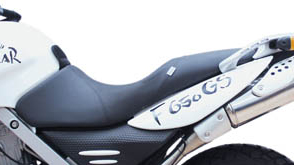
 XtremeLEE1188's Mr Ed's Custom (Classic).
 Bert's BMW solo seat as modified by Don Weber of Mr.
Ed's Moto.
Bert's BMW solo seat as modified by Don Weber of Mr.
Ed's Moto.
 It's one of 8 located under the Classic seat.
Russell Saddle
stuflinn


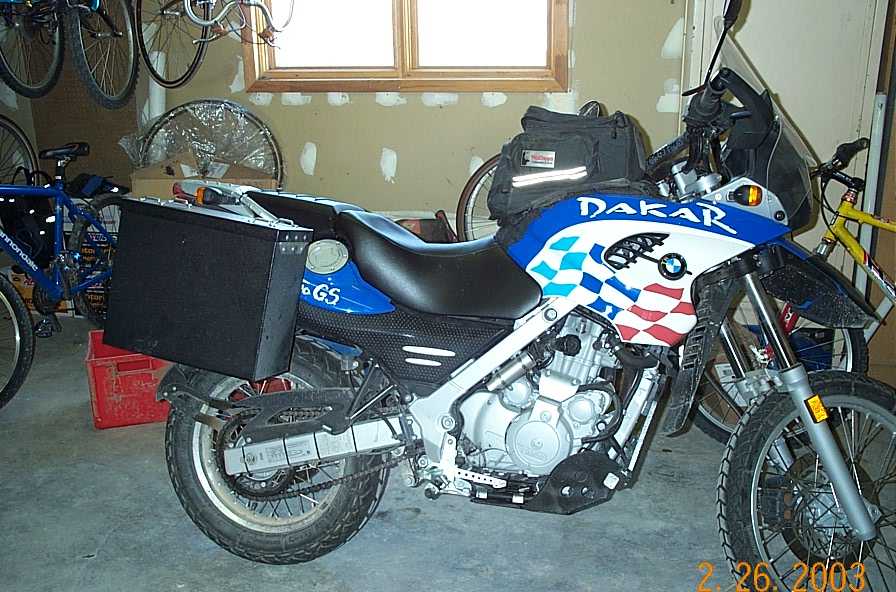
Seat Release Trick for GS/Dakar by Wayne
Here is a pic of the BestRest "T" model,
installed, on my 2003 Dakar.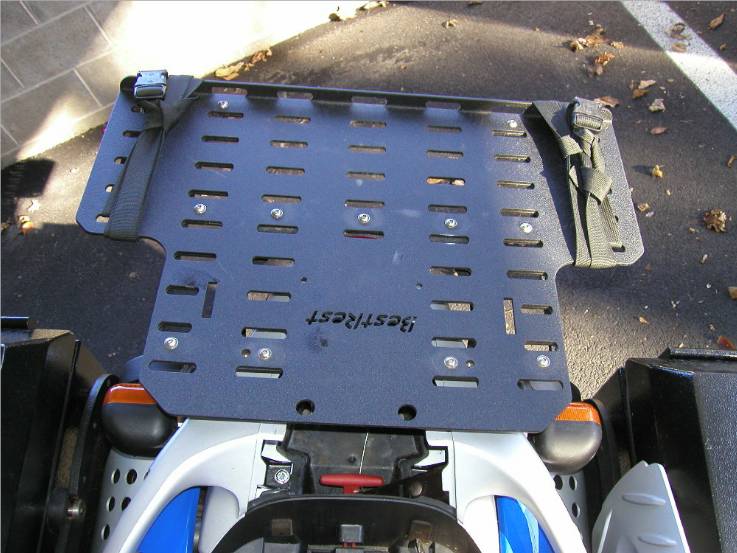 However, Anyone who uses an aftermarket seat in conjunction with a BestRest rack
may have a problem getting into their rear storage compartment, as the rack
completely covers the top of the compartment... My Corbin seat is very high in
the rear and there is no way to get into the compartment to release the seat.
The following three pics are my solution -
However, Anyone who uses an aftermarket seat in conjunction with a BestRest rack
may have a problem getting into their rear storage compartment, as the rack
completely covers the top of the compartment... My Corbin seat is very high in
the rear and there is no way to get into the compartment to release the seat.
The following three pics are my solution -
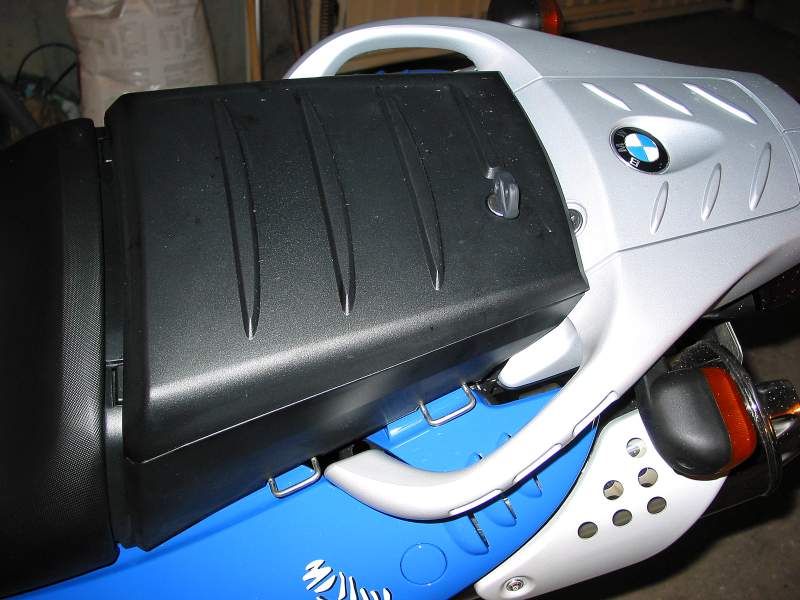
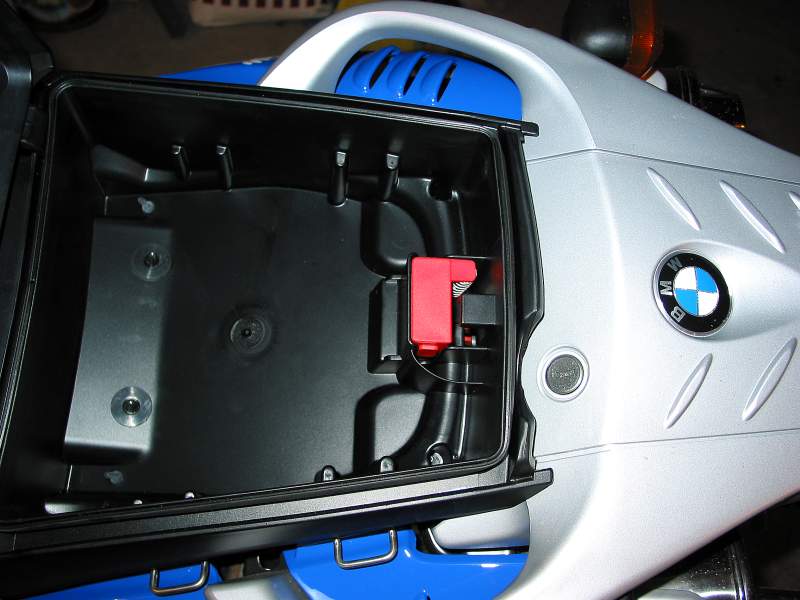
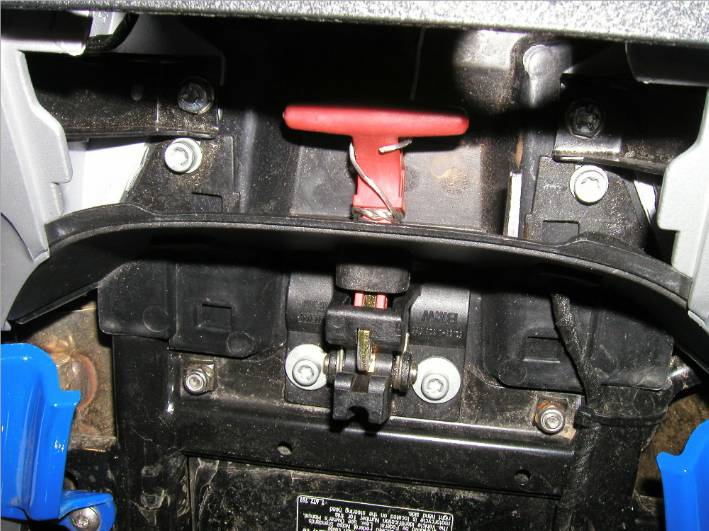
PIC 1: I tied some stainless steel Ook painting-hanging wire behind the BASE of
the red seat release (you have to tie it behind the base or the leverage to pop
it will not be sufficient).
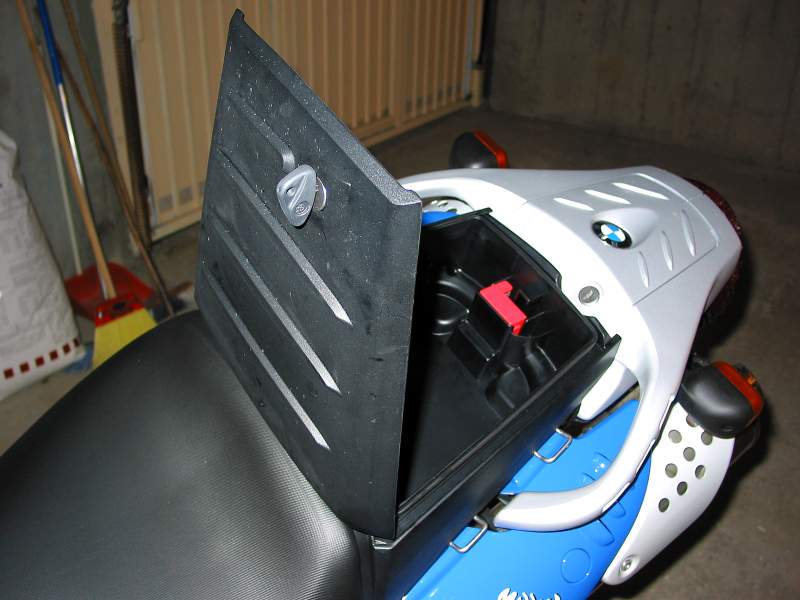
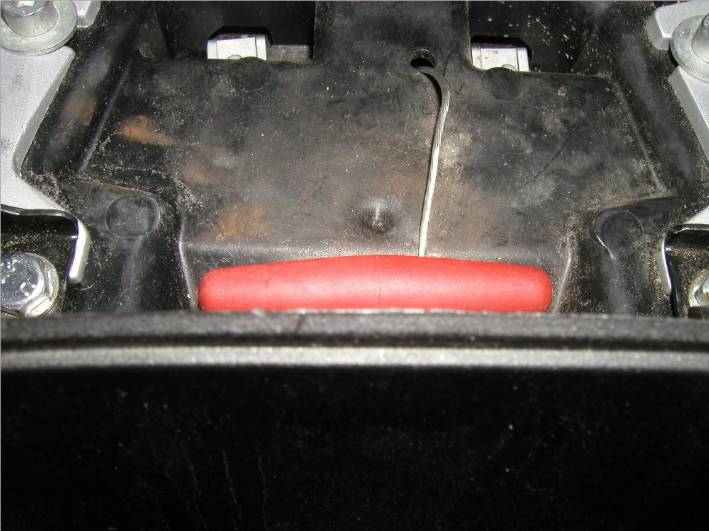
PIC 2: Then I ran it through the drainage hole on the floor of the compartment.
PIC 3: (from underside of bike, in rear wheel well): Then you simply cut it to
your taste and tie a loop in it, and you are done.
Now you can pop the seat keylessly and get into the rear compartment after the
seat comes off.
 Wayne #1314
Trevor's Very Special Soft Seat
![]()
 The high,
low and
extra-low seats from Wunderlich.
The high,
low and
extra-low seats from Wunderlich.
Stock GS Dual-Seat: BMW Parts Numbers
Note: For Photos, Visit the Gallery above.
Airhawk Inflatable Seat Cushion
Whatever seat you choose, your butt will eventually start to get sore. The best bang for the buck is the Airhawk inflatable seat cushion. After about 3 to 400 miles on the saddle, I'll pull out the Airhawk and throw it over the saddle and I'm ready to go another 3 or 400 miles. I used to switch it over to my Dakar but now that it is gone, I look forward to throwing it over the saddle of my new 1150GS Adventure thus, many more happy miles. They are a little pricey but well worth it. I have the large cruiser model that sort of resembles an old fashion bicycle seat. It is also nice to run with the different air pressures in the Airhawk. It is very simple and easy to adjust the air pressure while stationary. Best riding investment I ever spent. It goes with me almost everywhere. Beau #645
My BMW dealer has started carrying AirHawk seat cushions which I guess some of the Iron Butt guys use. Anyone have any experience with them? There is info on them at: http://www.whitehorsepress.com/onlinecatalog/sections/proddata/SCVRA.htm. Sam#1238MI
Reviews have been generally very positive. The latest in last month's issue of MCN. I have considered getting one and still may, but the slight extra height on top of the already "tall" Dakar seat makes me a little hesitant. Also, the shape of the Airhawks seem to favour more of a saddle type seat. Would be nice to be able to try one for a day before committing the $. RogerN#827
The magazine reviews that I have seen have been mixed. Some reviewers liked them and others didn't. My problem with the Airhawk is its price. Too much for what you get, in my opinion. Richard #230
I rode to the RA rally in North Carolina in Sept, 01 on my R1100RT with Corbin seat. My butt hurt. I bought a Small Cruiser size AirHawk at the rally for $150. I had seen it at dealers for usually $200. It worked for me on the Corbin. The key is to just use as little air as possible and it doesn't really raise you up more than maybe 1/4 to 1/2 inch. The company originally designed them for wheelchair people who set in them all day. I haven't rode my F650 the miles per day as I did on my RT (prob. 325 miles longest day on F650 VS 750 miles on RT) and I haven't found the need to use the AirHawk on the F650. I am keeping the Airhawk just in case and for future bikes, if needed, and if any chain gang member wants to ride to Hannibal and try it for a day, you would be welcome to. DaveJ#888
I've had an Airhawk for several years. It doesn't add much to your seat height if you fill it only enough to lift your tush off the seat, like they recommend. I don't need to use it on the GS as the seat is comfortable enough without it. On my previous bike, I used it for longer rides and it made a big difference. Riding pillion on my husband's K1200RS, it was essential for any ride over 50 miles. At the St. Louis motorcycle show I noticed that now they come with little tie down tabs. I sewed in tie down loops into the cover and I'm sure someone who does alterations could do it quickly if you don't sew. Bonnie #1158
I found the Airhawk pad to be the best touring accessory I've bought. I rode 1700 miles in two days on a Dakar and the pain never increased over 600 miles. The only snag is I haven't found a good way to secure it to my seat. I like to stand often while riding distance and the Airhawk will fly off if unsecured or flop around if loosely attached. But it is still worth every penny. Motoboy Mark
I have used a Small Cruiser Airhawk on several motorcycles including R1150RT, F650GS and my R1100GS. It is one of the best values and most versatile items to add to your gear. It can be swapped from one bike to another or traded between riders for a change. They last a loooong time, if you don't forget it was sitting on your saddlebags when you drove off... I immediately replaced it tho’! :-) Bert #1131
Although we both agree, what would help is a back rest for her to lean on. Plus, I would feel better for those times when I accelerate a little hard when she's loading the next book on the ipod (yeah, she downloaded some books-on-tape, ahhh I mean on-MP3 for the ride). Anyone making a F650 (classic) specific backrest? I looked at the BestRest, but it looks unnecessarily complex- plus we don't need the adjustability it offers. And I noticed Givi has them on their top boxes- but I not sure I want a top box behind it. Lee#1106, CT
I have the Givi case on my bike and my SO loves it as a backrest. She wears a TourMaster jacket, and the backpad in the jacket is enough for her. The Givi pad that attaches to the case was too thick for her comfort. Tim #203 '97ST
I think the Corbin seat has an optional backrest. Sean-STL
Corbin has a $200 backrest option for their $300+ seat (whatever it costs today). I also have a GIVI box and the GIVI backrest. i never installed the backrest because it's too fat, sits at a bad angle, and my wife preferred i didn't install it. Anyone need one? doesn't work with my Maxia. Mark #403
Same story. Wife likes the Givi Maxia for a backrest. Don't get the additional pad. Raleigh619 ST in TN
I have the Corbin seat/backrest setup, and I've been told the backrest is good (I don't know myself). Here's an easy, lower cost option: http://www.buddybelt.com/ plus http://www.backaline.com/ I have the back-a-line belt and I think it's great. As far as comfort is concerned, it really is a viable alternative to a backrest. Mason #631 - 97ST in PA
I also have a Back-a-Line belt and use it on all my long rides. I first saw it on the rear page of MCN and talked my daughter into giving it to me as a Christmas present. It feels great to have more back support than your typical kidney belt. Richard #230, Pacifica, CA
For pictures and opinion from TrayB of the BestRest CargoRest installed with a BestRest BackRest see The GS Aftermarket Luggage FAQ
Cooler Seating (Cool-Butt)
I use the stock seat with a CoolButt2000 (pat pending): I cut up one of those bead seat cover thingies that taxi and truck drivers use (the plastic sort, not the wooden) and stuck it on top of the stock seat. Air flows through wonderfully, completely preventing heat build-up, and I drive in 40-50 degree (104-122F) weather daily. Aleksander in Dubai 98ST.
I've noticed the same effect with my Corbin. I always figured it was because of that thick seat pan. I used to think this was a good thing but then people started talking about their VR's suffering due to excessive heat and having to move them out from under the seats blah, blah, blah...But, so far, I haven't noticed the bike gets any hotter under the seat with the Corbin on than the stock and my VR continues to R (Knocking on loads o' wood). Sean #1015.
Whitehorse Press has a motorcycle-specific wooden beaded seat cover in black with bungees to hold it on for $20. I had looked for this product before and it seemed to be sold out everywhere, but they may be back in stock. http://www.whitehorsepress.com/onlinecatalog/sections/proddata/CVRW.htm. I would highly recommend the beaded seat cover option. It's cheap, simple, and likely to be useful no matter what seat you use. I use one on my Corbin just the same. ;-) The stock seat let's a LOT of engine heat through, which makes your crushed balls even more uncomfortable, and having some airspace down there is very nice. ;-). Mason #631
My Taiwanese Taxi seat cover cost about US$4. I did two five hundred mile days last week followed by 984 miles on Monday (in powdered weasel squeezers) and my ass wasn't ever an issue. I am six feet, one inch tall. My ghoulies are just fine, too. My Arkansas hiway pegs saved my knees from excruciating pain, too. Flash #412 (CO).
After doing some 7-8000 miles on the beads, I recently removed them. I think that the stock seat is more comfortable than the beads, even for 700+ mile days. Robin #790 Chicago '01 GSD.
Corbin's Corbin Seats or www.corbinseats.com
I have been happy with the comfort of my Corbin seats, but they are all too heavy, assembly is only so-so and they all are higher than the stock saddle, no matter which bike they were made for. Richard #230
I have Corbin’s on my bikes but I have them fitted at the factory. They do tend to sit higher on the F650s but I think that if you have them narrow up the front part of the seat you should still get the same reach to the ground as the stock seat. The key is that they can place your hind quarters exactly where you want them vs. where the factory put it to average the 4'8 and the 6'4 riders. John #821
The main upside to Corbin is they make their own pans. so you get to keep your old seat and there's no down-time. I’m (slowly) planning to have a cheap lift done to the stock seat so I can use it in the dirt or in the rain. my Corbin is comfy, but I can't sit on the stock seat for more than 30 minutes without pain. it's made for someone a lot shorter than I am. Mark #403
I love my Corbin! Yes they are expensive, and yes they add a bit of height and width, but for me (6ft and long inseam) it worked out perfectly since I found the stock seat a bit low and very uncomfortable on long rides. It fits my bike perfectly ('97 F650 ST), locks with no problem, and I can ride for hours in comfort. If I ever get another bike, I will buy another Corbin in a minute. No, I do not work for Corbin. Alvaro #890
My original stock seat on my 97 Funduro was replaced under warranty after it started splitting. The vinyl on my second one is now stiffening up and I'd like to get an aftermarket. Recommendations or opinions on aftermarket seats? I had a Corbin on my K75 but it soaked up water like a sponge. have they improved? jbeemer
The Corbin does have a tendency to puddle water if you are not sitting in the seat when it rains. I have been caught in downpours that get me very wet, but the seat and my posterior stay dry. The seat by itself will take in some water if it is puddling and left without a cover while unattended. If you expect rain and your bike is not covered, you can get a rain cover, or a plastic trash bag works fine. I usually have a couple with me if on the road. As far as the money goes, it depends on what you want and can afford. I want comfort and since the bike is an extra, as I have a car, I can either ride it or not. Kind of like kids, if you wait until you can afford them, you never will have them! John
According to Corbin, their seats can't absorb water because they use a closed cell foam. My experience agrees with yours. I expect that any seat that is dished out (to better collect rainwater?) will allow the rain to eventually seep in (assuming a seam is required somewhere). BTW, Corbin sells very nice rain covers for their seats (the one for my K75 is a permanent resident to scare away the rain). The only problem is that Corbin doesn't like to sell their rain covers, as their seats don't absorb water. Fight with them until they sell you one. Marty #436
Stock very uncomfortable after 30 minutes, no way could I do several hundred miles. I also bought a Corbin. looks like Charlie’s. did the ride in service and glad I did as the stock Corbin (what you would get if you ordered over the internet) would not work for me. I slid forward when braking, and the sides (at the thighs) were too wide. I had the ass moved back, the front built up (to keep from sliding forward) and the thigh area narrowed. happy with my purchase. in contrast to Todd and mike, the $400 I spent made an excruciatingly uncomfortable bike (for me) quite nice for long hauls. in that sense, it was money very well spent. Mark #403
Seat=Corbin, Purchased=over the WEB from Corbin, price=$350 (if I remember right). When I first sat on this seat I thought I wasted my money because it wasn't comfortable. Although it wasn't uncomfortable either. The stock seat would get uncomfortable after a tank of gas but the Corbin stays the same all day long, mile after mile, day after day. It's the best thing that I added to this bike. Charlie #070
The Corbin seat is worth every nickel you pay for it. I assume some of the other aftermarket seats are also. I only have experience with the Corbin. John
My Corbin is huge success in comfort, too. Heavy is correct, but the offset of my muffler exchange to a Staintune equalled the weight! The stock cat pipe is a ton of weight, also. The weight is from the resin, fibreglass construction in Corbin's, vs. the plastic, very light stock seat. The fit? Mine rubbed the side panels on the '99 650 and a minor adjustment to the frame with rubber bumpers is all I required. Self fix! The latch mechanism is also adjustable with washers if the lock does not quite latch on the seat. Randy#748
I have found my Corbin to be extremely comfortable on my Dakar with the white piping. This is a great seat for the GS Dakar. Yes, it is tall, but tippy-toe is OK. Bumblebee #702
I recently bought a Corbin saddle for my 2001 F650GS. My back doesn't hurt anymore! I had changed out the stock GS saddle for a Dakar saddle but the Corbin did the trick. The down side to the Corbin is that it is high so now I'm on my toes at a stop light (6' tall) but my knees are also not cramped. IMHO this is a must accessory. Should have bought it 18,000 miles ago. PS looks great with the sky blue piping and black seat. Dave.
If you value comfort, Corbin is well worth the $299. Corbin seating area is wider, which makes for a more comfortable seat for me. I could only ride my 02 F650 GS for about an hour before I started to feel the seat. With Corbin I can ride all day :) Orders from Corbin are taking about two Weeks to ship. Ordered mine last month:) Eric (Jetskifast)
Yup, the Corbin Seat will pay big discounts to your bottom end. I got one for my 2001 Dakar and can ride all day without any discomfort. It's been great for me and I am Big Size guy. Bumblebee #702
My experience with Corbin on two bikes: Heavy, poorly made, poor fit, scratched the living daylights out of Sub-frame and body panels. I guess they might be good for huge people with huge asses, but they don't work for me (5'8, 160 lbs). The first Corbin I bought out of ignorance, the second came standard equipment on an old BMW. Never again. Paul#888
My Corbin is miles ahead of the stock one! It is not the foam in most cases that gets hard, it is the cover made of vinyl that gets hard after years use. My Corbin, after 6 years did the same thing (getting hard) and it was the cover. I had a new cover made at Corbin and like new again. FYI; the foam in Corbin seats is 100% life guarantee for comfort. Seat covers have to be replaced every half dozen years or so! Randy#748
I read the seat discussion below. I had a Corbin seat made for my monster and it was great. I was looking on line yesterday at the F650 Corbin seats. They are $299.00. Does anyone have one? Do you like it? On my monster the big difference was that it made a place for my, behind. Very comfortable. Tully, NYC, #1076
I have one. It adds about an inch to the seating height and is wider at the thighs. It makes it noticeably more difficult to touch both feet to the ground when at stops. It is also much heavier than the stock saddle and tends to catch water in the seating area, when parked or driven in the rain. However, once under way, the seat is a big improvement over the stock seat, when considering comfort and support. Richard #230
Same observations as Richard's. I have a ST with smaller handlebars than the F's and that makes it more difficult to seat right in the middle of the Corbin Seat. It's not so much of an improvement for short rides but it makes long hauls far better. Jean#
I have Corbin on an ST and an R80. Very comfortable for every trip I have taken, up to 1000 miles in a day. Prefer the stock seat for around town, per Richards reasons above. A comfortable seat is strictly a personal choice. David #651
One advantage of the Corbin seat is that it has its own base plate and does not require you to be without a ride, while a new seat is being made on your seat pan. Also, you can keep using the stock seat (which is light, low, waterproof and fairly durable) for commuting and utility purposes and use the tall, expensive seat for touring. However, those Corbin seats sure are heavy and do not always latch and fasten to the seat rails easily. My Corbin leather seat developed a blemish when I strapped a plastic water bottle to the passenger's seat and went for a long ride on a very hot day. I don't know if it was caused by rubbing or by concentrated sunlight shining through the bottle. That may not have happened with the vinyl material. Richard #230
First I thought that you guys have covered all the aspects of the Corbin, but not quite. I love my Corbin for all the above reasons, but also because it looks damn nice. Its light grey colour enhances the subtle tones of my 2000 Silver Bullet, as well as my distinguished greying beard. It adds aesthetic value to both bike and rider. So there. Werner #547
I put a Corbin on my Dakar about a year ago. I did have some problems with the first one they sent. I mailed it back and they sent one which I haven't had any problems with. They will not REFUND. I am 602 and the seat has made the Dakar more comfortable than my RT (which is for sale). It does make the passenger area smaller and probably not very comfortable for two up touring. Ed#670
I have a Corbin seat - it is more comfortable than the stock one for me but I'm really on my tip toes with it (usu can get the balls of my feet down). It is both taller and wider than the GS (low) seat. I also paid $399 for mine last April and didn't finally get what I ordered until September after having to send seats back and forth a few times (long story) and after they dropped the price to $299 (but I still had to pay $399). All reports of bad customer service are very true. In hindsight, I would have ordered through my dealer (I think they would have charged the same) rather than trying to deal with Corbin as an individual. partly because of width and partly height. They can cut the seat down some and make it narrower, which is how I ordered it. It does make it better but is still higher than stock. It took me a while to learn to slide my butt off the seat when stopping. Once I figured that out, the height doesn't bother me so much - but I still generally ride with the stock seat around town. Like Marty said - you might be able to buy someone's stock seat (I haven't checked the classifieds lately), and get it modified - all for the same price and have two seats – or sell your stock one later. Sounds like a good idea to me. Also, I asked how the height compared with the stock seat - they said it was the same, which is not true. It feels about 1-2 higher - Rebecca
I had a Corbin on a KTM 620 RXC and hated it. Too sloped in the front causing a passenger to want to slide forward and harder to slide back when riding solo. Also too slippery by not using a grained or patterned material. On my wife's GSA, I have a Dakar seat for when she lets me ride it (I'm 6'2), and a Wunderlich low seat for her (she's 5'4). The Wunderlich is the most comfortable seat I've had, and would suggest one if they make it in a taller version. They use a stock BMW seat base, so the fit is perfect. More costly than the Corbin at $359. I believe mredsmoto.com can re-work your seat. Iceman#975.
Thought I'd give me 2c about Corbin. Purchased a used Corbin seat, installed last Sat, and what a pleasure! It is almost impossible to explain the difference, compare sitting on a hard wooden pub bench for two hours, then going home to your plush lazy boy, that IMHO is a good comparison. Rode for close on 2 hours on Sunday, and getting off after the 2 hour trip you do not wish to stand and stretch to get rid of aches, it feels as if you just went round the block! Corbin definitely has my vote. Dirk
My experience with Corbin is that their seats are nice and comfortable but their service sucks. They *said* they could make it lower than the stock seat. It took 4 months+ to get my seat and it was not "as advertised". It is still higher than the stock seat but slightly lower than Corbin's "standard" seat. Rebecca.
The stock
seat is soft and somewhat comfortable but I found that when I settled back, I
was pushing up the rise to the passenger part and had to constantly put pressure
towards the back to stay there; let up and you slide forward. That was due to
the shape of the stock seat and what I wanted to get away from. I rode with the
Corbin for 2 1/2 hours tonight and found that everything changed as follows;
1 - the seat is 11/2 to 2 inches higher
2 - putting the two side by side on the floor, I could see that I would be
sitting 1 1/2 to 2 inches further back as well on the new seat ( a bit less
passenger seating ), just what I wanted!
3 - when you settle back, you are engulfed by a firm feel in your butt ( average
size ) where the bottom of your shape is supported by the rounded shape of the
Corbin; totally.
4 - no sliding forward until you want to.
5 - with the additional height, my knees now point down towards the signals
instead of up towards the windshield..., more leg room - terrific.
6 - the front of the seat is much wider and takes some getting used to ( can be
ordered narrower from the factory ). You have to spread wider a bit at stops if
you purposely slide forward. I did not before, but must now, due to the
additional height. Same thing I do on my LT.
The seat is not new... just the cover. It is called carbon fiber and is an
indestructible fabric laminated over leather that breaths and is cared for
exactly like leather. You don't slip around as on smooth leather and the seat
doesn't get too hot in this weather.
I'm dumbfounded by Mark's quality comment because I think the quality is very
good and the single heated Corbin seat , with adjustable backrest in smooth
leather on my LT for over a year and a half is truly, quality wise, as good as
it gets IMO. These leather seats require special care, which I don't mind, and
if neglected will look pretty bad after a year or two of sun, rain and riding.
I'm really looking forward to getting the seat for my classic because it is
factory lowered, which I truly enjoy, but adding an inch and a half or two in
the seat height will make it perfect....., the additional legroom that is, like
the GS. Art884
I purchased the Corbin for after 4000 miles.
The seat is much better than the stock F650GS stock seat. It is much more firm which at first I mistook for being hard. There are no hot spots or pressure points. The seat is heavier in both weight and strength. It is a bit higher than the stock seat. which took a little getting used to. This height affects not only standing still, but in control as well. The seating position allows you to sit in several different angles in relative comfort. I went from wiggling around in the saddle in with small trips to travelling 8+ hours in the saddled with almost no discomfort.
I was less than inspired by Corbin's Customer Service department when I called to get a replacement due to them sending me a different seat than ordered.
To summarize the product is good and allows me to keep the old seat if needed. The customer service is mediocre, not so much bad , just OK. - GeoB
So I got my Corbin last Friday and did a decent day on Sunday in it. I'm happy to report that not only did it *not* push my loins forward into the faux tank, but my arse was fresh as the morning dew after ~9 hours in the saddle! The Corbin people promised me the seat in 3-4 weeks, but delivered it in 1.5 weeks. No, you don't have to send your seat to Corbin for them to craft one for you. I just answered some questions regarding height and inseam and they put a seat together for me with just those numbers. I have an '02 GS that I put a Corbin seat on, the change was instant and long lasting. Not sure what they do for "classic" bikes, but if it's anything like what I am now sitting on, it is well worth the investment. (My seat was $320.00 signed, sealed and delivered). Other people have had problems with customer service at Corbin, but I got lucky. No hassles, no questions, nothing to bitch about. All in all a win/win situation. Seacuke #1214
The Corbin on the Fs lifts you about 2" and on the classic sets you back about an inch......., 2" on the GS. The seat is infinitely more comfortable than the stock on either bike and is much heavier and thicker, cutting the heat as Mason mentions below. Art884 North. NJ
Personally, I've had good service from Corbin's (two of them). Rick in AL.
I'm very pleased with my Corbin. Feels good and looks good. Has held up very well. Dave # 717 - '01 F650GS
CORBIN makes very good seats. They are based in Hollister California, so if you are in the area you can take your seat there and they can size you up. Otherwise, I think you will have to send your seat to the factory. He's a big player in the market, invents electric cycles and cars. Loves bikes-gives tours. Justin843
I would not buy a Corbin saddle. With your light weight and short height, you will find the saddle too hard and too tall (to say nothing of too expensive). Why not check with Mr. Ed (see his link on the home or links screens) and see what he can do for you? I have a Corbin seat, but have had several dealings with Don (#301) and have been satisfied with his performance as a retailer. I understand the Mr. Ed has made a number of custom F650 saddles and have not heard of any complaints. Richard #230, Pacifica, CA
I purchased the Corbin for after 4000 miles. I will separate this in two sections. The Seat and the Service.
First the seat is much better than the stock F650GS stock seat. It is much more firm which at first I mistook for being hard. There are no hot spots or pressure points. The seat is heavier in both weight and strength. It is a bit higher than the stock seat which took a little getting used to. This height affects not only standing still, but in control as well. The seating position allows you to sit in several different angles in relative comfort. I went from wiggling around in the saddle in with small trips to travelling 8+ hours in the saddled with almost no discomfort.
Now for the service. When I ordered the seat I had the option of having one made or choosing from 3 separate models in stock. I ordered one from stock since it would arrive sooner, and time was a factor. When it arrived the seat I received was not the one I ordered. This was slightly understandable since I ordered a Carbon Fiber on Carbon Fiber, what I got was Carbon fiber with smooth sides. There was also a welt on the seat where the left leg would rub against.
I was less than inspired by Corbin's Customer Service department when I called to get a replacement. When I explained the problem they defended, rightfully, the order taker but forgot that I was the customer. They gave the impression that I was in the wrong not them. If it wasn't for the defect, I am not too sure I would have been able to return it for a replacement. To get the replacement I needed to send the seat back and pay shipping costs for the return. They did pay for the replacement shipping cost. What should have been a week to get a seat took me 4 weeks.
To summarize the product is good and allows me to keep the old seat if needed. The customer service is mediocre, not so much bad , just OK. GeoB - 22-Sep-02
Love the Corbin seat. Much wider than stock seat, and very comfortable. I did order carbon fiber, just like on Corbin web site. I went with Corbin web site picture:) and very happy for doing so. Eric
I just put a Corbin seat on my 99 F650..It was $326 at my door. Very comfortable and looks great. I got the all black new Carbon Fiber looking leather they just came out with. Real classy... Make sure you have them install the hardware for the optional back post. Its no extra at assembly time but about 50 bucks later on. Looks great on my all black bike. I'll try to snap a pic of it soon and will post it if anyone is interested in seeing a Corbin on a F650. Jim The Jet F650.
Lots of folk who contribute to the Chain Gang Message Board have said that, although comfortable, they don't really like the Corbin seat for the F650GS or Dakar, because of the pronounced ridge on the seat, which prevents the rider from moving about, (back and forth), so easily, which you need to do on longer journeys :~)) Trevor George
Man, I reckon you'd need to swap out a lot of metal parts for carbon fibre parts to make up for that beast. Some people lift them as a routine workout. I can't believe that pic was off the Corbin site. I'd be embarrassed. Look at all the irregularities under the cover. It's wise to get a textured cover on your Corbin, so the bumpies don't show up as much. The weight of the Corbin comes from the fibreglass or whatever seat pan he makes that usually fits poorly. Foam doesn't weigh much. fish
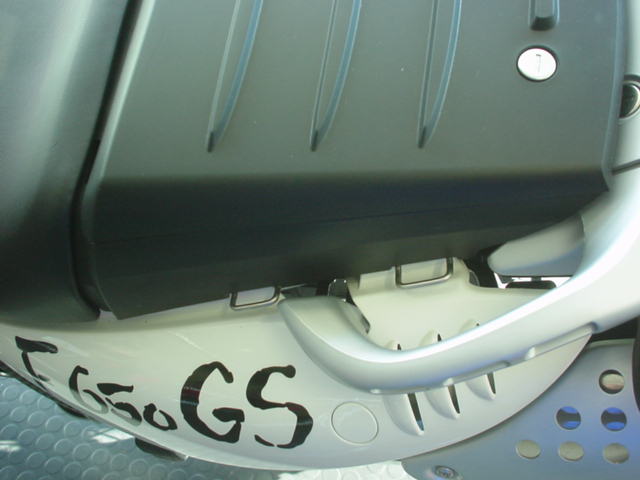
After installing seat I am unable to get the little panel back on the bike that covers the seat locking lever. Anyone else had this problem? How did you correct it? Any help would be appreciated. Fog McCobb. See movie above (ed).
I had/have a minor problem with sliding the little cover on my bike after I put the Corbin on there. What I have to do to make everything happy is to push the front of the cover down and get it aligned, then kinda push the back of the cover forward gently bending it (I mean gently!) to get the tab at the back of the cover to slide into its resting spot. Then the cover glides right on. Seacuke #1214.
I just plucked this message off the R1150R board: "Corbin just announced wholesale price increases ranging from 14-36%...it will be more at retail! Get one quick before this kicks in, if any are still available at pre-increase prices, or better yet buy another brand." To me, it just looks like another reason not to buy a Corbin seat. There are a lot of other choices for custom seats out there, for a lot less money, by some very skilled and caring small businesses. Years ago Corbin used to be a pretty good bet, but now it is just another big business that cares more about money, hype and internal politics, than their customers. (In my opinion, of course - which is based upon 20 years of buying six seats from them for both my bikes and two of my daughter's bikes.) Well, you could certainly go to Corbin, if you wanted to spend a lot of money and get a very heavy seat and a seat pan that may not latch properly to your bike without owner modifications to the hardware. Richard #230
I am on my fifth Corbin seat with one currently installed on my '02 Dakar. I ordered the seat on a Wednesday on it arrived the following Tuesday and I have had this same service from them regarding all the seats I have purchased. There have been minor fitment problems on some of the seats and I'll admit that they are way to heavy. The quality of the materials used in the cover have always been first rate. I am waiting for Sargent to get their "World Sport Seat" for the GS finished so I can replace the Corbin strictly because of the weight issue. I am 6'4" and the positioning in the new Corbin on the Dakar is near perfect for my stature. Hopefully the new Sargent will be equally as comfortable. Still no date as to when the Sargent will be on line. I was told that they were waiting for the CS to come out so that they could see if one seat would fit both models and it will not, so they have to R&D two seats. NCRedRider
Don't get the Corbin. So far I have heard a lot more stories as to WHY not to buy a Corbin then i have to buy one. I made the mistake once and it will never happen again. IT is your choice, but if ya look at the comments posted to my article...you judge, is a Corbin really worth that much trouble and money. I think not. R1150GS.
IMHO this is a pretty typical "Corbin Thread" that you will find on many m/c web sites. Lots of folks have had problems and are vocal, while another large group are equally satisfied and speak highly of the product. It's kind of like the HD, or oil threads that pop up now and then. Andy #618 (MD) 99F
I bought a Corbin for both bikes: F650GS and K1200RS. They were delivered quickly and the workmanship is 1st rate. Yes, I agree they are heavy, but so am I, so I don't think the bike notices the extra weight. The Corbin saddles are hard but after a long day of riding (1,000+ mile days) my butt feels fine. I had some back problems just before I bought the two saddles, I have had none since. I am a very happy Corbin user. I feel they enhance the looks of the bike while providing me with excellent support and comfort. I will buy an other Corbin for my next BMW, whenever, I change bikes. There are other good seat manufacturers, but I have been very pleased with my Corbin products. Dave# 717 - '01 F650GS
A friend of mine who lives in California has this advice about how to buy a Corbin seat... I never send someone there without a caveat. Frankly, I tell them this: The only way to get a Corbin seat is to go there make an appointment ahead of time call to confirm your appointment, at least once a few days in advance. It's a factory, there are no fancy waiting facilities -- there is a picnic table to sit at, a soda machine, and a roach coach so there is a place to sit, food and drink, but it's not fancy. IF you have them build the new seat on their own seat pan, you can put on your stock seat while they finish yours and ride into Monterey for lunch. They won't always build a seat on your seat pan. Their seat pans do not always fit as advertised. While you are there, make very sure you are happy with the way the seat fits your butt AND your bike. Make any changes/claims/complaints WHILE you are there. Mike Corbin is a nice guy. He is getting older and his health is not what it used to be. He also isn't as involved in the day-to- day operations as he used to be, now that he's off exploring electric cars and such. Your experience may vary based on the person you're dealing with at the factory. If you are going to be near Hollister anyway, and want a custom seat, it's worth a visit to Corbin. Otherwise, go to Russell. Flash 412 (CO)
Based on my experience and stories heard from others, I would like to warn you about purchasing a Corbin seat for your BMW. The reputation of quality service at Corbin no longer exists. Their advertising states that their seats "mount just like stock" is false. I ride a 2000 R1150GS and purchased a seat from Corbin believing in their advertisement and their reputation. The seat was a close fit but still took several minutes of tinkering to get it to lock down. And the rear seat fit was far worse, it damaged the locking mechanism and scratched the paint. With the hassle of removing the seat and the damaged caused, I am totally dissatisfied with their product. I did ask around to find that EVERYONE that I talked to, that bought a Corbin seat, had the same troubles fitting their seat to their bike. Upon contacting customer service at Corbin, I was ignored, until I wrote to Mike Corbin and complained. My comments and complaints were then passed around from person to person and 2 months later I have yet to get a response to my request of wanting to return the seat. I have gotten the run-around. From what I understand talking to other's that are dissatisfied with Corbin, this run around tactic is common practice. Please let it be known to all fellow riders that buyer beware. Corbin is practicing in deceitful advertising and poor business ethics that seems to be the norm of today, and they are placing profit over customer satisfaction. Had I know of all the others that have had problems with Corbin I would not have bought Corbin. Please "spread the word," don't let fellow riders get taken advantage of by Corbin. Joseph Leon #988.
What is the trick to putting on the Corbin seat for the GS? I got my Corbin seat but am having trouble getting it on my bike. I figure it is new and stiff and that is why. Is there a trick to getting it on. I can't seem to get it latched in the back. I had a bad feeling at first too that they gave me a Corbin seat for the ST cause there were not the two pegs in the front like the stock seat. From what I can tell though, it looks like the correct seat. There is a metal piece that sticks out the front at an angle of this one. The seat seems like it will be secure once I get the back latch. Any help there. I don't really want to force it. Bryan '02 GS #1157. See movie above (ed).
The trick is getting a seat from Corbin that's not a POS, in my experience. Those folks who have the best luck with Corbin seats seem to live near the plant and have them fit the seat. There are a few lucky souls who've had better luck, but I've had two, both requiring multiple trips back to Corbin, one never fitting particularly well. Harl #380
Mine was a pain too. I really had to force it to get it latched - pretty much had to jump up and down on it to get it to lock in place. And it didn't "relax" from sitting out in the sun, like I had hoped. With a flash light, you can see how far off the bar is from engaging the latch and then shim up the bar on the seat with some washers so that it sits down low enough to latch. Also try shoving the seat as far forward as possible under the "tank" too - maybe rock it side to side when you're doing that. And you have the right seat if it has the cut-out for the gas cap. They sent me the wrong seat the first time (and the second time). I didn't have any problems getting the cover back on. Someone else posted a month or so ago about having problems too - you may want to search back for it. Anyway - I think this is what I did - put the cover directly over where it should be when it is installed. Then slide it back toward the seat and it should drop into place. I think maybe I rotated it some to get one side in first and then the other. It's been a while and I don't have the seat anymore. (I'd be surprised if Corbin changed the design, but then I shouldn't be surprised at anything they do....). Yes, I did like the way it looked and it was more comfortable that the stock seat. But I really don't like the way they do business so I will never endorse them. When I ordered the seat, I called and talked to them about the seat height and told them specifically that I needed something that would be lower than the stock seat. The guy said no problem, that they'd put instructions to have it carved to be as low as possible. A month later, I get a seat, only it's for the classic, not the GS. I called and they said they wrote up the order wrong and to have me ship it back (which they paid for). Then another month later, they send me another seat and it's so much higher that the stock seat that I can't even get both toes on the ground. I call and they say the customization instructions had been left off when they wrote up the new order. Seat goes back again. Then I wait two more months, and then two weeks before I'm about to go on a week long motorcycle trip (the one I wanted the seat for), I call and ask about my seat. The guy says they're just getting to it. I told them about my trip and he says I should get it by then. Nope. Two weeks after I get back from my trip, the seat is still not here. So I call and they ship it the next day. Who knows how long it had been lost in the shuffle. It was still higher than stock. And by then, they had lowered the seat prices by $100 for which I got absolutely no credit or even a reply e-mail to my complaint - an "I'm sorry, but we can't do anything about it" would have been better than no reply at all. Anyway, it took 5 months and a lot of hassle for me to get a seat that was totally misrepresented. They also wouldn't let me return it because the "seats are custom products." As someone else here has said before - if what they have on the shelf works for you, then it's great. If you want anything different, forget it. Unless you can go in and stand in front of their counter with your seat, I suppose. Rebecca.
That was the way it was with installing the Corbin seat on my Funduro. The problem is Corbin's seat pan and hardware. Nothing matches up the way the factory pan does. It took me about a half hour to get that darn thing latched to the bike when I first installed it. After using it for thousands of miles, it is finally conforming to the bike enough so that it only takes a hard bang on the rear of the seat to latch. Now I am just irritated about the thing's weight. Surely there must be a way for them to make a lighter seat. Anyway, it isn't just the GS that has this problem. It happens to almost every seat that Corbin makes for just about every bike (such as my daughter's 1986 VFR - same problem). Richard #230
I'm counting my blessings. 3 Corbin's......., no problems. Not to mention the EXCELLENT custom trunk on my LT. Art 884
Well after my last post, I went out to the bike and slammed the seat on. (I had to hit the seat in a certain spot. After the third or fourth time it latched with the cover on. I did have a heck of a time getting the cover off though. It wasn't as easy as the movie showed but then again I admit I was frustrated. I'm at work now but when I go home I will try to take the cover off again and take my time to see if it is easier. (I'm doubtful though.) If the seat is a comfortable as I hear, I think I will be able to live with it. I am disappointed in Corbin. I would have asked them to lower the seat if I thought that was possible. I would have assumed they would make it the same as the stock. I figured it couldn't be made the same height as the stock or they would have..Dahh. If I decide that I need the back adjusted so to get at the cover, what are my options? Would I have to pay to have this seat shipped back to Corbin or do they pick that up. I really still am suspicious that I was given a seat that someone else had a problem with and they just gave it to me. Then again if they don't take returns, I guess that can't be the case. Bryan '02 GS #1157
I love my Corbin now. I have a really bad back but I feel very comfortable on it for longer rides. Only disadvantages to it was that it didn't fit right and I about had to slam it into place. After about 5 months now, it falls into place fine. You have some problems opening the storage compartment behind the seat. It is a learned technique. And the seat adds an inch to the height of the bike, so it borderlines being too high for me. I still love the seat though and wouldn't go back for anything. Bryan #1157
The classic Corbin seat practically latches itself when you drop the back, properly aligned. The GS needs some guidance. Once the seat is aligned. standing on the right side facing rear, place the heel of your right hand on the extreme back and push down. While doing that reach for the "T" bar from the latch with your left hand and slightly pull it upward (cover off). If you the push the "T" bar down and let go of everything, the seat should be latched. If not......, try again. Make sure the front of the seat is snug to the tank before pushing down. To put back the cover......, line it up about an inch forward of it's final position and once seated correctly, slide it rearward and lock it. It's really easy once you know how. You're gonna love the seat! The "new" carbon fiber OVER leather is excellent and not slippery with ANY pants. I have two. Much better than just leather and easy to care for. Keep in mind that any new seat needs some break-in time so ..... give it a chance. Art 884
With the stock seat I can touch the balls of both feet on the ground. With the Corbin I can only go tippy toe on both sides. The Corbin was not comfortable even for the 20 minute ride I took on it. It must be designed for a taller person as my butt did not seat is self all the way into the bucket there for it. I was sitting on my thighs and it was rather uncomfortable. The foam is way stiffer then the stock seat. MasterITRIT #F650-1231
I had the "carbon fibre leather" on my Corbin for the classic F650 too. I thought it worked great. The "off the shelf" seat was very comfortable for me, but at 6'4", I didn't mind a little extra height. I think riding in is the best way to deal with Corbin—lots of folks have had bad experiences dealing with them via mail order. The seat pan on mine was heavy, but it fit just fine. Overall, I'd recommend Corbin, but with the caveat that their customer service is pretty poor. Hey, that's kinda how I feel about BMW, too! Josh #581
When the F650 first came to the U.S., Helge Pedersen was promoting the bike and outfitted it with a heated seat kit from Travelcade. http://www.saddlemen.com/ James #523
Here at Mr. Ed's we have been putting heaters in custom motorcycle seats for a number of years. The heaters we use draw 1.7 amps at 13.8 volts on start-up and constant running current is 1.5 amps. The heating element has an overheat auto-shutoff built in. The best time to install a heater is when you have your seat reshaped and recovered. For more information contact deb@mredsmoto.com We have been in business for over 20 years and I have been building custom motorcycle seats since 1966. www.mredsmoto.com Don #301
Gel pad works well. Its cheap and can be used on another bike if you have 2. You can also microwave it on those cold mornings to stop bits freezing that shouldn't be allowed to freeze! Andy Leeds UK #982
Wunderlich has a heated set (Sitzheizung). Here's a Picture of it.
Mr Ed’s - Don & Deb's Moto www.mredsmoto.com
If the stock seat is uncomfortable for you (my '99 F650 seat was for me), it can be modified to fit you better by one of several companies. Mr. Ed's in Oregon does a good job, I've been told. Corbin is one of the gold standards of this industry, as is Russell. I had my seat redone by Rich's in Seattle, and it includes a built-in gel pad. Very comfy now. Bob#550
I am 5'2 with 28 inseam. Don has reworked my 650 seat as well as several other ladies in our area who have been quite happy with the results. Mr. Ed's prices are better than anybody else's around as well. Whatever you do, don't get a Corbin - they are broad and flat and simply don't work for vertically challenged women. MOO! (My Opinion Only) Gel pads will add to the height of the seat and I found they don't really add that much comfort - the secret is in the foam. Drop me a email for details, prices and pictures. Deb aka Mrs. Ed Deb #301
Skip the Corbin and send your business to Deb and Don at Mr. Ed's Moto, Chain Gang members and sponsors, and F650 owners. Their ad is in our Classifieds section, and they know more about F650 seats than anybody, can make standard modifications for specific problems, or can customize your seat as well or better than anybody out there. At least give them first chance at it - they answer e-mail. Second choice among those who know is the Russell Day-Long seat. Todd #389
You should talk with Don at Mr Ed's -- listed in the classifieds. He rebuilt the seat for my 650GS, and I'm very happy with it. I rode 240 miles the day I put it on, and was not uncomfortable or sore during or after the ride. Well worth the money! He can custom fit the seat to your requirements. Jim #1042
I have a Mr. Ed's remake on mine and it's a huge improvement over stock, which caused me to slide all over the place. NormJ #874.
I'll vouch for Mr Ed's seats. It's good looking, comfortable, and the timing of everything (build and delivery) was spot on what was promised. He was also easy to deal with over the phone. I have no connections, other than as a satisfied customer. Tim #203 '97ST
I have a Funduro but... Here is the saddle I am going to have mine made into.... http://www.mredsmoto.com/seats/index.php3 XtreemLEE
Got my saddle back !!! Yeehaa!!! Don Weber did a great job, looks perfect. I told him over the phone what I wanted and he nailed it. I got a longer seating area, higher seat height, blue colour welt, M colour detail, and carbon-fibre-look seating area. I have not had the opportunity to do any long trips but the saddle is much more firm (firmer than Sargent, softer than Corbin). I have a couple of shots of it (See above). $275.00 Plus the $20 bucks it cost me to ship it to him. XtreemLEE1188.
I too had my seat built up even though I am 5"6". Mr. Ed's did my seat and the viscoelastic foam stopped vibes coming from the seat and made it all-day comfortable. Got to stretch the legs more too. I am sure you will enjoy viewing the road from a higher perch. Kent #114
Shortly after buying my '99 F650, I discovered that I became really uncomfortable on the stock seat if I rode for longer than 30 minutes or so. So, I looked around my area (western WA) for a place that rebuilt motorcycle seats. I found Mr. Ed's in Oregon and Rich's Upholstery in Seattle. Rich's was closer to me, and I set up a ride-in appointment last year and it done. Rich rebuilt my seat to fit my butt, and accommodate how I sat on the bike. I opted for leather, which added a $100 to the price. Rich also uses orthopaedic gel in his seats -- a nice touch. I paid a total of $550 for this rebuild. Keep in mind, without leather it would be $450. Now on longer distance rides, I find the limiting factor for me is not the seat, but wind noise and buffeting. I believe that $300 is money well spent for a good aftermarket seat for the F, whether GS or Classic. It was one of the first things I added to my '99 F. I got one from Rich's in Seattle (drive in and custom fitted). It's all leather, and was a bit more than $300, but I love it. My next addition is a sheepskin butt pad from Alaska Leathers. I'll post my impressions after I live with it for a while. Bob#550
Rich's Custom Bike Seats. About a year ago I had Rich's Upholstery in Seattle (Rich O'Connor, owner, phone: 206-524-2274) redo the stock seat on my '99 F650. The result was a saddle that I could sit on all day, as opposed to the stock seat that had me wanting to get off after an hour. However, as I built up saddle time during the past year, I noticed that there was a little too much padding on the front sides of the saddle under my thighs. This seemed to bother my knees on longer rides (well, OK that and middle-age!!). Anyway, a few weeks ago I set up an appointment with Rich to remove some of this padding, and yesterday I rode up to Seattle from Olympia to have it done. I rode up and back on I-5, which gave me the opportunity to be flipped off twice (once by a woman in an SUV, who passed me on the right at 80 mph!) for no reason I could think of; almost rear-ended; caught in a walking-speed gridlock for about half-an-hour; and soaked by rain. Around Seattle, a good ride is turning into one you can walk away from. ;^) But back to Rich... Rich's policy is to take care of previous customers regardless of his present workload. So, my F650 got fit in between a Harley Softtail and an old Honda Pacific Coast. The visit took a little longer than expected (about 4 hours), but I left with a much more comfortable saddle. The cost: nothing. I paid a little more up front for Rich's work, but in the long run (literally!) I'm glad I did. If you'd like a saddle on your bike that actually fits you, I recommend Rich's. Bob#550 (Olympia WA)
I had mine done by Rich 3 weeks after I got the bike. Best to talk to him in fall and winter, he's very busy in spring and summer. My seat is kind of sagging out after 20k miles, not his fault, the foam is just shot. NormJ #473 Seattle
Ricky Mayer - Bill Mayer Saddles / Rick Mayer Saddles
I am very happy with my Rocky (sic) Mayer seat. I visited all of the seat vendor booths during the Redmond Rally and was very impressed with the Rocky Mayer seats. I have put about 2,500 miles on the seat and am very happy with the ride. I mailed him my stock seat and he rebuilt it. Great price ($247) and great service. I have no financial interest in his company, nor are we related. I have a Rick Mayer seat and love it. I mailed him my stock seat and he rebuilt it. Great price and great service. I have no financial interest with his company, nor are we related. I rode my 01 GS to the Redmond Rally this summer and hated my stock seat. At the rally I visited all of the seat vendors and was very impressed with the Rick Mayer seats. I bought one, $247. I love the seat. Buck# 901
Rick Mayer did a great job building my R11R seat. He builds his seats on your seat pan, so the fit is fine. The comfort is at least as good as Corbin, service was better and fit and quality also seem superior. Richard #230.
I have heard positive things about Russell Day Long Saddles, but personally think they look pretty goofy. Had some experience with Sargent (www.sargentcycle.com) - They take your seat pan and customize it according to your requirements. Found quality to be ok, but I wouldn't do it during the riding season because it took them about 6 weeks to turn my seat around in their shop. Much better was my husband's experience with Bill (Rocky) Mayer in California (www.billmayersaddles.com). He also builds on your own seat pan, but gives you a production date so that your only "without" for a couple of weeks. Bill asks you to send pictures of you on your bike and mark the critical spots on your seat. In our case we got what we wanted and the seat is great. It's also cheaper than Sargent or Russell. Happy Hunting. S#990.
I just had my classic f650 seat built into a much taller "dirt" seat by Rick Mayer cycles. I gave him instructions with a picture showing where I wanted the seat height. It's awesome, exactly what I wanted. I also have a Corbin for street riding, so I had the luxury of being without the stock seat for a couple weeks. www.rickmayercycle.com. mark #403 - 31-May-02
Check with the folks at Bill Mayer Saddles. I just spoke to Rocky (Bill Mayer Jr's) wife at Daytona. She said they had built a number of seats for F650s. I plan on ordering one for my '99. She said that if you call and get a build date from them, you can ship the old seat to them in time for the build date and have it back in about 10-14 days from the time you ship it. Very nice people with a long history of pleasing butts. Rick#939
To accommodate my 6'2", I purchased a seat from Rick Mayer, near Redding, CA. Moved me up and back. Also added bar risers, and removed the rubbers of the footpegs (97 Classic). The seat-to-pegs distance is one of the most important to me for my own comfort. This helped a lot. Rick guarantees his seat work, so I'm sending mine back this winter to have the sweet spot move back another inch or so. I also have a Corbin, which is designed for two people. It's more comfortable than stock, and way more comfortable for my passenger, but it locks me in very close to the tank. (I had the Rick Mayer seat set up for solo.) After seeing & using the Rick Mayer seat (cost me $250 for custom fit) and having several Corbin's on different bikes, I would NOT go with Corbin again. Scott S in WA.
I've been really pleased with my Rick Mayer seat. That trade sounds like a good deal to me. Sam#1238MI
I don't know about Bill Mayer, but I did have a custom solo seat made by Rick Mayer. It was much more comfortable than my Corbin. I enjoyed the ride-in experience & Rick's a friendly guy. Still, I had a number of customer service problems with Rick with his charges not matching the quote, some shipping damage that was never dealt with, and some other problems, so I won't use Rick again. Scott S in WA
A new, off the shelf, standard Corbin is $299, and it is on their seat pan which is very heavy and ugly. A new, custom made Rick Meyer Saddle is $339. You can ride in if you want (he's in California) or you can order online/mail/fax/phone, but you need to send him PHOTOS of you sitting on your bike. Rick has available stock F-650 seat pans, so he can make your seat on stock pan, while you ride your bike on your stock seat. When your custom seat arrives, you send him back your original seat pan. The $339 is for vinyl and the basket weave is available, no charge. He also does leather for more. So, what I'm saying is, Corbin is $41 cheaper and is off the shelf, non-custom. For an extra $41 you can get a custom-made seat. Seems like a no-brainer to me. Oh, Rick goes to rallies across the nation (49'er and MOA Nat'l) so you can get ride in service in other places too. I'm getting a Meyer. Gar #673
Russell - Russell Day-Long Saddles
15K on a Russell. Wonderful seat. Clark#232
I am 6'2 and ~215 lbs and the stock 2001 GS seat was a misery after about 90 minutes. I could barely walk if I stayed on the bike for a three-hour stretch. I invested in a Russell seat and can ride all day in comfort now. It's more expensive than the Corbin, and you have to supply them a GS seat pan or an old GS seat to build your new seat on. My BMW dealer (Irv Seaver of Orange, CA) had a spare used seat in the back, which they let me use while my seat was being built. The whole process took about 60 days, so I'm glad I had the loaner seat. I chose the Russell over the Corbin because there is a money-back warranty if they can't make it comfortable for you, and because of Corbin's increasingly bad reputation. Dan#823
I would go with a Russell seat, you at least have a chance of actually getting the saddle within a reasonable amount of time as compared to Rick Mayer. Mark #403
About a week ago I replaced my stock seat with a Russell All Day Saddle. What a difference. I've done a 3 hour ride with no discomfort. I'll be doing a 6 hour ride soon, and I still don't expect any discomfort. If you are inseam challenged as I am, make sure you can go a little higher. I noticed that I'm about 1" higher. This turned out to be an added bonus, since it puts my entire helmet into clean air. stuflinn
Sargent Seats - Sargent Cycle Products
I think BMW is big on selling coloured seats in Europe. BMWNA is smart enough not to permit them on their US bikes. They stick with basic black. As far as the foam stiffing up, you could go to an upholster and have them replace the foam in your seat. You might also check with Sargent Seats. I hear that they do a good job of rebuilding seats. Richard #230
I bicycle plenty (1200 miles since January 1st, and it's winter here!). And still, the BMW seat on my Classic F was one of the most miserable torture racks ever invented. More cycling wasn't going to help. I'm quite happy with the reconstruction done by Sergeant. Bryan#179
Considering that I've had both a Corbin and a Sargent on my Duc Monster and my R11GS, I guess I can speak to this. Actually, I've had a total of 5 Corbin's, and the one constant has been that the newer the seat, the worse the quality. The Corbin's are very heavy, don't fit worth a crap, and their customer disservice speaks for itself. They use a clumsy, heavy, ill-shaped fibreglass pan. They kludge up hardware rather than using BMW parts. On the GS it has chewed up the aluminum Sub-frame. The Duc is a far simpler seat, but the sharp edge of the fibreglass pan assures that the stretched material will split. Corbin knows this, so they put a sticker on the seat that they aren't responsible. If they know there is a problem and don't fix it, are they responsible? Hell yes. In addition, on the Duc seat, and all their gunfighters the vinyl/leather separates from the foam on the curved sections. Corbin does not consider this to be a fault and refuses to repair it. The Sargent's, on the other hand, use a vacuum formed poly pan, that is created using a custom buck. Where appropriate, as on the GS, they use genuine BMW mounting hardware. Their seat weighs a fraction of the Corbin, yet looks tons better, and fits correctly. They have a broader material choice as well, the new carbon fiber look is much nicer than the equivalent Corbin material. Now for some truth in advertising. I live in Jacksonville, Sargent's home. While I have no stake in the company, I do know the folks there. They have used my bikes and those of other BMW club members for prototyping and testing their seats. That said, it has provided me with the opportunity to see the care they take to produce a good product, and I am impressed. Alan#442
I've had good luck with Sargent's (they'll build a seat to your specs off of the original seat pan). I'm currently using a Dakar seat on a GS it has more foam and was cheaper than the Sargent's. I'm still thinking of sending my original to Sargent's though. Paul An
Sargent sells seat covers. They do not SHOW the F650 Funduro cover as being available. But they DO make and sell one.
I had my original seat customized by Sargent seats (see the links page) , and in a desire to lower it for my lack of inseam I had it lowered too much. Because the seat pan sits at an angle removing foam at the rear of the drivers portion can result in not enough foam for comfort. I think the angle is the reason most of the aftermarket seats sit higher. In order to flatten the platform you have to add to the front not remove from the back. Peter Jensen #233 97ST
I think Sargent is making complete seats now (for some models), but couldn't tell you about the weight difference. If I had a stock seat I didn't like, I think I'd just send it in and let them use my base. Would save some money and their turn-around time is fairly quick. I have the Dakar seat on my standard GS. It's a lot better than the stock GS seat but still room for improvement. P7HVN
You could also try Sargent's, out of Florida. They do excellent work and will make seats to your specifications. You can talk to a rep over the phone and tell them exactly what you want done, or send drawings/pictures of the stock seat and how/where you want it changed. They're like Corbin use to be (in the 80's); can call em' up, chat with the owner and get just about anything done you want (with excellent customer service thrown in). P7HVN
I have a Sargent on my RT and really like it. Mr. Ed's said he could do mine in a week of shop time plus shipping back and forth. Since on his website he had exactly what I wanted done I feel good about him doing it. His price was a flat $275.00 as I kept telling him other things that I wanted done the price stayed the same. I priced what I wanted with Sargent and got a bit frustrated that they upcharge for every little thing when it comes to custom. XtreemLEE
FWIW, the Sargent on my RT seems just a little lighter than the stock seat . It has the Sargent seat pan.
Stock seat was good for about two hours. Purchased Corbin, which is a marked improvement over stock seat, added a few more hours. Take a look at Sargent seats. Purchased Sargent seat for my K1200RS. Sargent seat is not as hard as Corbin and adds a few more hours over Corbin to your ride. 2002 F650GS with Corbin, 2002 K1200RS with Sargent. Sargent has my vote, by a long shot. y2kcorvette.
I found the info I got from M. Todd @ Sargent Cycle Products, from when I bought my seat (August, 1999): "Yes, we do make a seat cover, its part # SS-600, and it comes in either all smooth or with Griptex inserts and a color welt (if we have your BMW stock color matched) for $69.95 USD. You may add the BMW tri-color detail for $29.95 USD. Please allow 2-4 days to ship, and we will quote shipping if you provide a shipping address with postal code. It comes with a moisture barrier and installation instructions." The instructions that came with it say that it can be installed OVER the original cover. I actually never installed it because the guy who bought the bike never mentioned the three centimetre piece of electrical tape on the seat. BTW, there is NO difference between the Funduro and ST seats. They are identical. Flash #412
This is the answer I've got from Sargent Seats (November, 2003): "We have a sport skinz for a BMW F650 Strada, which I believe is designated as the ST. It is part #SS-600. Look at our upholstery choices on our web site for the look of the CarbonFX and Griptex. But we have a material called Vintech, which is very much like the original BMW seat cover. You may have a difficult time taking off the old cover, as BMW bonded them to the foam. It you can spare to be w/o the seat for a while, I suggest that you send it to us for installation. We will upholster your seat in the Vintech for $109.95 plus S & H of $9.95." gim
From the Sargent Cycle website: DIY installation is a little tricky on BMW models - please consult with a Sargent representative prior to purchase. Ed.
These guys do Custom made sheep skin covers, cut for ya particular bike. It is a short cut sheepskin pile not shaggy as Western Australians prefer. has elastic around bottom and slips on and doesn't move. I reckon increases my saddle time but several hours a day. very very comfy. I have a R100GS PD and they even do two colours like the seat is Mine is grey/black (looks very good.) Quality is great as not only do we have millions of sheep but the best looking ones in the world. Ask the Aussies that's why so many come here for a holiday :) If u are in USA also after including postage the price will be very good as 1 NZ$ equals about US .47 cents. Charman Motor Trimmers & Upholsterers Ltd, 10 Holden St Onekawa, Napier, New Zealand. 64 -6- 843 6969, NZ area code number (64). Rangi in Aotearoa.
I use a "sheepskin buttpad" from Alaska Leather. It's a strap on version and done in black so it matches my bike. Cost around $40. I love it. Go to: http://www.alaskaleather.com/
I have a black sheepskin seat pad from Whitehorse Press. www.whitehorsepress.com It's 18 x 18" and velcros on with straps that go under the seat. Says it can be trimmed to fit. I love it. Takes the burn out of the butt. Cool(er) in the heat and warmer in the cold. If it begins to rain, I just pop off the seat and take it off and stow it in a bag. That's the only disadvantage. You have to take the seat off to remove it. If I'm packing heavily and it looks like rain that day, I leave it off. $47.50. Sandy787
The seat is a good compromise height wise between the regular GS and Dakar seat (although I can't tell the difference). You do get a small storage space in the rear but need to order the lock kit and plastic dowel separately from the seat (a BMW PITA). Info on my web page at: DHP Solo Seat and DHP Solo Seat 2. which has part numbers, etc. It weighs about the same as the stock seat. davidhpark, #711
I have that seat David is talking about. It was the height of the regular GS seat which was too low for me so sent it to Sargents for elevating. Put it a bit higher than the Dakar seat and it's great!!! Storage space comes in handy!. Bill #697
I have one and like it fine. Adds some water tight lockable storage. Has 4 places to attach luggage straps/bungees. Easy enough to swap the regular seat for 2up and the storage lid is strong enough to carry a passenger in a pinch. The only time I use the regular seat is when I think I might be carrying a passenger, which isn't very often. No photos but there is no issue with the filler cap. The bike isn't here right now but the interior size is roughly length and width the same as the rear of the regular seat from the hump back. It's about 4 inches deep at the front and a little less at the back. It's water tight. I carry a larger tool roll in it. Video tapes will fit. Sun glasses. Camera, cell phone, stuff like that. I carry a bungy net in the rear compartment (behind the seat) and like the wire loops on the seat for attaching the hooks. I don't use luggage unless touring and leave the tank bag home when I can. I prefer my motorcycles like they were meant to be... naked... :-). Mike#639
I chopped off my seat just rear of the lip. The part where a passenger would ride if I ever had one. being 6 foot tall, I prefer the higher seat height and so not only replaced the foam plug butt section (cut it out with a razor) with a foam plug taken from the excised rear seat foam. I then added a doughnut pillow (you know, drugstore remedy for all manner of butt aches) as well as one of those cool extra swank foam butt pillows that compress really differentially to the load placed thereon. The result is more of a horizontal beam, than the traditional 1997 f-650 seat. Furthermore, the foam height is more than doubled increasing the seat height substantially. Combined with a 21 inch front wheel, the net result is a good three inches of altitude. Really feels good in the sand and loose dirt with some dot knobbies. It also leaves a shelf behind the rider for a lower center of gravity box/bag mount surface. Did I mention that it doesn't look too happy though. Kev.
Have one and am very happy w/it. Height = std seat. As you see from another response the storage capacity in not huge, but it is a huge *improvement* over the stock seat. Comfort = stock seat with one caveat: if you slide back in the saddle you butt (pun intended) up against the hard leading edge of the storage compartment rather than the padded edge of the pillion hump of the std seat. You can slide back just as far, but the "stop" is harder. Not a big issue for me as I just nudge 5'8" and only get back there for an occasional change of position. If you're tall and live back there, might be an issue--suggest you try a seat-of-the pants test in a showroom before committing. It comes with a keyed lock, but I did have to pay extra to have it re-keyed to match the ignition key. Rob, #1160
You need to order the lock dowel and kit the part numbers of which are detailed on my web site (Part # 9 048 198). Direct Link to DHP Seat Page. The seat height appears to be between the Dakar and GS seat height. Just ask your dealer to get one in so that you can look at it. Davidhpark, #711.
We have a 97 ST and a 99 regular F650 and have interchanged the seats with no problem. Dave #888
I toured quite a bit this past summer on my '01 F650GS, sitting on the stock seat all day (seven to eight hours with very short breaks), for days on end. I find the seat very comfortable. mspeed #1023
I have a '98 too, and I gather Corbin makes a seat for '97/98 models. I've never had a problem with the stock seat, but I'm fairly light so I don't think I compress the foam much, but I've liked what I see of the Corbin for passenger comfort. I gather from my wife that the stock seat leaves a bit to be desired from the back end. I've always felt that seats are a very personal thing and you may have to try a couple before you get one you like. Also something that not many people are mentioning is that if you have a really good upholstery shop in town they would be able to re-build and re-cover a stock seat anyway you like. Higher quality foam, leather, what have you. After all the seat is a cover pulled over some padding and stapled to a stiff composite mould. So long as you've got the base anybody that knows their way around an upholsterers can work up from there! Sean #1015
Call me cheap, but as much as I want a more comfortable seat, I just cannot handle spending $400 on a refit of a seat that only costs $120 brand new, no matter how uncomfortable it is! Todd #389
I'm with Todd on this one stock seat on my 99 is good for about three to four hundred miles before becomes intolerable sure ain't worth 300 plus bucks to me to make it any better. Mike
Before spending that kind of money, better make sure you can't live with the stock seat. Not everyone thinks they're so terrible. Personally, I think the stock seat is fine. Those after market seats look wimpy to me. Anon.
The stock seat is fine for one-up riding. For crying out loud it's a motorcycle. Three hundred buckeroos is a lot of clams on foam. Roy#1095
Save the 300 bucks and put on a few miles each month on a mountain bike. You'll be in better shape and the stock saddle will feel downright comfy in comparison. Worked for me when I put in two 1K days back to back on my old R100 Mystic heading from Portland to Atlanta for a job. Northwet #1101
I have a 33" inseam and ride an '02 Dakar, the peg / seat relationship is fine for me, I think it has a lot to do with personal preference. The seat is o.k. for comfort, but not the greatest, I have not ridden a non-Dakar GS so I cannot compare the two. My two cents, I think the bike would be great on busy city streets, for the same reasons its great on back woods trails. Best of luck with your new bike, Mike
After 4-500 miles on the F650GS in a day you can turn into a true alcoholic - seat is worse that the stock seat on my RT. Can anybody recommend a good replacement seat for an F650GS. The Corbin web site shows a seat, but it looks like it is for the older F650's not a GS. PhilSpace
If you have the *standard* F650GS seat on at the moment, then try the Dakar seat which is more than an inch thicker, 'cos it has a more foam. It is *much* more comfortable. Trevor George
I agree: Try a Dakar seat. Of my three (street legal) bikes, I would say the Dakar seat is the most comfortable -- even more comfy than the KLT. DakotaDakar
In August I bought an 02 Dakar. I asked for the low seat! There are two BMW seats available. I was originally going to buy the F650, not Dakar, until I sat on the Dakar with the low seat. That was it, I was convinced. The high seat was just a little too much. I believe the seat pan is the same for either seat. The regular GS comes with the low seat, unless you ask for the high seat. The high seat usually comes on the Dakar. I took it a step further and purchased the extra low seat manufactured by Wunderlich. Don't buy it from the BMW dealer in Santa Cruz. I learned the hard way. Once I bought the seat, I found it much cheaper at Sierra BMW in Las Vegas. Richard
Here I think is the correct answer....maybe....I think...don't know why BMW has to make this so mysterious. Dakar and GS seats are interchangeable. Dakar is 1" higher. Many have received a trade by the dealer upon purchase. Last year Wunderlich came out with a seat that is 1.25" lower than the GS. Looked like the OEM to me and I wondered if Wunderlich makes the OEM seats for BMW. Then this year BMW came out with their own extra-low seat that can be purchased. Does not come standard on any bike. Also 1.25" lower than the GS. Much cheaper than the Wunderlich....same price as the other two seats....about $160.....if memory serves. That said...I'm <5'5" with a 29" inseam. Ride the GS with the standard seat. Weight allows me to set the suspension somewhat soft. That coupled with some thick-soled boots works just fine. Shelley #798
BMW Parts Numbers for Stock GS Dual-Seat
(F650GS & Dakar) 52532345735 Dual-seat, high, black (Normally comes with the Dakar.)
(F650GS & Dakar) 52532345736 Dual-seat, low, black (Normally comes with the GS.)
I've done it. Handed it in to a furniture re-upholsterer a couple of months back. He did a total rebuild, which raised the seat 2 inches. He used original BMW anti-slip/slide fabric combined with a black leather imitation fabric. Looks great, seats good, cost: $166. This particular shop rebuilds all the police bikes, that's why I trusted them with the job. Do a search on the web and look for companies that have experience in doing saddles for bikes. Thomas #849
Back when I was looking at buying a Suzuki SV, lots of folks reported good results with taking the stock seat to an upholstery shop and putting in high-density foam. Of course that only makes sense if you feel your seat is too soft. I'm not sure how much additional material for the seat cover there is to actually raise the seat height. I you just want to change the shape, check out one of the local shops. Compared to $320 for a Corbin that's worth a shot. its_xls.
I finally got around to modifying my OEM F650GS seat per the FAQ (which is great by the way). Took me longer than the FAQ indicated. There are a million staples to remove (I recommend needle nose pliers, staple puller, screwdriver). The only manual staple gun that worked was the "Power Shot." If you have a 31" inseam like me (or shorter) carve out existing foam from the back in addition to adding foam up front to keep the seat height low. Also, don't put foam on the sides, just in the top area. Not a Corbin, but much better. Thanks a lot to the folks that pioneered this $$$ saving idea! Rod, CO '02GS.
I told the furniture re-upholsterer who did my saddle to make me one. He makes the saddles for all the police bikes here in Oslo, so he had original BMW anti-slip material in stock. I told him to add 2 inches of foam (had the lowered saddle to start from). I also asked him to move the "bump" back an inch. It's awesome. Really comfy. Looks GREAT. Reasonable priced at 1500 NOK ($200). Took about a week to have it done. Aridriel
I recently had a local upholstery shop rework the Dakar seat I bought for my GS. I considered the choices in the FAQ but opted to work with someone local to me. It took two tries to get it the way I asked for it. I wanted the seat higher in the front-most portion but the same in the mid-seat area. That took out the forward slope. I also had them use stiffer foam. I wanted to retain a seat that was still suited to some off road riding so I did not want a 'bucket seat' type shape. The rework required a new cover so I went for a two texture, marine grade vinyl. The new material, especially the dimpled material used in the two front sections is a bit slippery. Makes for easy weight transfer in the turns compared to the grippy stock cover. I paid $225. It took about a week. They are in the SF Bay Area down the street from CalBMW and do a lot of seats for them. I have not been on it more than an hour yet so I'll not make a final judgement until a full day ride. Brad #1002
To change “seat colour”, take your seat (preferably with the bike attached for colour matching) to an auto upholstery shop. You might have to visit a few, but they can usually re-cover seats for cheap in a minimal amount of time. Never did it myself, though. chppdlvvr
After our dog ripped the back off our sofa to get a mouse inside the sofa, an upholsterer quoted me $750 to fix it. A trip to our local fabric store got 9 sq. yards of better-quality Naugahyde and, with some trim strips from another upholstery shop, we fixed it for ~$40. Point being, it may be even cheaper and more fun to do it yourself. You probably need a good staple gun, proper length staples, auto weather-stripping cement, vinyl of your choice, and the old seat cover for a pattern. Other thoughts. They sell naked gel pads that you could embed into the existing foam if it's losing its cushiness. The vinyl from an auto place may have better UV protection. Take some photos of the old seat bottom so you or your contractor can see how BMW folded the vinyl around the seat pan before stapling. teddco
You may also want to check with a marine shop or RV/awning shop. Also consider posting an ad for a "used seat" if BMW made them in the right colour. Lots of Inmates have replaced their stock seats. Marty #436
My local auto trim shop has spray-dyed two BMW seats and a Transalp seat when I couldn't get the correct colour of vinyl. An auto paint store mixed the exact colours in a product that uses an adhesion additive and flexing agent. This works beautifully and the results wear very well. Any colour you can imagine can be mixed. The secret is to mask the bottom (pan) perfectly, so you can't even tell it was sprayed. You can also vary the degree of gloss or mat finish in your dye for exactly the look you are after. A half-pint of dye will be more than enough for your F650 seat. Cost will be up to your local trim shop. This is all assuming that your original seat skin is in perfect condition and a colour change is all that you are seeking. Farflenoogie
I took my stock seat and stretched deerskin over the original and stapled it. The deerskin is much more comfortable than synthetic. It is also is less slippery. The deerskin has such great ability to stretch, it looks sculpted. Be sure to use stainless staples. I also put in snaps for a rain cover or extra pad. Ted G
Compare Wunderlich's three seat heights.
For the GS. ERGO Saddle low. A little bit harder and 2cm lower than the stock saddle. New personal record with 948km/day. Joe at Joe Equip F650GS.
The Wunderlich seat for the standard GS which is the SAME height as the stock one. Is it significantly different from the stock? If so in what way? To find out I went and bought one to break new ground for the gang. My main concern with the stock seat was that it would tend to push me forward and smash my balls into the tank (schmaaaaang) or suck my balls under my arse (screeeooooowwwwaaaa). Matters have definitely improved. The padding of this seat is nice and firm (almost too firm in the snow) and there is much more padding upfront. The seat height is unaltered. The profile of the seat is slightly flatter which also has helped the sliding forward difficulties. The seat is built on the same pan as the stock seat so fitting isn't a problem. I commute daily on the bike but haven't been on a trip longer than an hour. I have felt no numbness which I would have by then on the stock seat. The covering of the seat also feels a bit more grippy. I haven't tested the pillion bit but it looks very comfy and again is firmer than stock. The seat has been subjected to rain, sun, snow and cat spray/wee and appears unaffected (so far). The only downside is cost (c.£240) and the dealer wouldn't part-ex my stock seat. Still if the Wunderlich fails over time I have a spare ready to be sent off to customise with Baglux if necessary. The FAQ reviews the 'low' Wunderlich seat but not this 'normal height' version. Is it possible to add these comments to the FAQ as I know a few people have problems with the stock GS seat? Andrew C (UK).
Here is a picture of both a low stock seat (left) and a replacement high seat (right). [Courtesy of my friend Haakon]. The 1.5 inch (40 mm) difference is very obvious and they seem to have fairly the same forward inclination. The BMW part number for the high seat is 52 53 2 345 735. About $200 at any BMW dealership. Optionally you can get the Wunderlich Ergo high seat, (2-3/4 inch) which they claim to be of higher quality. The big problem with that seat is the $529 they ask for it!!. Check it out here: http://www.bmwscruz.com/SHOP/BMW/index.html. Fernando.
The Wunderlich is a little over an inch lower than the stock BMW seat that came with the GS. Apparently, there is not a lower seat offered by BMW. (Although there has been much discussion about this, no one has come up with an existing part number for an extra low seat from BMW.) I absolutely love the seat. To me, it is much more comfortable on long rides than the stock seat. It is pricey though. Two of the three web sites I found it on are asking $529, but last time I checked, ASCYCLES.COM still has it for $399. I think it is worth the money if you ride a lot like I do. That's where I ordered mine from. Grits
Just received the "extra low" Wunderlich seat for my GS and I'd say the height difference is really noticeable, probably around an inch. I still can’t flat-foot both feet (I'm 5'5" w/ 29" inseam) at the same time but I can one-side flat-foot comfortably. jagged
Ideas and Links
This article on seat cover installation, by Moto Professor, will show you how to install seat a cover on your bike: http://www.motocross.com/motoprof/pdffiles/seat.pdf The website also contains various other interesting tech articles.
Flash's friend Wilkerson (see " 5,172 Miles in 12 Easy Days" thread) did a nice seat modification, and posted it to his site - Scott, ID # 1244 http://webpages.charter.net/hondapotamus/corbin.htm
What causes your butt to hurt are "Pressure Points". Basically the blood flow gets cuts off to a certain area of muscle and after a while the lack of oxygen causes it to ache. I've found that if I shift my weight back and forth between my buns (kind of like a sponge squeezing out the old blood and letting oxygenated blood flow in) every so often, I can ride hours in complete comfort. If I do this every 20-30 minutes from the START of a ride, I can ride 5-6 hours fine. If I forget until my butt starts hurting, I can ride another 2 hours in comfort. If I do it ALL RIGHT: a) stretch and take Alleve before a ride, and b) sponge-butt from the beginning, I'm good all day. David #476
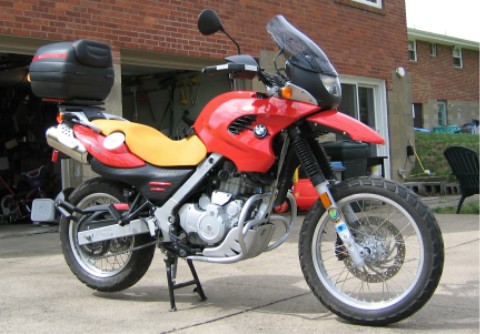 I got the yellow seat on my 650, and it really picks up dirt. However, I found a
good way to clean it! I picked up a large can of Plexus that I use for cleaning
my helmet and plastic parts. I sprayed it on the seat, and used a microfiber
towel to remove it. The seat is clean, and it took the black road dirt right
off. Also, Plexus is cheap. A large can is only $5.95, and it doesn't require
any water. After letting the bike sit in the sun the other day, I was happy to
find that the seat was noticeably cooler than a black seat would have been.
I got the yellow seat on my 650, and it really picks up dirt. However, I found a
good way to clean it! I picked up a large can of Plexus that I use for cleaning
my helmet and plastic parts. I sprayed it on the seat, and used a microfiber
towel to remove it. The seat is clean, and it took the black road dirt right
off. Also, Plexus is cheap. A large can is only $5.95, and it doesn't require
any water. After letting the bike sit in the sun the other day, I was happy to
find that the seat was noticeably cooler than a black seat would have been.
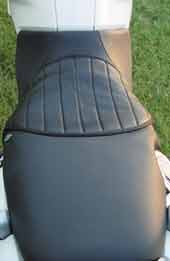