
For Fairing Q's see Fairing FAQ GS
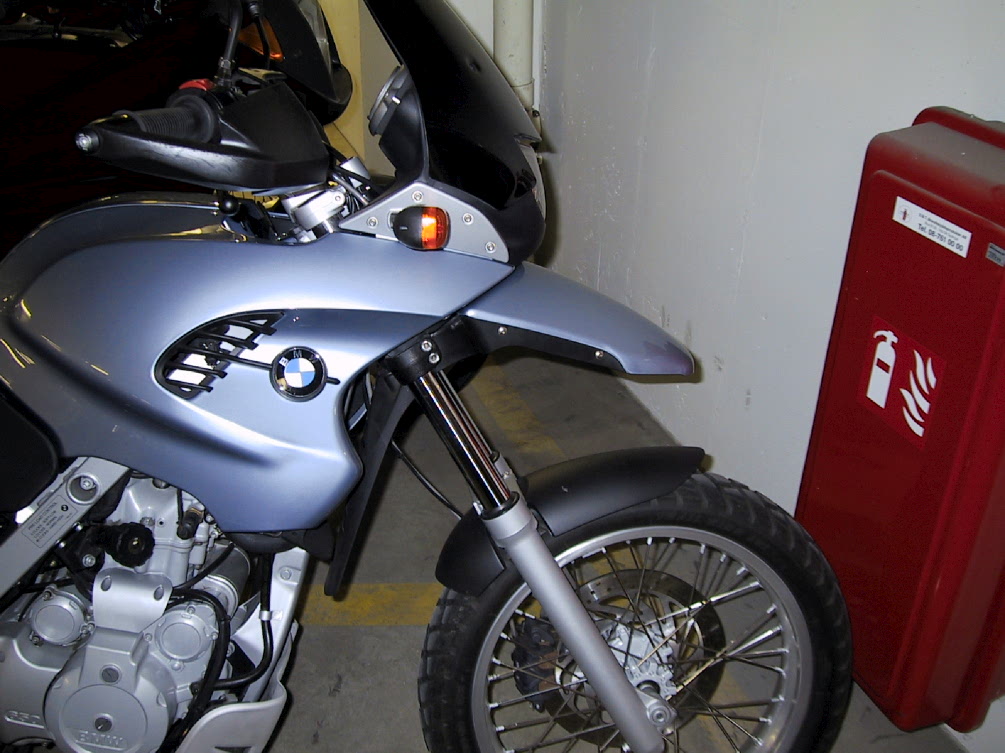
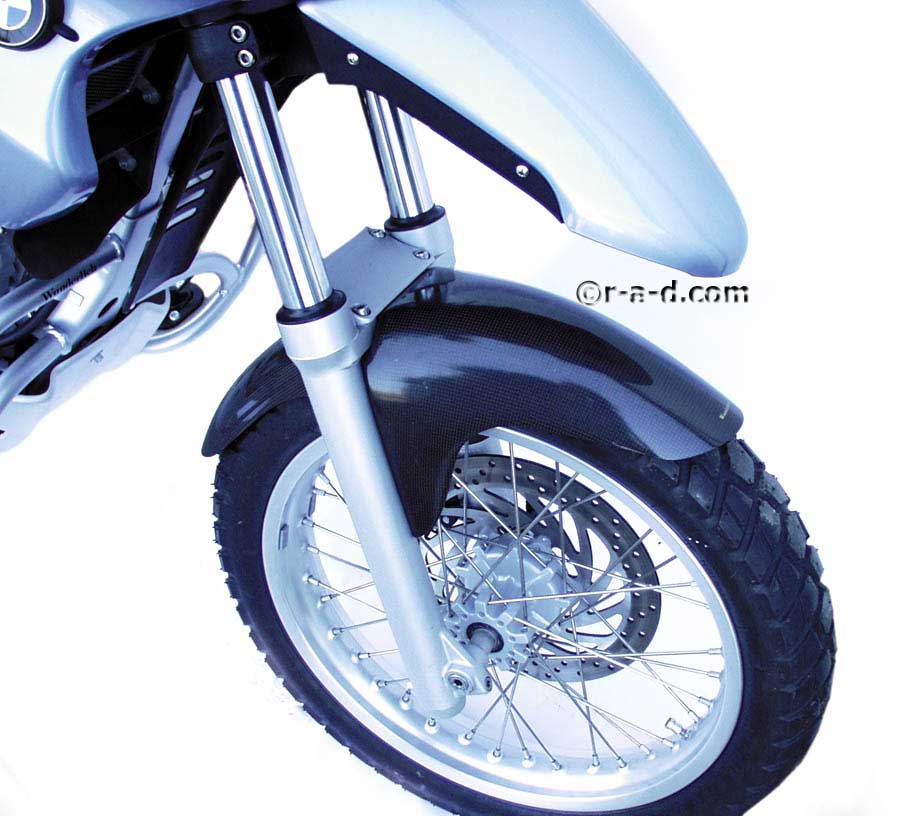
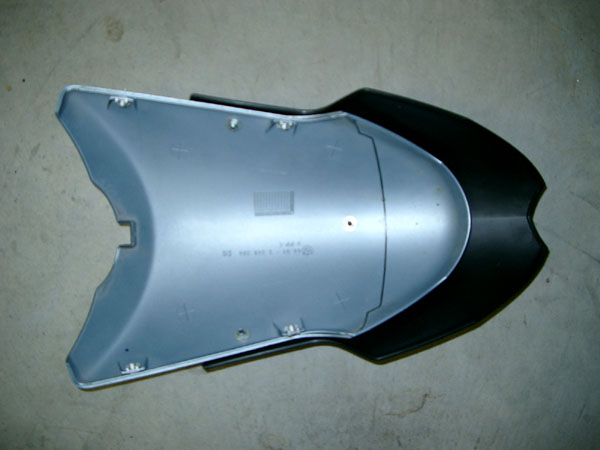
BMW OEM Low Front Fender
Note: 25 May '03. The NEW GS's ('04 Models in the US) now have the low Fender as
Standard
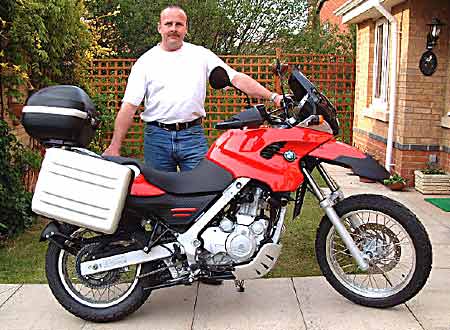
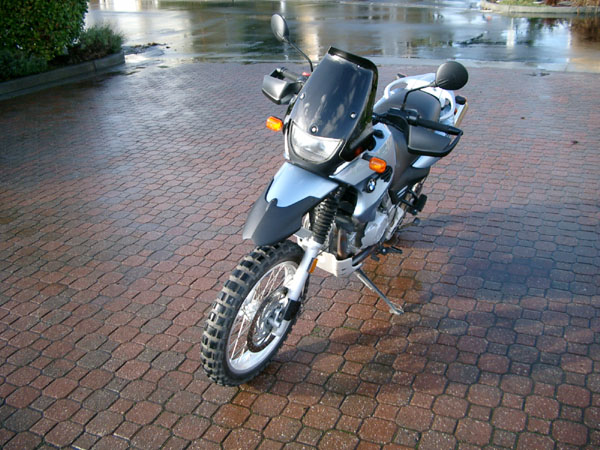
This is a '03 UK model new from the dealer on 10
April '03. Photos from adamapost:
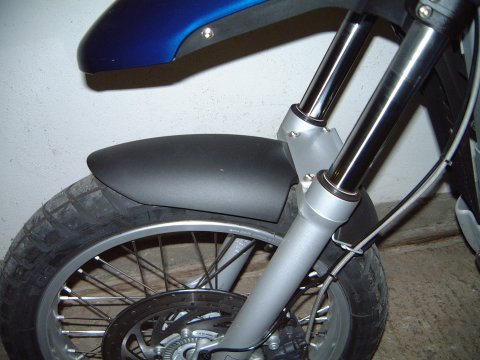
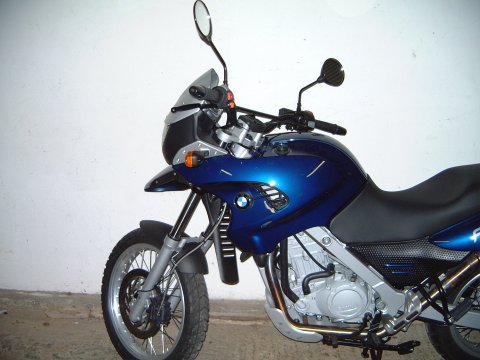
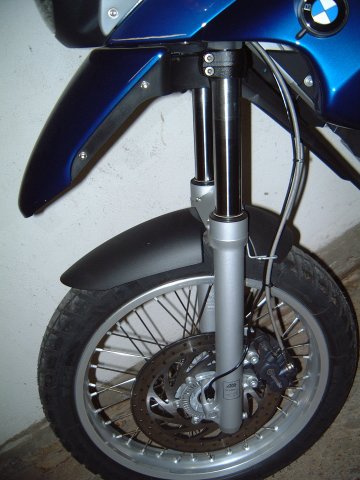
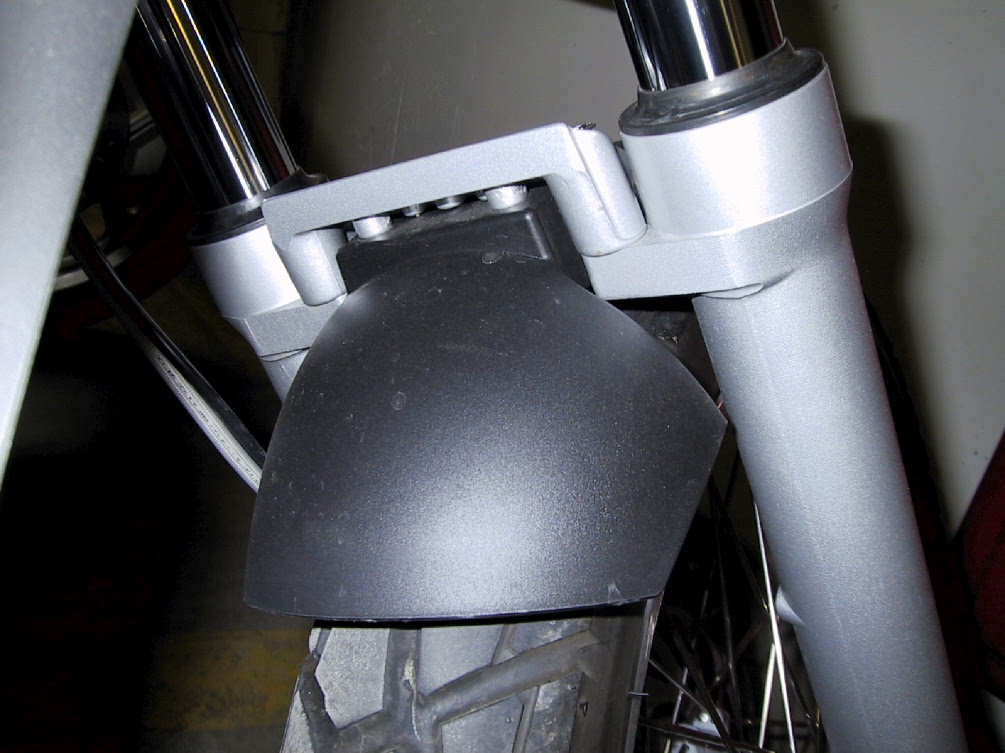
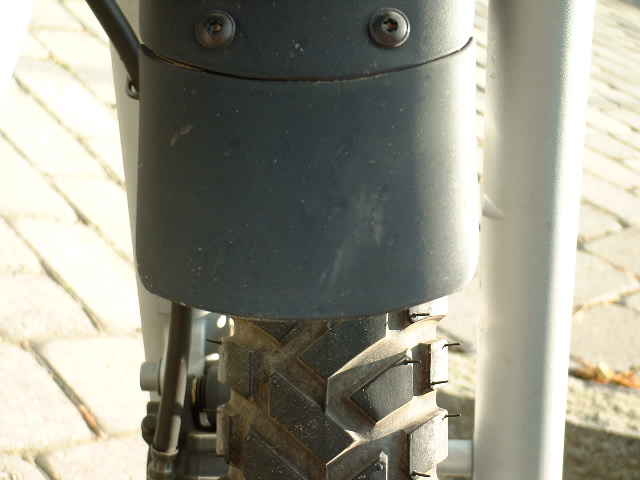
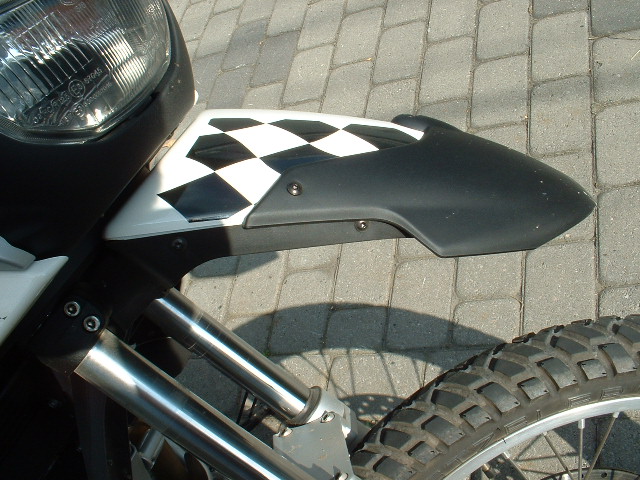
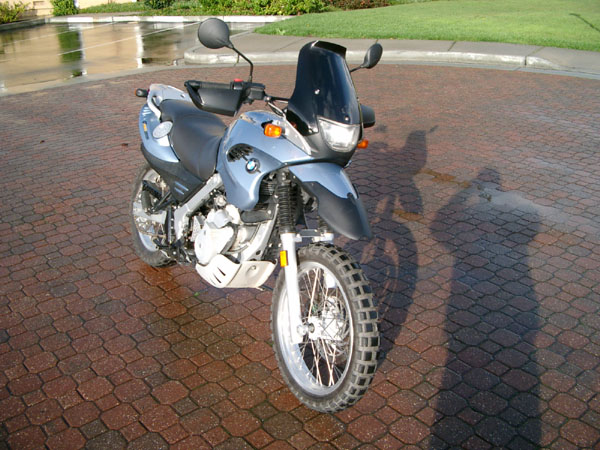
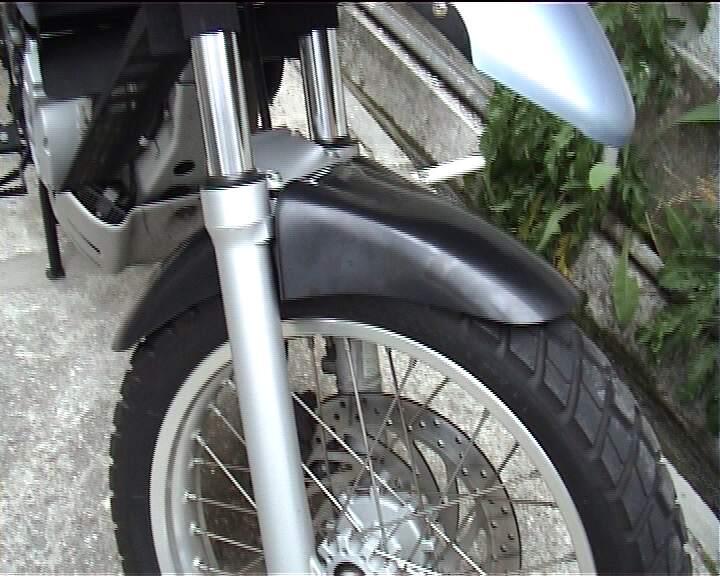
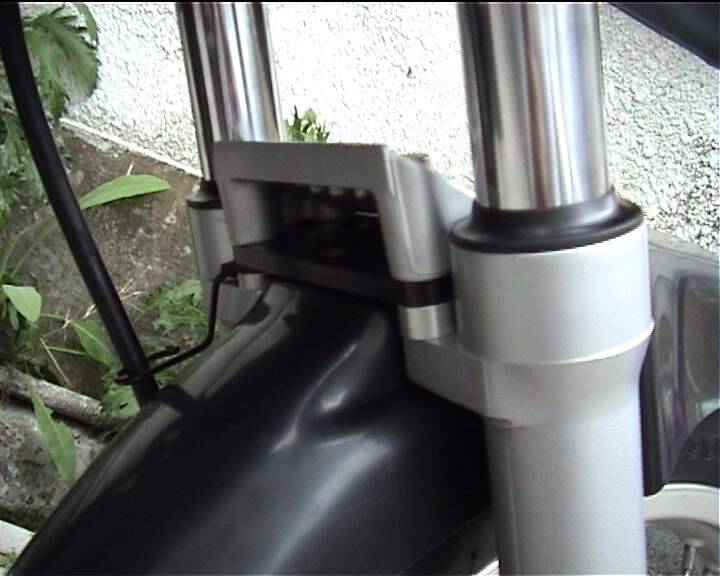
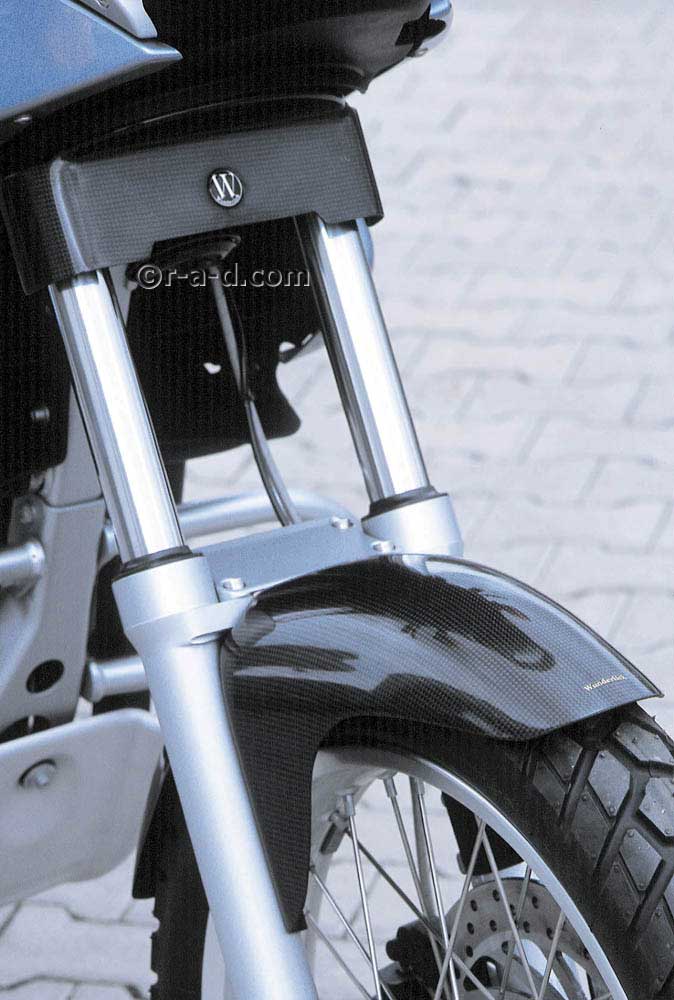
These next pics are of a retro-fitted one
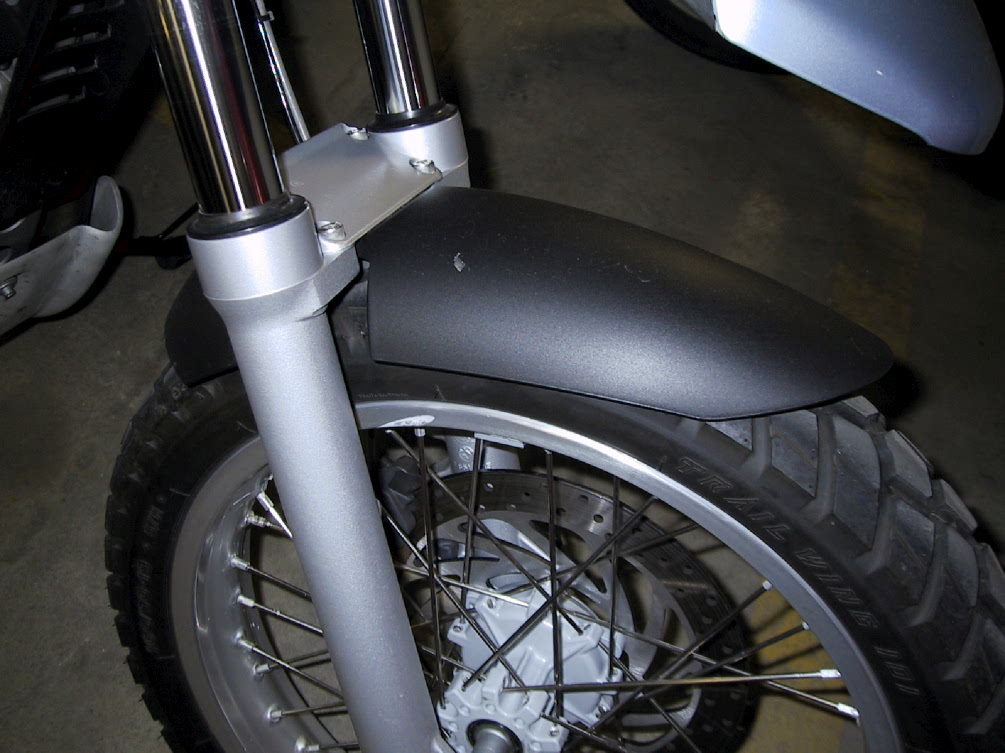
 Photos from Pelle
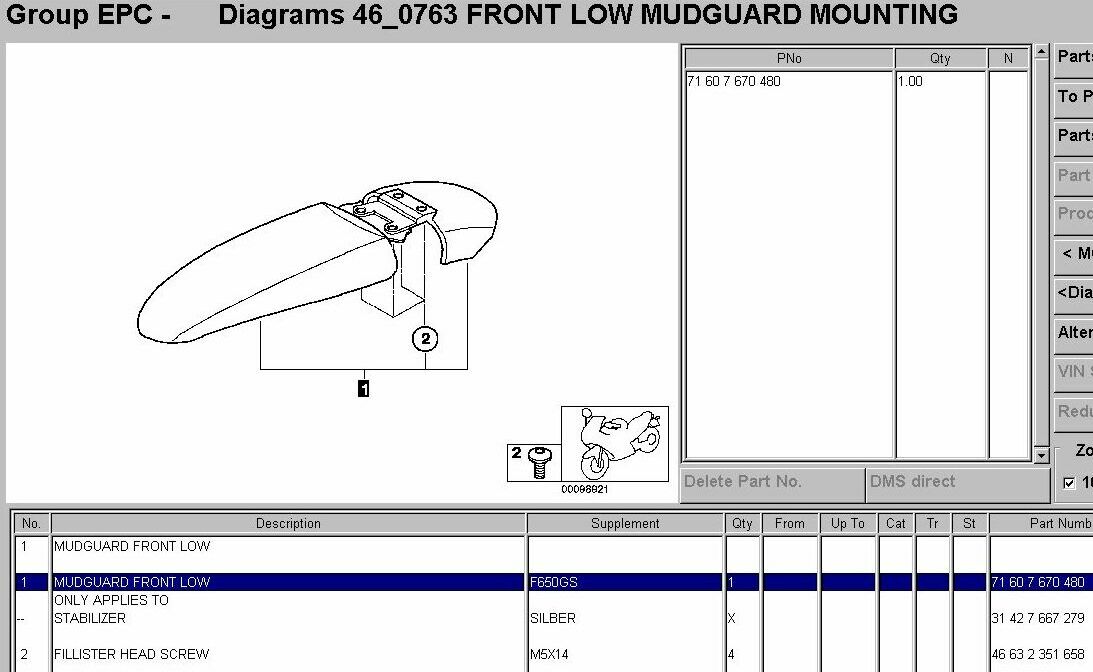
The BMW Part # for the Fender is 71 60 7 670 480
The Parts Fiche for the Low Fender also notes the following parts: It would appear both of these are required. Jack in Oz (see Retrofitting a BMW OEM Low Front Fender) made his own.
Stabiliser (Silver) 31 42 667 279
4# M5x14 Fillister Head Screws 46 63 2 351 658
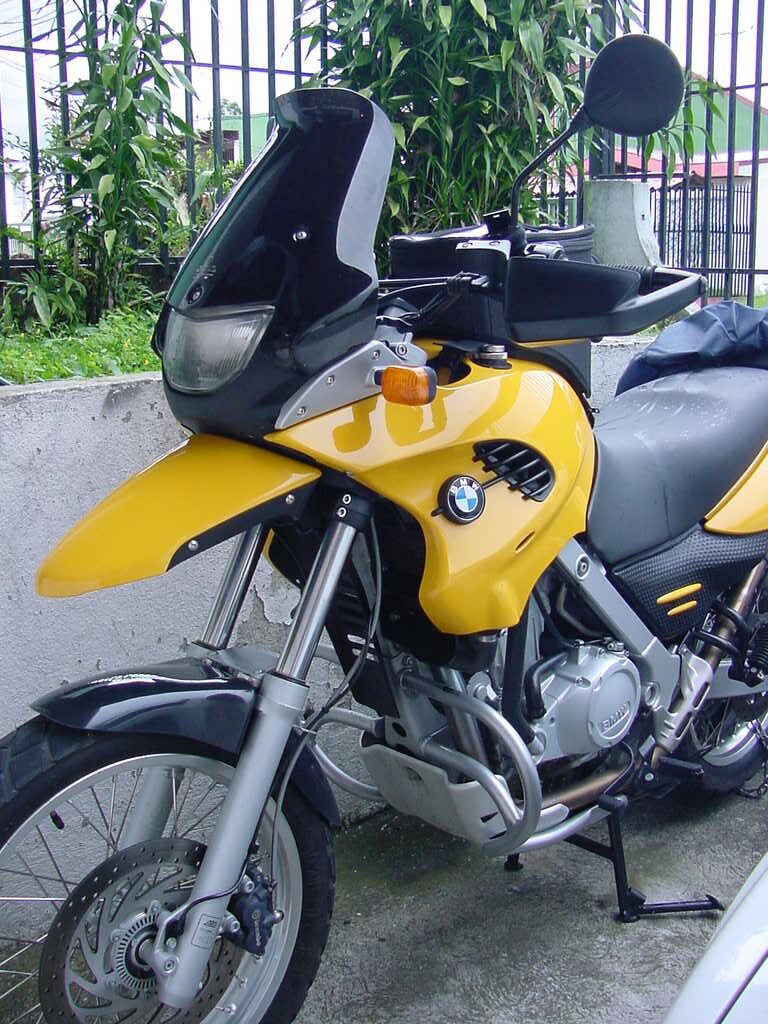
Being the foremost low front-fender-freak I just had to see the new one from BMW. In my opinion uglier than all of the third party ones and if I'm to guess, with less protection of engine/frame. Said to fit both GS and Dakar (up until now Touratech has been only choice for Dakar) and with an extremely low price to be from BMW - less than $30! Unfortunately the original fork brace is being used here as well so no room for Fork Gaitors. Pelle.
£9 BMW OEM front mudguard GS. I spoke to my dealers on Thursday (after reading the MCN article) and they confirmed that it would fit my 2002 F650GS but needed 4 replacement screws. They said that they couldn't trace any stock in either the UK, US or Germany but would place an order and see what transpires. So I'll cross my fingers and let you know how I get on. Reggie Lancashire England
I spoke to my local dealer this weekend and he said that they were notified by BMW about it last month, but it was only when MCN ran the story that they got inundated with requests/orders etc. He also tells me that BMW have no stock nationwide (UK) and possible none in Europe for the foreseeable future. Nice one! Either BMW are running the old "Just in time management" a little too tight or they have Railtrack's PR people working for them. Couple of other things (unlike MCN to get anything wrong) the price is actually £17 - but, yes you guessed it - it doesn't fit the Dakar without a new fork brace - another £50 odd quid - putting it firmly in the price range of all the other after market front guards. Jeesh! Anyway - I have been mildly surprised by the cost of parts in the UK, either on a par or cheaper than equivalent Honda parts. Still enjoying the Dakar, but must admit, have given in with the stock saddle and ordered a low one, it's just too much hard work in traffic and I hate having to dab my feet rather than getting at least one down flat. First service due in next two weeks. Dave.
I purchased a January 2001 F650GS from UK dealer in June and had a BMW front mudguard fitted before delivery. It cost £71.00 fitted. I was disappointed because although it followed the wheel out the front it failed to extend very far to the rear and therefore offers little protection to the engine/exhausts from road dirt. - Mel.
I still think that is to short in the back of the wheel. And maybe don't work as well as the others. I prefer the G&G, Touratech (for Dakar), Wunderlich in that order. And yes, it will fit in the 2002 with the new fork bridge only. guz
I just bought a silver/black '03 GS and love it. On the showroom floor they had 4 650's and 1 of them had a black plastic fender 1" above the front wheel, extending 10" to the front, 5" to the rear and about 6" wide. Mine was still in the crate and when they put it together it also had the fender. Does anyone else have this or is something that BMW just introduced? The dealer didn't even notice it until I pointed it out and they weren't sure why some had it and others didn't. Mark
I was at
Gina's BMW 3 weeks ago and asked why some had it and some didn't and the
salesman said from now all, all 650GS's will have it per a new BMW requirement.
I thought they looked better with the additional fender. DaveJ#888
Was at the dealer 2 weeks ago, asked the parts guys about it. He has no idea what I am talkin' about... Must be still a new thingy then. Kean
To use this fender on the older models you "must" have a new fork brace too-- or modify the old one. Haakon#626 (Norway,12-1999- F650GS)
Be careful if you ride off road with that fender. Mud can cake btn the fender and the tire, causing said tire to stop going in circles!! denverjim
If you've got the latest GS, I believe that the low front mudguard from BMW only costs about £10 and bolts straight on. It's not as long (effective) as the Touratech one though.
I am the proud new owner of a sparkling new F650GS. I am considering getting a retro-fitted lower mudguard for the front wheel - is it worth it? and are there any better deals than £55 from Touratech? I've ordered the BMW one to be fitted at my 600mile service - It's mega cheap - seems good enough for my type of use and as yet don't intend to any major/heavy off-roading. Andy Stoneman UK
I fitted the BMW one. Only 16quid from the dealer. Not as long as the Touratech one, but has stopped the headlight getting covered in crap every time I ride in the rain. Definitely worth 16 quid. MarkW
I also have the BMW version and I'm quite happy with it. However I've never liked the 'beak' design of the original high level version and I'm considering removing it altogether and replacing my short, lower one, with a Touratech model. Has anyone else taken this route or do I have weird tastes? Guest
Next.
Retrofitting a BMW OEM Low Front Fender (to Early GS)
by Jack in Oz
Low Budget Install of BMW OEM "mini beak" low front fender kit for early GS.
About the only piece of useful info in the fitting instructions was that all
bikes prior to frame number 2H78902 require the upgraded stabiliser (I call it
fork brace!). This is a write up with pics for a low budget install on pre
2H78902 frame bikes...go this way and save bucks :-)
For those people wanting to install the BMW OEM low front fender kit to the pre
frame number 2H78902 F650GS, the are 2 ways to go. One is to simply buy the kit
for about A$48 and THEN empty your wallet to the tune of A$194 for a new
stabiliser (fork brace) that has mounting standoff points in its casting. OR,
read on!
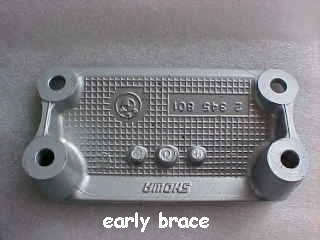 Early Brace
You will need some hand tools, including an M5 set of 3 thread taps and handle.
Remove your existing fork brace and give the bottom side a good clean, here
comes the "sticky" bit! you can hold the guard and simply sit the brace on it,
but you need to hold it all together and be able to mark 4 drill points in the
brace and its not easy! So.....you use hot melt glue! BMW love this stuff....it
holds their pannier lids on!
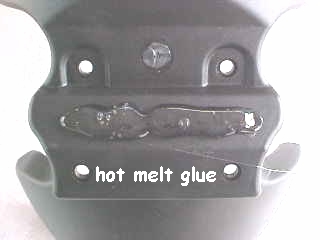 Glue
Glue
As shown, glue the brace to the guard, being careful to make sure its centered
properly, if you muff it, then simply tip hot water on it, and go again.
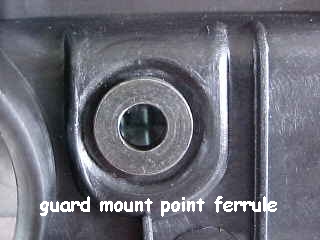
You will notice that the guard has 4 metal ferrules in the plastic at the mount
points, these can fall out, so don't lose them. If you look through these holes
at the underside of the brace, you will see a steep angle relationship between
guard and brace....where you need to drill holes in the brace and tap the M5
thread.
 Ferrule
To do this properly, you need to be VERY careful! Get a drill size that fits
snug through the ferrule as you are going to use the ferrule as the "guide bush"
for the drill to make a starting hole for the smaller sized tap drill. The idea
here is to simply commence drilling the brace enough so the you have an
indentation that the small drill tap can use, so that you get a properly centred
hole to tap the thread into. Be careful to try and hold the drill straight to
avoid grabbing the ferrule and spinning it out of the plastic. The reason I did
it this way was because I did not have a centre punch small enough that I could
use while the guard was "glued" in place.
After you have marked all 4 holes and drilled them with the tap sized drill, you
then separate the guard from the brace, then carefully tap the holes using the 3
M5 taps (taper, intermediate & plug) make sure you use some kind of lubricant (I
use INOX) while doing the job. You will be surprised there is quite a bit of
"meat" in the brace for a good thread.
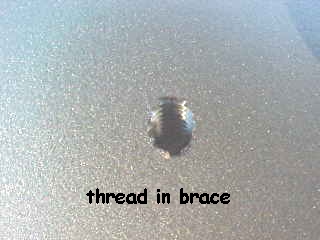 Thread
 Finished Brace
Next, when I looked at the guard initially I thought that the ferrule mounting
points looked quite wimpy, so I made 2 additional security straps from some 3mm
thick aluminium and drilled them to match the mount hole spacing, these are to
fit on the underside of the guard
as shown.
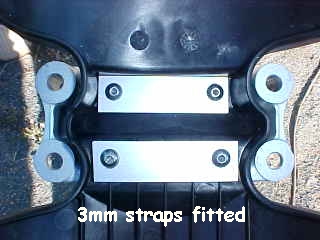 Fitted Straps
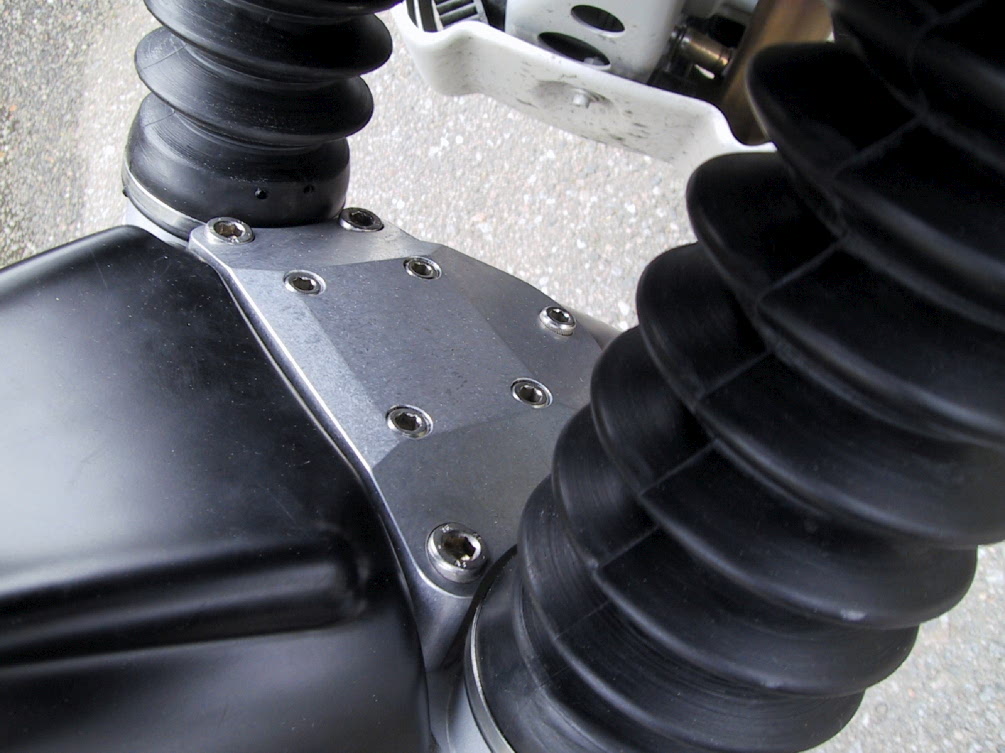
You are now ready to reassemble the guard and brace, fitting the straps etc. I
used 20mm x M5 stainless Allen bolts. Using Loctite 515 on the threads is a must
to keep corrosion etc out of the threads. Fit the guard to the brace and tighten
the screws evenly, you will see the screws only very slightly protrude through
the top of the fork brace. The guard will tighten firmly to the brace, do NOT
overtighten, it will serve no purpose and distort the plastic guard some. Once
you are happy that its done, refit the assembly to your machine!
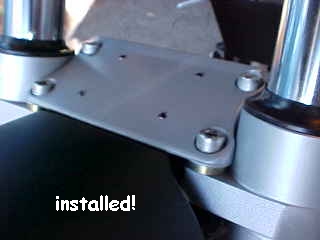 Installed
I added some 6mm cadmium plated spacers between brace and forks to just raise
the guard a little. The spacers came as leftovers from a pannier frame kit I
used on my CX500B, about 18 years ago! I saved A$194 for 2 hours work and had
fun doing it and have probably voided all warranties for life, with BMW!
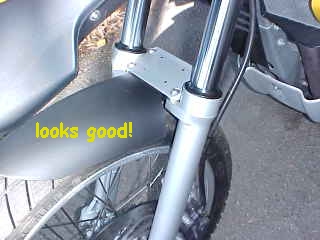 Done!
Done!
Even if I DID buy the proper fork brace for the install, I would still make up
the aluminium security straps and fit them, as I have horrible visions of the
guard cracking off around the ferrules, jamming up the front wheel and sending
you base over apex, off your machine! Jack, F650GS, Queensland, Australia.
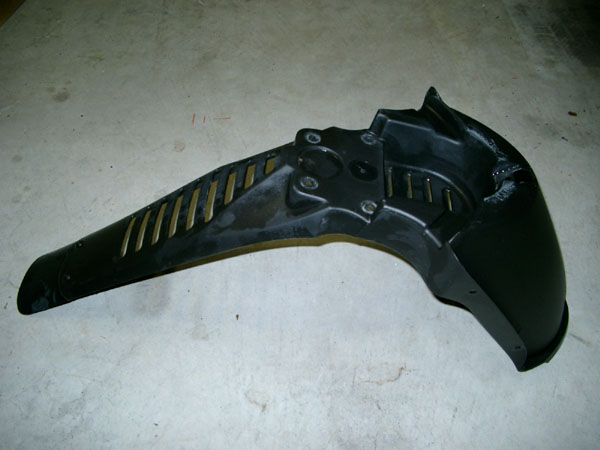
BMW OEM High Fender Extension
Photos from Trevor #999, Pelle

Photos from Aridriel, Advrider


Photos from bg #1002

The BMW part number for the Dakar extension is 46 61 7 655 717. You will need two (2) M5X12 screws (BMW 46 63 2 325 998) and one (1) M5X17 (not sure the BMW #) and three (3) washers (BMW 07 11 9 936 439) and three (3) lockwashers (I used Nylocs). You can use non BMW hardware if you prefer but I like to keep the standard Torx T25 when I can. I had to remove the front fender assembly to get the painted portion to separate from the base. There are four T30 cap screws securing the fender assembly to the bottom of the lower triple clamp. They should be reinstalled with medium strength thread lock compound. The new extension bolts to the painted portion of the fender. The nuts live between the painted part and the main fender base. I taped the new extension to the fender, then marked and drilled the holes. I used a Dremmel with a cut-off disc to trim mine to reduce the number of places for mud and debris to collect but you don't have to. bg 1002
I have ordered a Dakar extension for my bike, cost was A$12.50 for the part. Dealer told me that I may need to trim my existing fender to fit it. Jack, F650GS.
Talked to a guy yesterday who had an 01 with the fender extension on. He said that the extension helped with splatter, but not as much as he'd hoped. He was eyeing the Wunderlich low fender on my 02 GS and was wanting to know where I got it. The extension looks very cool on the GS. Deborah, #1074
I know of a guy that mounted the Dakar extension and immediately realized that he needed a low fender as well. I believe the extension is more for looks than anything else. I have a Dakar and after having the light completely covered after a wet gravel road I went for a low fender. BMW coming out with a low fender is also proof that the original doesn't protect very well. Pelle, Sweden
Next.
Dakar
Fender on GS
Q. Has anyone put the front Dakar fender extension (black plastic piece
over the body colored piece.) on their GS.? I'm thinking of doing this to my 01
GS, I ordered the extension, but after closer examination to a friends Dakar it
looks as though the body colored piece is cut shorter at the factory?
I've never added the extension to a non-Dakar but I can tell you the painted portion of the Dakar front fender looks as if the tip has been cut off with a pair of dull tin snips. Jason#1027
Yes, the colored portion of the Dakar fender is trimmed but the black extension can be placed directly over a stock GS fender. Don't need to trim the fender at all. Just be careful to measure and mark the drill holes carefully. Kristian
I just finished installing my Dakar fender extension on my red 01 GS. I did not need to trim the original fender, I just lined it up straight, marked spots to drill and hand turned the bit to get it started so that the drill would not slip and mar the finish. I purchased 3 bolts with washers and nuts for the backing, as the BMW one's were 1.50 a piece! It's a very easy upgrade that looks great! Fergie
I have one on my '01 GS. The cost was about $12 for the extension, plus the needed screws and body panel fasteners. The extension probably cuts down on road spray a bit but haven't had it in any real mud to see how it does there. I took measurements from a showroom Dakar and transferred them to the GS fender. I did not completely remove the two-part front fender, rather left the rearmost center screw in place and separated the upper and lower parts of the fender to make room. Measure two, no better three times, before drilling, and make sure the rounded part of the body fasters are against the plastic, not the flat side. If the extension does not mold completely to the fender, you might have to enlarge the drilled hole a bit. I waited a day or two and found the extension molded to the fender better. Works for me but doubt if it would make much difference in slow, muddy conditions. On the GS the fender extension is much closer to the tire and doesn't catch as much of the spray. But I like the looks and it's worth the about $12 bucks, plus change for the body screws and rear fasters. Just remember to put the flat part of the fasteners against the plastic as the screws aren't long enough to thread the other way. FYI, I didn't have to remove the fender completely to do the drilling. Cheers, Northwet #1101.Northwet #1101
Yes the extenders fit straight on, because the GS and Dakar fenders are the same item, like in this photo (above) of one of my UK colleagues. Trevor #999
As for the fender extension, if you ride an F650GS on the road at night and in the rain you can see the water coming off the tyre and onto the headlight. Under these conditions I get a 90% improvement with the fender extension and do not need to stop to clean the headlight. Off road this drops to about 50% because more dirt comes off the sides of the tyres which is not captured so well. Summary, must be worth a Tenner! Trevor #999
You might also want the extension on the trailing edge too. The Dakar's come with one that bolts right on. You need to drill the holes in the existing fender though. This piece will keep some of the mud and stuff out of the frame and engine. The cost was about $8 plus screws and nut plates. bg 1002
from Kristian #562
from Guz
Contact: http://eurotechmotorsports.com in CA. They are selling a lower front fender for the new GS made by the Swiss Company G&G. I purchased one and it is easy to install, looks good and works well. I believe cost is about US dollars $160. Do not know if they produce a rear fender. Good luck. If you want to see pictures of the Dakar extension on a GS, go to this Direct Link and click on the small pictures. The site is in French, but not the pictures ;-) The G&G Technik low fender is visible here : Direct Link to Eurotech's G&G Fender El Lo
I bought the lower fender at WÜDO in Germany at DM 199,-, not Wunderlich as I said in the above message (just digging up the old paperwork here). I think Cascade BMW in WA. carries the line of WÜDO products in the USA (www.wudo.com). You guys might wanna talk to them first. US$156 at Eurotech Motorsports seems a little stiff. Mike, Munich, Germany.
I have
the G&G low fender and like it very much. Without it I was getting pasted with
dirt and water when the streets are wet. With it I stay much drier/cleaner. It
developed a crack and I have sent it back for replacement. Below is a copy of
their e-mail to me:
"You can return it. I have more coming from GG Techniks very soon. Include a
note with your name and phone number. As soon as I receive them I will send you
another. The new ones are redesigned.
Chris@Eurotech
1017 Willow ST.
Chico, CA.95928
530 345-7145 Phone
530 345-7138 Fax
If you get the low fender, make sure you get the new design. Also, be aware that one of the bolts on the fork brace has a nut on the end of it. The other three do not. I stripped the nutted bolthead before I realized this. Rymo#876
I have one, ordered direct from G&G Technik. Easy to install, but there is a big gob of black semi-stiff silicone-like substance at the front of the stiffening/attachment frame under the Fender. The other thing is it pushes the Brace up even higher, so that before I could JUST get the Triumph Fork Protectors to fit but I had to take them off. I understand however that Touratech actually make and sell a New Brace with clearance as part of their Fork Gaitor kit, according to Chuckles. Kristian #562.
There are some Wunderlich Gaitors available through BMW of Santa Cruz County I don't have them yet, but I read about them on this board several months back -- one of the benefits of this set is they give you machined fork brace so that you don't have to do that tweak yourself... Hope this helps. Chuckles (#912).
I purchased the GG low fender over a year ago direct from GG who shipped to Australia very quickly, I have had no problems at all although I still get water everywhere whenever you ride thru puddles etc. Holty.
I have a G&G and works really well. It's material is very durable and strong. A friend has the Touratech and its soft and flexible not to strong but, covers like 2 inches more and it make it work better. Also better matching color to the bike. After seeing how it works I like the Touratech better. but is too late. I don't recommend you the BMW, It does not work the half good of the others. GUZ.
G&G Technik (Switzerland)
Direct Link to the Fender
BMW_F650GS-DAKAR (Direct Link to Touratech's Site)
Installation
by Pelle, Sweden
12-Apr-02
I have now received my Touratech low front fender and mounted it on a 2002
Dakar.
Here is what is in the package:
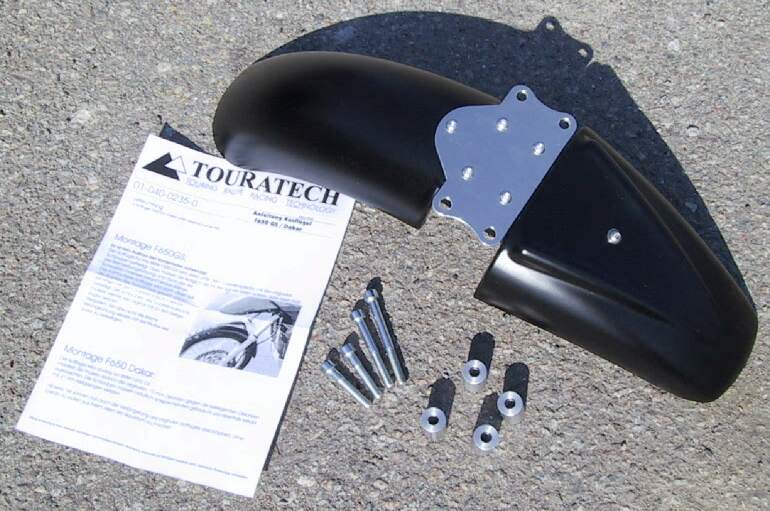
Apart
from front fender itself new, longer screws and higher spacers (correct word?)
are supplied in the package for use on Dakar. Spacers are 25 mm high as opposed
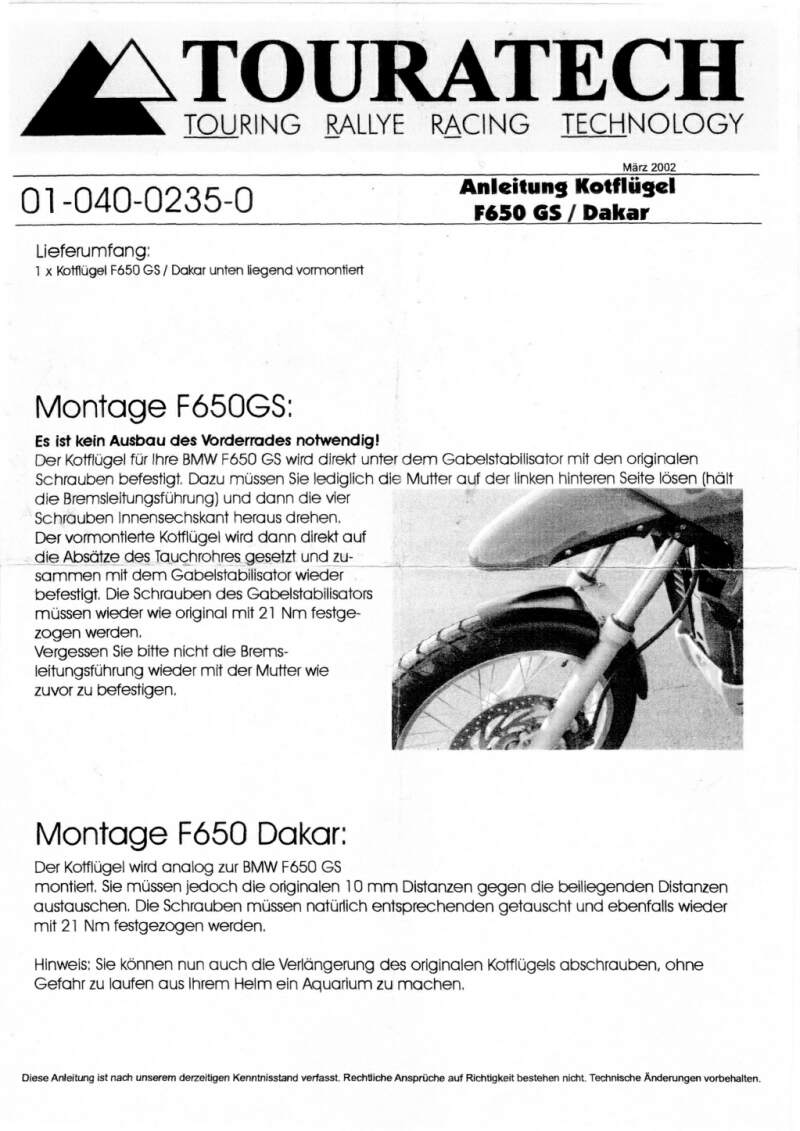
to 10 mm for the original ones. Supplied mounting instructions (in German only)
can be found here:
Only problem was that the fork brace has been changed between models. In the following picture a 2002 fork brace can be seen to the left and one from a 2001 on the right.
This has now been rectified by Touratech.

The front (leftmost in picture) nipples (I don't know what better to call them) pointed out with red arrows are in conflict with heads of screws on top of the fender as can be seen here:
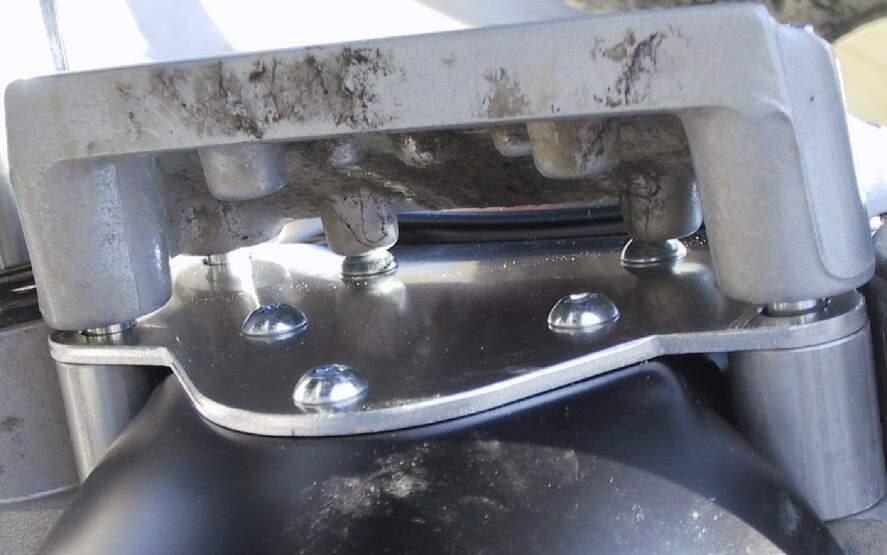
I now solved this by using the older brace instead but otherwise the fork brace will have to be modified. This is how it should look:
NOTE: Received e-mail from Touratech about the fork brace issue. They have now relocated the holes to work with the 2002 model as well.
Mounting is simple but please notice that the brake line is kept in place by a
wire that is attached by a nut on the bottom of the longest bolt.
This is how it all turned out when mounted:
Quality of product seems to be acceptable but effectiveness on rainy and dirty roads remains to be proven when weather is suitable.
Unfortunately the fork brace is now higher mounted (GS +3 mm, Dakar +18 mm) than originally which even further complicates attaching fork gators (?). So the next project will be to produce a combined fork brace and mount for the fender that allows for attaching fork gators. I don't think a Wunderlich fork brace will help on a Dakar with Touratech fender as the fender mounting itself is conflicting with the fork gators. It may work on a regular GS but in that case I would rather buy a Wunderlich fender that in my opinion is better looking.
Opinions on the Touratech Low Fender
Q:
Do you have to remove or drop the front wheel to fit the Touratech lower front
fender?
A: No. Remove fork brace, fit fender with spacers and attach fork brace
with supplied screws. The spacers are only needed for the Dakar. It really is a
case of removing the fork brace and positioning the fender, the brace is then
reinstated using the slightly longer bolts provided.
After checking out all makes I went for the Touratech item. When compared price for price it offers best protection and OK quality for the least money. It is also very easy to fit (German instructions excepted) and is black injection molded so scratches will not show. In addition, as it is made of a soft-ish material it bends rather than snaps, which can be useful off road. I looked at BMW's version initially, assuming that it would match the finish of the bike best, but it does not extend very far down the back of the wheel. Initially it seems very good value, around 20 GBP, then they tell you that if your bike is pre 2002 you need an alternative fork brace at an extra 50 GBP. This makes it more expensive than the Touratech item. I thought both GG and Wunderlich more expensive and less well thought out. Tim
I've recently fitted the Touratech version and am delighted with it. It's much cheaper than the Wunderlich fender it also looks good and works well. The BMW effort is cheap and much smaller. Sue
I have a G&G and works really well. It's material is very durable and strong. A friend has the Touratech and its soft and flexible not to strong but, covers like 2 inches more and it make it work better. Also better matching color to the bike. After seeing how it works I like the Touratech better. GUZ
I mounted the Touratech low fender on my '03 F650GSA. I'm sure everybody knows Touratech items come with instructions in German, and in this case the blurry photocopy picture didn't really help. Here's what I did: I removed the nut securing the brake line holder (13mm I think) and removed the bracket. Remove the 4 bolts securing the fork brace (6mm Allen) and lift it out. If you don't clean around the threads, it would be easy to get a bit of dirt in them and when you put the bolts back in you will have paranoid worries that you are stripping the aluminum threads and only God knows how much it would cost to replace those fork tubes. (Or at least if you are me you would worry.) The fender parts go on thus: The spacers go first, then the fender then a shim that has holes drilled to provide clearance to a couple of threaded protrusions on the brace, then the brace itself. It's a mild pain to keep these things lined up to reinsert the bolts, but not really difficult. When all the bolts are in, replace the brake line holder bracket and the nut. There are, surprisingly, a couple of fitment issues. The shim that is used to give clearance for the threaded protrusions was drilled incorrectly. To get it to fit, I had to file the holes bigger by about 5 mm on one side. It wasn't really a big deal, but I was just surprised by the mistake. The other problem is that the bolt that the nut threads onto to hold the brake line bracket is too short to engage the threads. It is short by just about the thickness of that shim they had to add to the kit...hmmm. On road performance seems to be good. I rode through a few puddles and then to work on wet streets and whereas before my windshield would have been spattered pretty bad, it was much decreased. The headlight stays cleaner and I could see out of my helmet visor. I haven't yet tried it in really wet weather since it's been so cold in Michigan, so I'll be interested to see how it goes in the springtime. When I rode through the puddles, before the fender it seemed like the front tire would gather up the water, atomize it and actively channel it at my legs and it didn't happen with the low fender. The fender does clear the tire without the spacers, but it's close. I just figured the extra space was to provide clearance for mud. Citizen
I've just mounted the low fender on my 02 Dakar - I'm pretty sure you only need the shim and longer bolts with the Dakar. My fender fitted perfectly and all lined up as it should. I agree with the point about the cable retaining bolt being a little too short. I've used it in light showers so far, but shock horror the really heavy rain in the UK seems to be having a holiday too. I know for a fact that it will keep the fork legs, light and screen much cleaner though. Dave
I seem to recall that the spacers are only required on the Dakar. The mudguard fits straight on to the standard GS with 19" front wheel. The supplied instructions are in German. I translated them and so have a rough English version. let me know if you want a set and I'll email them to you. Tim
I've recently fitted the Touratech version and am delighted with it. It's much cheaper than the Wunderlich fender it also looks good and works well. The BMW effort is cheap and much smaller. You'll see from this thread that I have recently fitted the Touratech low fender. Tim is correct in stating that the spacers are only needed for the Dakar. It really is a case of removing the fork brace and positioning the fender, the brace is then reinstated using the slightly longer bolts provided. Sue # 704
The front
fender from Touratech works better as it bolts on and covers more of the rear of
the tire to keep debris off of you. The Touratech lists for $91.40 USD (25 April
'03)
KEM F650GS Dakar, USA.
Another vote for the Touratech. Although I considered the BMW until I discovered that as mine is an '01 model I would need a £50.00 bracket to fit it! I guess it depends if you are fitting the lower mudguard for practical or for aesthetic reasons. Reggie
I have the Touratech one, it is probably the best one for the job. Stuart
Wunderlich Fender
http://www.wunderlich.de
Kotflügel-Umbau F650GS (Direct Link, in German)
Wunderlich have two fenders, a Carbon-Fibre and a
Glass-Fibre one. They come with the necessary Fork Brace, which also has the
advantage of Gaitor clearance.
Photos from www.bmwscruz.com
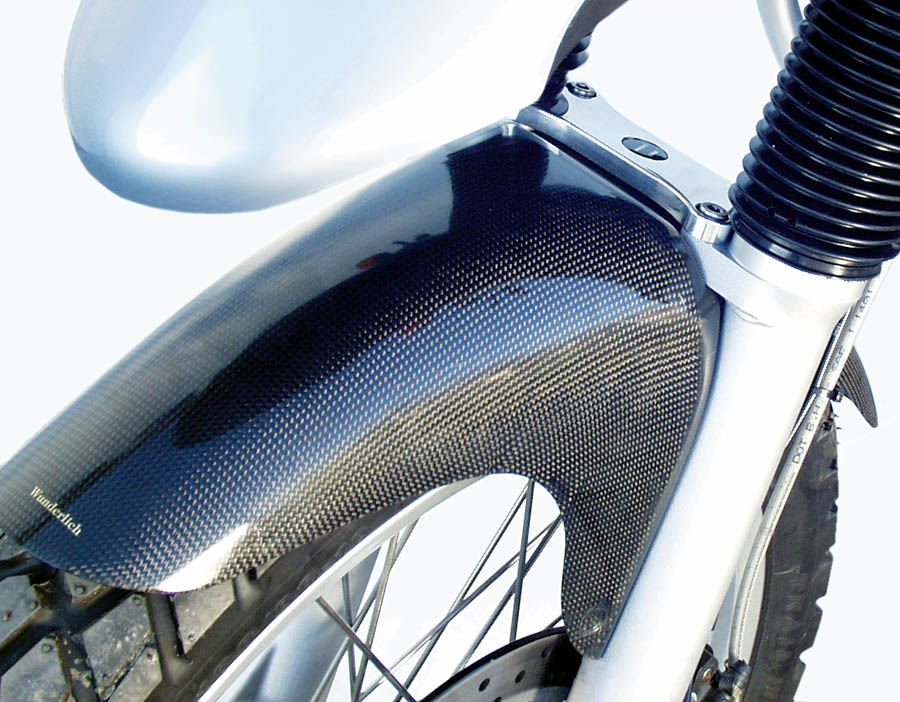 Carbon Fibre
 Fibre Glass
Here's a link to the Gaitor pics. Wunderlich Gaitors.
Opinions
Here's a good trick. Get the Wunderlich low fender and pay more $$, but you get a new fork brace that has room for fork Gaitors. Get some cheap fork Gaitors from a dirt bike shop or wherever. You have now solved two problems fairly cost effectively. Rod CO '02GSA
Custom Fork Brace to
allow fitting of Gators
Fork Gaitors with a low fender.
from Pelle, Sweden - 13-May-02
I previously mounted a Touratech low fender kit on my Dakar. Unfortunately
that kit is designed using the stock fork brace and doesn't allow enough space
to attach fork Gaitors. I have now had a custom fork brace/low fender mount
made for me that does it all. Close up, End result.
