F650 Windscreen Wellnut FAQ
by Brad #1002, original idea for this fix came to me from Trevor #999
edited by Kristian #562, 25/3/02
Please read the Disclaimer before attempting any work in this FAQ.
Last Updated: 20 March 2007, by Winter #1935
Introduction
The
windscreen on the new model F650GS and GS Dakar bikes are secured with three
screws. The top two screws thread into nuts that are tack welded to metal tabs
on a tubular frame under the instrument console. It is not unusual for one or
both of the screws to break loose from the tab. This could result in the nut
eventually loosening or falling off completely. While this may be covered under
warranty the following modification will result in a more appropriate attachment
by providing an one that is less prone to failure and more flexible. If you are
altering the angle of the windscreen or want some flexibility in the connection
this modification may help. Obviously this modification needs to be done
properly to insure your windscreen is securely attached. You don't want it
coming loose and flying off the bike. If you are confident with basic tools you
should have no problem with this rather simple
modification/repair.
| Which bikes is this relevant to? |
|---|
| I have never seen the attachment
used on the Classic model. I understand that it already uses this approach and,
if true, this FAQ is only applicable to the single spark Fuel Injected Models
(ie CS, GS, Dakar from 2001 through 2003).
|
Modification
Tools
- T25 Torx - for various body panel screws
- Drill and 3/8" drill bit (a 1/4" and a 5/16" can be helpful to
step drill the holes)
- Small cross point screw driver (Phillips head)
Hardware
- 10-32 x 1/2" Wellnut (2) - In the US they are stocked by Ace
Hardware stores (see note below on thread size)
- 10-32 x 1 1/2" - 2" SS screws (optional) - The length will vary
depending on which windscreen you have. The well nuts require about 3/8"
extra screw length.
- Touch up paint, primer or other
corrosion preventative for the new holes in the metal tabs.
- Note: The existing nut is 5mm. If
you have a supply for metric Wellnuts you should use them. However, I found the
10-32 thread to be nearly identical to the 5mm thread. The short length of
thread allows them to be interchanged.
-
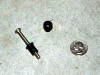 Wellnuts top and side view along side a good old US 25 cent piece (they cost about
$1 ea. in the US)
Wellnuts top and side view along side a good old US 25 cent piece (they cost about
$1 ea. in the US)
Work time
- Should take less than 60 minutes. Most of the time is spent
removing body parts to gain access.
Modification process (for an F650GS or F650GSD)
- With the bike on the center stand
or side stand remove the windscreen. If you have a nut that has already broken
loose under there and the screw just spins try pulling up on the screw a
little to get the nut to bite into the frame it was supposed to be welded to.
If all else fails you may have to cut the head of the screw off. Keep track of
any washers and spacers used to attach the windscreen.
- Remove both the left and right
turn signals. I would suggest unplugging the electrical and getting them
completely off the bike.
- Remove the seat. Remove both the
right and left tank panels. Three screws hold it on. One is under the front
edge below where the turn signals attach. Be sure to remove the oil tank cap
to get the left side off. I always do this after all the screws are removed so
that I don't drop one in and put the cap back on right away.
- Next you need to remove the two
black expansion fasteners from the top of the instrument console. They are
small and require a small cross point screwdriver. Remove the entire fastener
(screw and expansion piece). Now you should be able to open the top of the
console a bit and see where the nuts are attached to the tabs on the tubular
frame that provides the mounting points for the instruments as
well.
- Optional but recommended.
The headlight assembly should now come out but you will have to maneuver it a
bit to get it out. You will have to unplug the headlight connector and parking
light connector to get it completely off. With the assembly about halfway off
you should be able to reach in disconnect them. The large plug pulls off
before the larger rubber cover comes off. The parking light also just pulls
out. Wiggle it a bit to remove it. It is just a rubber fitting wedged into the
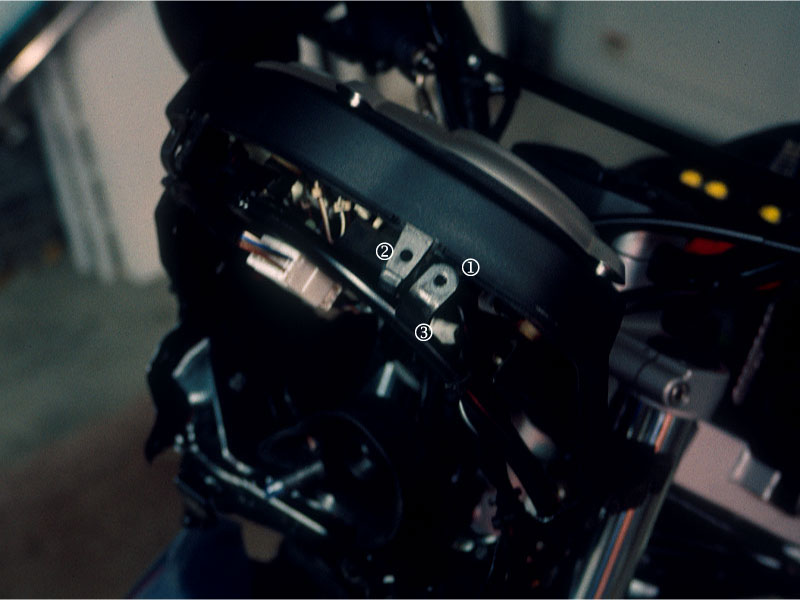
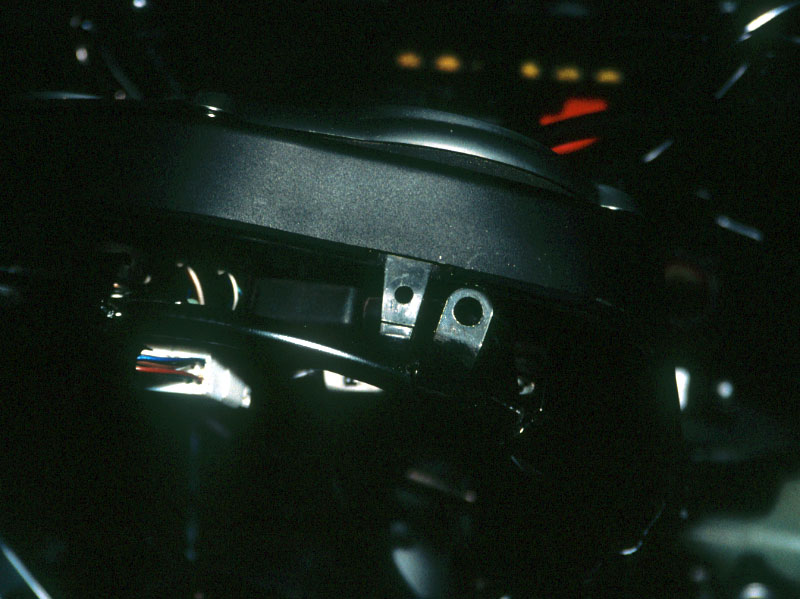
opening. You should now have access to the area. Click on the picture below to
see a larger view that has the items numbered: 1) the left side's metal tab
that will need to be drilled for the Wellnut, 2) the plastic tab that will be
left unaltered, 3) the tubular frame the tab is welded to.
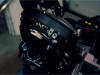 View of metal tab that needs to be drilled
- If you still have one or both of
the nuts attached they should pop off the tab with a little help from a hammer
and punch or big flat bladed screwdriver. Be careful. Don't drive the punch
into an instrument! If all else fails you can just drill out the tab with the
nut in place. It will probably fall off in the process.
- Next we need to enlarge the holes
in the tab to be big enough to accept the Wellnuts. The Wellnuts I used
required a .375" dia. hole (3/8"). I suggest opening the hole up in steps. I
started with .25 then .312 and finally .375. Remove any burs around the
openings. You may want to put a rag under the tabs while you drill to catch
the metal filings. These could result in some nasty rust stains if you don't
get them out of there.
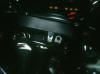 The tab after being drilled
- Test fit the Wellnuts. They
should slip in but fit snugly. They go in from the top of
course.
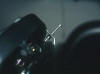 A side view of the Wellnut being test fit
- I would suggest touching up the
bare metal with paint to reduce the chance for corrosion. Any paint will do
just don't glob it on too thick or your Wellnuts won't fit.
- After the paint dries insert the
Wellnuts into the tabs with the flange on the top.
- Reinstall the headlight assembly
making sure you connect both the headlight plug and install the parking light.
Getting the plastic expansion fasteners (the black ones) back in can be tricky
as the Wellnuts take up a bit of space and make the two plastics housings
harder to connect. It can be done. It might help to put screws into the
Wellnuts to hold the parts in place. Don't tighten them up because you
will need to remove them to install the windscreen of course.
- Now put the tanks panels back on
along with the turn signals by reversing the process followed to remove them.
Lastly you can reattach the windscreen. The two top screws that go into the
Wellnuts need to be long enough to get into the threaded portion. If your
screw just spins and does not get a bite on the Wellnut you will need a
slightly longer screw. There is room inside for a screw that is longer than
stock. But, too much longer and you risk hitting the backside of the
instruments or wiring.
- Tighten things up. Remember you
are pulling the Wellnuts up against the tab. They will eventually tighten.
Don't over do it.
- I would double check all the
screws on the body panels to make sure they are snug. Replace the seat and
you're ready to ride. Check your headlight alignment if in case things did not
go back exactly the same. Your manual has instructions for adjusting the
headlight.
Wellnuts
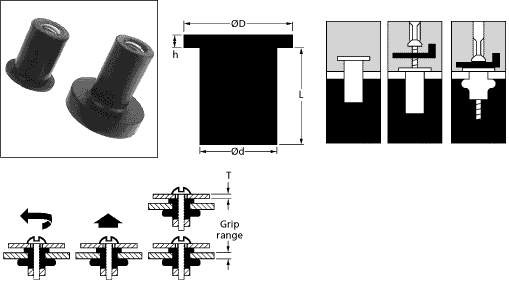
For more information on Wellnuts see:
Wellnuts
Also available from Ace Hardware.
Here's some pics.
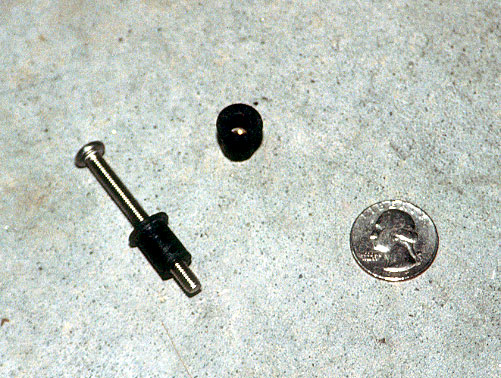 Wellnuts top and side view along side a good old US 25 cent piece (they cost about
$1 ea. in the US)
Wellnuts top and side view along side a good old US 25 cent piece (they cost about
$1 ea. in the US)
 View of metal tab that needs to be drilled
 The tab after being drilled
 A side view of the Wellnut being test fit